
Learn how to make the best gluten-free pumpkin cheesecake with an exceptionally airy, creamy texture and no speciality ingredients required. What’s the trick for velvety smooth texture, rather than dense and heavy? This well-tested pumpkin cheesecake filling uses heavy cream and an easy baking technique for guaranteed results. When paired with an easy, 5-minute pecan crust you have a GF pumpkin dessert any home baker can pull off!
Want to Save This Recipe?
Enter your email below & we'll send it straight to your inbox. Plus you’ll get affordable and easy gluten-free recipes delivered each week!
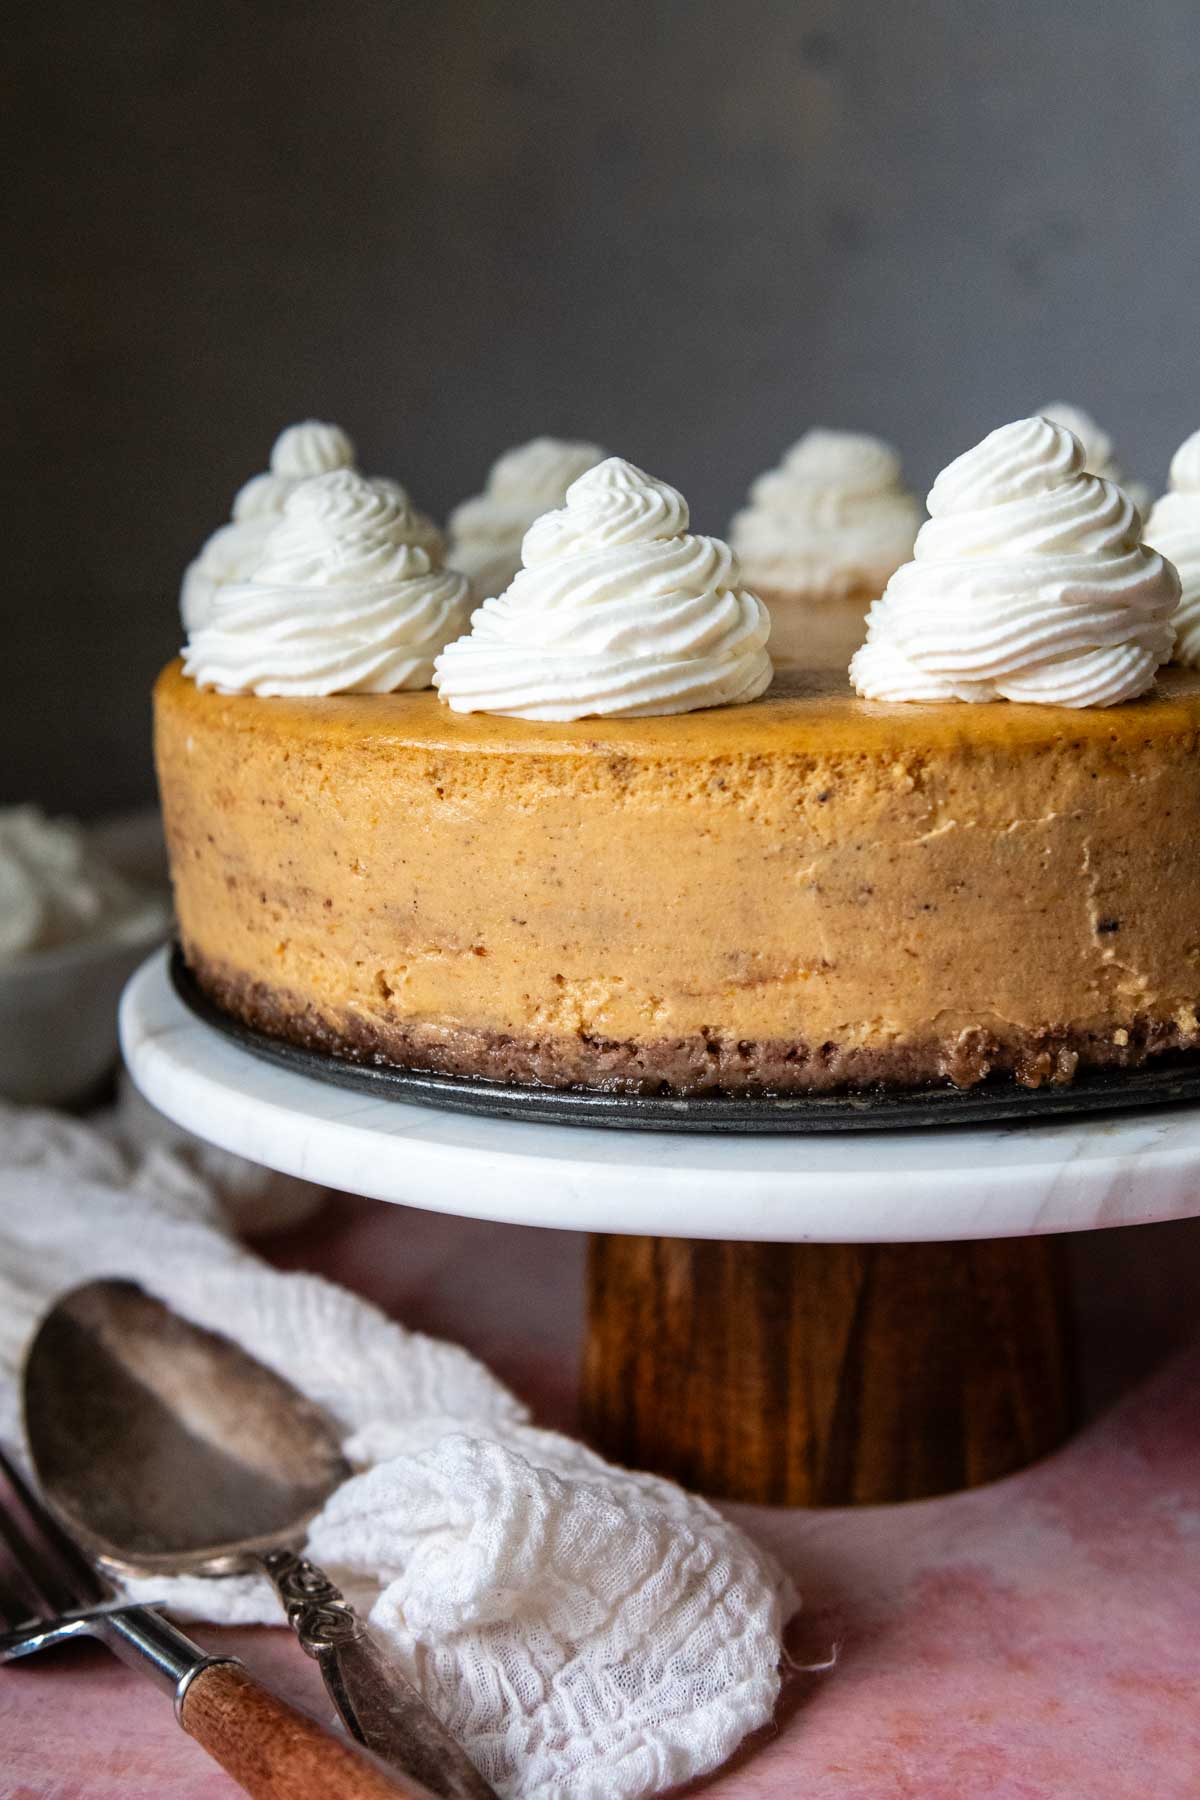
Best Gluten-Free Pumpkin Cheesecake with Easy Crust
Whether you are new to gluten-free baking, hosting guests who follow a GF diet, or looking for a spectacular addition to your holiday Thanksgiving table, this easy recipe for gluten-free pumpkin cheesecake doesn’t disappoint! It’s right up there in my hall-of-fame pumpkin recipes. (Hello, light, fluffy gluten-free pumpkin cake!)
The recipe starts with using an easy, press-in pecan cheesecake crust. While most recipes swap out gluten-free graham cracker crumbs, I find this problematic. Generally, I avoid speciality ingredients for my favorite gluten-free dessert recipes because they are expensive, hard to find, and typically lead to disappointing tastes and textures.
Instead, I created a gluten-free cheesecake crust using a combination of pecans, butter, and sugar. Not only are these ingredients found in any grocery store, but are the perfect salty contrast to a thick pumpkin cheesecake filling. And, just like these ridiculously easy GF pecan pie bars, it’s as simple as mix, press, and bake.
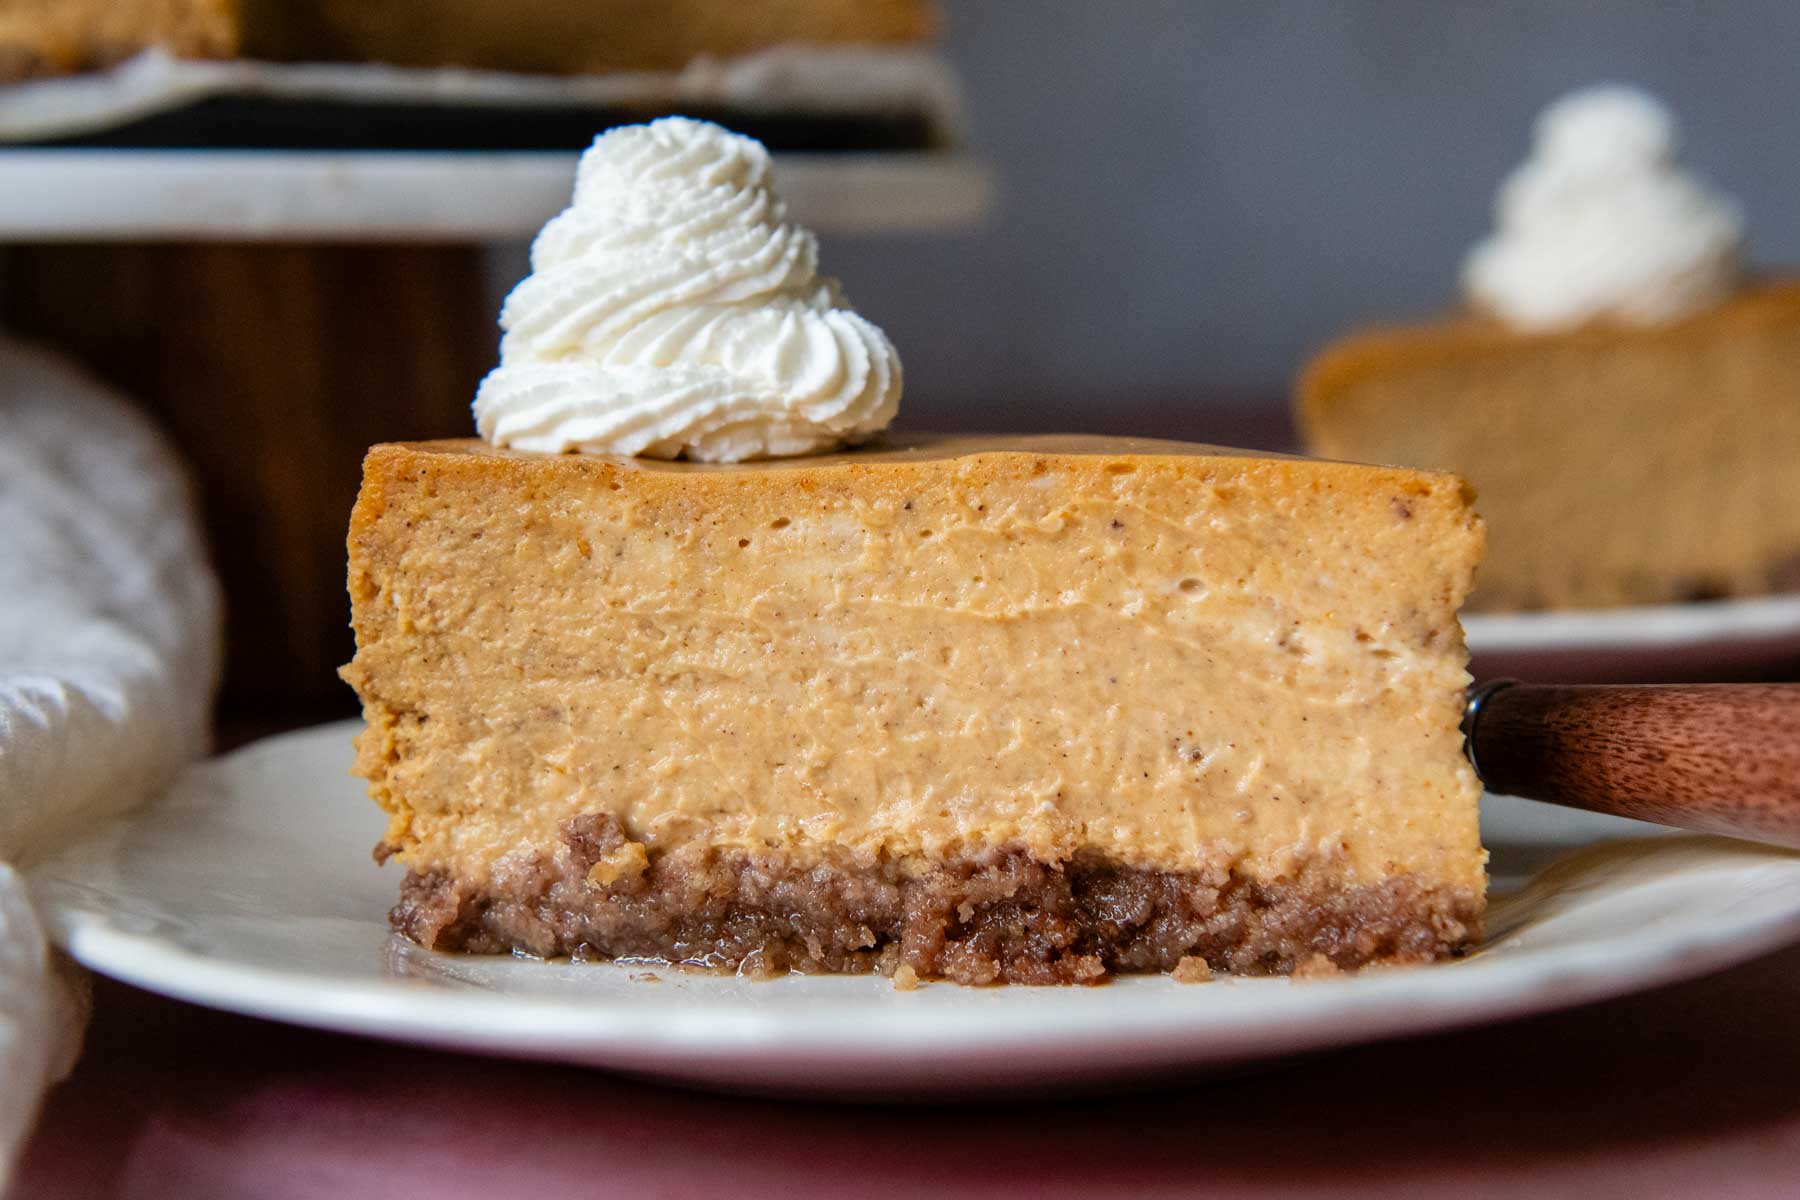
Next, I set out to achieve the ideal cheesecake texture – one that is light, fluffy, and airy, rather than dense and heavy. Four full blocks of cream cheese and canned pumpkin puree builds the structure, while the addition of heavy cream and eggs creates a soft, custardy finish.
Additionally I tested the recipe baking in a water bath versus without. Usually I strive to avoid overcomplicating things, but baking in a water bath provides a consistent low baking temp, which lightens the texture. It greatly enhances the texture from everything from cheesecakes to this epically-good coconut flan recipe. Fortunately, it’s quite easy to do with one essential thing – 18-inch heavy duty foil, which I also grabbed from my local grocery store.
If I lost you at water bath, no worries! This easy recipe also includes an alternative baking technique that will still impress! Read on to learn more expert tips, such how to avoid a soggy cheesecake crust, alternative GF crusts options, plus how to cool for a smooth, crack-free top!
Free Guide! 5 easy tips for baking like a gluten-free pro!
Simple hacks for fail-proof gluten-free dishes every time!
Ingredient Notes and Equipment
To make a baked cheesecake you will need a 9-inch springform pan. A 10-inch pan may also be used, but if using something smaller than 9-inch, do not fill to the top or you will risk overflowing as it bakes.
For the water bath, you will need an oven-proof baking pan that the springform pan can sit inside of. Typically a roasting pan works great, or anything larger that your springform pan can sit inside of.
Lastly, you will need 18-inch heavy duty aluminum foil, and unfortunately standard-sized foil will not work. I learned this the hard way by using the foil I had and wrapping it in several layers. Water still found its way in.
The cheesecake crust was inspired by this quick and easy pecan pie crust. For best results, mix the crust in a food processor to make the crumbs as fine as possible. You may also crush the nuts by hand, but the crust will not bind as well and the slices may crumble.
- Pecans – Used for the cheesecake crust. For accurate measuring use chopped pecans or they may be swapped out with chopped walnuts.
- Canned pumpkin – Be sure to use pumpkin puree, rather than pumpkin pie filling, which will not work for this recipe. For gluten-free pumpkin recipes, such as this and perfected GF pumpkin pie, I recommend using Libby’s pumpkin puree because it has the thickest consistency.
- Cream Cheese – You will need 32 ounces, or four 8-ounce brick blocks, softened to room temperature. Stick with full-fat cream cheese because if you are going to enjoy a cheesecake, savor the best version ever!
- Heavy Cream – While some recipes opt for sour cream to emulsify with the cream cheese, for a pumpkin-flavored cheesecake I find heavy cream to be a better option. The pumpkin puree naturally thickens the filling, so sour cream isn’t necessary. Plus, heavy cream loosens the texture to avoid denseness.
- Spices – For best pumpkin spice flavor use a mixture of cinnamon, ginger, nutmeg, and cloves. Alternatively, substitute 3 teaspoons pumpkin pie spice.
Let’s Make This Together!
(Below shows step-by-step photos and modified instructions. For the complete recipe, along with ingredient amounts, scroll down to the recipe card.)
5-minute cheesecake crust and easy tip!
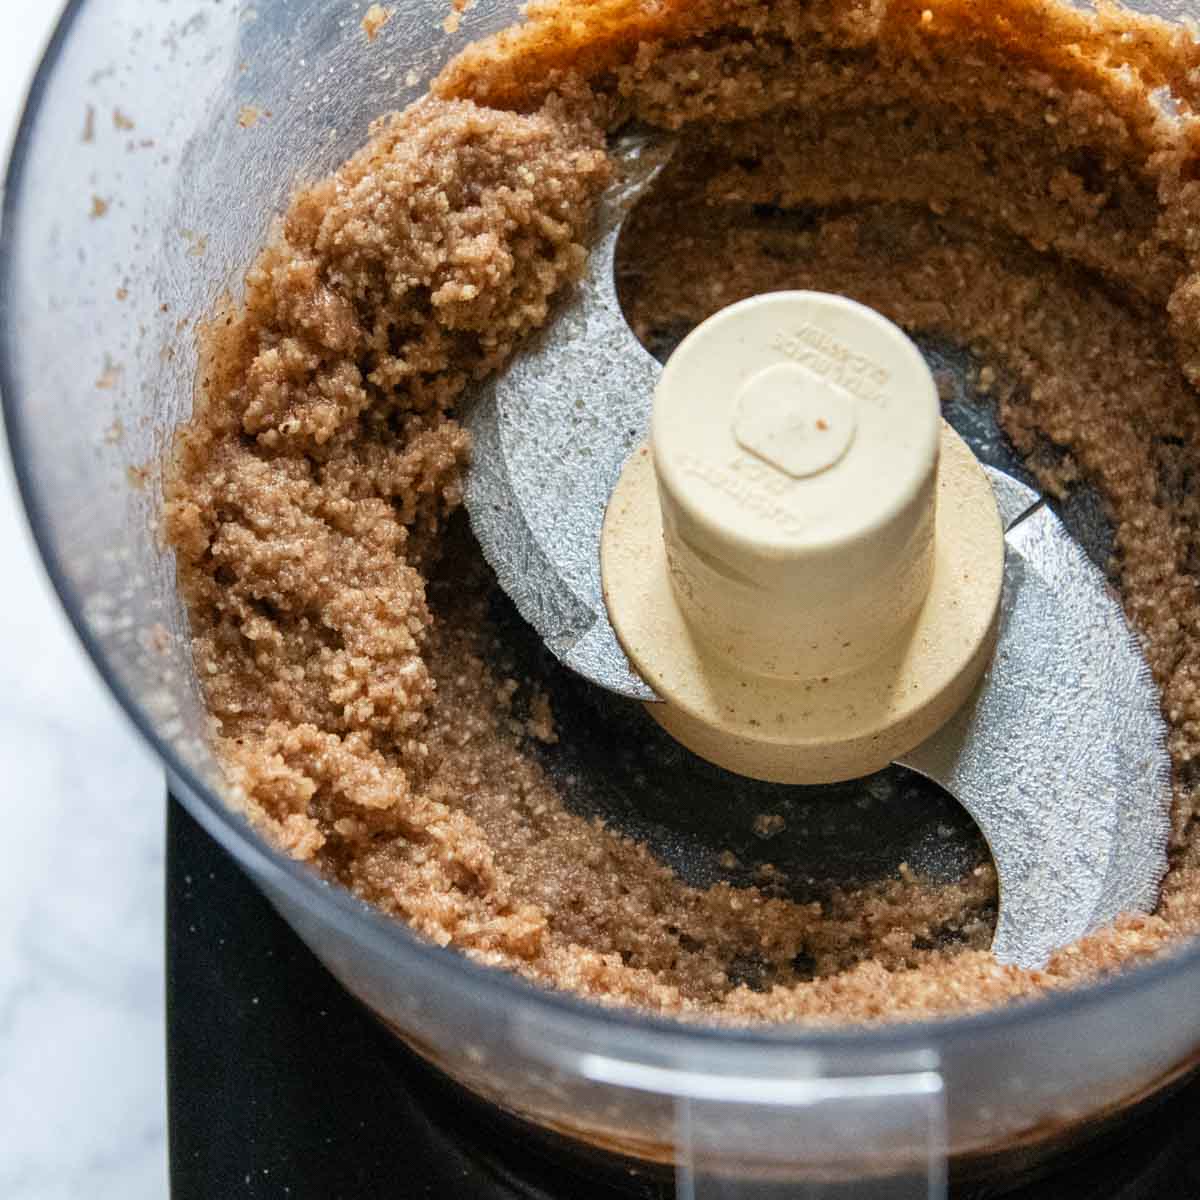
Line your springform pan with parchment paper and set aside. In a food processor add the chopped nuts, sugar, and melted butter. Process until the mixture is smooth and finely ground.
Pour the mixture into the pan. Spread evenly along the bottom and press firmly down with your fingers.
Pro tip to prevent a soggy crust – Lightly whisk an egg white and brush it on the crust before baking. It creates a barrier between the crust and the filling so moisture doesn’t seep into the crust. While this step may be omitted, I find it enhances the crust’s texture to keep it crisp and not soggy.
Bake for 12 minutes, then set aside to cool while filling is prepared.
Creamy pumpkin filling
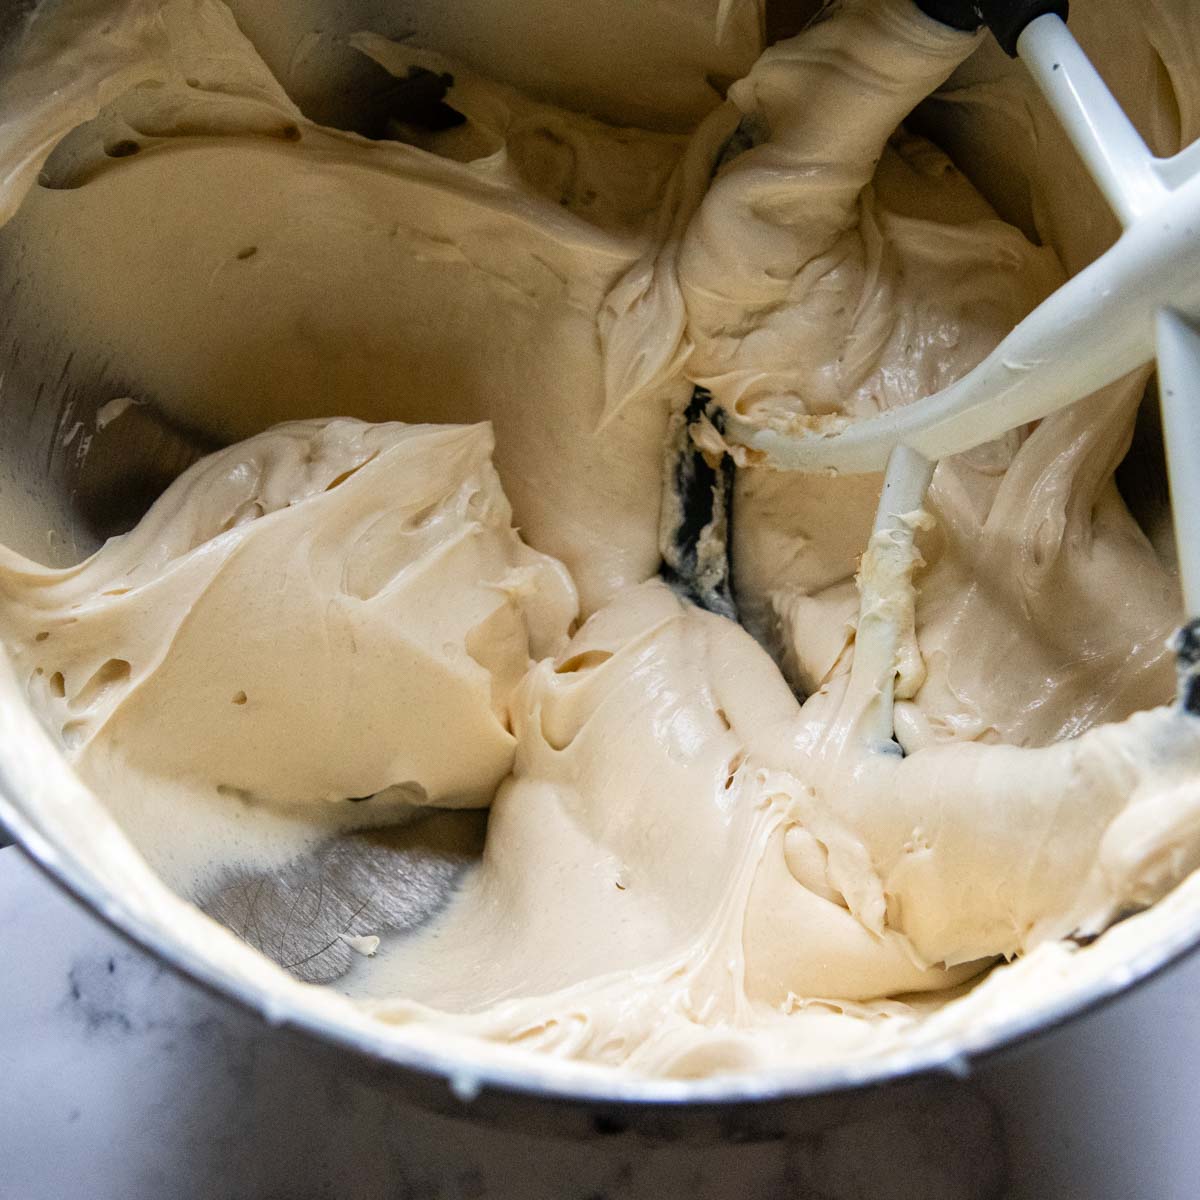
First, beat the softened cream cheese until smooth, then add in the sugars. Beat in the eggs, one at a time, just until incorporated. Be careful to not over beat the eggs or the cheesecake may crack.
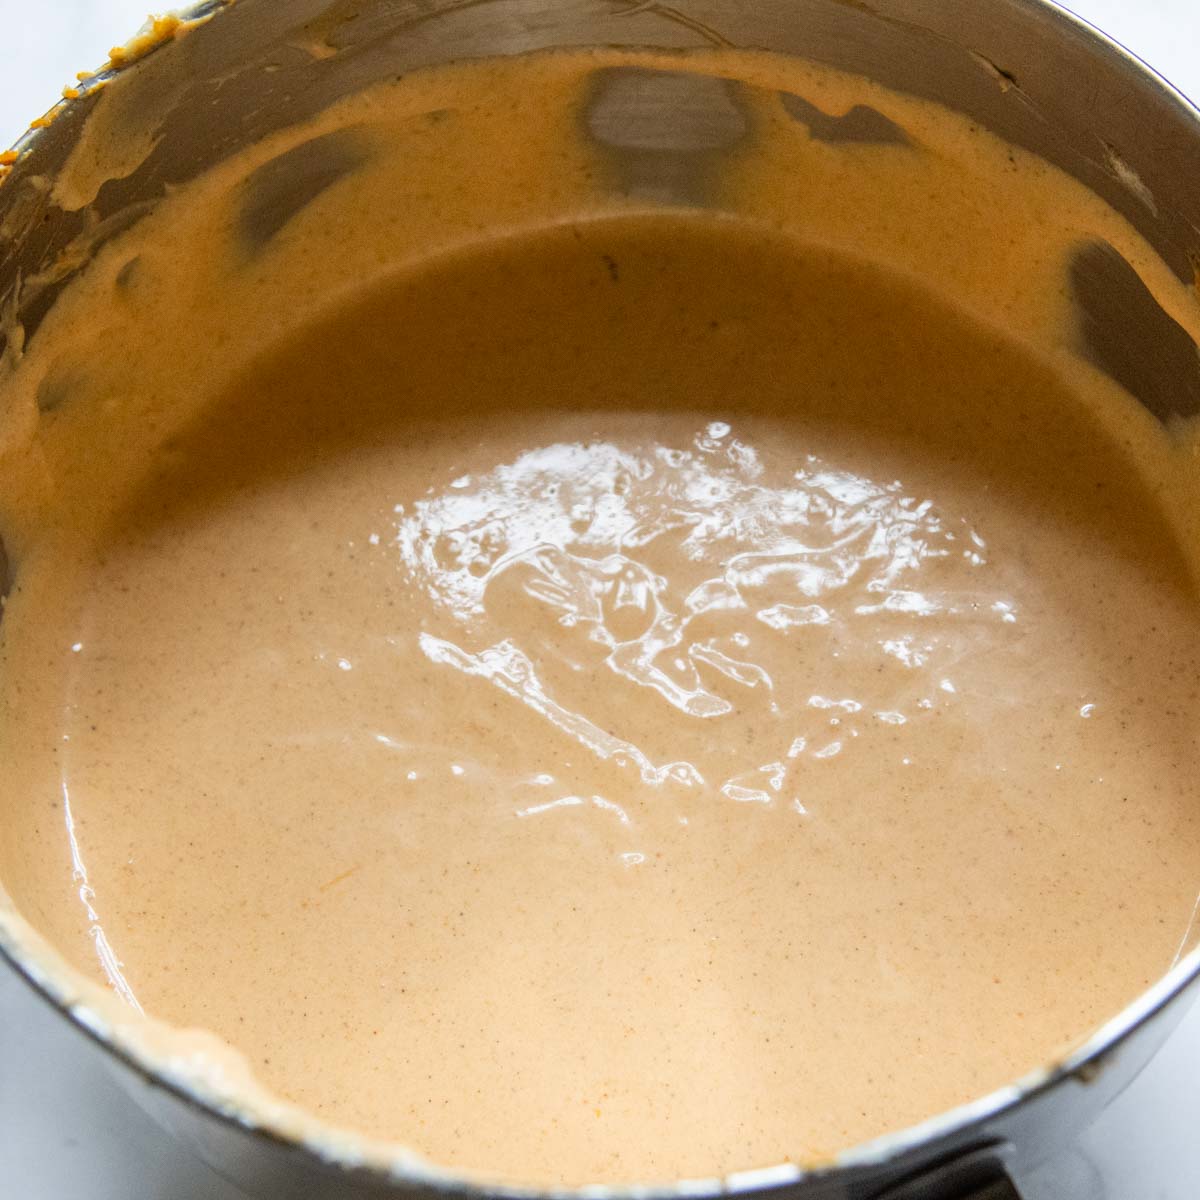
Add in the remaining ingredients and beat until just incorporated and no pumpkin streaks remain. The mixture will be pretty thin at this point.
No-fail water bath
So, so important – There is no substitute for the 18-inch foil. If you do not have any on hand, please refer to the recipe card for the instructions. I found out the hard way “regular” foil will not work.
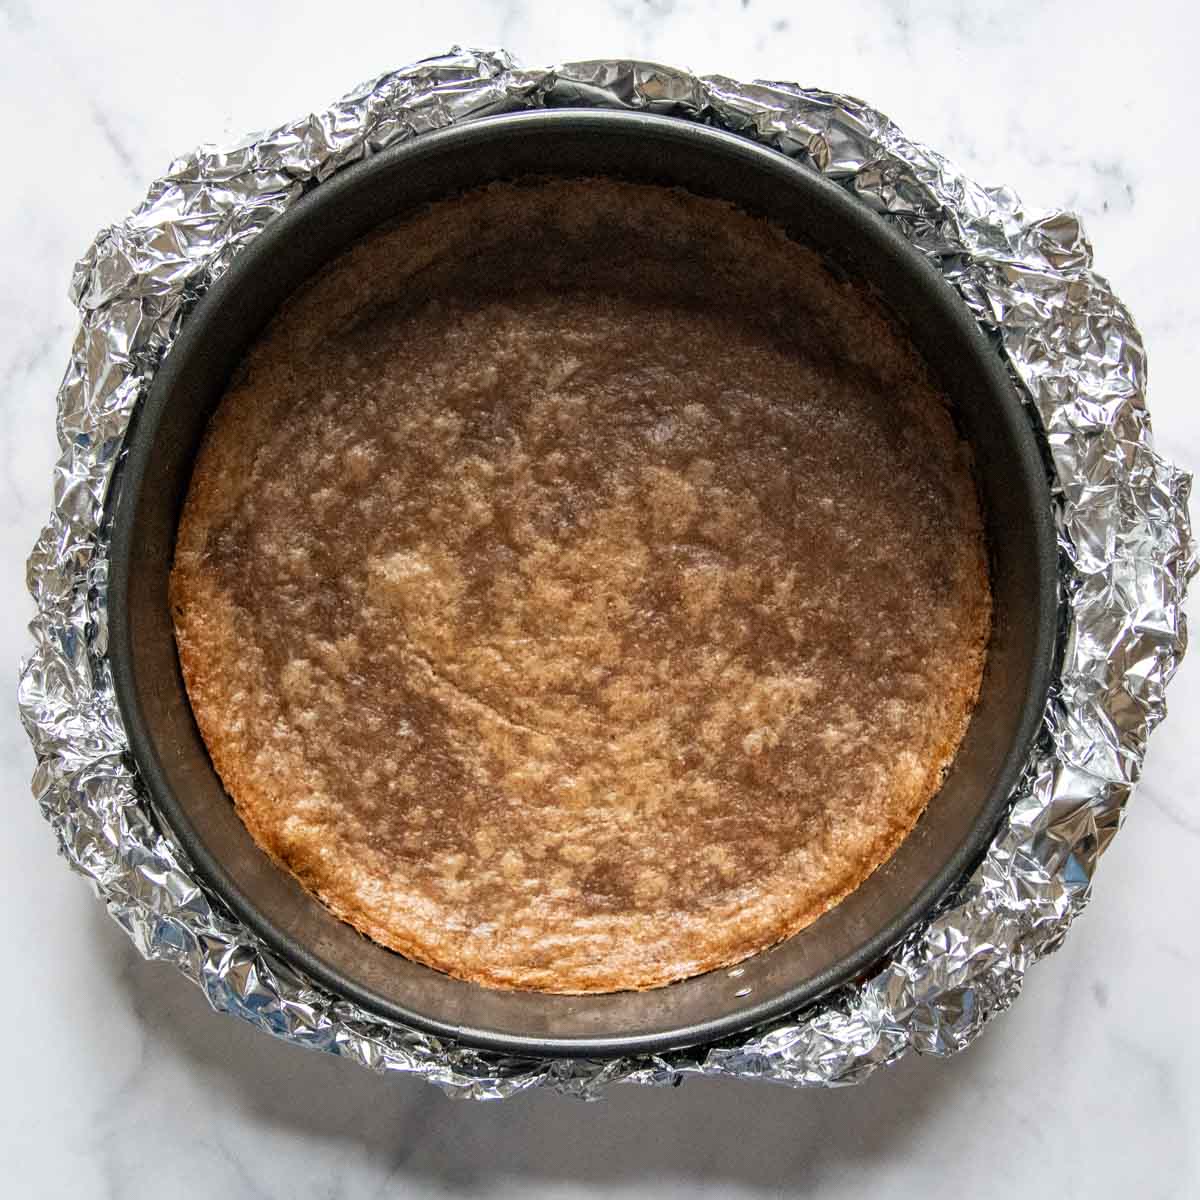
Take the cooled crust and place on a large double layer of 18-inch heavy duty foil. Securely press the foil around the pan so it’s flush against it, reaching almost to the top.
Place the springform pan a larger roasting dish. Pour the cheesecake filling in, making sure there is at least 1 inch of space at the top for the cheesecake to expand while baking.
Boil a kettle of water. Place the roasting dish, with the cheesecake inside, in the 325ºF oven on the middle rack. Carefully pour the water into the roasting dish so it reaches about 1-inch up the cheesecake pan.
Baking and Cooling Tips
Water baths always extend baking time and this cheesecake takes about 1 hour and 45 minutes. Try to avoid opening the oven door until the very end (the temperature changes causes cracking).
How do you know when it’s done? The edges will be puffed and set. The center will slightly jiggle, which is fine because it will set more as it cools.
At this point just turn the oven off and keep the door closed. Let it cool in the turned off oven for 30 minutes. Crack the oven door open (you may have to prop it open with a wooden spoon) and let it cool for 1 hour longer.
Now it’s time to remove your masterpiece and discard the water bath. Let it sit at room temperature (keeping the outer ring on) until fully cooled. Transfer it to the fridge to chill throughly, at least 6 hours to overnight.
Make A Cheesecake Like A Pro
I shared a lot of information here, but I promise it’s not a complicated process. While I go into more detail above, here are the most important tips to remember when making your pumpkin pie cheesecake!
- Brush the crust with an egg white before baking. This keeps the crust crisp during the second bake with cheesecake filling.
- The cream cheese should be very soft. If it is not room temperature, unwrap the bricks, place on a microwave-safe dish, and use the defrost microwave setting to soften fully.
- Cooling the cheesecake in the oven finishes the baking process gently so it does not collapse or crack.
- When baking in a water bath, you must use 18-inch heavy duty foil. Standard 12-inch foil allows water to seep in, no matter how much it is wrapped. (Trust me.)
- Although the dessert is easy, it is not one to rush through. It has a longer bake time and several hours to cool before refrigerating and chilling completely.
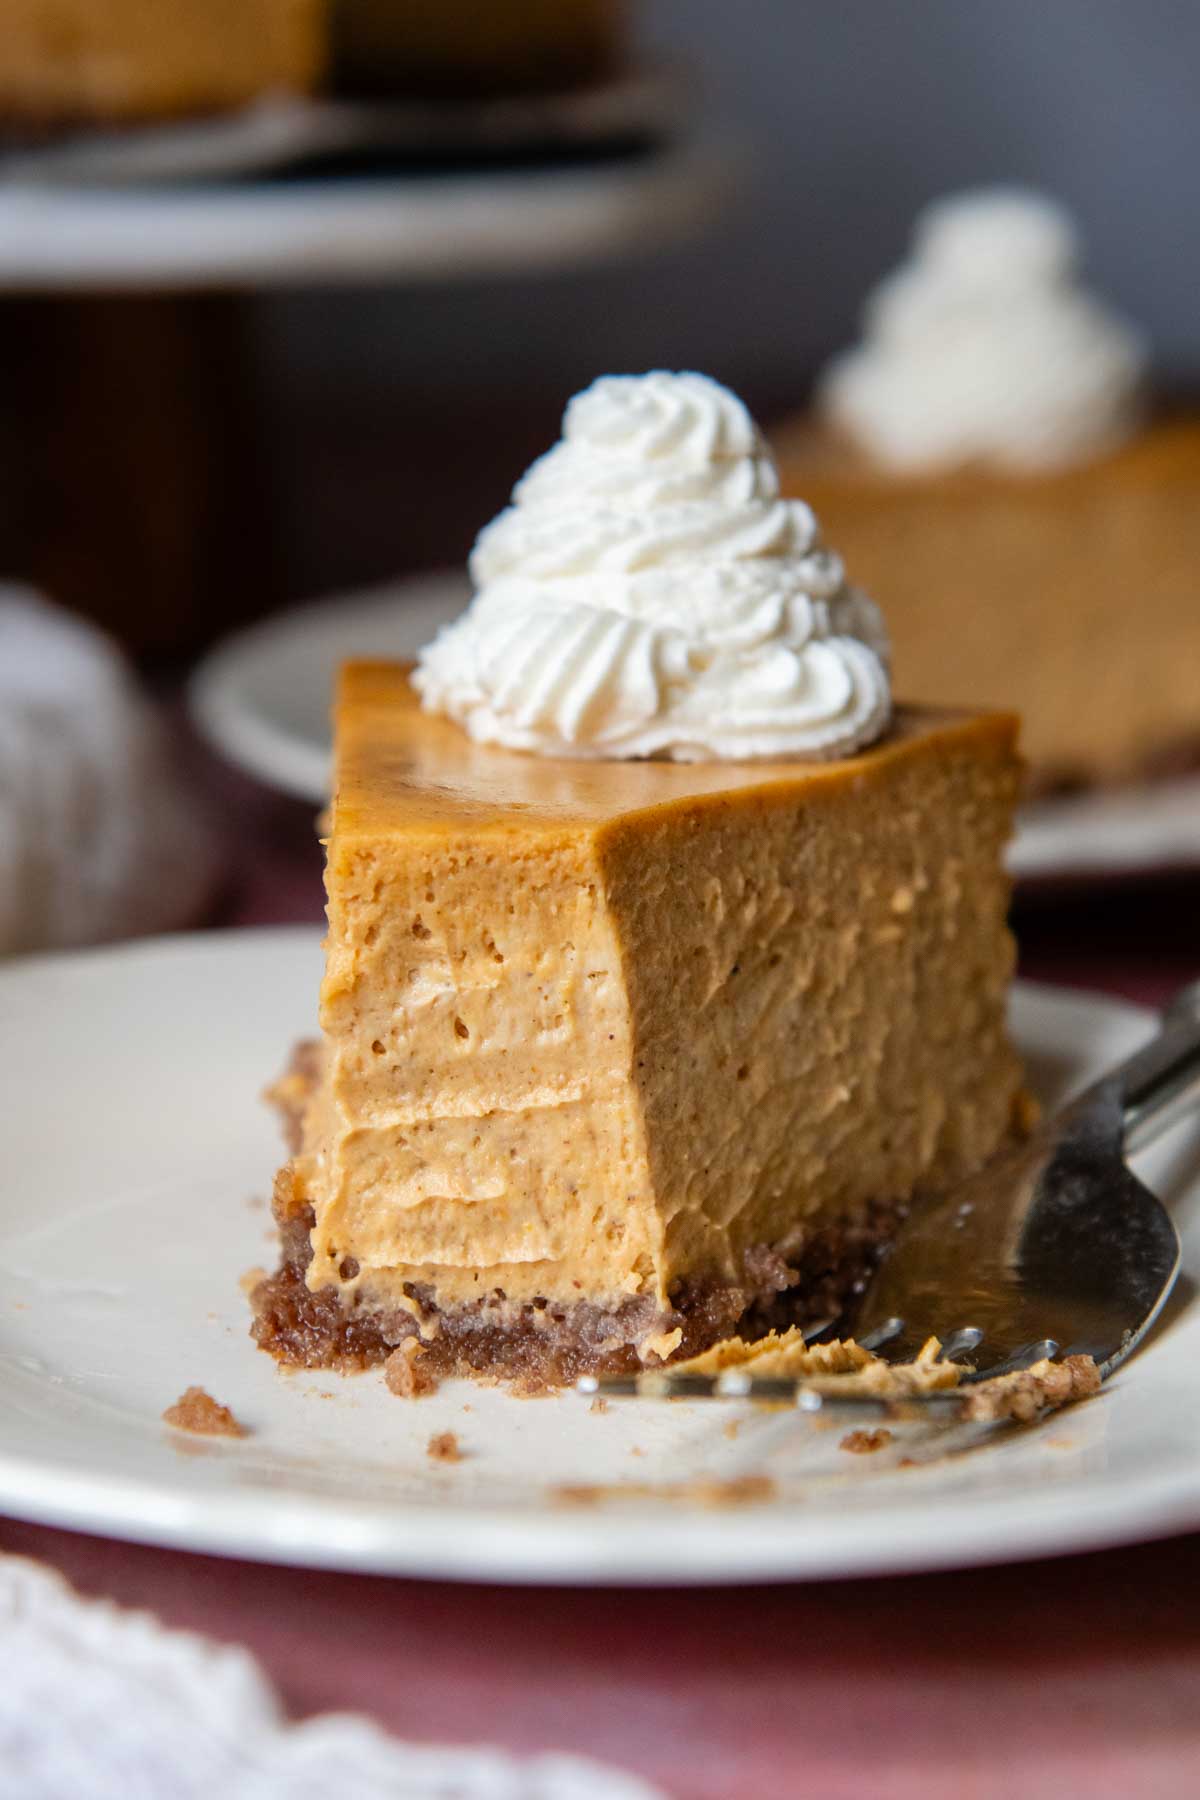
- The rich pumpkin spice flavor and texture are the stars, but for added flair serve with homemade whipped cream (piped on or served alongside), gluten-free toffee bits, or dust the top with cinnamon.
Save this recipe to your pinterest board!
Let’s be friends on Pinterest! I’m always sharing great recipes!
Did you make this recipe? I love hearing from you! Leave a star rating and comment below the recipe card. It helps others when searching for recipes and I appreciate feedback from our community. You will always hear back from me! -Melissa

Silky Gluten-Free Pumpkin Cheesecake (5-Min Crust)
Ingredients
Pecan Crust
- 1 ½ cups chopped pecans, or walnuts
- ¼ cup granulated sugar
- 4 tablespoons melted butter
- 1 egg white, lightly beaten
Pumpkin Cheesecake Filling
- 32 ounces blocks full-fat cream cheese, very softened
- ¾ cup granulated sugar
- ¾ cup packed light brown sugar
- 3 large eggs
- 15 ounce canned pumpkin puree
- 1 cup heavy whipping cream
- 1 tablespoon vanilla extract
- 2 teaspoons ground cinnamon
- ½ teaspoon ground ginger
- ¼ teaspoon ground nutmeg
- ¼ teaspoon ground cloves
- ¼ teaspoon salt
Whipped Cream
- 1 cup heavy whipping cream
- 3 tablespoons powdered sugar
- 1 teaspoon vanilla extract
Instructions
Pecan Crust
- Preheat the oven to 350ºF. Line the bottom of a 9-inch springform pan with parchment paper. Fit the ring over the top, lock into place and trim off excess paper. Grease the bottom and sides with nonstick cooking spray.
- In a food processor add the chopped nuts, sugar, and melted butter. Process until the mixture is smooth and finely ground, about the consistency of wet sand, about 45-60 seconds.1 ½ cups chopped pecans, ¼ cup granulated sugar, 4 tablespoons melted butter
- Pour the mixture into the prepared pan. Spread evenly along the bottom with a silicone spoon and then press firmly down with your fingers. Brush the egg white on the pressed crust. This creates a barrier between the crust and the filling so moisture doesn't seep into the crust, preventing it from becoming soggy.1 egg white
- Bake for 12 minutes, or until the edges brown. Remove and set aside to cool while filling is prepared.
Pumpkin Cheesecake
- Lower the oven to 325ºF. In a large mixing bowl, or stand mixer fitted with a paddle attachment, beat the softened cream cheese until smooth and creamy. Add the granulated and brown sugar and beat until fluffy and well combined.32 ounces blocks full-fat cream cheese, ¾ cup granulated sugar, ¾ cup packed light brown sugar
- Beat in the eggs, one at a time, just until incorporated. Be careful to not over beat the eggs or the cheesecake may crack. Add the pumpkin, heavy cream, vanilla extract, spices, and salt. Beat until just incorporated and no pumpkin streaks remain.3 large eggs, 15 ounce canned pumpkin puree, 1 cup heavy whipping cream, 1 tablespoon vanilla extract, 2 teaspoons ground cinnamon, ½ teaspoon ground ginger, ¼ teaspoon ground nutmeg, ¼ teaspoon ground cloves, ¼ teaspoon salt
Baking and Cooling
- Take the cooled crust and place on a large double layer of 18-inch heavy duty foil. Securely press the foil around the pan so it's flush against it, reaching almost to the top.
- Place the springform pan in the roasting dish. Pour the cheesecake filling in, making sure there is at least 1 inch of space at the top for the cheesecake to expand while baking.
- Boil a kettle of water. Place the roasting dish, with the cheesecake inside, in the 325ºF oven on the middle rack. Carefully pour the water into the roasting dish so it reaches about 1-inch up the cheesecake pan.
- Bake for 1 hour and 45 minutes, avoiding opening the oven door until the very end (the temperature changes causes cracking). When done, the edges will be puffed and set. The center will slightly jiggle, which is fine because it will set more as it cools.
- The following cooling directions finishes setting the cheesecake, prevents collapsing or cracking. Turn off the oven, and keep the oven door closed. Let it cool in the turned off oven for 30 minutes. Crack the oven door open (you may have to prop it open with a wooden spoon) and let it cool for 1 hour longer.
- Remove the cheesecake from the oven and discard water bath. Let it sit at room temperature (keeping the outer ring on) until fully cooled. Transfer to the refrigerator to chill throughly, at least 6 hours to overnight. Run a knife around the outer edge and then remove the outer ring.
Whipped Cream
- Add the heavy cream, powdered sugar, and vanilla extract to a mixing bowl. Beat until medium peaks form, about 3-4 minutes. Serve with the cheesecake or pipe decoratively on top. Refrigerate leftovers.1 cup heavy whipping cream, 3 tablespoons powdered sugar, 1 teaspoon vanilla extract
Notes
Baking Without A Water Bath
I’ve tested the recipe both ways, and while both techniques will earn rave reviews, baking without a water bath does have a slightly more dense, traditional cheesecake texture.- Prepare the crust and filling as directed. Place the filled springform on a parchment or foil-lined baking sheet. This will prevent released moisture from making a mess in your oven.
- Preheat the oven to 325ºF. Place a 9X13-inch baking dish on the lowest oven rack. Add boiling water to the pan to reach about 1/2 full.
- Set the lined baking sheet with cheesecake above the water pan on the middle baking rack. Bake for 60-70 minutes, or until the cheesecake appears puffed and set, but still jiggles slightly in the middle.
- Turn off the oven and let cool, with oven door closed, for 30 minutes.
- Crack the oven door open (you may have to prop it open with a wooden spoon) and let it cool for 1 hour longer.
- Remove the cheesecake from the oven and discard water. Let it sit at room temperature (keeping the outer ring on) until fully cooled.
- Transfer to the refrigerator to chill throughly, at least 6 hours to overnight.
Make-Ahead and Freezing
For best results, prepare it 1-2 days before serving. Cover securely and refrigerate. To Freeze: To achieve a good wrap on the cheesecake without making marks in the filling, first freeze without wrapping. Once it is solidly frozen, wrap in a couple layers of plastic wrap and then cover with foil. Freeze up to two months. When ready to serve, remove the wrappings and thaw overnight in the refrigerator.This post contains affiliate links. My opinions are always my own. If you purchase a product through an affiliate link, I make a small commission – at no cost to you. Read full disclosure policy here.


Best cheesecake recipe, and I have made quite a few in my lifetime. I love the creaminess and subtle sweetness the heavy cream gives it rather than using sour cream. I substituted puréed butternut squash that I had from my garden and it worked out perfectly. Follow the baking instructions exactly and it will turn out perfectly
Sounds incredible! Thanks for taking the time to share.
Best,
Melissa
32 oz block cream cheese????? Should this be 8 oz?
No, it uses 4 blocks of cream cheese to make a cheesecake. This is pretty standard. If you are making a no bake cheesecake, it will use less and add in other things, like Cool Whip.
Best,
Melissa
Thanks, Melissa, for the clarification! 🙂 Just wanted to make sure I was reading that correctly. I’m making it now! LOVE all your recipes so far! Happy Thanksgiving! Kathy
I made this for Thanksgiving and it was an absolute hit. I didn’t have the foil needed to do the proper water bath, so used the method without a water bath. It was still VERY creamy and delicious. My crust did get a little soggy (and I had used the egg white), so I’m not sure what to do about that? Also, the filling made quite a bit more than would fit in a 9” springform pan. I poured the extra into mini ramekins and baked them as is and they were equally delightfully (though they sunk in the middle).
Hi Nichole,
So glad to hear! Your comment means a lot and I appreciate you taking the time to let me know!
As for the filling, I’m wondering how far in advance it was made? We enjoyed this for Thanksgiving as well. I had made it before and froze it. I noticed after thawing the crust was not as crisp as when it was after baking. I’m thinking the longer it sits it might affect the crust.
Best,
Melissa
Hi Melissa! I made it one day in advance, Wednesday afternoon, refrigerated it overnight, and served it Thursday evening (cold and fresh from the fridge). I froze four pieces, and can’t wait to enjoy them over time. ☺️
Is the measurement of the pecans before chopping or is it after they have been chopped? Thank you
Hi Donna,
The measurement is after they have been chopped. Best,
Melissa