
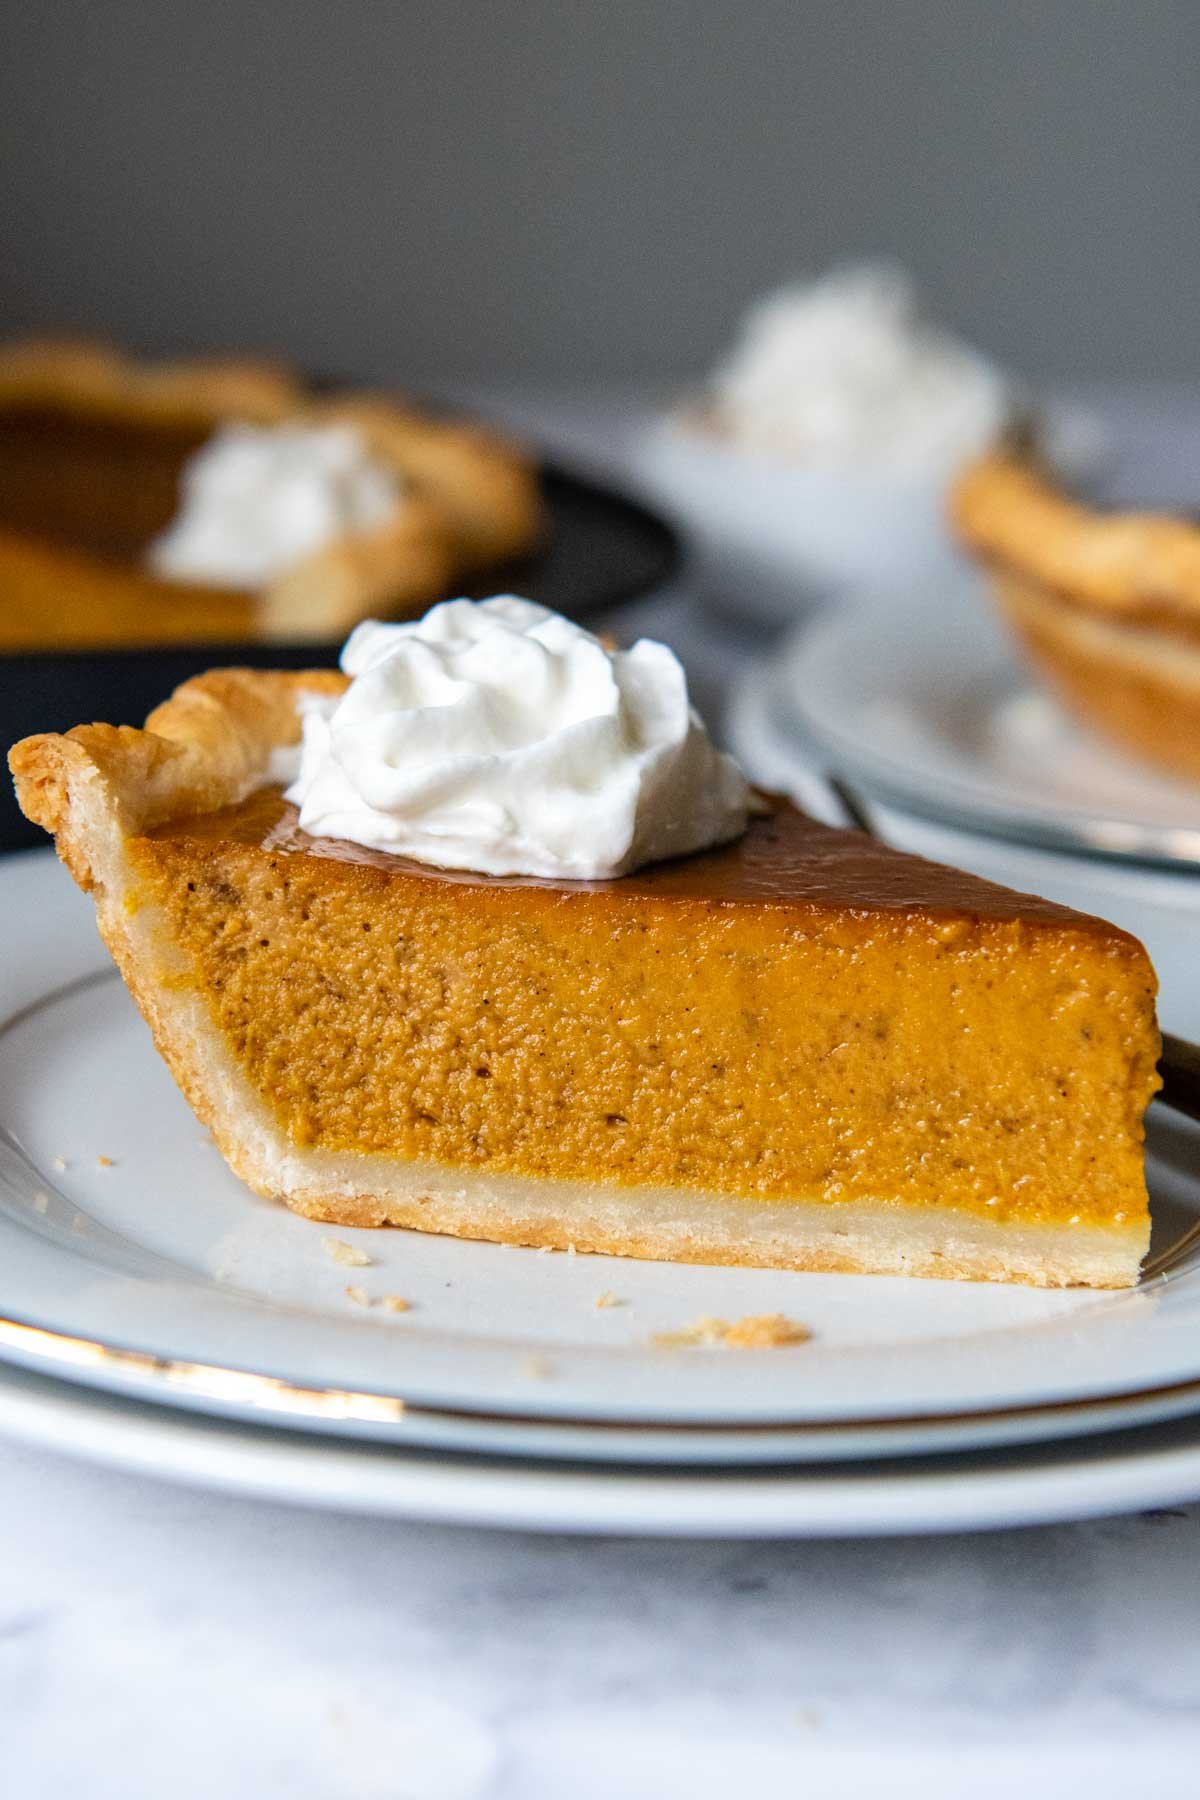
Please all holiday guests with this easy, from scratch gluten-free pumpkin pie recipe! Start with an extraordinarily tender, flaky gluten-free pastry crust, and fill with a rich, custardy pumpkin pie filling, thanks to the addition of heavy cream. Plus, this gluten-free pumpkin dessert also includes a simple trick to avoid a soggy bottom crust!
Want to Save This Recipe?
Enter your email below & we'll send it straight to your inbox. Plus you’ll get affordable and easy gluten-free recipes delivered each week!
Best Homemade Gluten-Free Pumpkin Pie
A classic pumpkin pie is easy to create with this easy, from scratch gluten-free recipe. Whether you are intimidated by making a gluten-free pumpkin pie crust or just want the best velvety, silky smooth filling, this step-by-step tutorial guarantees the best results!
For the GF pumpkin pie filling I wanted to replicate a completely homemade taste, but without the time or complexity of using fresh pumpkin. Therefore, I relied on a baking trick my mom used for her famous Thanksgiving pies.
Using canned pumpkin with the addition of heavy cream recreates a freshly-made filling, made in only 5 minutes. Combining heavy cream with brown sugar subtly smooths the flavor into a perfectly sweetened pumpkin custard.
I prefer using cream with an adequate amount of sugar and spices over sweetened condensed milk, which can be a little syrupy and artificial tasting. The other option, using evaporated milk, requires slightly more sugar for taste. Because heavy cream adds richness from the fat, I find it requires less sugar.
A soggy bottom crust plagues many gluten-free pumpkin pie recipes, but I rely on an easy trick to avoid that. When creating this homemade gluten-free apple pie recipe, I found using a metal pie dish baked directly on a baking sheet makes a crispy bottom crust.
When paired with other not-to-be-missed Thanksgiving desserts, like my famous gluten-free pecan bars, you have all bases covered, and better yet all guests are guarantee to relish, GF or not!
Free Guide! 5 easy tips for baking like a gluten-free pro!
Simple hacks for fail-proof gluten-free dishes every time!
Ingredient Tid Bits
- Gluten-free pie crust – For best taste and ease, use the included recipe, which earns high marks in my easy gluten-free pie recipe collection. For the best texture, I highly recommend using Cup4Cup gluten-free flour blend.
- Canned pumpkin – Be sure to use pumpkin puree, not pumpkin pie filling. I recommend using Libby’s brand because it is thicker, more concentrated, and contains less moisture than other brands.
- Heavy cream – The fat adds a richness to the pumpkin filling and recreates a from scratch taste, but with the easy of using canned pumpkin. For a dairy-free option use full fat coconut milk (sold in a can).
- Brown sugar – I prefer using packed light brown sugar over granulated sugar to add rich, caramel undertones.
- Eggs – Using room temperature eggs homogeneously combines with the filling ingredients. Also, lightly beat the eggs with a fork before adding to the pumpkin mixture to avoid cracks in the cooled pie.
- Spices – Through recipe testing other pumpkin recipes, I’ve found the spices need to be amplified to shine through, so don’t be afraid of the slightly increased amounts. Swap 1 tablespoon pumpkin pie spice for the combination of cinnamon, ginger, nutmeg, and cloves.
Let’s Make This Together!
(Below shows step-by-step photos and modified instructions. For the complete recipe, along with ingredient amounts, scroll down to the recipe card.)
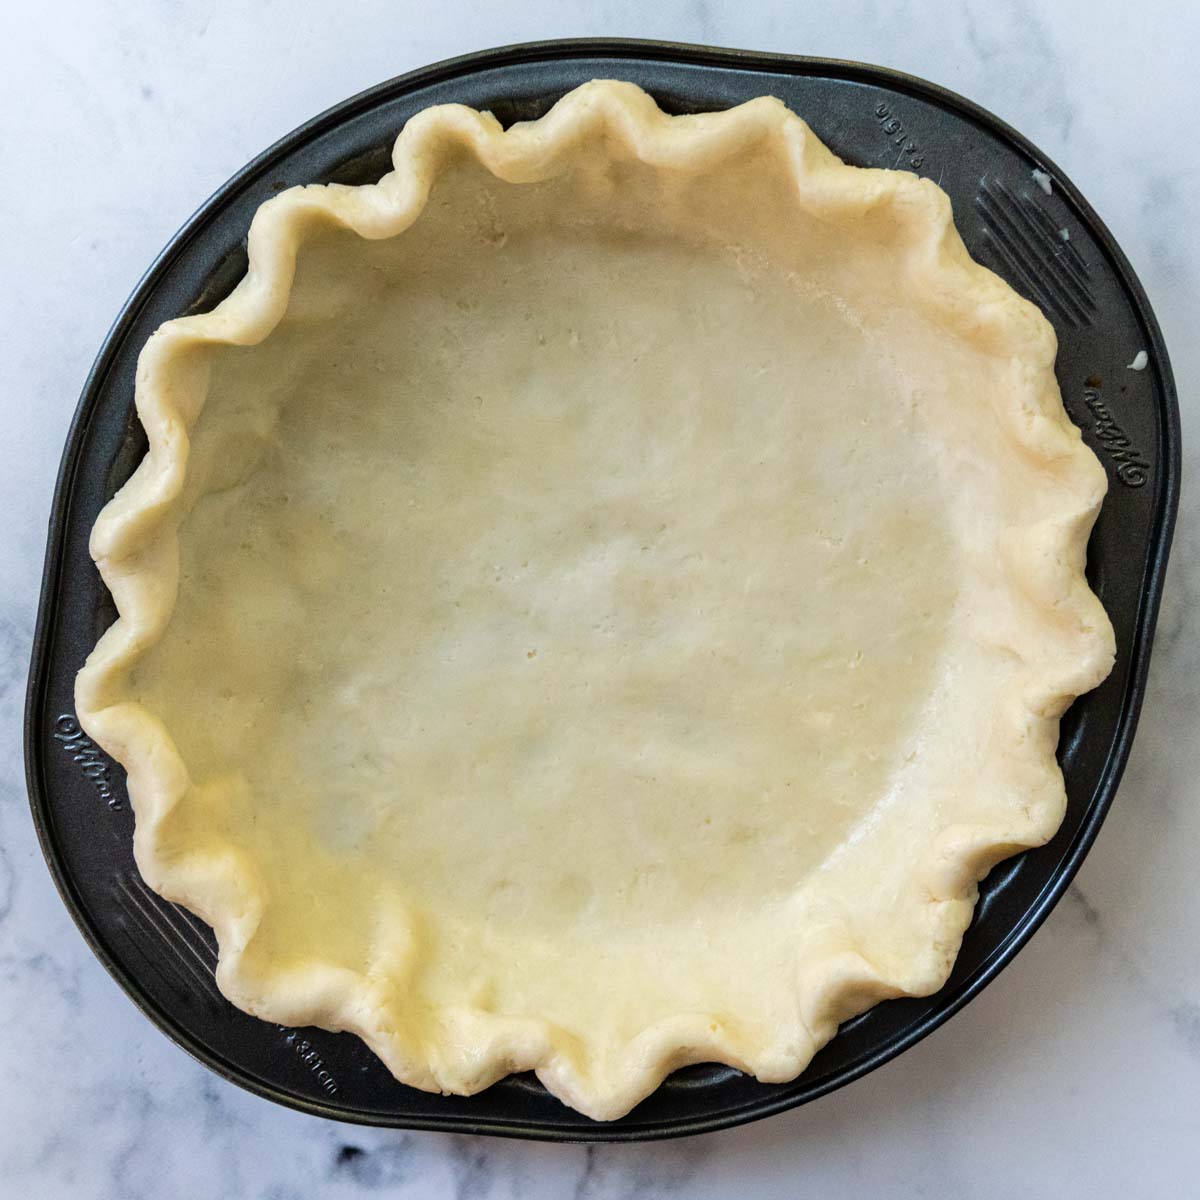
First, nail a flaky crust
Use a metal pie dish for best results. Once it is fitted in a 9-inch pie plate, place in the freezer for at least 15 minutes. You’ll want the pastry to be cold when it goes in the hot oven for the flakiest results.
While it is freezing, preheat the oven to 400ºF. Place a baking sheet on the middle rack. The baking sheet heats, along with the oven, to place the pie on. More deets on this below. 👇
Pumpkin filling tips
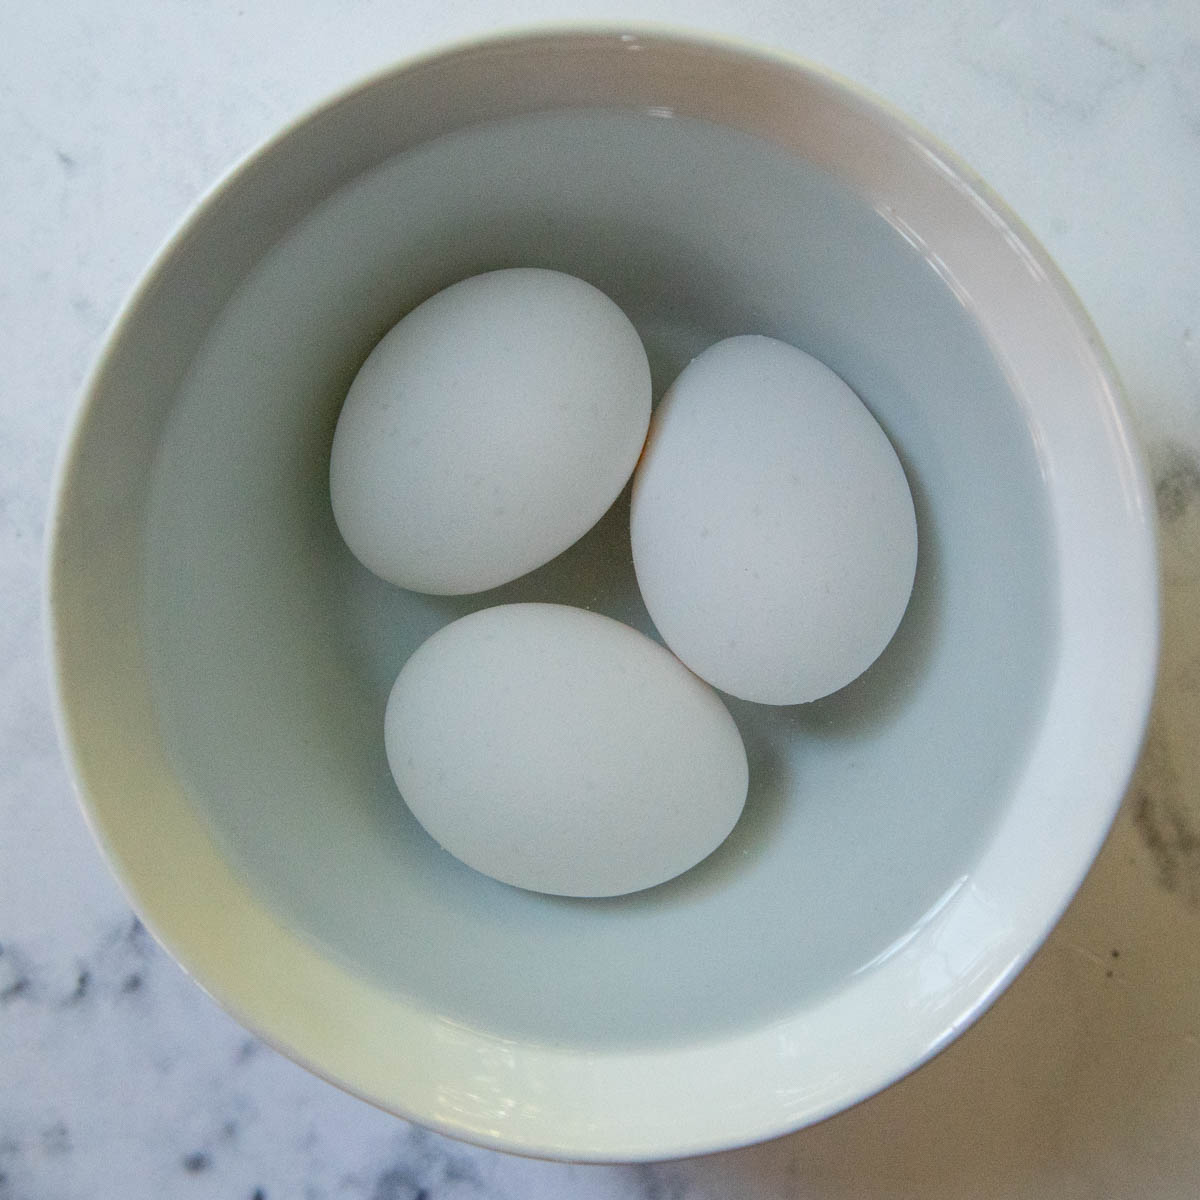
Make sure the eggs are at room temp. If you need to do this quickly place the whole eggs in a bowl and cover with hot water. Let sit for 5 minutes. Then, crack the eggs in a small bowl and lightly whisk with a fork. This avoids over-mixing the filling, which can cause the pie to crack upon cooling.
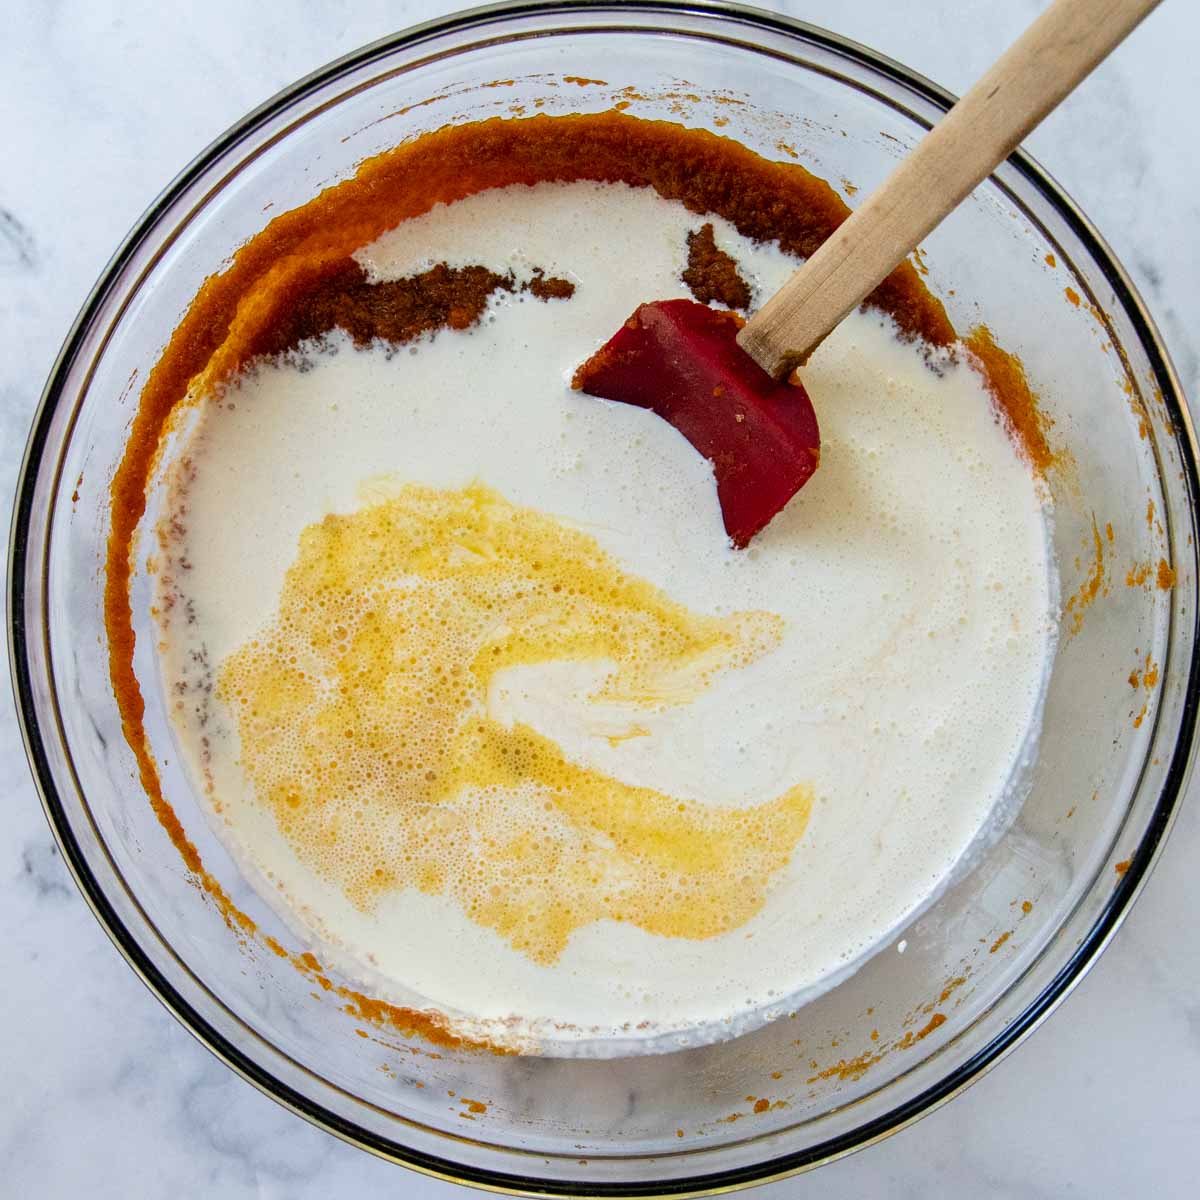
Once you stir together the pumpkin, brown sugar, and spices in a large bowl gently stir in heavy cream and lightly beaten eggs to avoid a cracked filling.
Pro, bakery-style baking tips
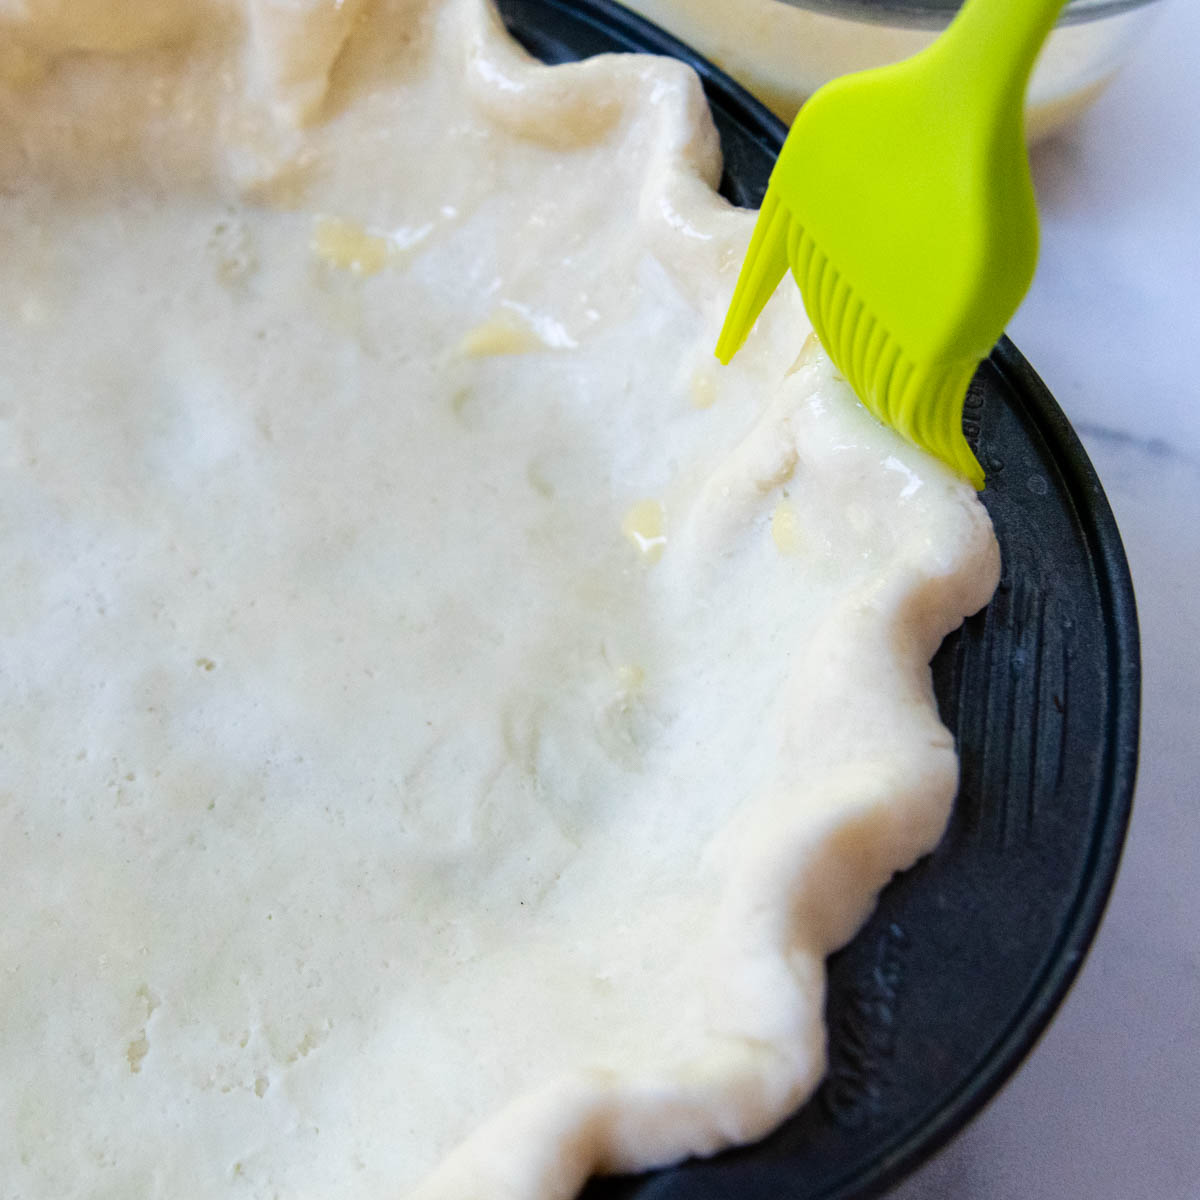
If you’d like a shiny crust, before you pour in the filling, brush the outer crust with an egg wash mixture.
Pour in the filling and transfer the pie to the hot baking sheet in the oven. Baking on a metal baking sheet ensures a golden bottom crust that isn’t soggy. You’ll also want to protect the exposed crust with a pie shield or loosely over the edges with foil.
If you’re questioning when to pull the pie from the oven, the edges should be set, firm and start to puff and slightly crack. When the pie is gently moved, the middle shouldn’t be sloshy, liquidy.

Best Canned Pumpkin To Use
For this recipe be sure to use pumpkin puree, not pumpkin pie filling. I recommend using Libby’s brand because it is thicker, more concentrated, and contains less moisture than other brands.
Any brand of canned pumpkin is safe for gluten-free pumpkin desserts. However, different brands contain varying consistencies, which can affect the filling’s texture. If the pumpkin puree is on the thinner side you may want to slightly reduce the heavy cream.

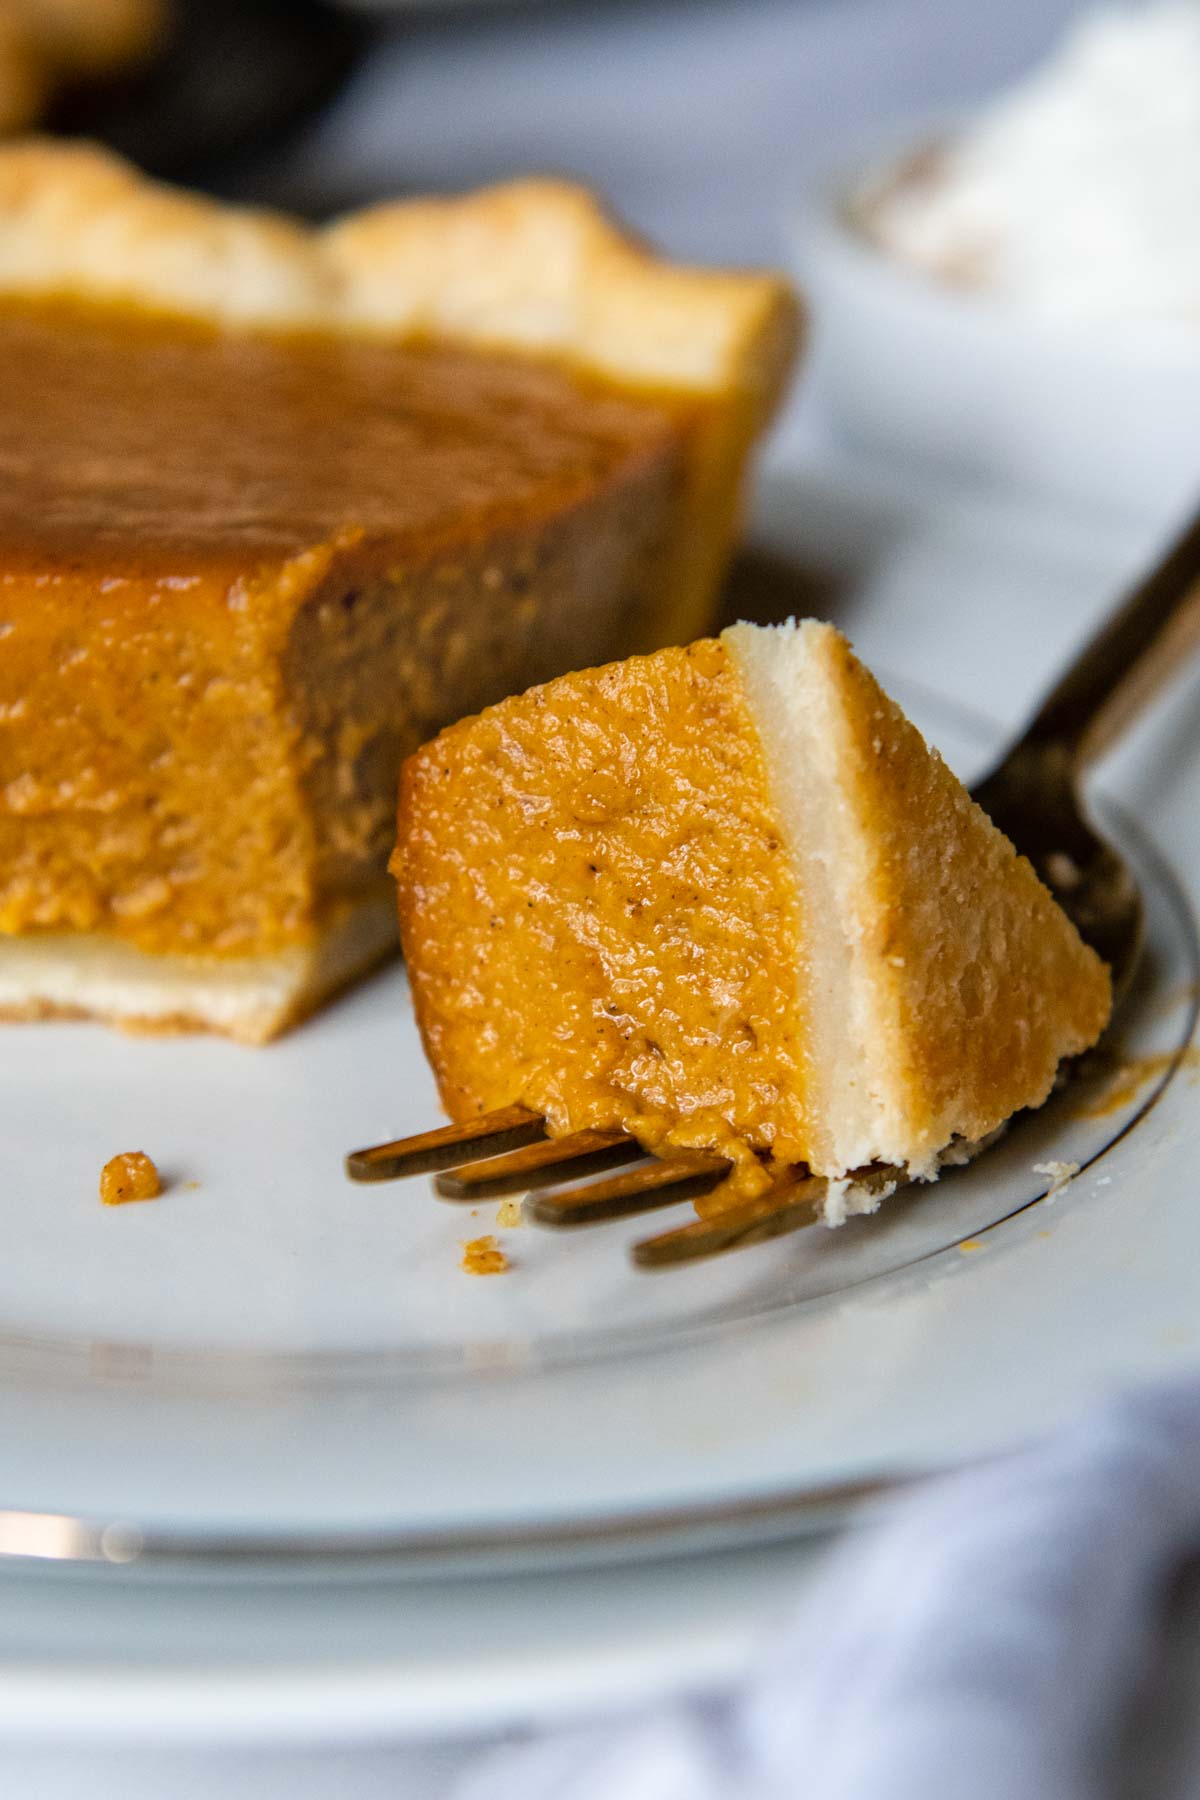
Baking Tips For Flaky Bottom Crust (Not Soggy)
GF pastry dough has a harder time absorbing fat, which is where the common problems of dense crust or soft bottom layers comes from. Fortunately it’s not hard to rectify this problem using the easy tricks below!
- Be sure the pie is well chilled before going in the oven. Freezing for 15 minutes before does the trick. It’s important to bring the fat (butter) back down to a cold temp before baking.
- While the oven is preheating, place a metal baking sheet in the oven, which the pie will sit on to bake. The extra heat from the pan reflects into the crust, making it crisp.
- For best results use a deep dish metal pie pan, rather than glass or ceramic. When coupled with the heated baking sheet, you are guaranteed great results.
- Start at a high oven temperature for first half of baking time. With the cold butter, hot metal baking sheet and pie dish, it crisps the crust quickly. Finishing baking at a slightly lower temp.
- Use a silicone pie shield to protect the outer crust. While we are using excess heat to crisp the bottom and sides, you do not want the edges to become overly browned and tough.
- Instead of pairing a metal pie dish with baking sheet, you can also par-bake the crust before filling, a trick used in this southern gluten-free sweet potato pie recipe.
Save this recipe to your pinterest board!
Let’s be friends on Pinterest! I’m always sharing great recipes!
Did you make this recipe? I love hearing from you! Leave a star rating and comment below the recipe card. It helps others when searching for recipes and I appreciate feedback from our community. You will always hear back from me! -Melissa

Perfect Gluten-Free Pumpkin Pie (No Soggy Crust)
Ingredients
Gluten-Free Pie Crust
- 8 tablespoon (113.6 g) unsalted butter, cut into small cubes and frozen for 10 minutes
- 2 ½ tablespoons (2.5 tbsp.) ice water
- 1 ½ tablespoons (1.5 tbsp.) sour cream
- 1 ½ teaspoon (1.5 tsp.) apple cider vinegar
- ¾ PLUS ⅔ cup (184 g) (6 ½ ounces weight total) gluten free flour, I highly recommend using Cup4Cup gluten-free flour
- 1 ½ teaspoon (1.5 tsp.) sugar
- ½ teaspoon (0.5 tsp.) salt
Pumpkin Pie Filling
- 3 large eggs, room temperature
- 15 ounces canned pumpkin puree, not canned pumpkin pie filing
- ¾ cup packed light brown sugar
- 1 ½ teaspoon vanilla extract
- 1 ½ teaspoon ground cinnamon
- ½ teaspoon ground ginger
- ¼ teaspoon ground nutmeg
- ⅛ teaspoon ground cloves
- ¼ teaspoon salt
- 1 cup heavy cream, see recipe notes for dairy-free
- Optional egg wash: 1 egg beaten with 1 tbsp. water, for shiny crust
- whipped cream, , for serving
Instructions
Gluten-Free Pie Crust
- Place the cubed butter in the freezer for 10 minutes. Mix together the cold water, sour cream, and vinegar in a small bowl. Place the liquids bowl in the refrigerator until you are ready to use.8 tablespoon unsalted butter, 2 ½ tablespoons ice water, 1 ½ tablespoons sour cream, 1 ½ teaspoon apple cider vinegar
- FOOD PROCESSOR: Pulse flour, sugar, and salt together until mixed.BY HAND: Whisk dry ingredients in medium-sized bowl.¾ PLUS ⅔ cup (6 ½ ounces weight total) gluten free flour, 1 ½ teaspoon sugar, ½ teaspoon salt
- FOOD PROCESSOR: Process the butter into the flour mixture until well incorporated, evenly dispersed, and without large chunks.BY HAND: Use a pastry blender, fork, or fingers to cut and knead butter into the dough until it is well incorporated throughout.
- FOOD PROCESSOR: Add the liquids to the food processor and pulse until the flour becomes moistened and small dough clumps appear. If dough doesn't start to come together, add a touch more cold water. BY HAND: Add half the liquids and knead with fingers or a fork. Pour in the remaining liquids. Knead until the dough starts to come together and the liquids are well mixed with flour.TIP: To check if you have enough liquid, clump and flatten a small bit of dough. If it doesn’t stick together, is crumbly, or breaks apart easily, add a small dash of ice water. Pulse a few times and recheck. If the dough is too wet or sticky, add a dash of flour. Pulse a few times and recheck.
- Turn dough onto sheet of plastic wrap and flatten into a thick 1" disk. Wrap tightly and refrigerate for at least 1 hour or freeze for 30 minutes. Before rolling out, let sit on counter 5 minutes so it is easier to work with.
- Use a silicone pastry rolling bag or lay a large piece of parchment paper on your workspace. Place unwrapped dough disc in middle and place same sized sheet on top. Use a rolling pin to press and spread out down from the middle out. Roll out into a circle slightly larger than your pie dish.
- Remove top paper, and invert onto pie dish. Remove second paper. TIP: If the dough warmed while rolling, it may be trickier to take the paper off. If this happens, leave the paper on, and stick the whole thing in the fridge for 5-10 minutes. Once the crust is chilled again it's much easier to pull off the paper. If the dough is too cold and the crust breaks, let it sit on the counter for a minute first.
- If necessary, trim the edges so there is an even ½ inch overhang all around the edges. Tuck the edge under, all the way around, and then use your finger and thumb to make a decorative edge. Freeze the crust for at least 15 minutes before filling.
Pumpkin Pie Filling
- While it is freezing, preheat the oven to 400ºF. Place a baking sheet on the middle rack. The baking sheet heats, along with the oven, to place the pie on. The metal conducts the heat better, which makes a crisp bottom crust.
- For the filling, first make sure the eggs are at room temperature. If you need to do this quickly place the whole eggs in a bowl and cover with hot water. Let sit for 5 minutes. Then crack the eggs in a small bowl and lightly whisk with a fork. This avoids over-mixing the filling, which can cause the pie to crack upon cooling.3 large eggs
- In a large mixing bowl stir together the canned pumpkin puree, brown sugar, vanilla extract, spices, and salt. Once that has been mixed well, add the lightly beaten eggs and heavy cream. Gently stir to just combine, without any streaks left.15 ounces canned pumpkin puree, ¾ cup packed light brown sugar, 1 ½ teaspoon vanilla extract, 1 ½ teaspoon ground cinnamon, ½ teaspoon ground ginger, ¼ teaspoon ground nutmeg, ⅛ teaspoon ground cloves, ¼ teaspoon salt, 1 cup heavy cream
- Remove the crust from the freezer. For a shiny crust edge (optional), brush with the egg wash on the outer crust edges and about 1 inch down from the top. (It's okay if some of the egg drips down into the crust.)Optional egg wash: 1 egg beaten with 1 tbsp. water
- Pour the mixture into the crust. Transfer the pie to the hot baking sheet in the oven. Bake for 15 minutes. Leave the pie in the oven, but lower the temperature to 350ºF. Protect the crust with a pie shield or loosely over the edges with foil.
- Continue to bake for 50 minutes longer, or until edges are set, firm and start to puff and slightly crack. When the pie is gently moved, the middle shouldn't be sloshy, liquidy. If you don't mind puncturing the pie, you can stick a knife or toothpick in the center. It should come out without liquid.
- Cool the pie completely before slicing and serving, about 3-5 hours. For best results, make the pie one day ahead of serving and store at room temperature, uncovered or loosely tented with foil.
Notes
Dairy-Free Modification
For a dairy-free recipe, follow a specialized gluten-free dairy-free pie crust recipe. Use full-fat coconut milk in place of the heavy cream.Storing and Make-Ahead Notes
For best taste and texture, the pie can be made one day ahead of serving. If you would like to cover it, loosely tent foil over the top, but avoid using plastic wrap, which will trap in moisture. If you prefer refrigerated pies, after it has completely cooled, loosely tent foil over the top and place in the fridge up to 2 days. However, refrigerating a pie adversely affects the crust, making it softer and not as flaky. If you are worried about a pie sitting out that long, I would recommend freezing the baked pie instead. Once it has completely cooled (at least 5 hours), place it in the freezer, unwrapped. Once it has frozen, wrap securely with plastic wrap and cover with foil. When ready to serve, unwrap the pie and thaw at room temperature for 3 hours. Be sure to take the wrappings off before thawing or the condensed moisture will make the crust soggy.This post contains affiliate links. My opinions are always my own. If you purchase a product through an affiliate link, I make a small commission – at no cost to you. Read full disclosure policy here.


I have made almost every one of your recipes exactly as written and they always come out AMAZING. For this recipe though, I have a last minute adjustment I hope to make work in time for Thanksgiving. I was wondering if I could make this in a cast iron pan? And if possible- would anything would need to be adjusted? Maybe temp/time? Thanks in advance!
Oh, thank you, Megan! So happy to hear this. I love this idea. I don’t see why not. I just baked it this morning and I like to do it in a metal pie plate because it makes the crust crispier. I have a cast iron pie plate and I normally don’t make any adjustments with that. What size is your pan, though? If it’s bigger then 9-inch you might have to make a little more filling and pie crust.
Best,
Melissa
Firstly, thank you for your timely response! We only have access to a glass pan and we love a crispy crust, I am so appreciative that you responded! It’s a 10 inch that I’m working with for Thanksgiving dinner/dessert. Should I x’s ingredients by .25 (1/4) more for the filling and crust?
Hello,
It’s up to you and how much math you want to do on Thanksgiving 🙂 Yes, by 1/4 would be good, but if I were you I would keep it simple, use the glass pan and bake it on the baking sheet. Make sure the baking sheet heats along with the oven and then put your pie plate on it. I think you will still get a crispy crust. 🙂
Best,
Melissa
Great recipe! I made it for an elderly couple I cook for, who needs gluten free.
Awww, that’s so neat, Jean! Thanks for sharing and taking the time to let me know.
Best,
Melissa
Melissa, this recipe looks lovely, and I’m excited to add it to our gluten-free Thanksgiving spread! I only have glass pie dishes, so I’ll opt for the par-baking option. I compared a lot of recipes today, and this one just looks so scrumptious!
So happy to hear, Kristi! Let me know what you think and have a wonderful Thanksgiving!
Best,
Melissa
It was absolutely delicious, and the crust so flakey and beautiful.
I made it in Sweden with Swedish ingredients and it worked great! Reminded me of home. ❤️
I didn’t have time to let it cool in room temperature, so thanks to the Swedish weather in mid November, I put it out on a cooling rack in the pie pan on the balcony and covered it with a large mesh colander to keep the local wildlife from having a taste. I left it out there for about 45 minutes and by the time that it was ready to cut it, it was cool! So a good option if you are running low on time and have a cold climate (8 deg C, or 46 def F).
What a lovely comment. I love thinking of you baking this pie in Sweden, and I’m so happy it brought you good memories. Do you celebrate an American Thanksgiving there?
Best,
Melissa
Yes, celebrating American thanksgiving with American expat friends. I haven’t eaten pumpkin pie for years, since it is difficult to come by canned pumpkin puree, but was able to locate a few. So nice to be able to have a taste of the US from afar. 😀