The best homemade gluten-free breadsticks recipe will make you forget those soft Olive Garden breadsticks ever existed! This extra easy recipe with a garlic topping is not only gluten-free (with dairy-free option), but uses the simplest prep and baking method even a GF novice can pull these off with success!
Want to Save This Recipe?
Enter your email below & we'll send it straight to your inbox. Plus you’ll get affordable and easy gluten-free recipes delivered each week!
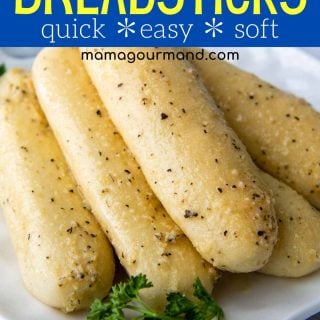
Better Than Olive Garden! Gluten-Free Breadsticks
Enjoy soft, Olive Garden-style breadsticks again with this easy gluten-free recipe. These breadsticks are so good, my family was fooled into thinking they were traditional rather than gluten-free!
These garlic breadsticks based off another reader’s favorite, a combination of gluten-free bread recipe and gluten-free garlic knots. Just like the bread recipe, the ingredients are simple, kitchen-staples, and it comes together in a matter of minutes!
Since homemade gluten-free breadsticks have a brief rise time, you can be enjoying soft parmesan garlic bread in less than 45 minutes start to finish!
Crazy easy! My non-GF husband has declared these the “go-to bread for company”, so that’s as big of a win as I could ask for.
—Caitlyn
Free Guide! Receive a Free Gluten Free Dinners Cookbook
TOP 5 Highest Rated Recipes!
Ingredient Tid Bits
Gluten-free garlic breadsticks use ingredients I always have on hand so they are perfect side dish to throw together with my never-mushy gluten-free lasagna, soups, baked ziti, salad, tender homemade gluten-free meatballs, or this 10-minute silky gluten-free alfredo sauce.
- Gluten-free flour blend – Using the best gluten-free flour makes or breaks the quality of the bread. I tested the recipe with different flour blends to make sure it consistently turns out, but some performed handedly better than others. My preferred brand I use for all gluten-free baking recipes is Cup4Cup, which includes xanthan gum.
- Psyllium Husk Powder – I’ve made the bread multiples with and without the psyllium husk powder. It doesn’t affect the taste, but it does help maintain moisture, adds softness, and elasticity. I do suggest using a lighter colored brand, or the breadsticks will bake a weirdly purplish color. It doesn’t affect the taste, but my favorite brand to use is linked.
- Instant (Rapid Rise) Yeast – I would suggest buying this is bulk and storing in your refrigerator. If you use active dry yeast it will have to be activated in the warm water first.
- Eggs – Room temperature. Do do this quickly, I place the eggs in a bowl of hot water for 5 minutes before breaking and using.
- Olive Oil – Or substitute the same amount of vegetable oil or melted butter.
Watch The Recipe
Let’s Make This Together!
(Below shows step-by-step photos and modified instructions. For the complete recipe, along with ingredient amounts, scroll down to the recipe card.)
Easy peasy dump and mix dough
This is where gluten-free bread recipes win out. No kneading necessary! Just mix together the dry ingredients then add the eggs, oil, and water.
Mix on low speed to let the dough come together. Then increase the speed and beat for 5 minutes. This helps hydrate the GF starches so the breadsticks are nice and soft.
The batter will be slightly thick, like brownie batter (see pic below), which is totally fine! These don’t have to be rolled or shaped so we don’t need a stiff dough.


Simple shaping method and bake
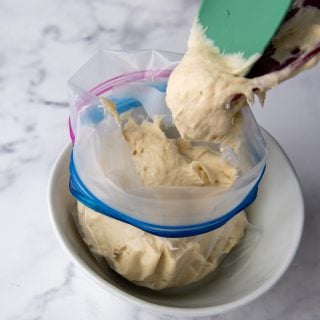
A looser dough means softer breadsticks, put we also need a way to get them on the baking sheet! Place a gallon ziplock bag in a bowl and fold over sides so it’s open. Use two silicone spoons to scrape the dough into the bag.
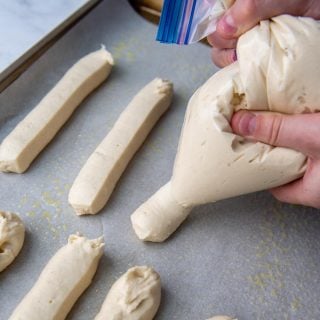
Snipe off a 1-inch corner so you have a makeshift piping bag. Be sure to not cut too big of a corner, or you will have large breadsticks. Pipe 6-inch long breadsticks onto the prepared baking sheet, about 2-inches apart.
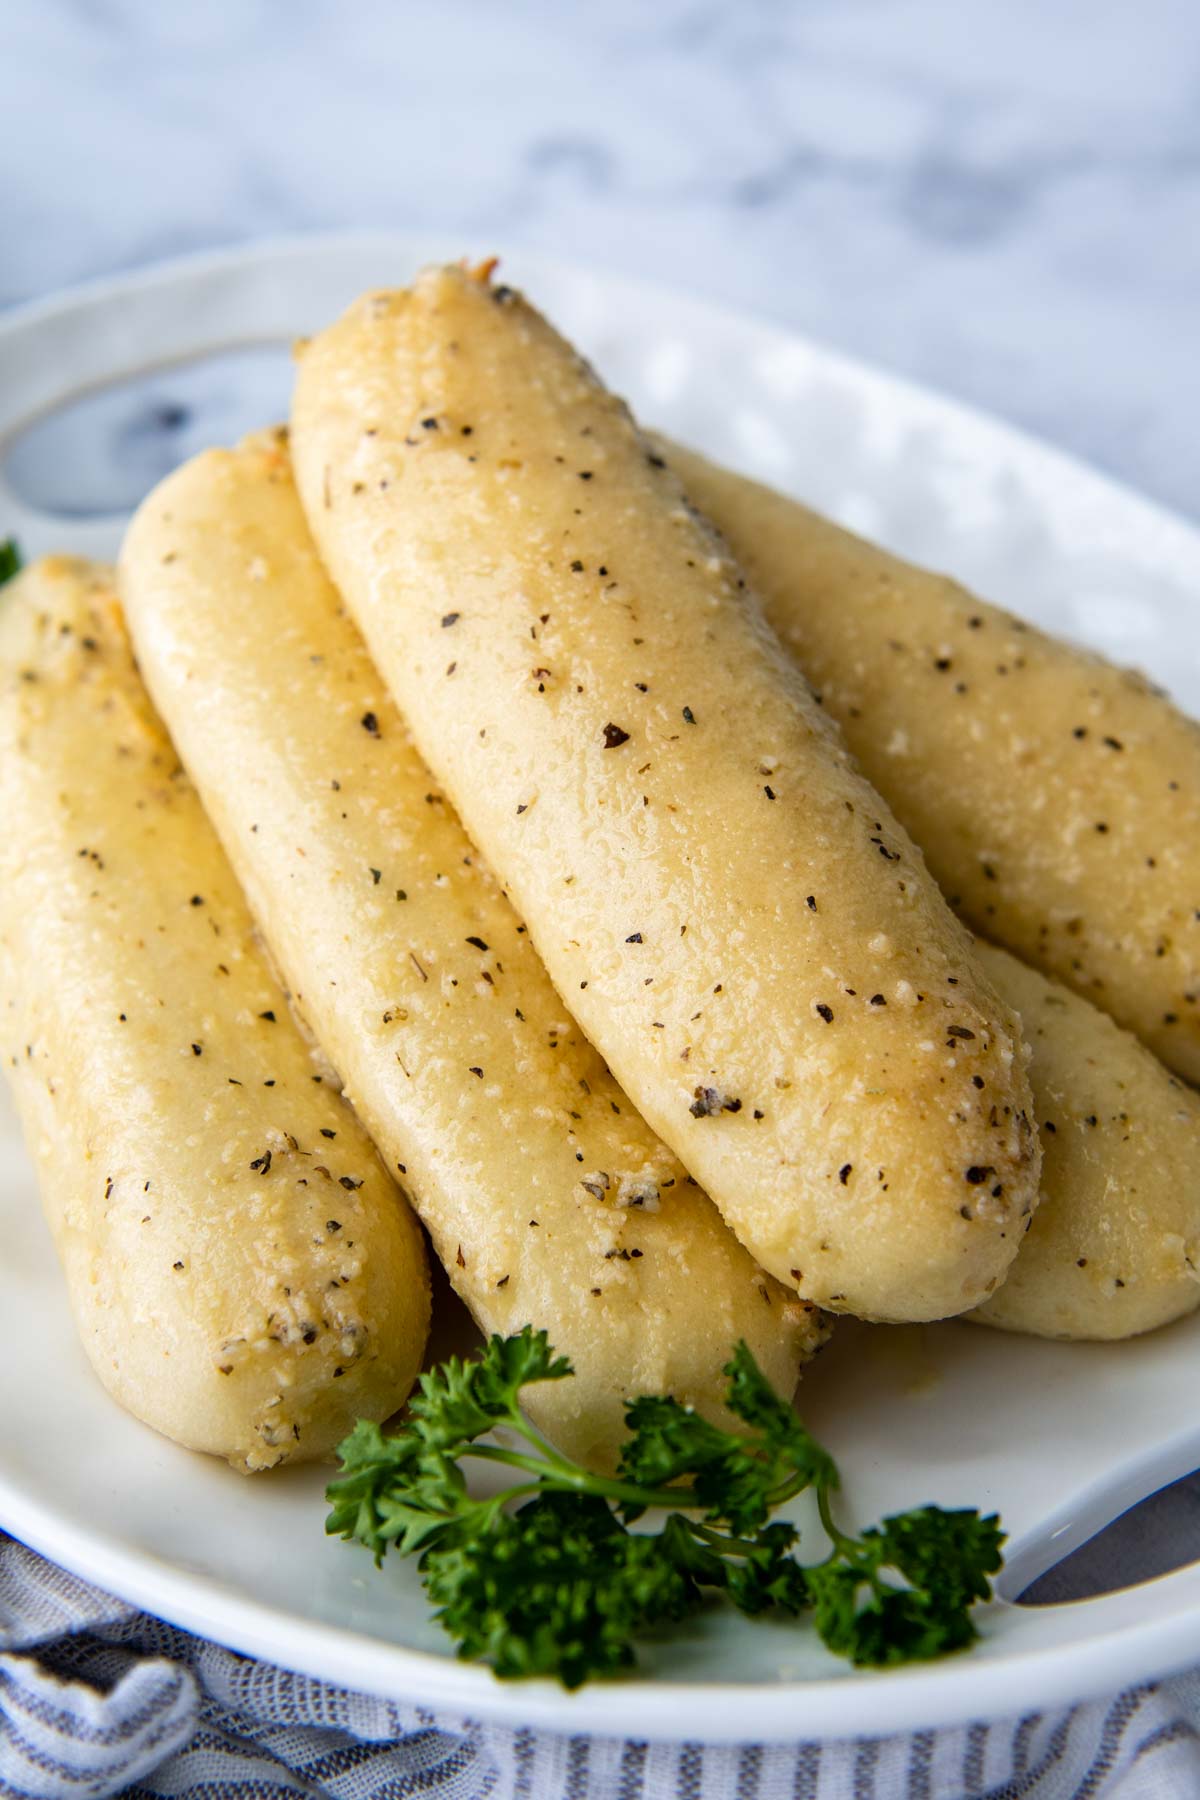
Let it rise for about 15 minutes while the oven preheats then bake for 15-17 minutes. While they’re baking combine the garlic butter topping, brush on, and enjoy immensely!


Parmesan Garlic Topping & Yummy Alternatives
The garlic breadstick topping is reminiscent of my local pizzeria’s famous garlic knots with parmesan cheese and seasoning. However, there are many ways to flavor these soft breadsticks!
First top with melted butter or olive oil, then sprinkle on one of the toppings listed below. Of course don’t forget the dipping! Check out this easy recipe for gluten-free soft pretzels for my favorite GF dips.
For a dairy-free option, omit the parmesan cheese and substitute olive oil for the melted butter. I’ve also topped them with sesame seeds, everything bagel seasoning, or nutritional yeast, which also works well for a DF / GF recipe.
Do I Need A Stand Mixer?
Yes and no. It definitely makes the recipe easier to throw together. It may be done with a hand held mixer, but since it uses a large amount of flour, it will be a lot more taxing on the mixer and yourself. If you have a bread maker, that also works well for mixing the dough together.
Best Way to Tell When They Are Done Baking
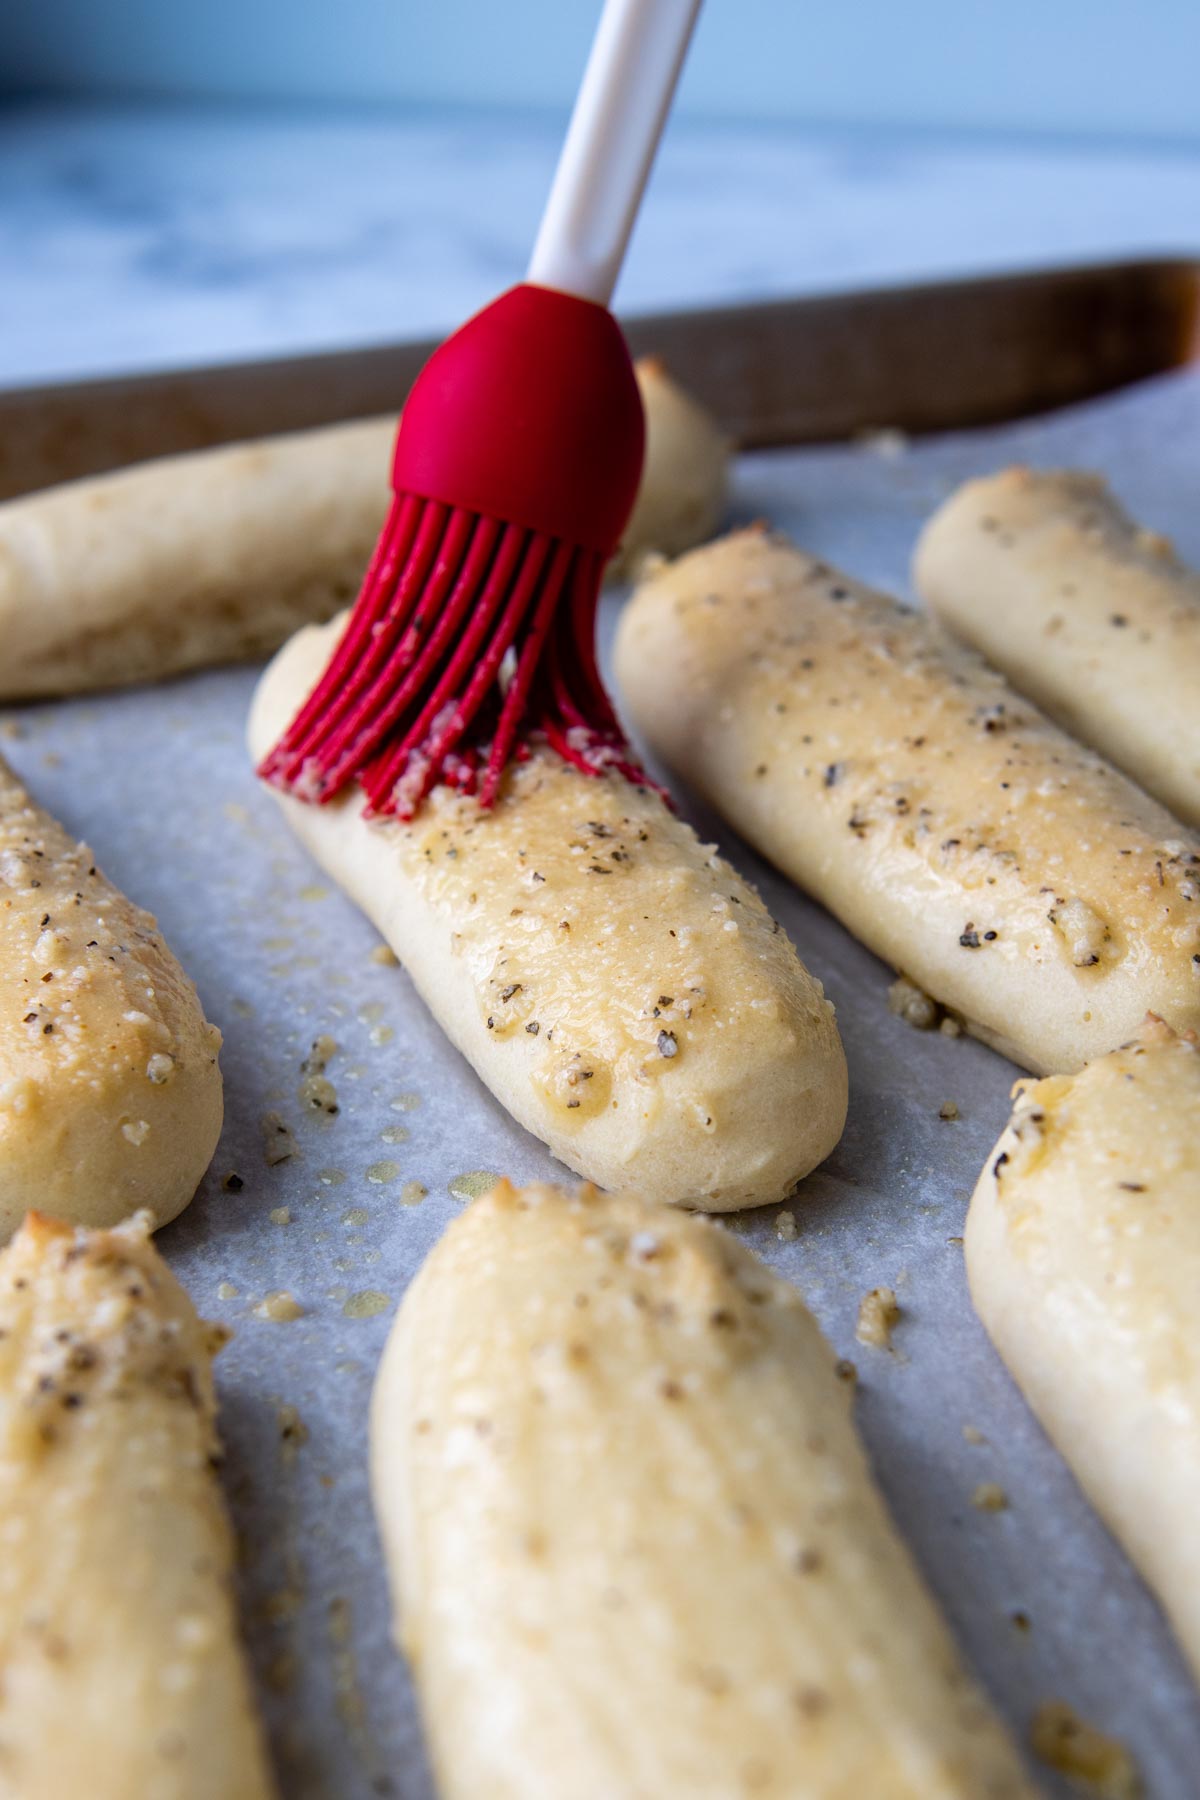
I highly recommend using an instant read thermometer to check the temperature when baking any recipe in my gluten-free bread recipe collection. Typically, the bread will “look” done before it’s actually done adequately baking.
If you pull the bread too soon the liquids won’t have time to evaporate and it will be gummy and dense, instead of soft and fluffy.
The internal temperature should reach 195-205ºF. Checking quickly with an instant read thermometer will help the bread retain valuable heat while the temp is being read. A Thermoworks Thermapen does this efficiently and accurately. It’s seriously one of my favorite kitchen tools!
Save this recipe to your pinterest board!
Let’s be friends on Pinterest! I’m always sharing great recipes!
Did you make this recipe? I love hearing from you! Leave a star rating and comment below the recipe card. It helps others when searching for recipes and I appreciate feedback from our community. You will always hear back from me! -Melissa

Softest Gluten-Free Breadsticks (Impossibly Easy)
Ingredients
- 3 cups (438 g) gluten-free all purpose flour, Cup4Cup gluten-free flour highly recommended
- 2 tablespoons (25 g) granulated sugar
- 1 (7 g) packet (2 ½ tsp) instant rapid rise yeast
- 1 tablespoon (11 g) psyllium husk powder , helps with bread moisture & structure (what is psyllium husk?)
- 1 teaspoon baking powder
- 1 teaspoon salt
- 1 ½ cups (360 g) warm water (110°F)
- 2 large eggs, room temperature
- ¼ cup (53 g) olive oil
Garlic Parmesan Topping
- 1 ½ tablespoons (21 g) melted butter, see recipe notes for dairy-free
- 2 tablespoons grated parmesan, see recipe notes for dairy-free
- ¼ teaspoon garlic powder
- ¼ teaspoon kosher salt or sea salt
- ¼ teaspoon Italian seasoning
Instructions
- Using a stand mixer with paddle attachment, mix together the gluten-free flour, sugar, yeast, psyllium husk powder, baking powder, and salt on low speed until combined.3 cups gluten-free all purpose flour, 2 tablespoons granulated sugar, 1 packet (2 ½ tsp) instant rapid rise yeast, 1 tablespoon psyllium husk powder , 1 teaspoon baking powder, 1 teaspoon salt
- Add warm water, eggs, and olive oil. Mix on low speed to let the dough come together, about 1 minute.1 ½ cups warm water (110°F), 2 large eggs, ¼ cup olive oil
- Increase speed to medium and beat for 5 minutes, scraping down paddle and bowl halfway through. The batter will be slightly thick, like brownie batter.
 Line a baking sheet with parchment paper and spray with nonstick cooking spray. Place a gallon ziplock bag in a bowl and fold over sides so it’s open. Use two silicone spoons to scrape the dough into the bottom of the bag. Push all the dough to the bottom, squeeze excess air from the top, and twist to close. You don't have to worry about "zipping" it close because the twisting keeps the dough from escaping out the top.
- Snipe off a 1-inch corner of the bag so you have a makeshift piping bag. Be sure to not cut too big of a corner, or you will have large breadsticks. Pipe 6-inch long breadsticks onto the prepared baking sheet, about 2-inches apart. You may need a second baking sheet to fit all the dough.
- Set the pan in a warm, draft-free place to rise for about 15 minutes while the oven preheats oven to 375°F.
- Bake for 15-17 minutes, or until the bottoms are lightly browned and the internal temperature of the bread reaches 190-200°F.
- While the breadsticks are baking combine the topping ingredients. Immediately brush on the topping when they come out of the oven. Serve immediately or transfer to a wire rack to cool completely before storing.1 ½ tablespoons melted butter, 2 tablespoons grated parmesan, ¼ teaspoon garlic powder, ¼ teaspoon kosher salt or sea salt, ¼ teaspoon Italian seasoning
Notes
Dairy-free Option
For the garlic topping, omit the parmesan cheese and substitute olive oil for the melted butter. Instead of parmesan cheese, nutritional yeast may be used.best tips and tricks
- The size of snipped off corner is important. The first time I made these I cut off too much and the breadsticks were huge! Error on going smaller and you can always snipe off more. Remember they will rise slightly in the oven.
- Brush on the garlic butter immediately when you pull them from the oven.
- These are best served warm, but if you need to make them ahead, wrap cooled breadsticks in a paper towel and microwave for 10-15 seconds.
- For make-ahead breadsticks, they can also be baked, cooled, and frozen until ready to serve. Thaw at room temperature for 1 hour before rewarming.
freezing, storing, and rewarming
For best results, enjoy the breadsticks immediately or within the day. If you need to rewarm them, wrap the breadsticks in a paper towel and microwave for 10-15 seconds. For oven rewarming, wrap the breadsticks in foil and place in a 350ºF oven for 5-7 minutes. Leftover breadsticks may also be frozen. Wrap each individually and transfer to a ziplock freezer bag. Freeze up to three months.This post contains affiliate links. My opinions are always my own. If you purchase a product through an affiliate link, I make a small commission – at no cost to you. Read full disclosure policy here.


Can the sugar be omitted? Options for no sugar/artificial substitutes?
Hi Carla,
I would at least leave in 1 tsp sugar to help activate the yeast. You can omit the rest, but there will be a slight tradeoff with moisture.
Best,
Melissa
Nice. Soft. Too sweet for my taste. Will make again
Hi Hannah,
Glad you enjoyed the texture. The sweetness is an easy fix!
Best,
Melissa
These look so delicious! What can I substitute for the psyllium husk? I am just as allergic to that as I am to wheat, so its a no-go for me…but I’d love to make these!
Hi Holly,
For this I would just leave it out. I’ve made them without it and it works, especially since these aren’t “shaped” and just piped through a bag.
Best,
Melissa
These breadsticks are so soft and delicious!!! 😋 Even my anti gf husband thought they were so good .. he doesn’t know they’re gf 😄 I didn’t have enough Cup4Cup flour so I also used Bob’s Red Mill 1:1 flour and they turned out perfect! Your instructions are so thorough and the pictures are so helpful. Thank you from the bottom of my heart ❤️
Aww love this, Rita! It’s my pleasure! Thank you for such a kind note.
Best,
Melissa
Best gluten free breadsticks I’ve made so far. My daughter was so happy! Said she felt like she was eating “real” bread again! Thanks for the great recipe!
I just love this, Marcie! Thanks for taking a moment to share.
Best,
Melissa
Wonderful!
Yay! Thanks, Zoe!
Best,
Melissa
Made these for my very first GF baking experience. Our GF teen AND the rest of the family loved them. Soft, fluffy, delicious. And so easy! Followed the recipe exactly using Bob’s Red Mill 1 to 1 GF Baking Flour, and they came out great. I did proof my yeast because it’s not new, so I’m excited to try your easy peasy method next time!
This is wonderful to hear, Darien! Thanks for taking the time to share.
Best.
Melissa
So, so good! I just made these today. My son has missed breadsticks since going gf. We of course had to sample one before dinner. He was so happy he tried to run off with the pan of them!
Easy to make and delicious!
Haha! Love this, Jen. So glad you all loved them. Thanks!
Best,
Melissa
I cannot believe these are gluten free. WOW. 10/10, so good!!!
Thanks, Lena!
Best,
Melissa
Oh my gosh, how are these sooo good?! Even my family who is not gluten free was all over them. Definitely a keeper!
Thanks so much for taking the time to comment, Katie! I appreciate it.
Best,
Melissa
Thank you for the recipe. I have used it quite a few times, it’s awesome. Sometimes instead of savory I brush melted butter on them and sprinkle cinnamon and sugar on them to make cinnastixs. I will also making an icing sugar dip to go with them. They are amazing too.
Thank you so much!
Sounds divine! Thanks for sharing, Crystal. I appreciate it!
Best,
Melissa
I’ve made these 3x now, and I’ve encountered all the same issues as everyone else.
The 1st set were purple and didn’t rise well. I had expired Baking Powder & didn’t use ‘Fast Acting ‘ yeast. I also didn’t have access to a KitchenAid Mixer, so I had to mix them by hand. (Big Mistake!) I effectively made large pencil erasers.
The second time, I used ‘Blonde’ Psyllium Powder, new baking Powder, fast acting yeast, and a KitchenAid mixer. WOW! What a difference!
The 3rd time, I took the added steps of proofing my Fast-Acting yeast first, and allowing the piped dough to rise an hour before baking. WOWZA! Big, fluffy, and delicious!
For leftover stix, I cut them half lengthwise, buttered and grilled them face down, then topped them with pulled pork and cheese. HEAVENLY!
Hello Kevin,
Thank you for the inspiration to bake these again immediately! I will definitely try your elevated suggestions. I can’t wait!
Best,
Melissa
We followed the recipe exactly with the Cup4Cup flour, etc. The texture is great and the flavor is good with the butter topping. The dough looked perfect while rising, but when we baked them, the breadsticks turned out this strange gray color. I’m not sure why– could it be the psyllium husk powder? I used the “It’s Just” brand that I ordered on Amazon. Has anyone else encountered this? They don’t look very appetizing.
Hi Stacy,
Yes, that is exactly what happened. Some psyllium powders are darker, which turns baked goods purple after they bake. I linked to one I use in the ingredients and talked about this above the recipe in the “ingredient tid bits.” Sorry this happened, but I’m glad you enjoyed the taste and texture!
Best,
Melissa
These breadsticks were AMAZING. Even after 4 days, they were still soft and delicious. The dough is very sticky but piping it onto the cookie sheet works great. Even my non gf family members gave them a 2 thumbs up. Definitely a keeper.
I love hearing when even non-GF people love the recipe. It’s the ultimate stamp of approval. Thank you so much for taking a moment to share with me. It means a lot!
Best,
Melissa