
Learn how to make ultra smooth and creamy fudge that is not only easy, but safe for those on a gluten-free diet! Use the fool-proof homemade recipe, made without condensed milk, for a traditional chocolate version, peanut butter fudge, Oreo fudge, or choose from the variety of gluten-free mix-in ideas. I’ll teach you the secret for making fudge perfectly every time!
Want to Save This Recipe?
Enter your email below & we'll send it straight to your inbox. Plus you’ll get affordable and easy gluten-free recipes delivered each week!
Hands-Down Best Gluten-Free Fudge!
While many fudge recipes are naturally gluten-free, it’s best to use caution before enjoying. Traditional fudge is made of butter, sugar, milk or cream, chocolate or other flavorings. Some recipes use marshmallows, or like this gluten-free fudge recipe, which uses marshmallow fluff.
So, if the basic ingredients are gluten-free, what could possibly be unsafe for a GF diet? The uncertainty comes from the flavorings. For instance, maple fudge may contain malt. Cookies and cream or cookie dough fudge contains wheat flour. For the ultimate peace of mind make your own easy homemade version in minutes.
When researching and testing homemade fudge recipes, just like with these classic no bake gluten-free peanut butter bars, I was completely overwhelmed with the various methods! Recipes varied from those with condensed milk, evaporated milk, cocoa powder, marshmallows, and marshmallow fluff – all claiming to be the best!
From previous experience I knew to stay away from recipes using sweetened condensed milk and chocolate chips. I find the texture to not be authentic, resembling more of a thick, overly sweet, slab of chocolate.
Recipes using unsweetened cocoa powder hit the mark for old fashioned creaminess, but can be finicky, without consistent results. Therefore, making classic fudge with marshmallows was the next method to test and within these I found a winner!
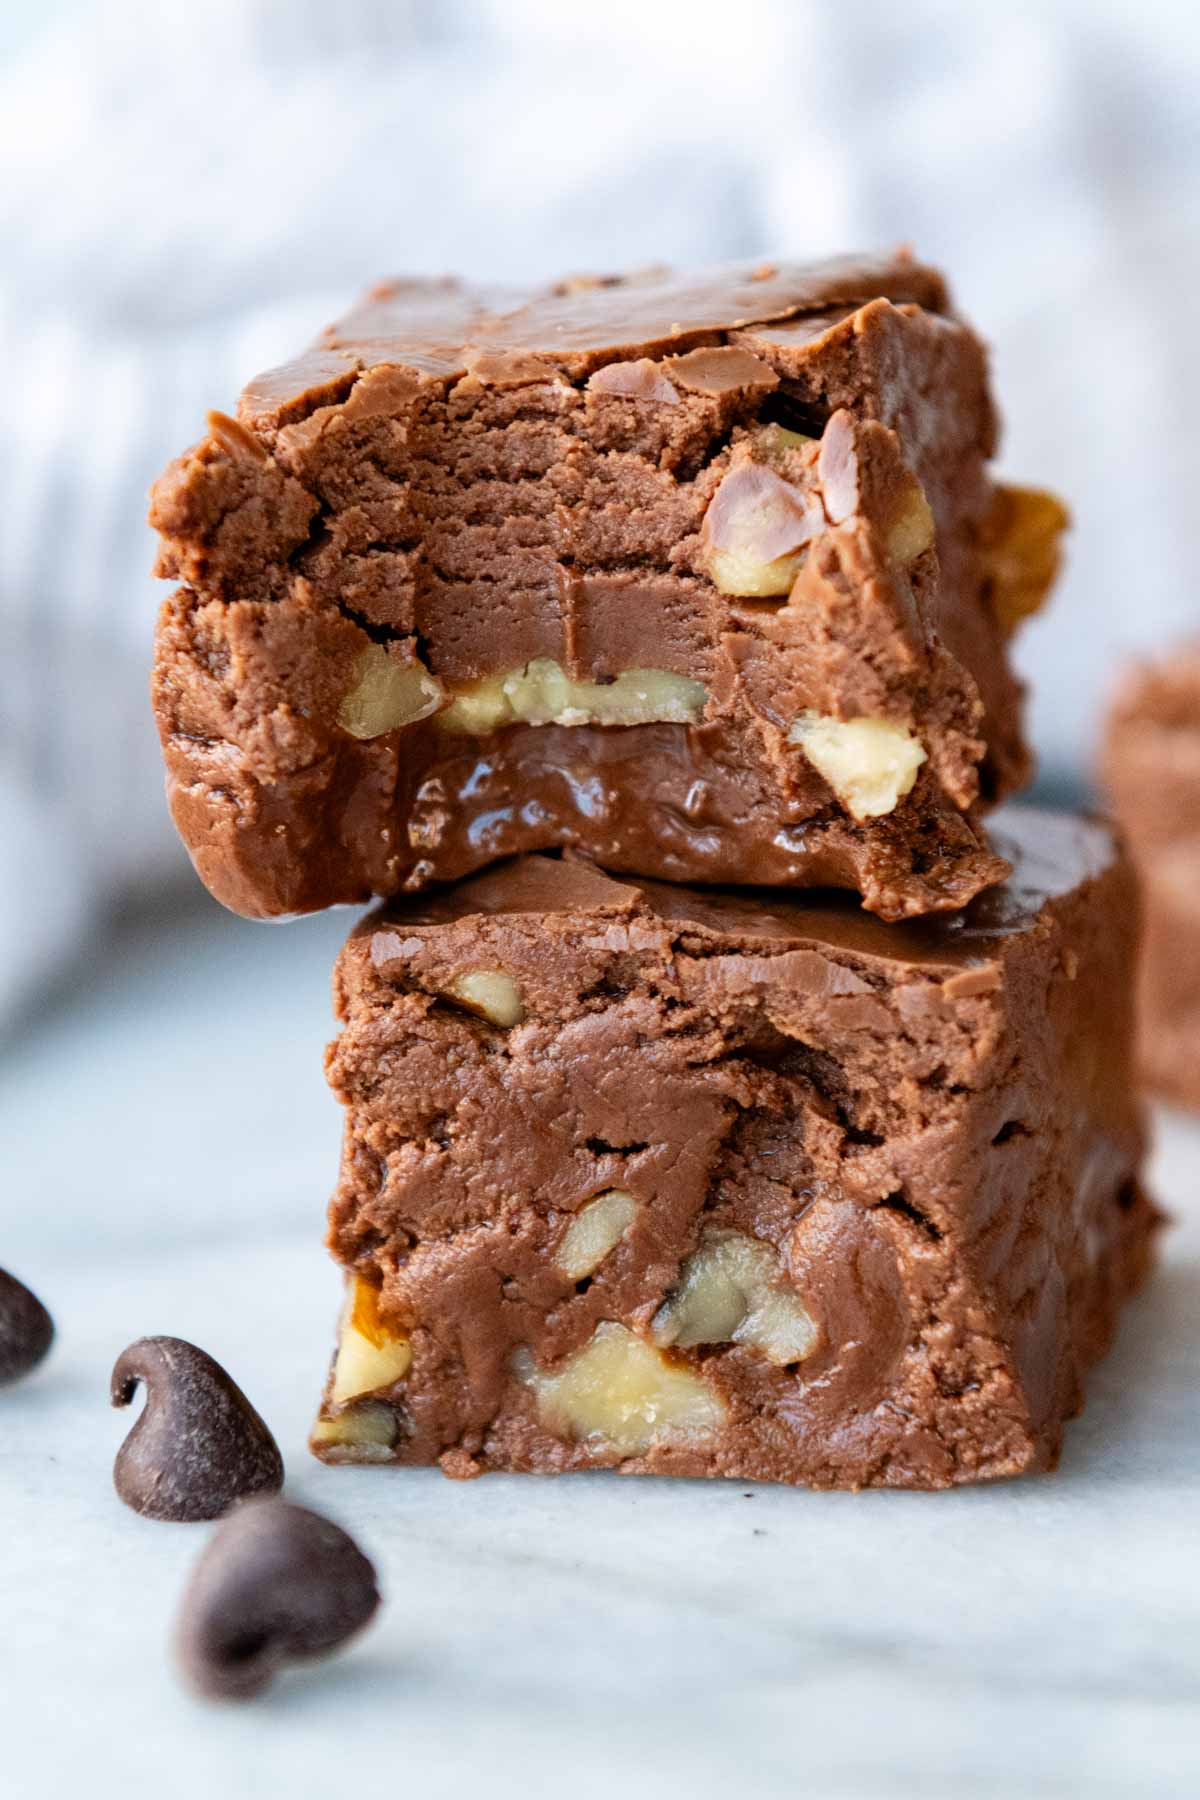
Making fudge using marshmallow fluff, also known as Fantasy Fudge, yields the best, old fashioned consistency, while also consistently turning out batch after batch. When compared to a similar method – using mini marshmallows – the marshmallow fluff fudge had a pleasantly softer texture that ultimately won over all my taste testers!
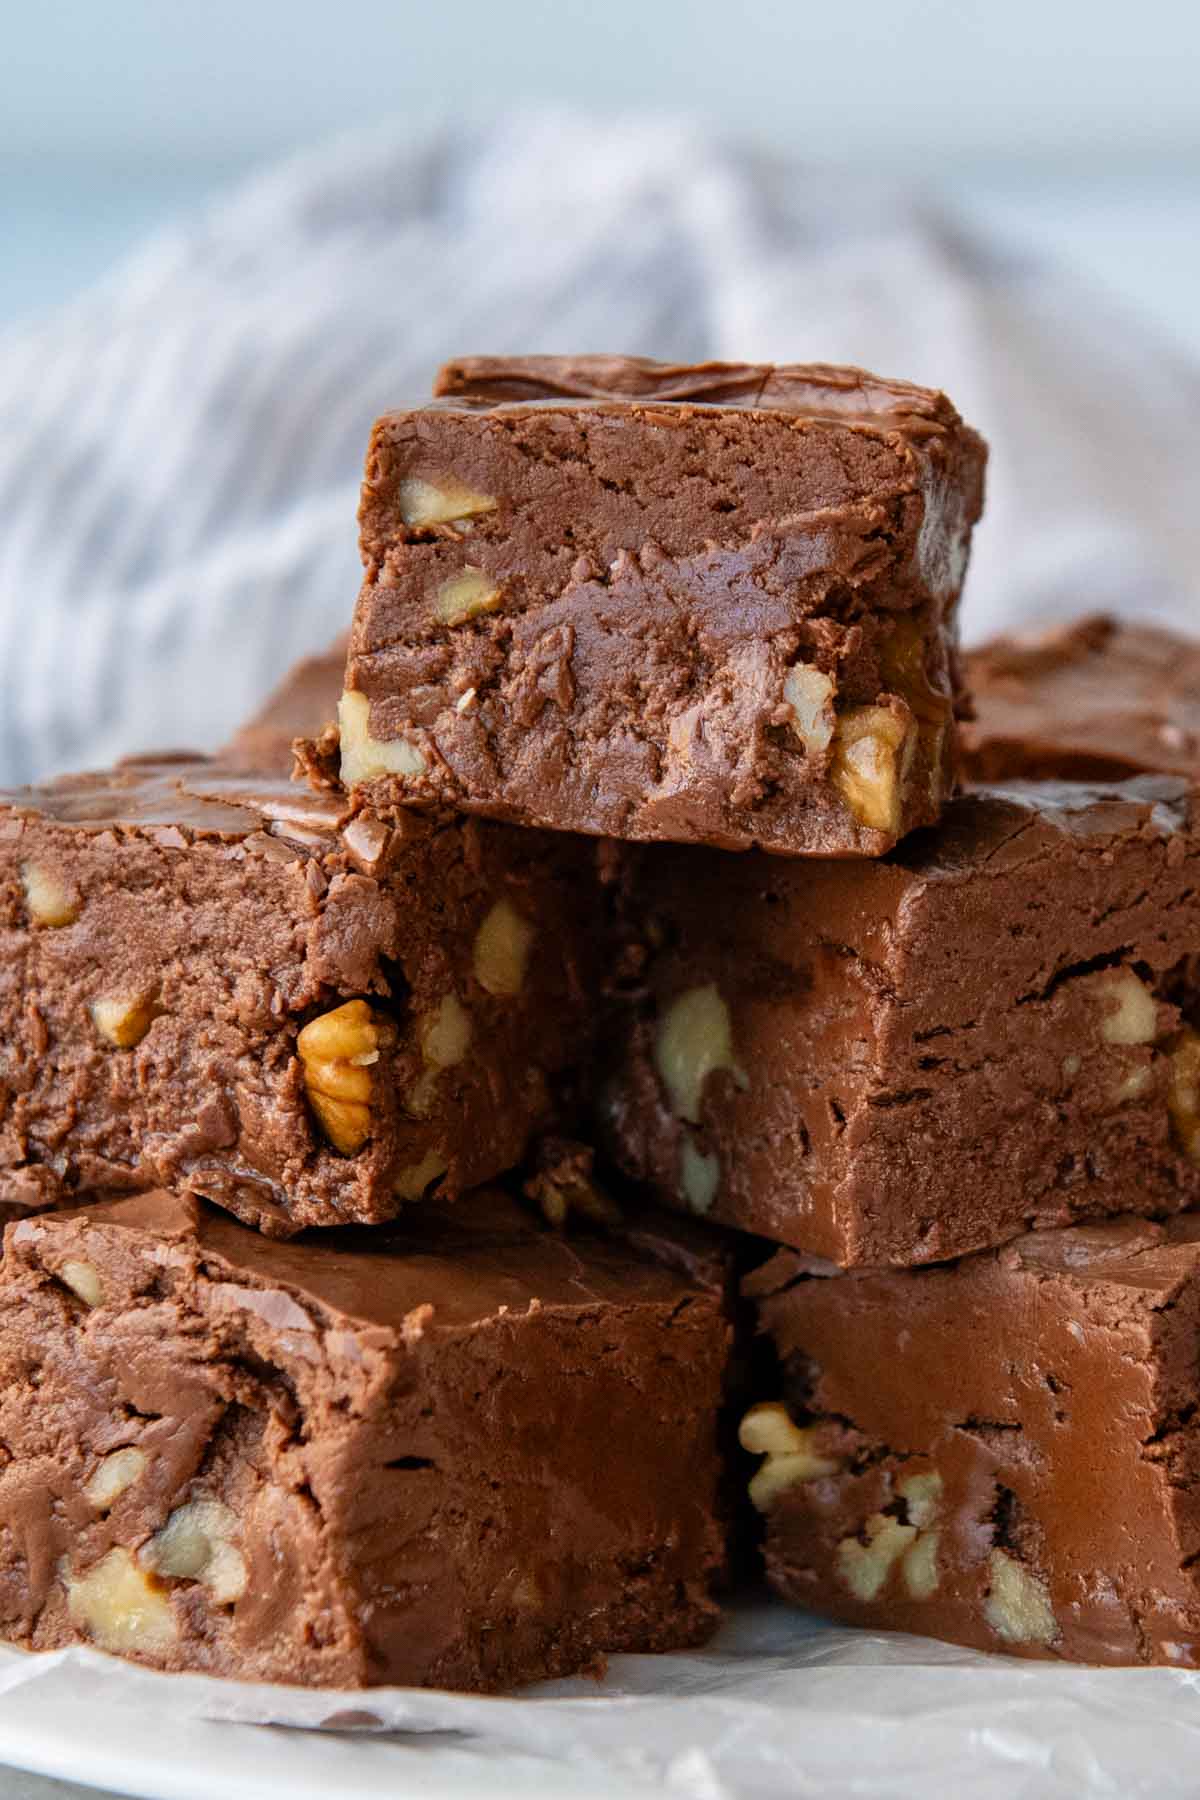
Once I landed on the winning formula, I experimented with converting the recipe for a variety of flavors. Similar to another favorite candy treat of ours, GF oreo truffles, variations such as, chocolate walnut, peanut butter, and cookies and cream all work. With batches of delicious results, it was conclusive – this is best gluten-free fudge recipe!
Free Guide! 5 easy tips for baking like a gluten-free pro!
Simple hacks for fail-proof gluten-free dishes every time!
Ingredient Tid Bits
This easy no-bake dessert only requires butter, sugar, evaporated milk, chocolate chips and marshmallow fluff. It only takes minutes to prepare and then a few hours to fully set before enjoying.
- Evaporated milk – This is shelf stable milk that has had its water content removed. It works well in fudge recipes because it can withstand cooking at higher temps, longer, without risking curdling. Additionally, since the water has been removed it adds an ultra creamy taste to fudge.
- Marshmallow Fluff – You will need a 7 ounce container. It may say “marshmallow fluff” or “marshmallow creme.” They can be used interchangeably and both are gluten-free. Mini marshmallows will not work in this recipe.
- Chocolate Chips – When testing the recipe I found dark chocolate chips won out for flavor over semi-sweet chips. It had a nice balance of richer chocolate flavor, and even those who aren’t fans of dark chocolate found they preferred the taste. For the best quality chocolate chips, refer to my favorite Christmas bark recipe.
How To Tell When Fudge is Done
The no fail, fool proof way to tell is using a thermometer. For this recipe the mixture should reach a temperature of 234ºF (soft ball stage) before removing from the heat.
Some recipes simply instruct to boil for 4-5 minutes. After testing this recipe several times, and using a thermometer to gauge accuracy, I found it took anywhere from 3-5 minutes to reach this temp. If I wouldn’t have tested the temperature I would have over boiled, and risked ruining multiple batches.
Over boiled fudge is hard and crumbly from cooking the sugar crystals too long. Adequately-timed fudge is soft, creamy, and the ideal texture. Temperature is critical!
Luckily, a candy thermometer is very cheap. In fact, it’s cheaper than rebuying fudge ingredients if you ruin a batch! Besides fudge, you can use it to make homemade caramel sauce, this easy peanut brittle recipe, toffee or pralines. It’s the ticket for fool-proof results!
If you would like to invest in a thermometer that does more than measure candy temps, I suggest my favorite kitchen tool – a one-second instant read thermometer. It can be used for homemade candy, meat temperatures, and testing the internal temp of GF breads.
Let’s Make This Together!
(Below shows step-by-step photos and modified instructions. For the complete recipe, along with ingredient amounts, scroll down to the recipe card.)
Start with a full boil
The recipe goes quick and you’ll want to have everything ready to go. Line a 11X7-inch pan with foil or parchment paper. For thicker fudge use a 8X8-inch pan, for slightly thinner use a 9X9-inch pan.
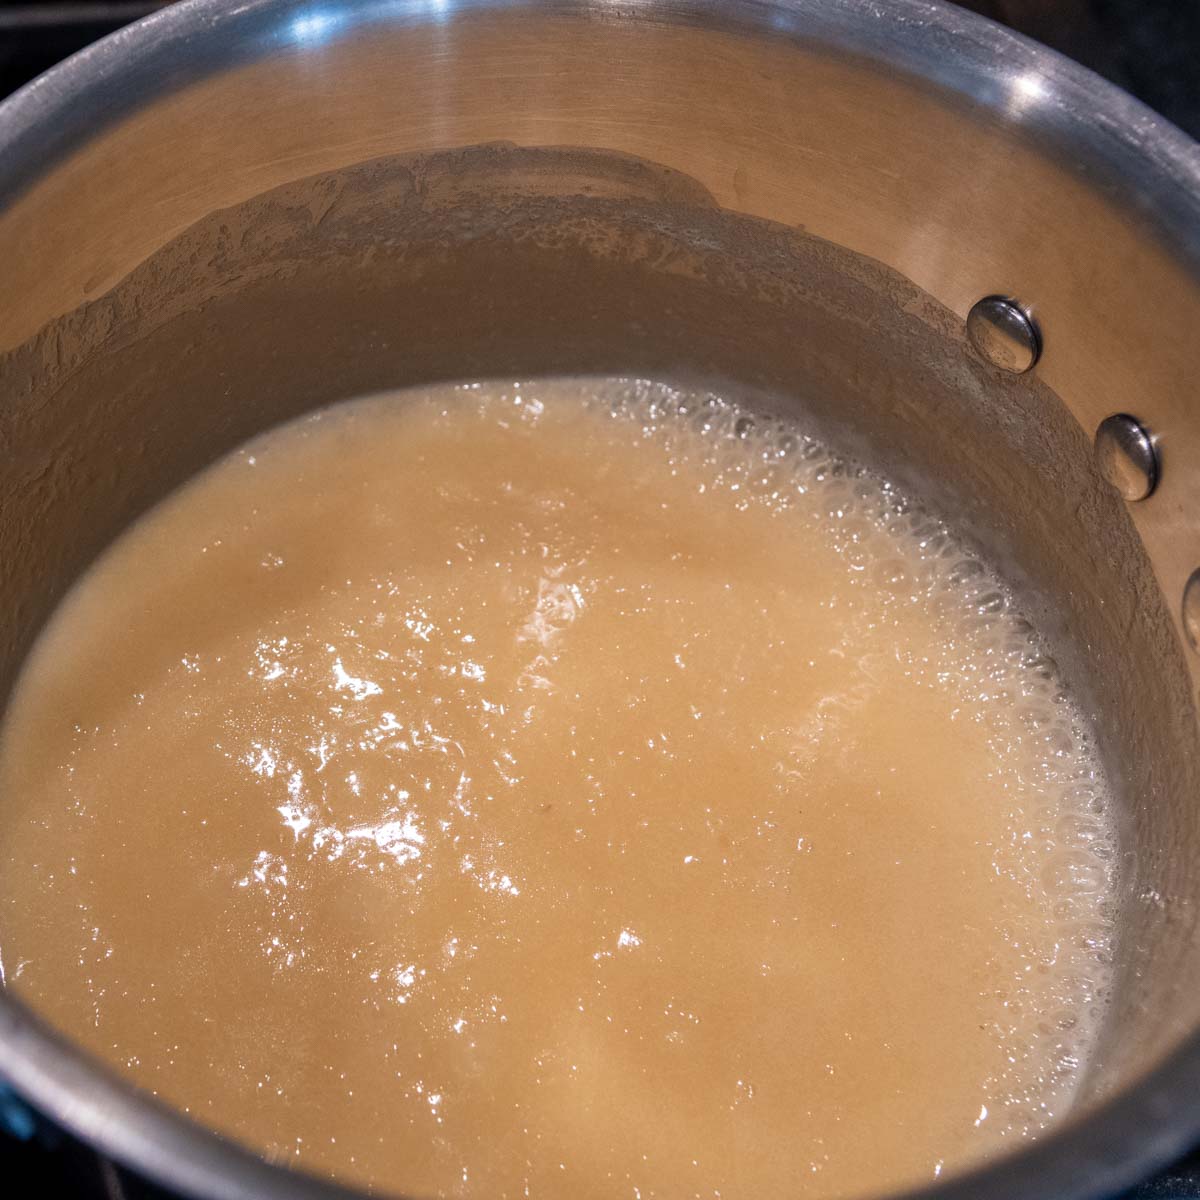
Now for the boil. This may seem silly, but it will really make or break your fudge recipe. Place the butter, sugar, and evaporated milk in a heavy-bottom saucepan. A heavy saucepan does a better job of evenly distributing the heat, avoiding hot spots.
Bring the mixture to a rolling boil over medium heat, stirring constantly. A rolling boil is where there are bubbles throughout, not just at the edges. After it has reached the full boil stage, continue to cook and stir for 4 minutes.
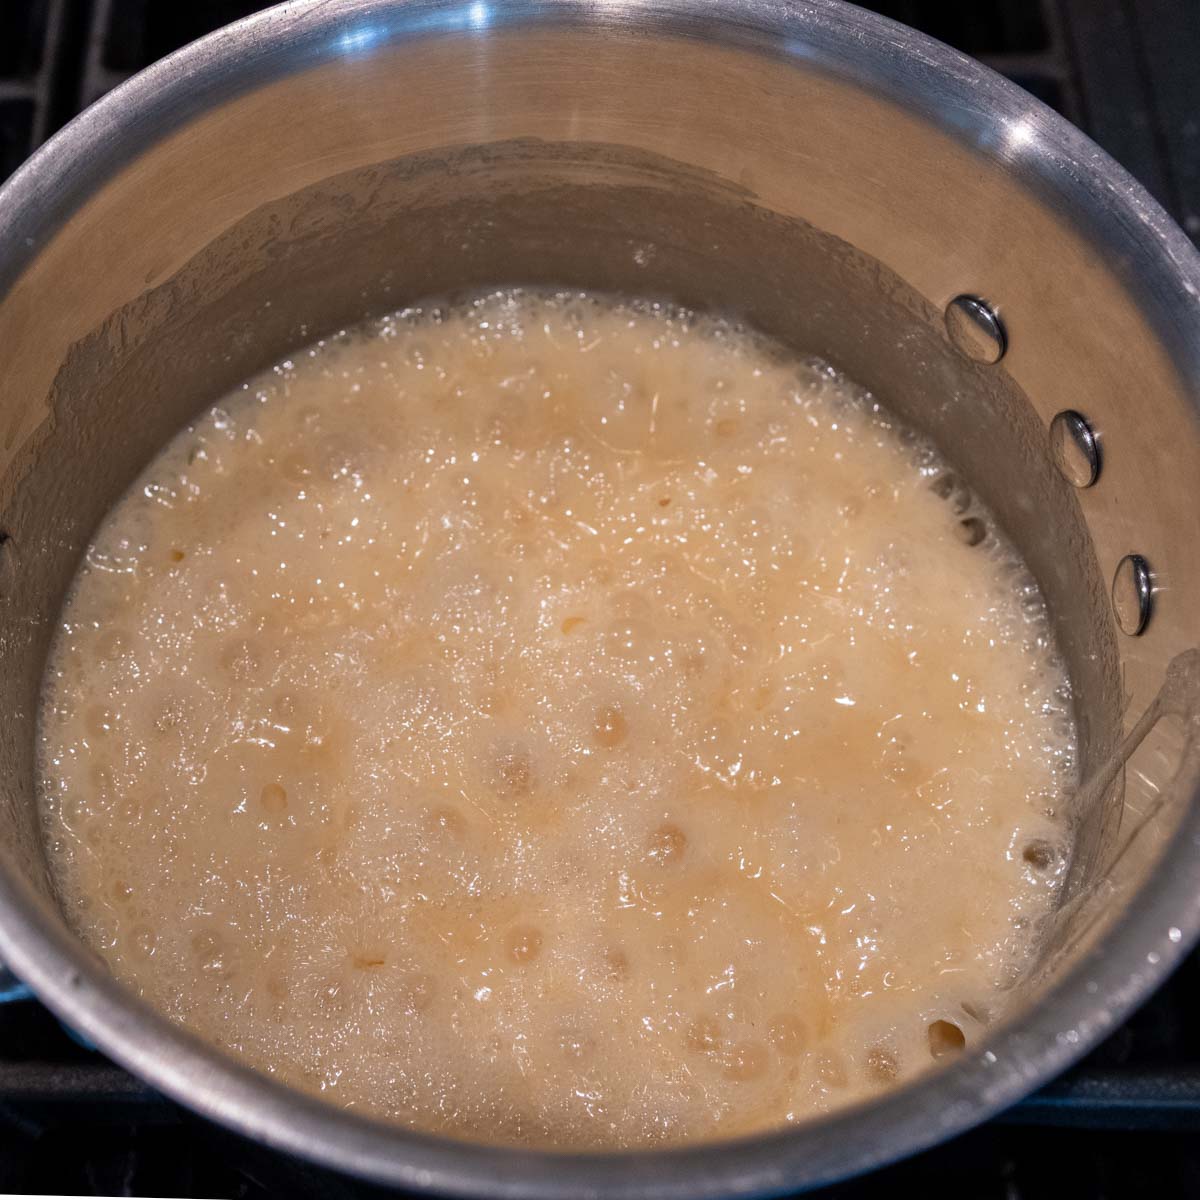
For best results use a candy thermometer or an instant read thermometer to check the temperature of when to pull from the heat. When it is 234ºF remove from the heat. If you do not have a thermometer, you can use the timing of 4 minutes at full boil. The mixture will have thickened and reduced slightly.
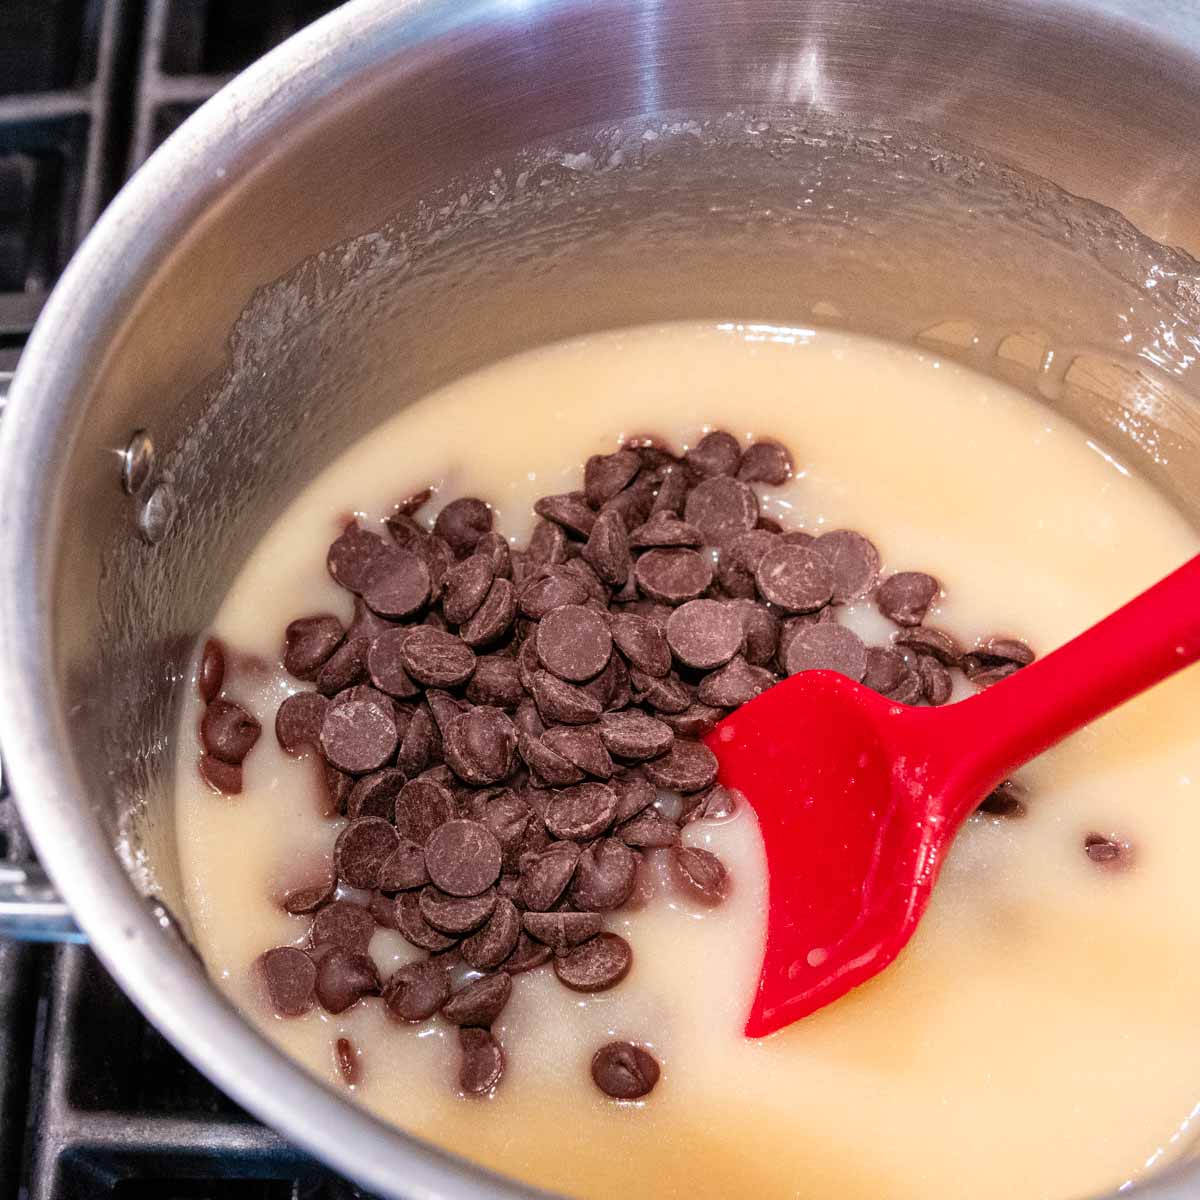
Hard part is over! Remove from heat
Immediately stir in the chocolate chips and vanilla extract. Then stir in the marshmallow fluff and any mix-ins, such as nuts.
Pour the mixture into the prepared pan and let it sit for about 2-3 hours to cool completely before slicing. Actually, maybe the waiting is the hardest part. 🤷♀️
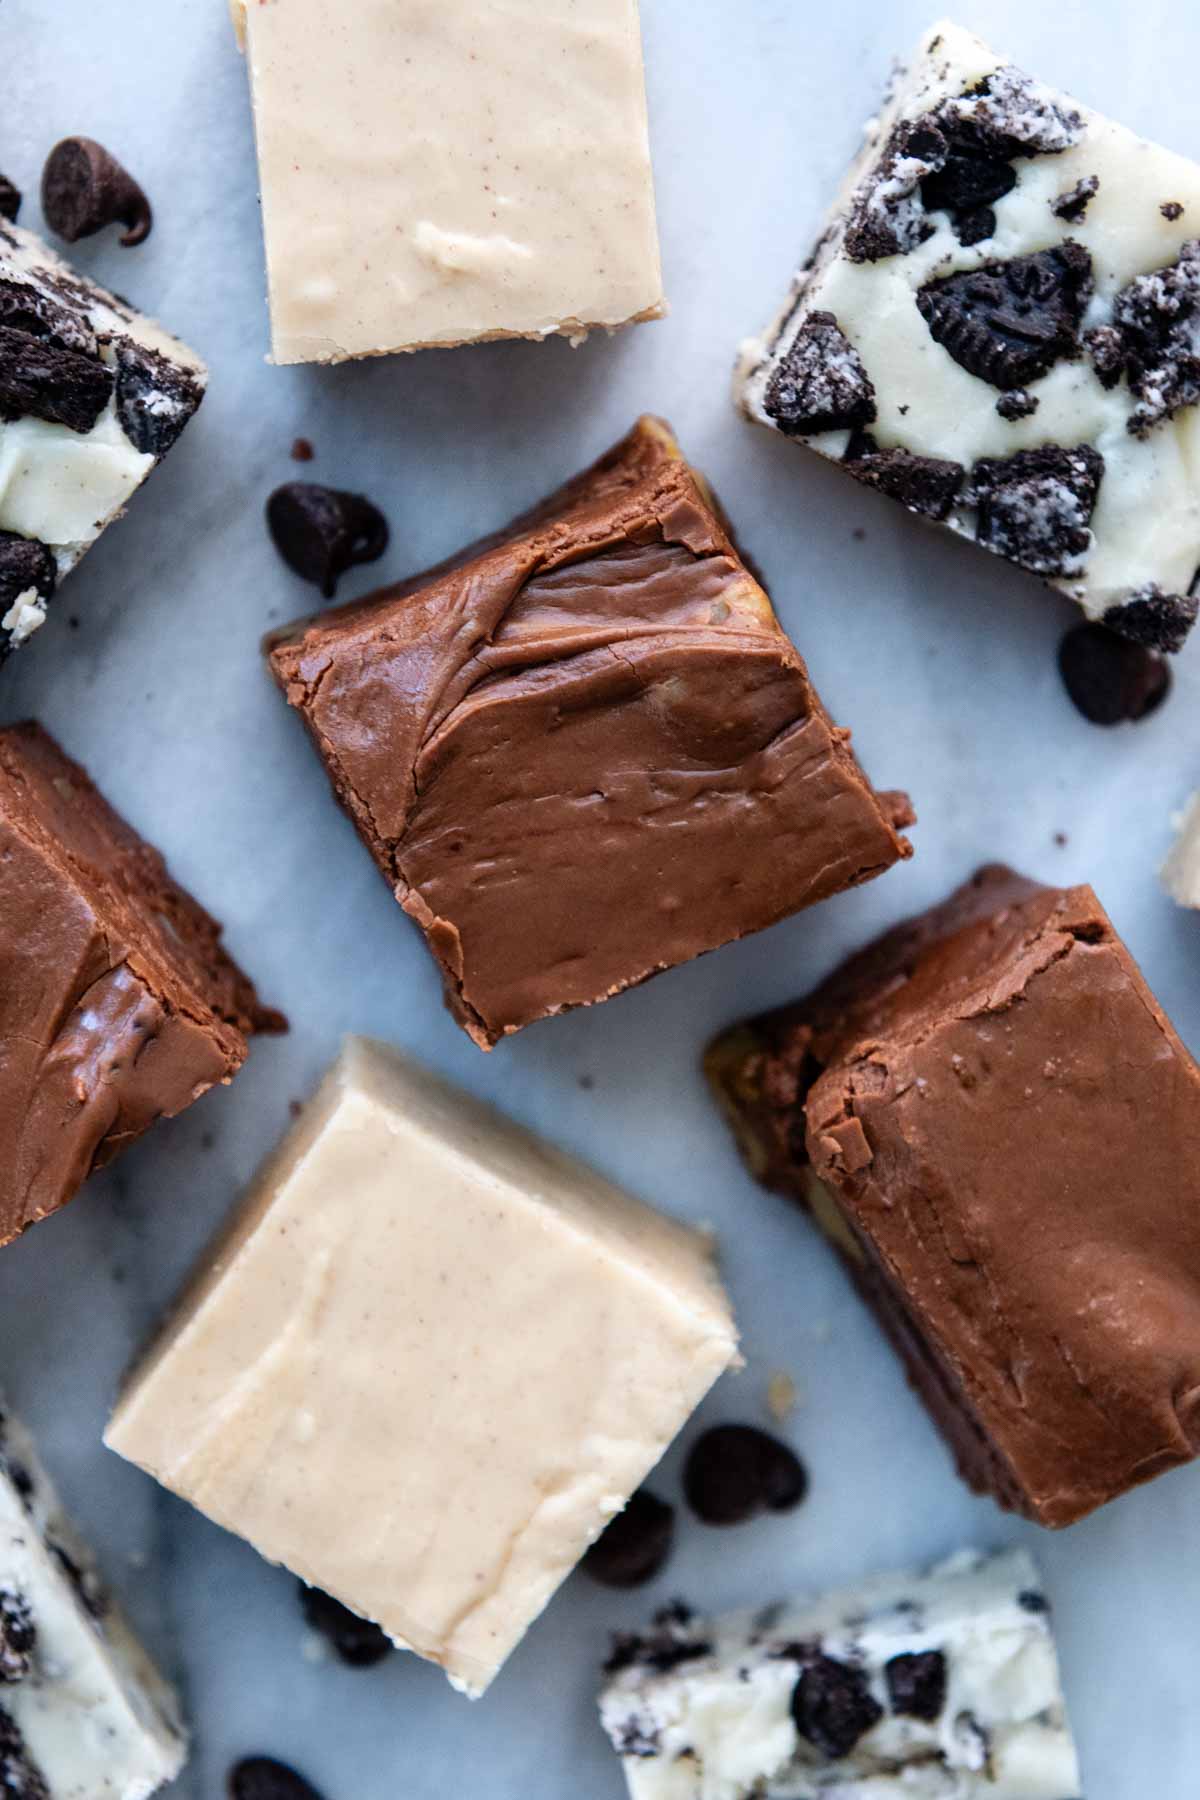
What Are Some Other Yummy Variations?
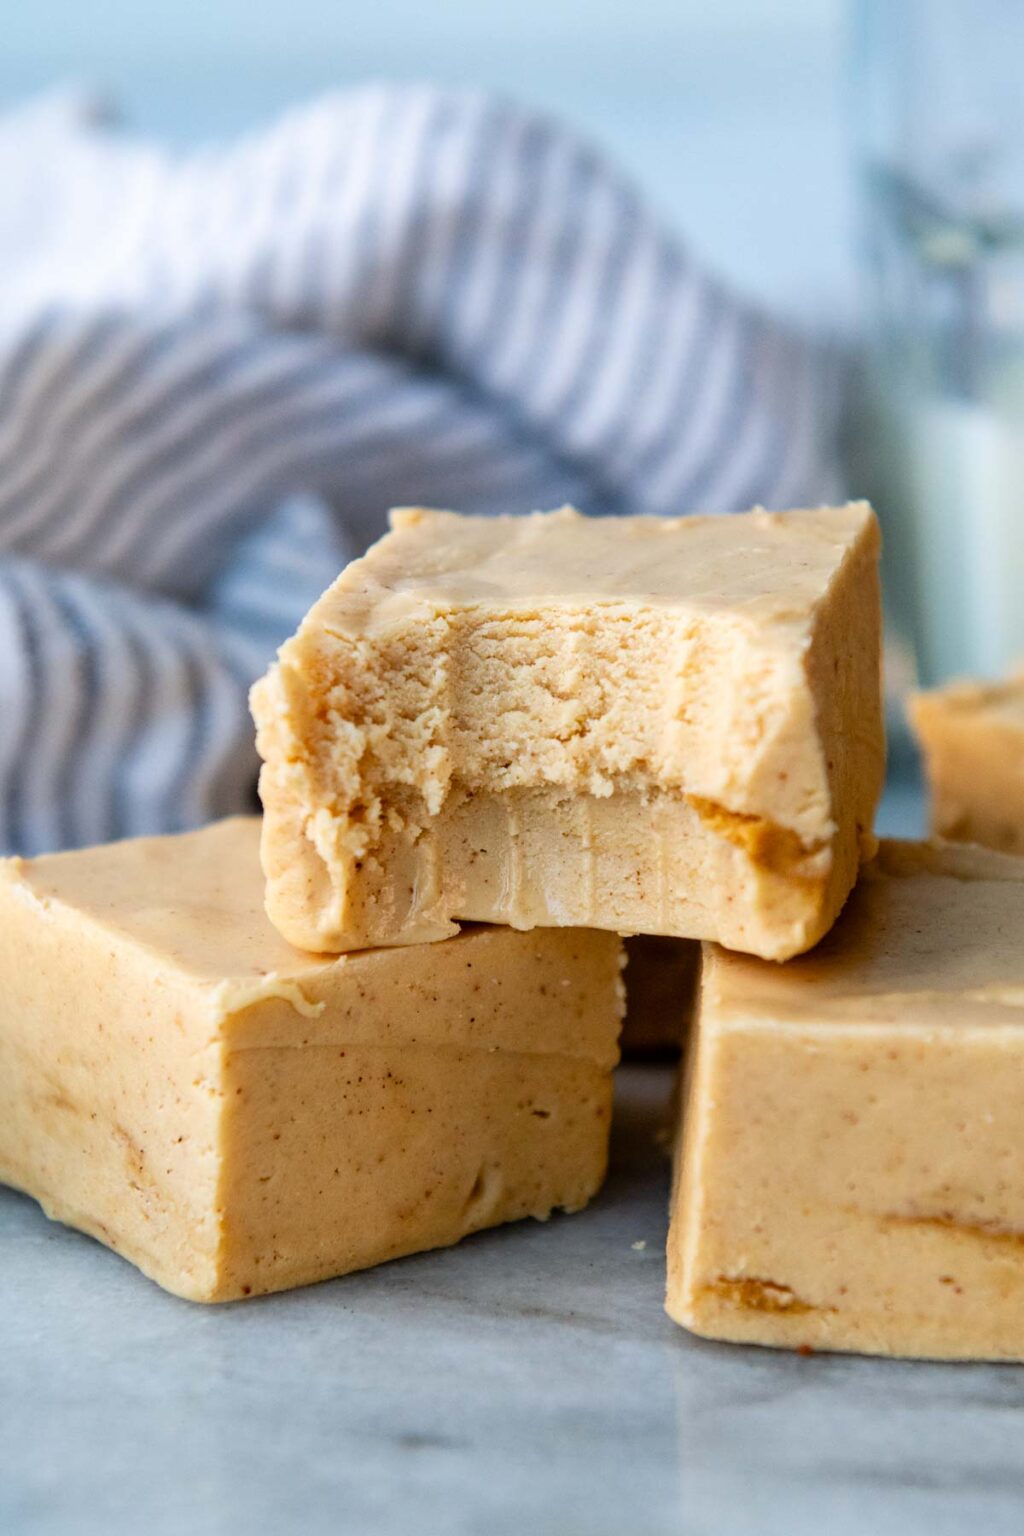
The recipe card below includes the recipe variation for gluten-free Oreo fudge or peanut butter fudge, both pictured below. But, there are plenty of GF mix-ins to choose from to add to this classic, from scratch recipe.
- Rocky Road – After stirring in the chocolate and marshmallow, let the mixture cool for 2 minutes, stirring occasionally. Stir in 1/2 cup mini marshmallows and 1/2 cup salted peanuts. Spread in the pan and sprinkle more mini marshmallows and chopped peanuts on top.
- Nuts – 1 cup chopped pecans, walnuts, cashews, pistachios, or macadamia nuts
- Dried fruits – 2/3 cup cup dried cranberries, cherries, raisins, apricots, or pineapple
- Peppermint – Use white chocolate chips or dark chocolate. Stir in 1/2 cup crushed peppermint candies and sprinkle additional on top. Replace the vanilla extract with 1/2 tsp peppermint extract.
- White chocolate cranberry pistachio – Use white chocolate chips, 1/2 cup dried cranberries, and 1/2 cup chopped pistachios

Save this recipe to your pinterest board!
Let’s be friends on Pinterest! I’m always sharing great recipes!
Did you make this recipe? I love hearing from you! Leave a star rating and comment below the recipe card. It helps others when searching for recipes and I appreciate feedback from our community. You will always hear back from me! -Melissa

Creamiest Gluten-Free Fudge (Easy, No-Fail Recipe)
Ingredients
- 3 cups granulated sugar
- ¾ cup (12 tbsp) unsalted butter
- ⅔ cup (5 ounces) evaporated milk
- 2 cups dark chocolate chips, Nestle Dark or Ghirardelli 60% Cacao
- 1 teaspoon vanilla extract
- 7 ounces marshmallow fluff, or marshmallow creme
- 1 cup (optional) chopped walnuts or pecans, see recipe notes for other variations
Instructions
- Measure the ingredients and prep the pan. The recipe goes quick and you'll want to have everything ready to go. Line a 11X7-inch pan with foil or parchment paper. For thicker fudge use a 8X8-inch pan, for slightly thinner use a 9X9-inch pan.
- Place the sugar, butter, and evaporated milk in a medium, heavy-bottom saucepan.3 cups granulated sugar, ¾ cup (12 tbsp) unsalted butter , ⅔ cup (5 ounces) evaporated milk
- Bring to a rolling boil over medium heat, stirring constantly. A rolling boil is where there are bubbles throughout, not just at the edges. After it has reached full boil stage, continue to cook and stir for 4 minutes. For best results use a candy thermometer to check the temperature. When it is 234ºF remove from the heat. If you do not have a thermometer remove from the heat after 4 minutes at full boil. The mixture will have thickened and reduced slightly.
- Immediately stir in the chocolate chips and vanilla extract. Then stir in the marshmallow fluff and any mix-ins, such as nuts2 cups dark chocolate chips, 1 teaspoon vanilla extract, 7 ounces marshmallow fluff, 1 cup (optional) chopped walnuts or pecans
- Pour the fudge mixture into the prepared pan, smoothing evenly. Let it sit at room temperature for 2-3 hours to cool completely before slicing with a sharp knife. Store in an airtight container at room temperature up to 2 weeks.
Notes
Storing
If stored in an airtight container at room temperature, it will last up to 2 weeks. Place sheets of wax paper between the layers to prevent it from sticking. It can also be refrigerated, stored similarly in an airtight container. It will last about 1 week longer in the fridge, but will have a slightly harder texture. You may want to let it soften at room temp before serving. To freeze, wrap it securely to prevent any ice crystals forming on it. Freeze up to 3 months and thaw at room temperature for 2-3 hours before enjoying.Gluten-Free Oreo Fudge
- When prepping the recipe ingredients chop or crush 12 gluten-free Oreos. Measure out 1/2 cup crushed Oreos and set aside the remaining. The remaining will be mixed into the fudge.
- Instead of 2 cups chocolate chips, replace with an equal amount of white chocolate chips (read labels carefully).
- Prepare the recipe as directed. After stirring in the marshmallow fluff, mix in the crushed Oreos. Spread in the prepared pan and then sprinkle the remaining 1/2 cup Oreos on top. Press down slightly.
Gluten-Free Peanut Butter Fudge
- Prep the ingredients and pan. Instead of chocolate chips, use a 10 ounce bag of peanut butter chips (Reese’s Peanut Butter Baking Chips are gluten-free). You will also need to measure out 1/3 cup creamy peanut butter.
- Prepare the recipe as directed. After stirring in the peanut butter chips, mix in the marshmallow fluff and peanut butter. If desired, you may also stir in 2/3 cup chopped peanuts or sprinkle some on top after spreading in the pan.
This post contains affiliate links. My opinions are always my own. If you purchase a product through an affiliate link, I make a small commission – at no cost to you. Read full disclosure policy here.


Great recipe. I didn’t have a candy thermometer so I tested it in cold water to find soft ball stage. It turned out fantastic. Thank you.
That brings back some memories of how I used to make candy when I was little! Thanks for sharing, Beck.
Best,
Melissa
I have been making versions with white chocolate chips and pepermint – everyone loves this one and it is usually gone first. The other I came up with for a dear friend who was caffeine and nut free – caramel melts. You can honestly substitute any of the baking chips available. Andes candies and toffee bits also make good add ins for various fudge flavors.
Thank you so much for taking the time to share, Norvella. All these versions sound absolutely amazing!
Best,
Melissa
As soon as I saw you post a fudge recipe, I had to try it. I’ve never had much luck in the past making fudge on the stove. This recipe was so easy and the thermometer was key. It turned out perfectly (first try) and was sooooo good. I’m going to try the peanut butter version next. Thanks MG. 🙂
Thanks, Murry! I’m glad it worked out so well for you.
Best,
Melissa