
If you are looking for a copycat “real thing” recipe, then these are best gluten-free bagels out there. My easy recipe makes homemade, big, doughy bagels with chewy crusts and doughy soft middles. What’s the trick? Use a little bit of oat flour to absorb moisture and avoid a dense, gummy texture. I’ll show you how, step-by-step, how simple it is. Vegan and dairy-free adaptions included.
Want to Save This Recipe?
Enter your email below & we'll send it straight to your inbox. Plus you’ll get affordable and easy gluten-free recipes delivered each week!
Legit, THE BEST, Gluten-Free Bagel Recipe
Creating a gluten-free bagel recipe that is easy to make, yet mimics the taste and texture of New York-style bagels was a challenge I was ready to tackle after some recent winning recipes.
Readers have exclaimed my collection of gluten free bread recipes beat any store bought or homemade version they have tried. I wanted to bring that same winning energy to gluten-free bagels, which is why I turned some easy baking tricks to make this recipe a success.
I’ve found when making yeast breads, replacing a small amount of gluten-free flour with another starch to counteract any potential problems works wonders. It worked great for these popular gluten-free baguettes, so why not bagels?
Bagels need to be shaped, which requires a stiffer dough. Instead of adding additional flour, which leads to a dry, crumbly texture, adding a little oat flour absorbs moisture, but also maintains a soft texture. Once the dough was perfected the process follows traditional bagels, including the water bath to get a nice chewy outer crust, and finishing in the oven.
I also share you to turn this easy bagel recipe into many more bakery-style versions, like everything, onion, cheese, cinnamon raisin and more. All of that is below, along with shaping and baking tips. We welcomed soft gluten-free english muffins with lots of nooks and crannies, we can do the same for perfect gluten-free bagels!
First of al, I followed this recipe exactly, using Cup4Cup flour. These are so good!!! I have tried sooo many different bagel recipes. Even going so far as to try gluten free bread flour and they were “ok”. This recipe tho! Wow. These bagels are AMAZING . So easy too!! Thank you!!!
—Megan
Free Guide! Receive a Free Gluten Free Breakfasts Cookbook
TOP 5 Highest Rated Recipes!
Ingredient Tid Bits
- Gluten-free flour blend – I use and recommend Cup4Cup all purpose gluten free flour, which does contain xanthan gum. Check out the reader comments below for alternative flours that have worked.
- Oat flour – A small amount is added to help absorb the liquid, saving the bagels from a gummy texture. Oat flour recipes also adds a nice hint of nutty flavor and is an excellent gluten free binding agent.
- Psyllium Husk Powder – A powerful secret ingredient for GF breads to help mimic the elasticity and crumb structure of traditional baked goods. In this recipe, it helps absorb moisture, making the dough pliable without having to add additional flour, which adversely affects texture.
- Butter – A small amount of melted butter adds flavor and coats the GF starches to eliminate grittiness. For dairy-free bagels, use vegan butter sticks and reduce salt to 1 teaspoon.
Let’s Make This Together!
(Below shows step-by-step photos and modified instructions. For the complete recipe, along with ingredient amounts, scroll down to the recipe card.)
Dump and mix dough
To make the dough, begin by dissolving yeast in warm water with a touch of sugar. The water is lukewarm (110ºF) and I found it helpful to use an instant read thermometer to get an accurate reading. After 5 minutes, add the melted butter and stir to combine.
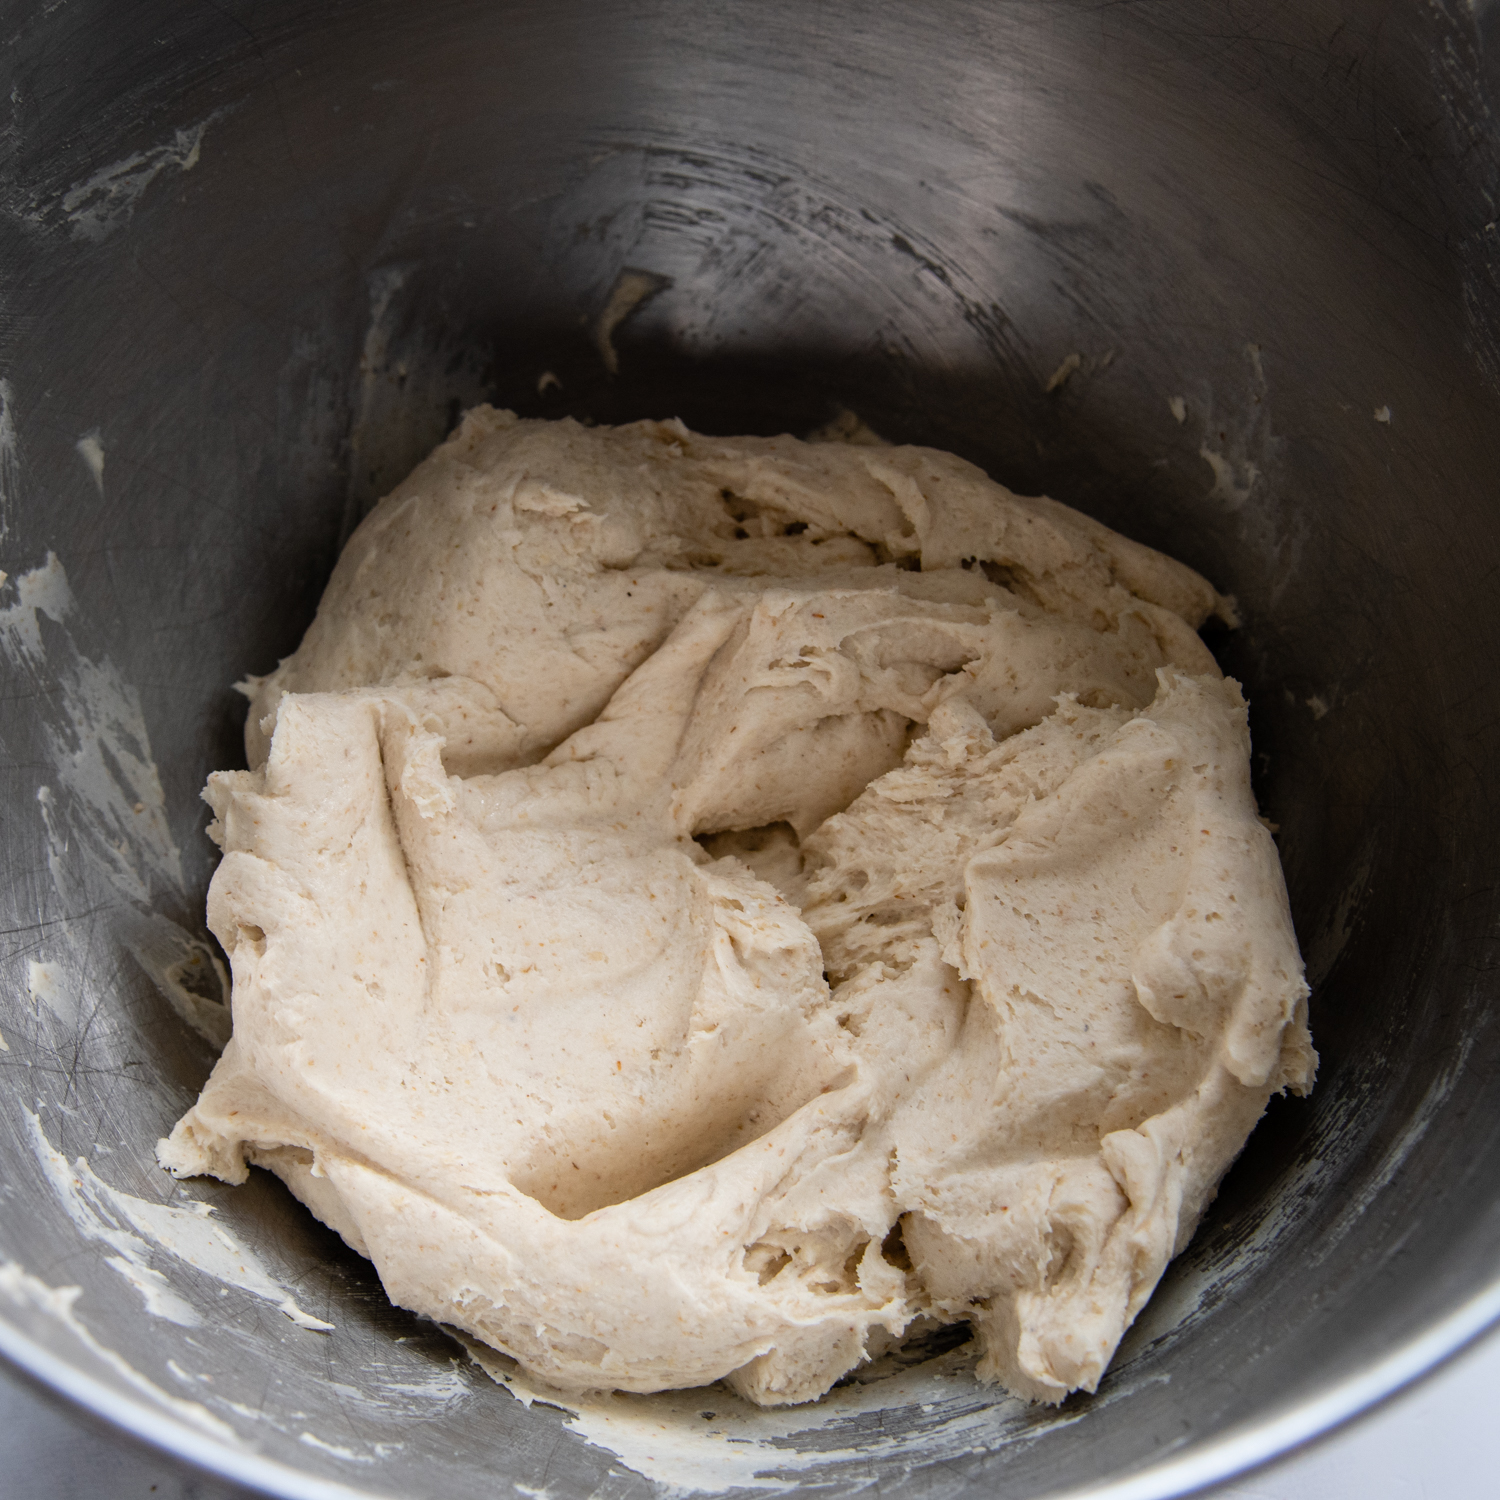
In a stand mixer using the paddle attachment combine the dry ingredients and add in the yeast mixture. Once the dough comes together, increase to medium speed and beat for 6 minutes. The dough with be pretty stiff, so you may want to stop the mixer and scrape down the bowl once or twice.
Shaping the dough
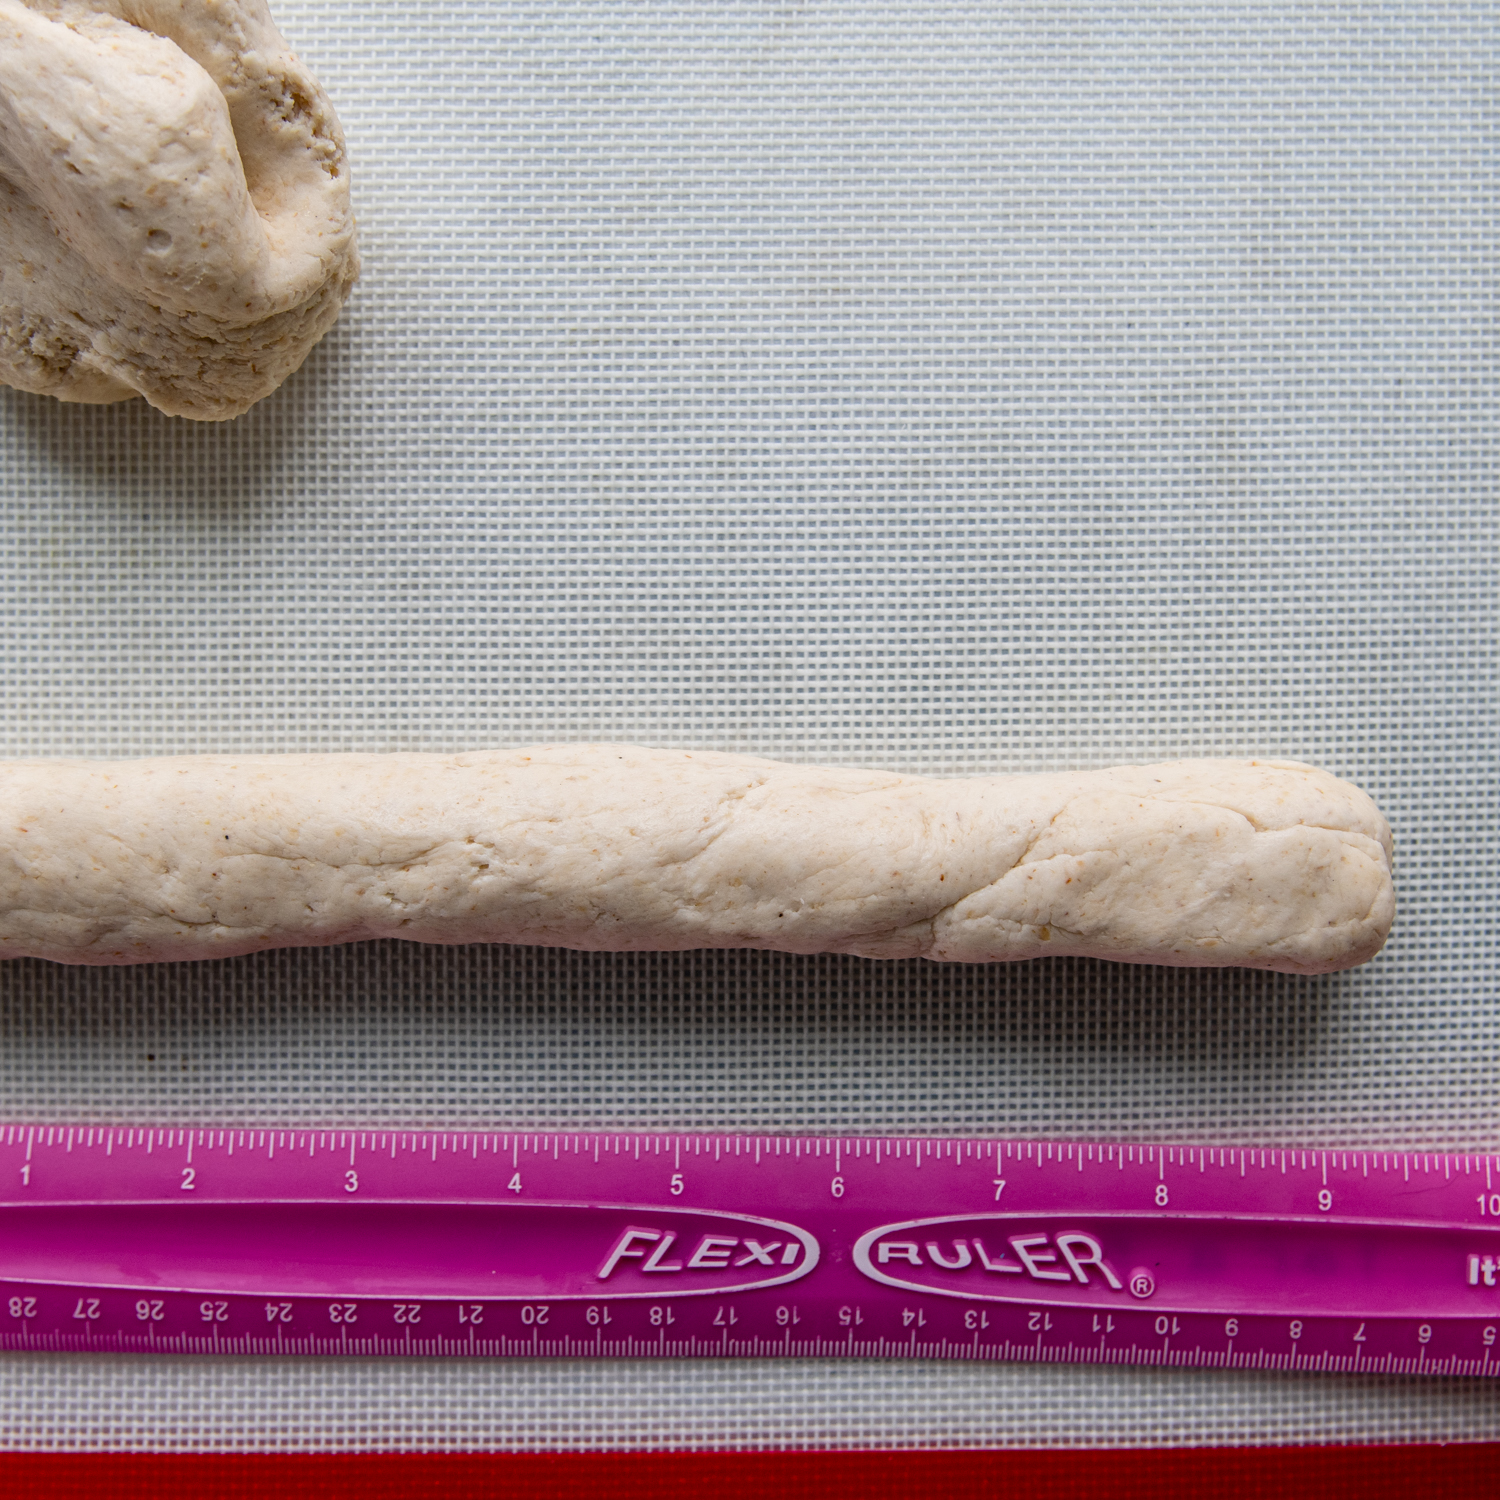
I use a silicone baking mat, which provides a clean nonstick surface. Use a knife or pull apart dough to divide the dough into 6 equal pieces.
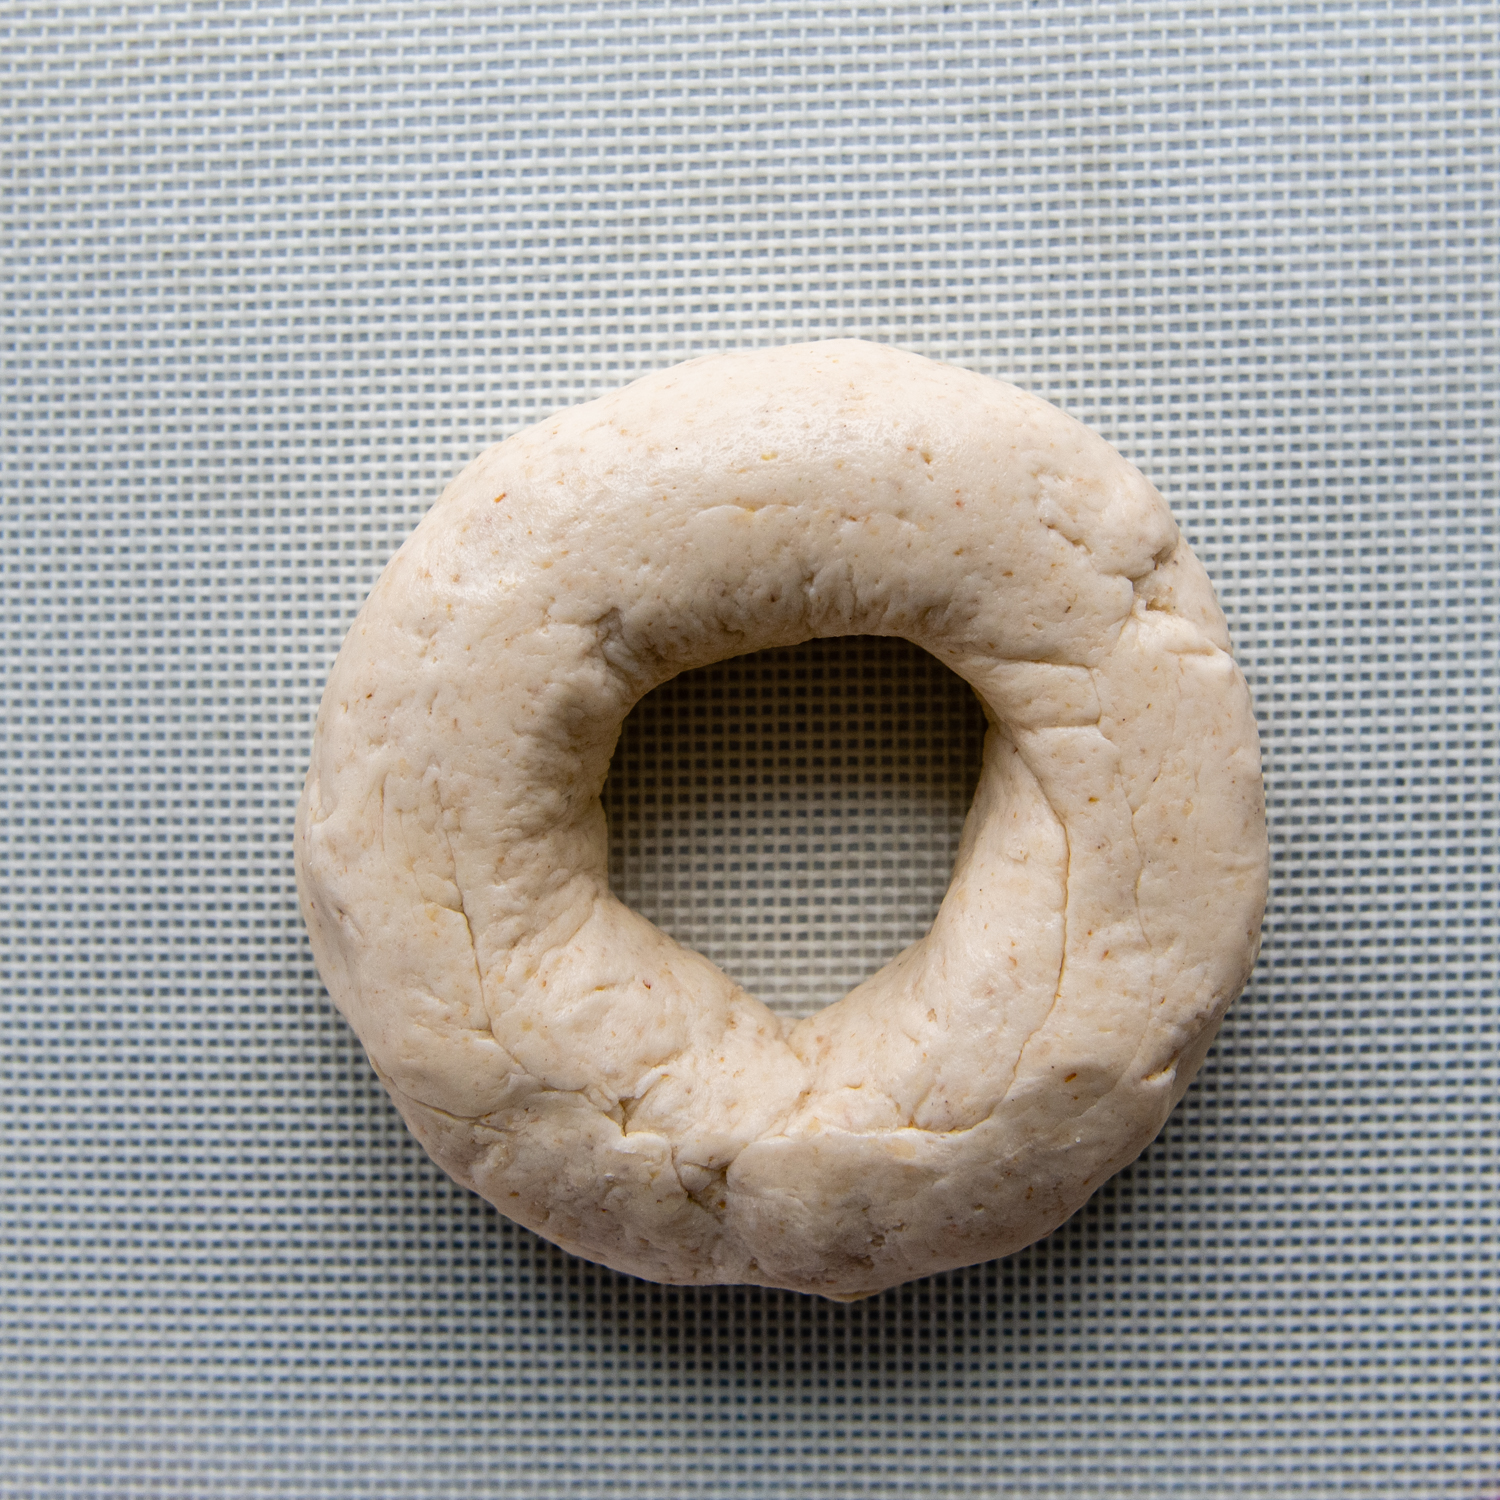
Take one ball and roll it until you have a thick, 9-inch rope. Bring the ends around to make a circle. Gently press the ends together, both on the top and bottom of the bagel. You will want to make sure the ends are securely pressed together or they will come apart in the water bath and during baking.
Cover with plastic wrap, let them rise for 30 minutes. In the meantime you can start boiling the water bath.
Water bath and bake
Boil a large pot of water with the baking soda added. This alkaline water bath sets the outer crust and gives it that signature chewy texture.
Once the bagels have risen, submerge one in at a time using a slotted spoon or skimmer. Cook in the boiling water for only 10 seconds, flipping halfway through. Return the bagels to the baking sheet to bake.
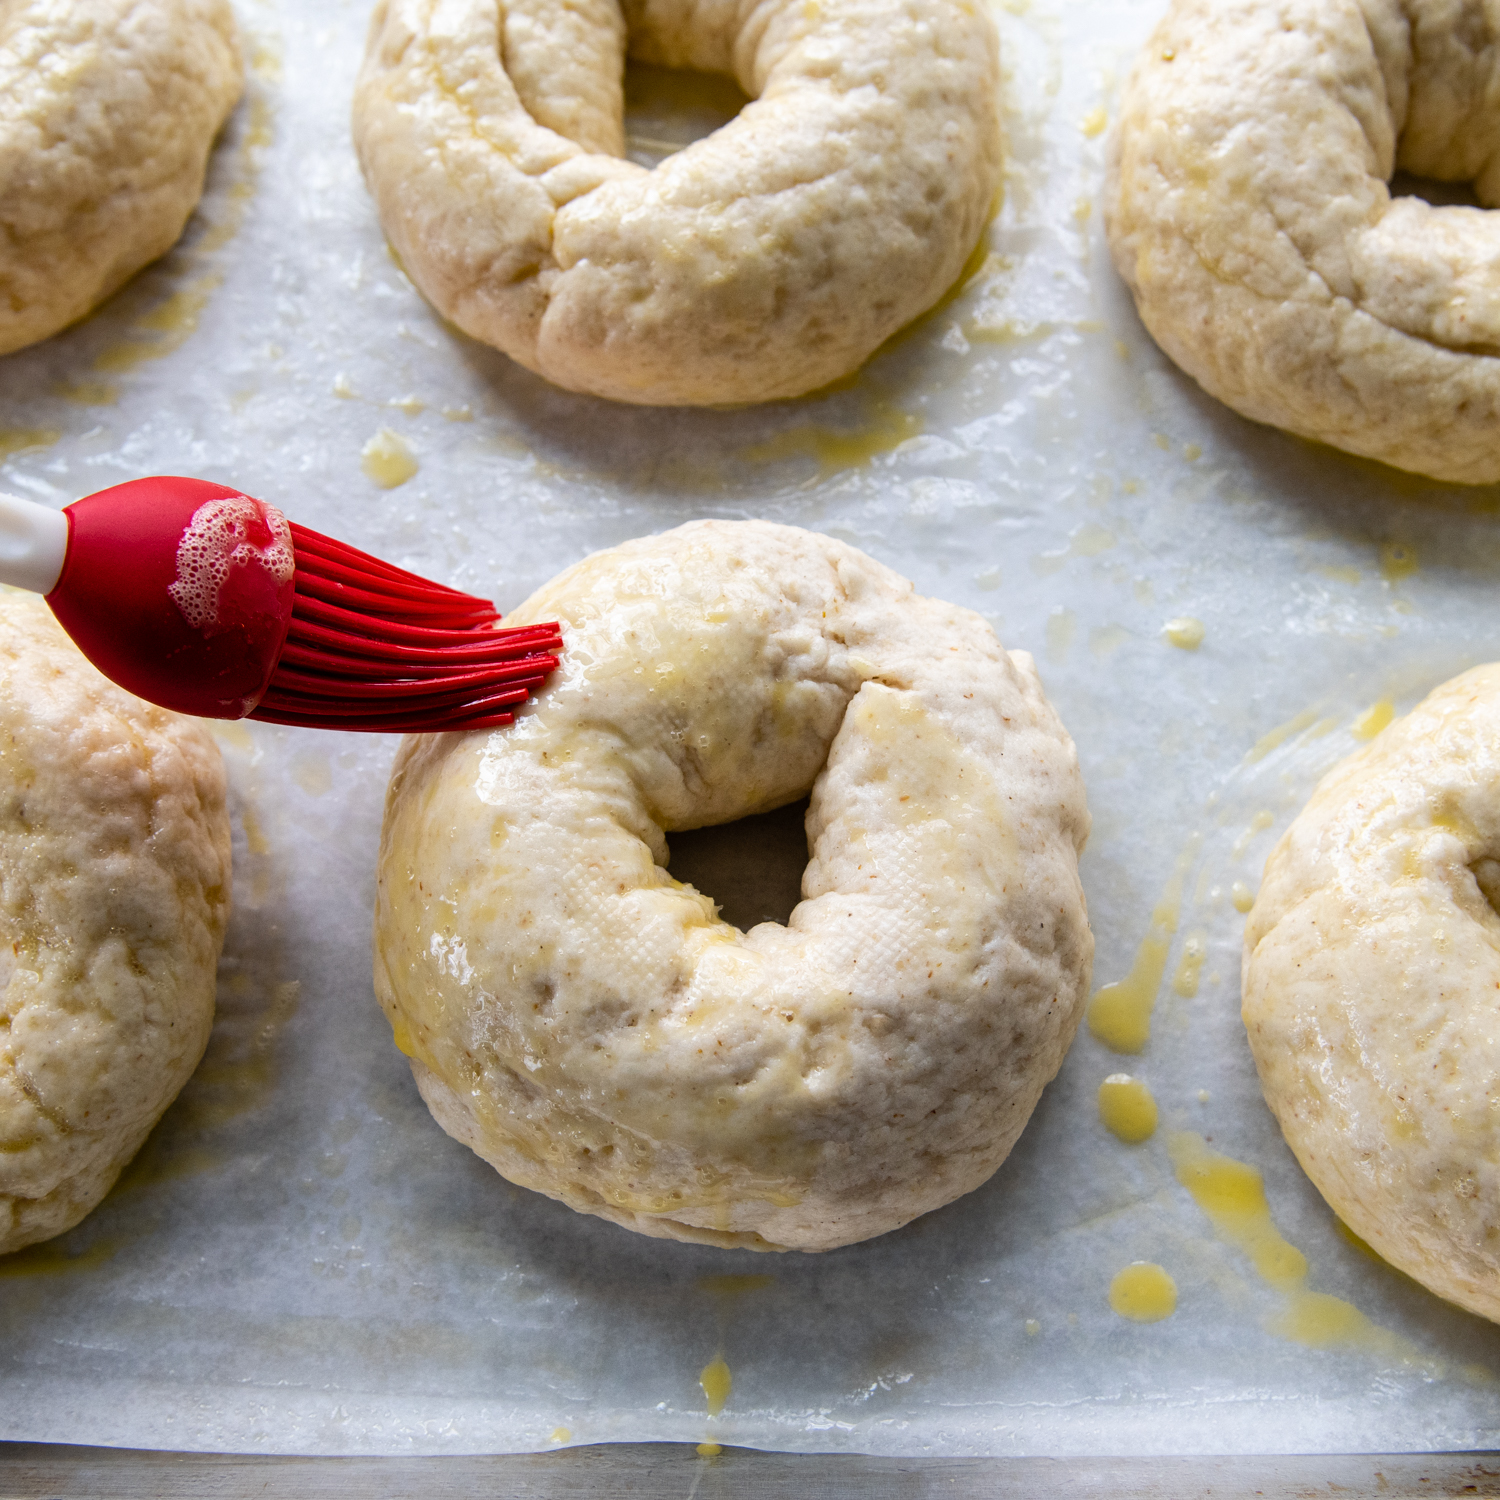
To have nice, shiny crusts I like to brush on an egg wash. This also helps any seasonings stick on the bagels, like everything seasoning, sesame seeds, or cinnamon and sugar.
Bake in 425°F oven for 15 minutes to set the crusts then reduce the oven to 350°F to bake for 20 minutes longer. Enjoy!
Bonus Yummy Homemade Flavors
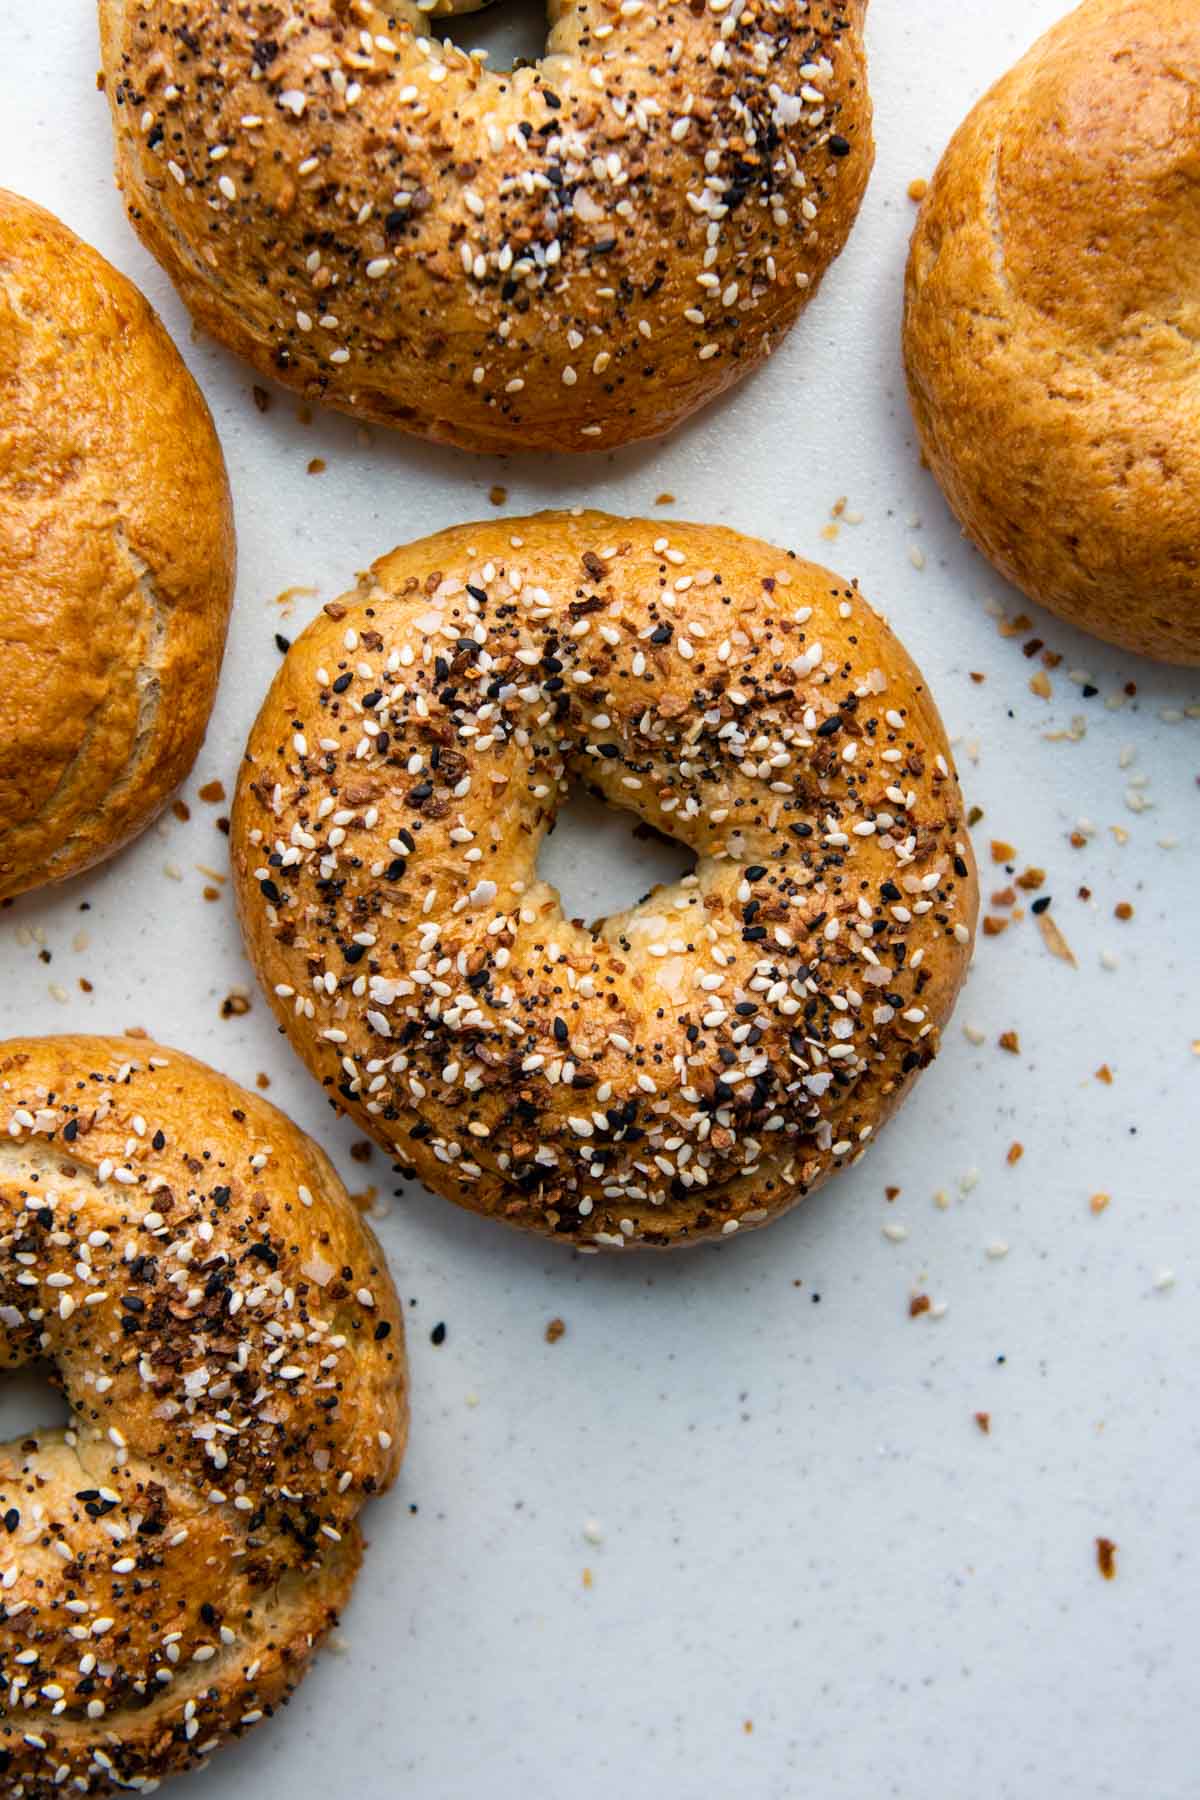
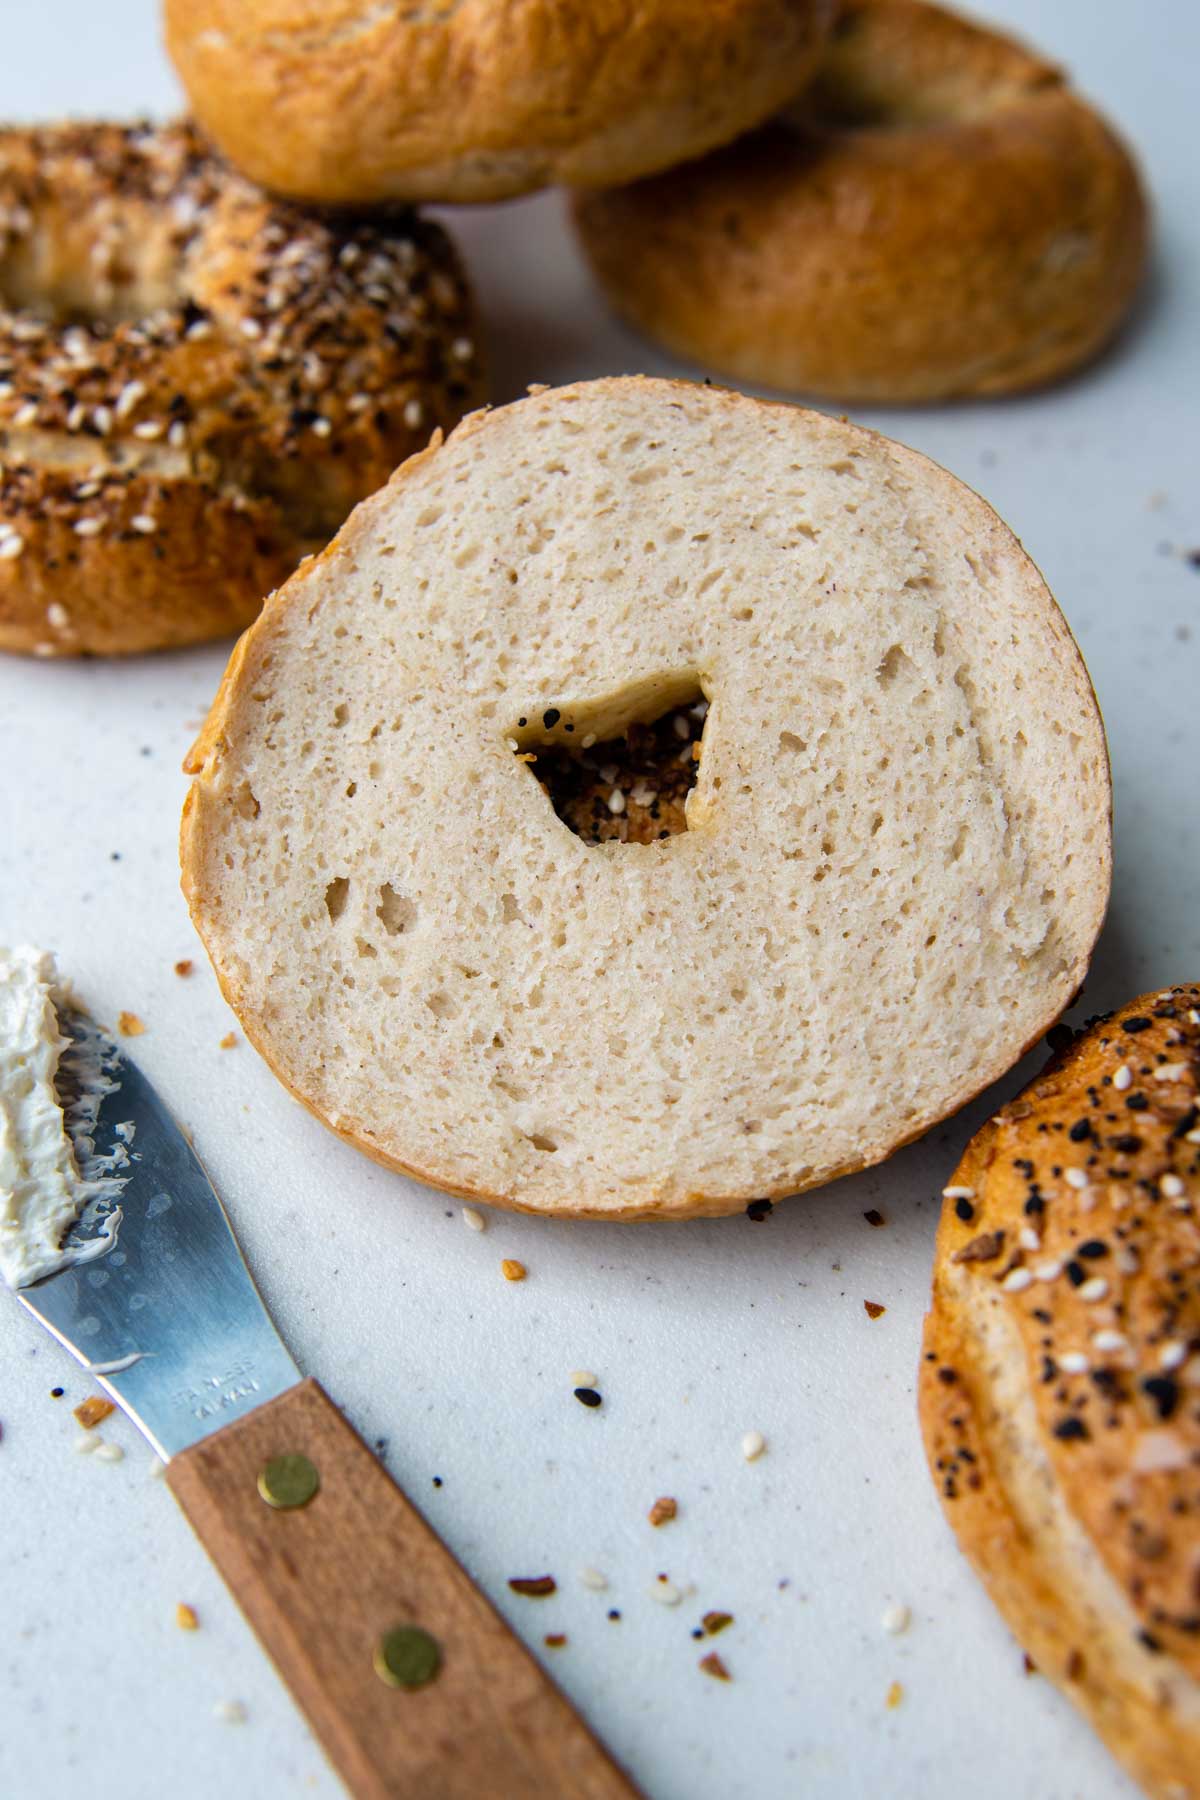
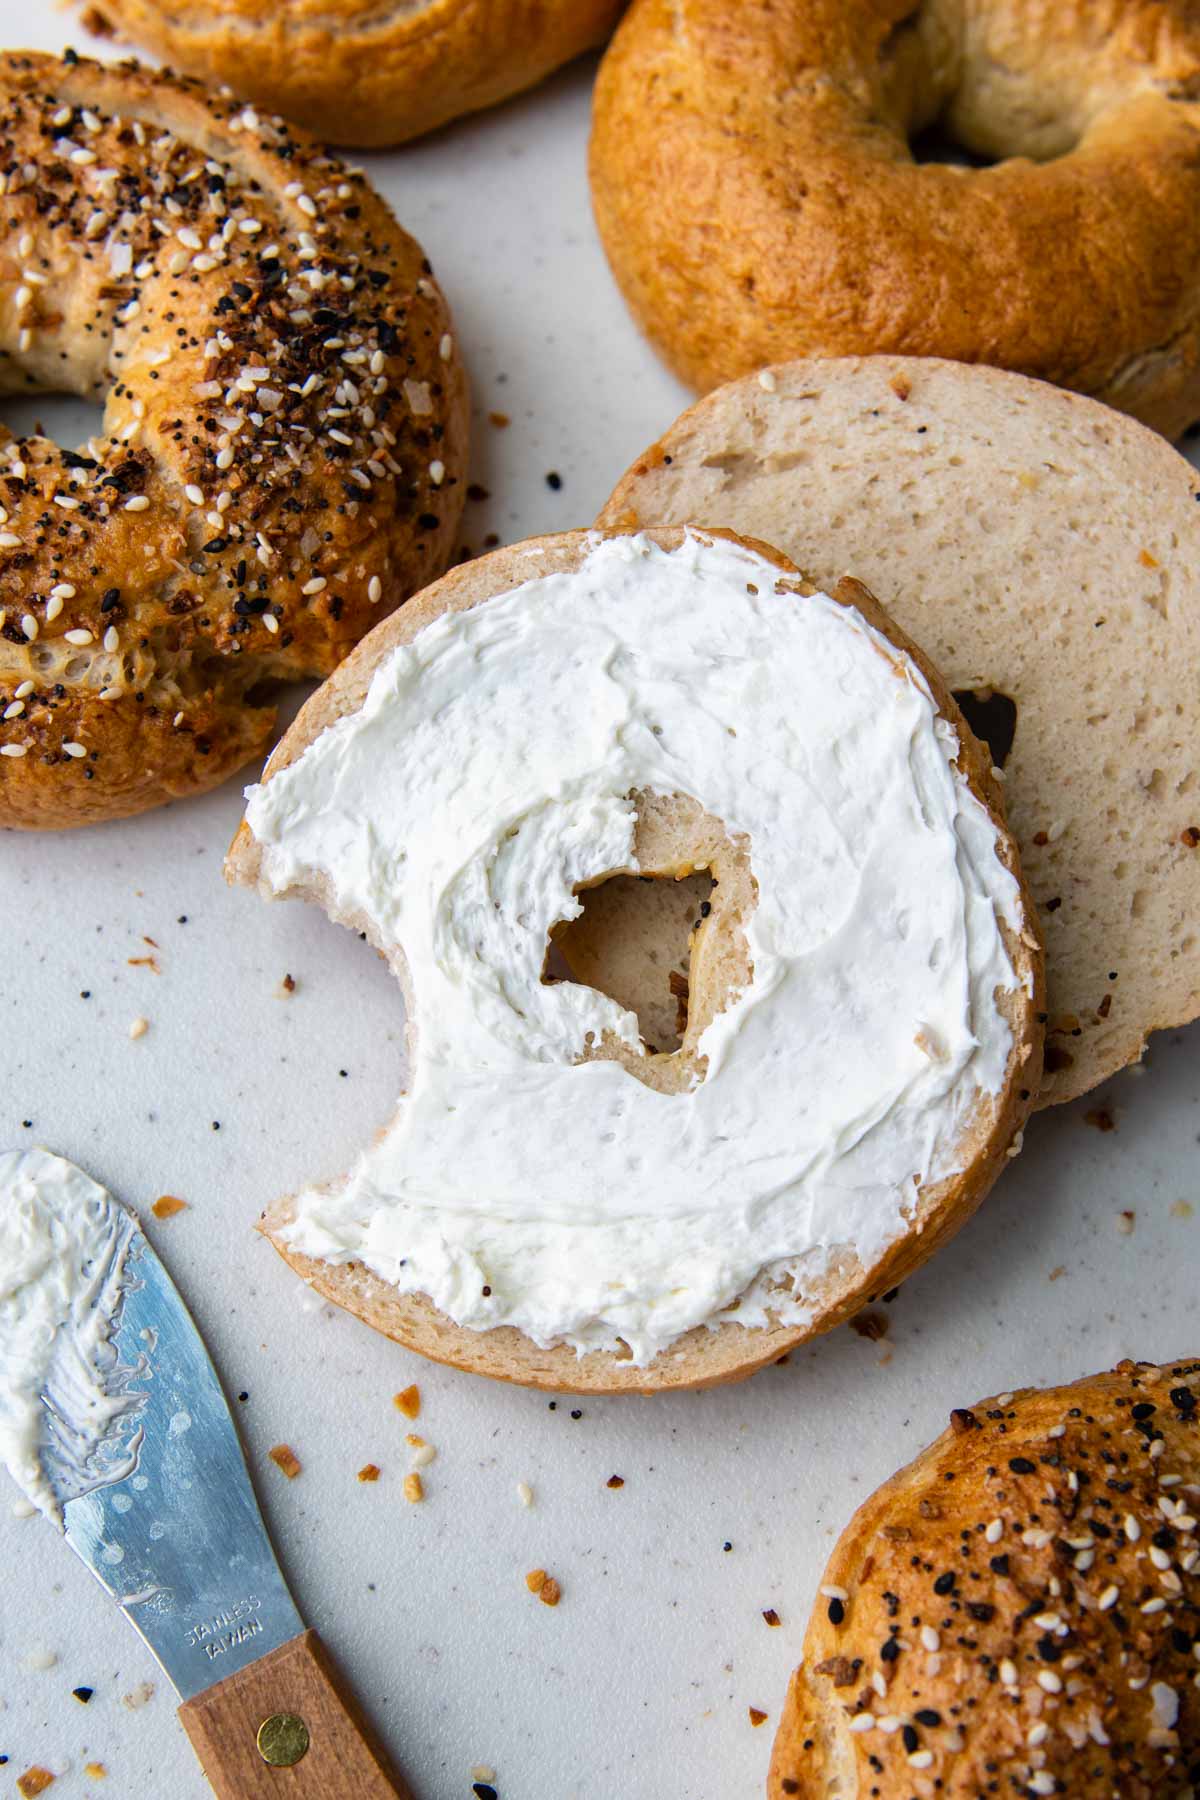
Once all the bagels have been boiled, it’s time to create that shiny crust and sprinkle on some additional flavor, if desired. I particularly love gluten-free everything bagels to slice and use for sandwiches. However, any of these bagel flavors are ideal popped in the toaster and smothered with cream cheese.
The egg wash helps the toppings stick on. For plain bagels, just brush on the egg wash or leave off completely.
- Everything – I use a shortcut seasoning mix that is sold in stores. I pick up mine at Aldi
- Poppy seeds or sesame seeds
- Cinnamon sugar – Add 1 teaspoon cinnamon and 1 tablespoon brown sugar to the dough. Sprinkle with cinnamon sugar topping.
- Onion – Add 2 teaspoons onion powder to dough and sprinkle on dried minced onion
- Cinnamon raisin – Add 2/3 cup raisins, 1 teaspoon cinnamon, and 1 tablespoon brown sugar to the dough.
- Cheese – Add 1/2 cup cheese to the dough and sprinkle additional cheese on top before baking.
Save this recipe to your pinterest board!
Let’s be friends on Pinterest! I’m always sharing great recipes!
Did you make this recipe? I love hearing from you! Leave a star rating and comment below the recipe card. It helps others when searching for recipes and I appreciate feedback from our community. You will always hear back from me! -Melissa

Doughy Soft, Chewy Gluten-Free Bagels Recipe
Ingredients
- 1 ⅔ cup (320 g) warm water (110°F)
- 1 tablespoon (10 g) instant dry yeast
- 1 tablespoon (13 g) granulated sugar
- 3 tablespoons (42 g) melted and cooled unsalted butter, see recipe notes for dairy-free
- 3 cups (438 g) gluten free all purpose flour, I recommend Cup4Cup GF flour
- ⅔ cup (63 g) oat flour, see recipe notes
- 1 ½ tablespoon (17 g) psyllium husk powder, what is psyllium husk?
- 2 teaspoons baking powder
- 1 ½ teaspoon salt
- 1 tablespoon baking soda, for boiling water bath
- Egg wash – 1 egg whisked with 1 tbsp water, omit for vegan
- Optional topping everything bagel seasoning mix
Instructions
- Before you begin mixing the bagel dough, turn the oven to 200ºF. Once it reaches the temperature, turn it off. Line a baking sheet with greased parchment paper.
- Add the yeast and sugar to the warm water. I found it helpful to use an instant read thermometer to get an accurate water temperature reading. Stir to combine and let sit for 5 minutes. Stir in the melted butter.1 ⅔ cup warm water (110°F), 1 tablespoon instant dry yeast, 1 tablespoon granulated sugar, 3 tablespoons melted and cooled unsalted butter
- While the yeast sits, use a stand mixture with a paddle attachment to combine the flour, oat flour, psyllium husk powder, baking powder, and salt. Slowly add the yeast mixture and mix on low speed to combine.3 cups gluten free all purpose flour, ⅔ cup oat flour, 1 ½ tablespoon psyllium husk powder, 2 teaspoons baking powder, 1 ½ teaspoon salt
- Once the dough comes together, increase to medium speed and beat for 6 minutes. The dough with be pretty stiff, so you may want to stop the mixer and scrape down the bowl once or twice.
- Scrape the dough into a large ball and then divide up into 6 equal pieces. Using a clean surface or silicone baking mat, roll each piece into a a thick, 9-inch rope. Bring the ends around to make a circle. Press the ends together, both on the top and bottom of the bagel. You will want to make sure the ends are securely pressed together or they will come apart in the water bath and during baking. Finish by shaping into a smooth circle.
- Transfer the shaped bagels to the prepared baking sheet. Cover with plastic wrap and place in the warmed, turned off oven for 10 minutes. Remove the pan from the oven and let sit at room temperature for 20 more minutes. Preheat oven to 425°F.
- While the bagels are rising, boil 4 quarts water with the baking soda in large pot. Use a slotted spoon or skimmer to submerge them, one in at a time. Boil for 10 seconds, flipping halfway through. Return the bagels to the baking sheet.1 tablespoon baking soda
- Brush the top, sides, and center with the egg wash, if using. Sprinkle on the everything bagel seasoning mix or other desired toppings. Bake for 15 minutes. Reduce oven to 350°F, rotate baking sheet, and bake for 20 minutes more, or until golden brown.
- Remove from the oven and cool for 5 minutes on baking sheet. Transfer to a wire rack and cool for at least 20 minutes before serving. Store in an airtight container up to 2 days or freeze up to 2 months.
Notes
Oat Flour
To make your own, blend 2/3 cup gluten-free quick oats in a food processor or high-speed blender. Process until no large flakes remain and it is a powdery mixture.Dairy-Free / Vegan Adaptations
Replace the butter with vegan butter sticks and reduce salt to 1 teaspoon. The egg wash may be omitted before baking. Read the ingredient label on your GF flour blend. Some mixes contain milk powder.Storing and Freezing
Once the bagels have completely cooled, wrap individually in plastic wrap and transfer to an airtight container. Store at room temperature for two days. I don’t recommend refrigerating because it will dry the bagels out. Gluten-free baked goods lose moisture quicker than their wheat flour versions, so if you don’t plan on consuming within a day or two, freeze for longer storage. To freeze, transfer the wrapped bagels to an airtight freezer container or ziplock freezer bag. Freeze up to 3 months. When ready to enjoy thaw at room temperature or defrost in the microwave. Toast or enjoy as is! Recipe adapted from America’s Test KitchenThis post contains affiliate links. My opinions are always my own. If you purchase a product through an affiliate link, I make a small commission – at no cost to you. Read full disclosure policy here.


Love this recipe and love the bagels! Thank you sobmych for sharing this recipe! And especially for the recipe that doesn’t include starch!!!
Yay! Thank you, Lina for sharing this note. I appreciate it!
Best,
Melissa
When you list a tablespoon of baking soda under the directions for boiling, but you don’t say how to use it, I’m assuming you put it in the water when you’re boiling the bagels.?
Yes, Wendy, you are right. I will make some adjustments so it’s clear!
Best,
Melissa
Your directions were very good and easy to follow. I did not have cup 4cup flour and still got a good product, not perfect but good.
Great to hear! Which GF flour blend did you end up using?
Best,
Melissa
Hi Melissa,
Thank you so much for sharing your hard earned knowledge and experience with the gluten free community. I cannot tell you how happy I am to have tasty, soft gluten free baked goods after years of terrible store-bought products.
I did notice something that didn’t quite line up between recipes. On this bagel recipe you shared that it calls for 1 Tablespoon of instant dry yeast and cites that as 4 grams. On your Legit Squishy Gluten Free Bread recipe it calls for one packet of instant dry yeast or 2 1/4 teaspoons or 9 grams. By the bread recipe math and the reading from my own kitchen scale that would mean 4 grams of yeast would be 1 teaspoon, not 1 Tablespoon.
If you could clarify if it should be a teaspoon or a Tablespoon of instant dry yeast on this bagel recipe, I would greatly appreciate it ☺️
My bagels didn’t turn out quite like I had hoped but we’re still miles better than the store bought and I wondered if I used too much yeast.
Hi Bridgette,
Thank you so much for drawing this to my attention. Gosh, I am so sorry I missed that. The backend of my site will auto-populate ingredients based on other recipes and I’ve done and since I typically use the 1 packet, that is what it included. I’m glad you pointed that out! It is 1 tablespoon of yeast, which I now changed to 12 grams.
When you made your bagels how much yeast did you use? That good have had something to do with how they turned out. If you did use the 1 T, I’m happy to troubleshoot other possible issues.
Best,
Melissa
These bagels turned out perfectly! They are chewy, soft, and bagel like texture. I followed the recipe exactly except I made 8 instead of 6 bagels. My husband who can eat gluten said these were the closest to real bagels we’ve had. I wish I could share my photos to show you hpw beautifully these turned out. I definitely recommend you try this recipe!
Thank you, Stacey! I love hearing this! I appreciate the time you took to share 🙂
Best,
Melissa
DELICIOUS!!!! They came
Out gret- easy to follow directions. Another winner at #mamagourmand.com 🥰
Aww, Thanks so much Christina. I love this!
Best,
Melissa
Made tonight and the came out amazing. One strange thing the dough has an almost purple hue to it after baking.
Hi Sue,
Glad you enjoyed the recipe. That is from the brand of psyllium used. Some are very dark, which turns baked goods purple. I love the brand linked in the recipe card.
Best,
Melissa
First of al, I followed this recipe exactly, using cup4cup flour. These are so good!!! I have tried sooo many different bagel recipes. Even going so far as to try gluten free bread flour and they were “ok”. This recipe tho! Wow. These bagels are AMAZING . So easy too!! Thank you!!!
Yay, Megan! This makes me so happy 🙂 Thanks for sharing!
Best,
Melissa
In my opinion, there will never be perfect replica of bagels in GF form.
BUT as far as GF bagels go, this recipe is the real thing. I used King Arthur Measure-for-Measure flour instead of Cup-4-Cup, as directed above, because my girlfriend is Vegan as well as GF.
I also replaced the real butter with DF butter, and reduced the salt by 1 tsp, again as the notes suggested.
I followed the directions exactly. They turned out damn good. Just a LITTLE undercooked in the middle, so I kept the remaining bagels in the oven for an additional 10 minutes. Maybe its just my oven, but it seemed to help. I’ll be making this recipe again.
Thank you, Joe, I appreciate the kind words and adding the dairy-free modifications. Yes, we can never get exactly the same results, but my goal is to always make a version that makes you just as happy to eat.
Best,
Melissa
I used Cup for Cup flour and these turned out fantastic! I had difficulty getting them to stick in a circle because the dough very sticky and I needed cornstarch to roll them, but the taste is spot on! Well done and thank you for putting bagels back in my life. Those frozen store bought ones make me sad😄.
Thank you, Joyce. I appreciate you taking the time to write and I love the cornstarch trick! I also use wet fingers or grease my hands with a little nonstick cooking spray too. Glad bagels have made a resurgence!
Best,
Melissa
King Arthur – Measure for Measure, not living in the states so I used what I had access to.
Millet Flour – used instead of oat flour
Dough was very dry, I ended up adding an additional 1C of warm water while mixing. I will probably add more water next time. I will also boil them for longer, maybe 30 sec each side.
Dense end product typical with gf breads in my experience, flavor was ok. Hoping my store restocks the Cup4Cup so I can try it out.
Hi Devin,
Sorry you had this experience. I find these bagels anything but dry. I would never publish a recipe that I thought was inferior or has typical “dry” results. There is enough of that in GF baking! Since this recipe is so reliant on the GF flour, I think the substitutions is what contributed to this. Unfortunately, I know we all don’t have access to the same products. There are so homemade Cup4Cup blends online you may want to try to use in recipes if you don’t have access to the “real” thing.
Best,
Melissa
Idk if I didn’t let them rise enough or what but they came out like a brick. Not good at all. I used king Arthur Flour. Followed the recipe exactly.