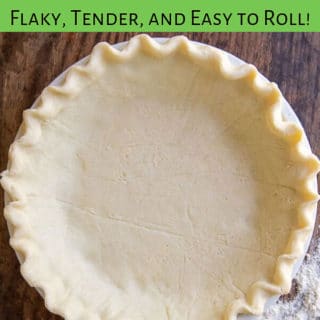
If you’re looking for a flaky, tender gluten-free pie dough (or pastry dough) that is fabulously easy to roll out, look no further. Not only is this the best tasting gluten-free pie crust, this detailed guide is also full of tips and tricks to help you make perfect GF crust at home. The secret? A tablespoon of sour cream! It tenderizes the dough to make it just as light as all butter pie crusts you grew up on.
Want to Save This Recipe?
Enter your email below & we'll send it straight to your inbox. Plus you’ll get affordable and easy gluten-free recipes delivered each week!
Legendary Gluten-Free Pie Crust Recipe – See Why!
I’ve always loved to bake, but the first time I tried making gluten-free pie dough I was in tears. What used to be so easy (pre-GF years), was now horribly frustrating with dismal results.
I had found other GF crust recipes to fill the void, such as press-in oatmeal pie crust that doesn’t require rolling or chilling. BUT, I was missing the perfect pie dough made gluten-free so I could finally enjoy the classics again, like an buttery, flaky crust to go with apple pie or a crisp bottom to pair with pumpkin filling.
Then a cookbook called America’s Test Kitchen: The How Can It Be Gluten Free Cookbook came along. Its revolutionary tips and tricks not only helped me enjoy beloved desserts again, but taught me to bake like a GF pro. It inspired this legendary soft, squishy homemade gluten-free bread recipe, and led me on a path of publishing my own gluten-free cookbook.
I learned making a gluten-free pie crust with sour cream and all butter was the essential ingredient I had been missing. It tenderizes the pastry dough by coating the starches, making a homemade GF pie crust that is light and flaky instead of dense and chewy.
Pie-making and I gladly reunited, and inspired me to create an entire gluten-free pie recipe collection I thought I would never enjoy again! I even use this recipe to make a from-scratch GF pot pie that has won over the toughest critics.
Not only is this crust the best tasting, but I also include many tips, hacks, the best flour to use, recommended equipment, how to make the dough using a food processor or by hand, and rolling tips. I’ll teach you have to make the best pastry dough with consistent results every time!
This is The Best GF Pie Crust Recipe!! My non-GF son-in-law raved about the crust & was shocked when I told him it was GF! I feel I have arrived in the baking world when I can make a beautiful pie! This. Is. It!! Thank you for a grand recipe!
—Julie
Free Guide! 5 easy tips for baking like a gluten-free pro!
Simple hacks for fail-proof gluten-free dishes every time!
Equipment To Make Your Life Easier
Technically it doesn’t require much to make a GF pastry crust. Basic requirements would be a bowl, fork, and rolling pin, so don’t the lack of “fancy” kitchen gadgets stand in your way!
However, if you have been frustrated with homemade pie crust recipes and are looking for consistent, easy results, some kitchen equipment can be a game changer! Below I explain why I recommend it for you to decide what is necessary, based on problems you may have experienced.
- Food Processor – If you find making homemade dough to be intimidating or complicated, using a food processor makes it extremely quick and easy. From start to finish, it takes about 10 minutes and the blade does a much better job working the butter into the dry ingredients than a fork or pastry blender would.
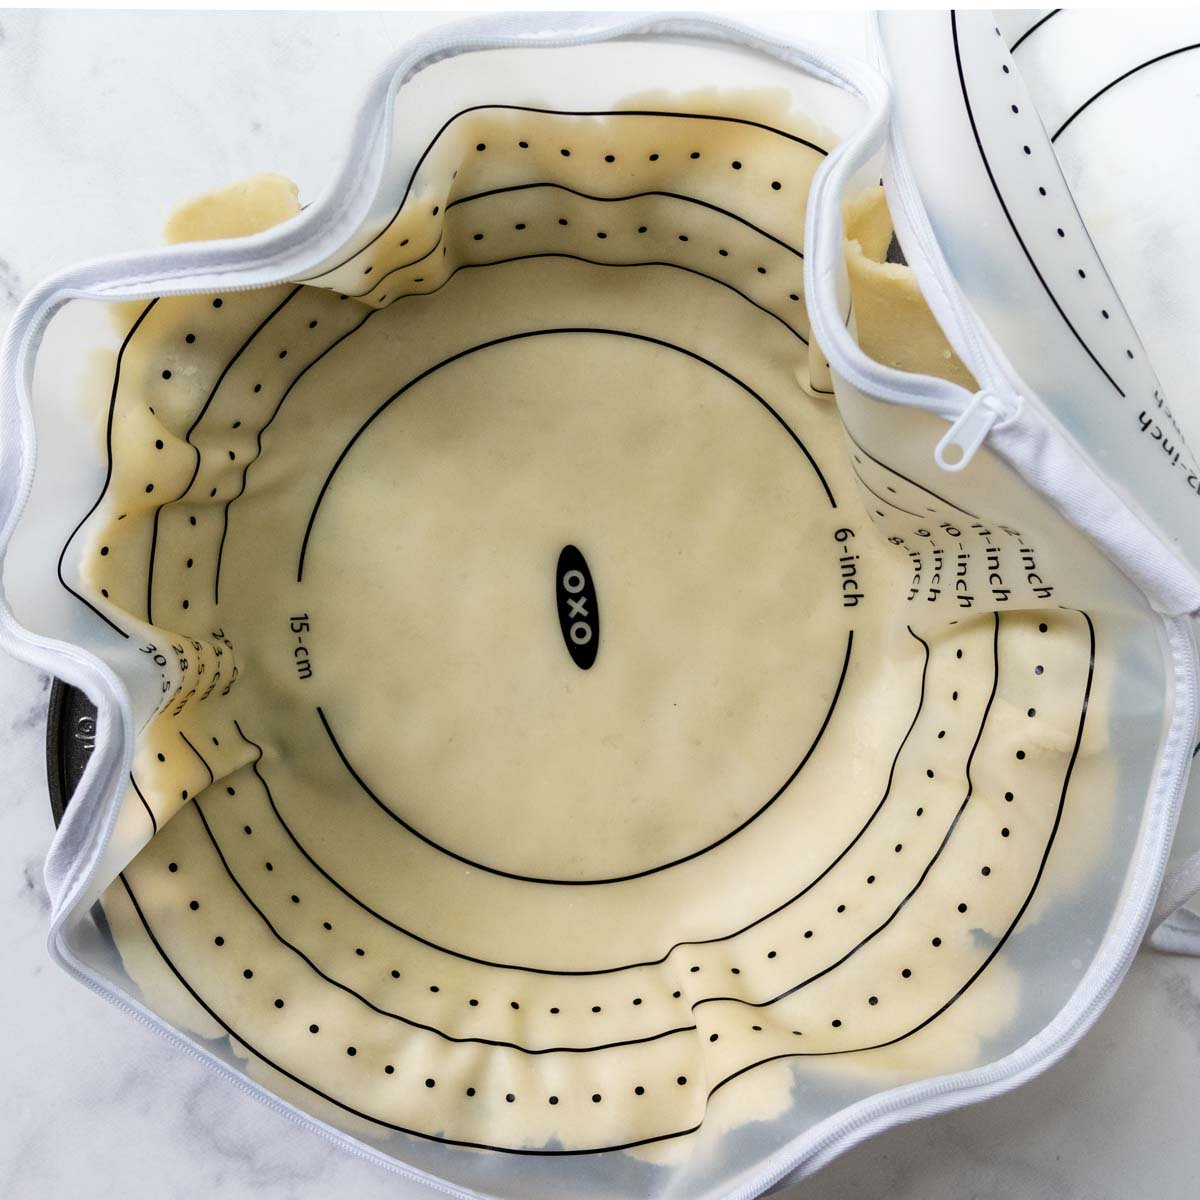
- Silicone Dough Bag – Struggle with rolling out dough? This affordable tool is a must! I used to roll out between two sheets of parchment or plastic, but it would consistently crease and the dough would get stuck in the ridges. (See rolling tips for how to fix this!) But, this bag makes it easy to roll, size correctly, and transfer to the pie plate.
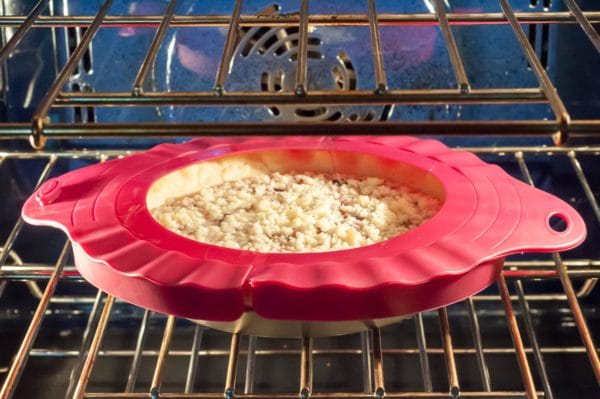
- Pie Shield – Since the edges are exposed during baking, they brown a lot faster than bottom crust. The cheap fix is using aluminum foil, but it hard to move the pie around to check on things. Using a pie shield really simplifies things.
- Metal Pie Pans – A common problem with GF pies is a soggy bottom crust. Fats have a harder time absorbing in GF starches, which often leads to a lack of flakiness or a soft bottom crust. Baking the crust in a metal pan conducts the heat better and faster, which guarantees the best results.
- Pie Weight – If you need to blind bake a pie (bake the crust without a filling first) or partially bake a pie (helpful for fillings with a lot of moisture), the crust should be weighted as it bakes. One way Place a piece of parchment on the bottom and fill with dried beans. However, I really like this pie weight because it doesn’t require parchment and it has holes so the heat can circulate to the bottom crust. Just put it on and bake.
Watch This Recipe
Let’s Make This Together!
(Below shows step-by-step photos and modified instructions. For the complete recipe, along with ingredient amounts, scroll down to the recipe card.)
Prep the ingredients
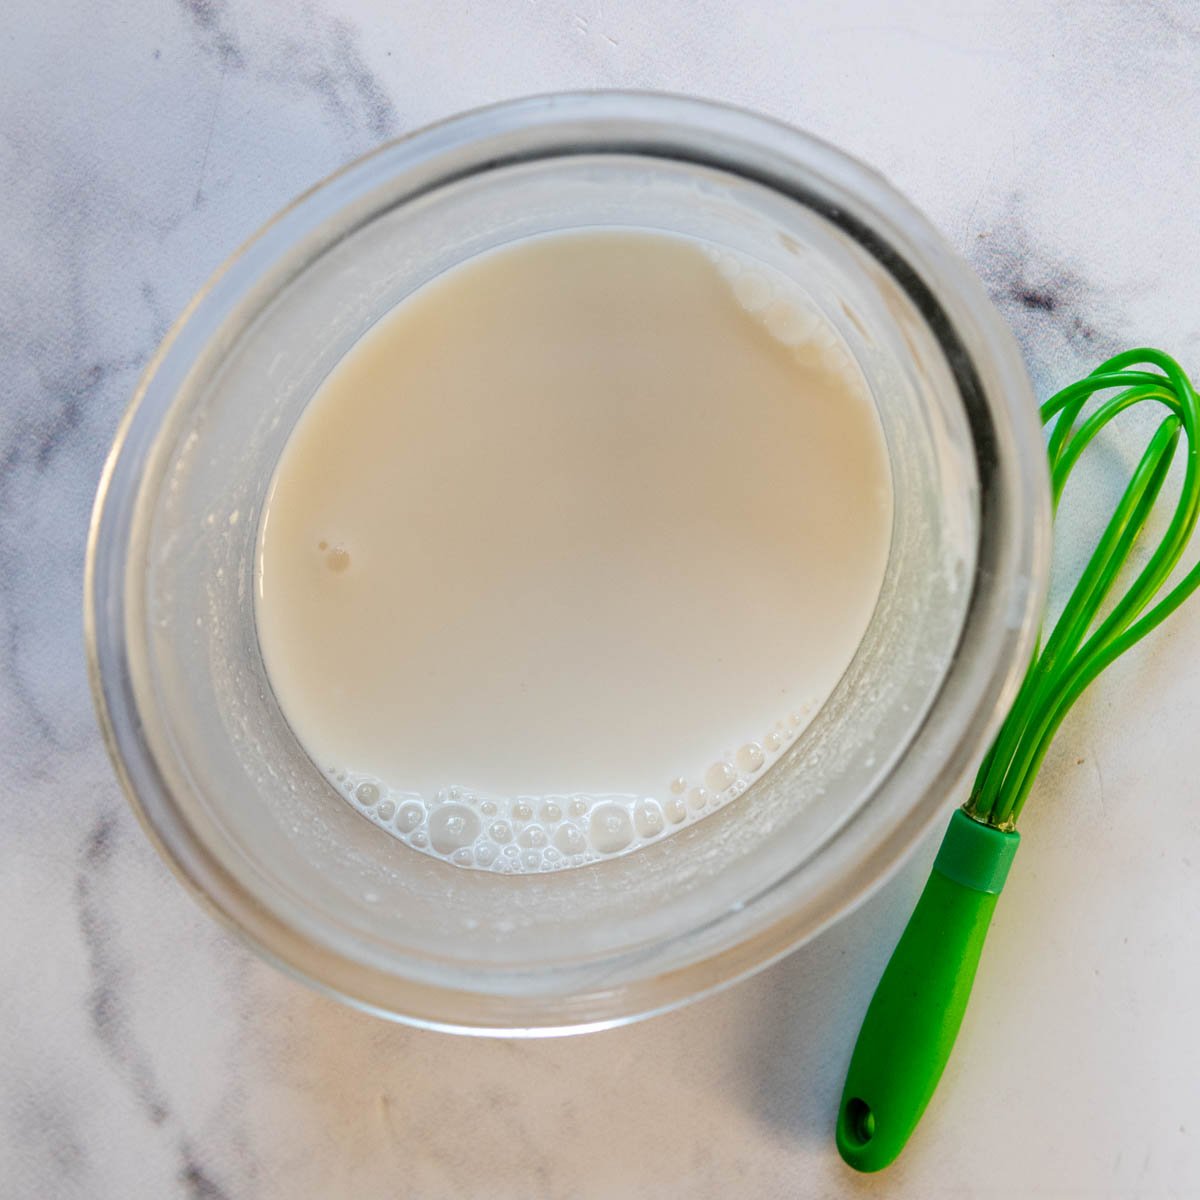
The key to a flaky, all-butter crust is very cold ingredients. Whisk together the cold water, sour cream, and vinegar in a small bowl and place them in the fridge until ready to use. Chop up the butter and freeze briefly, about 10 minutes.
Time to mix
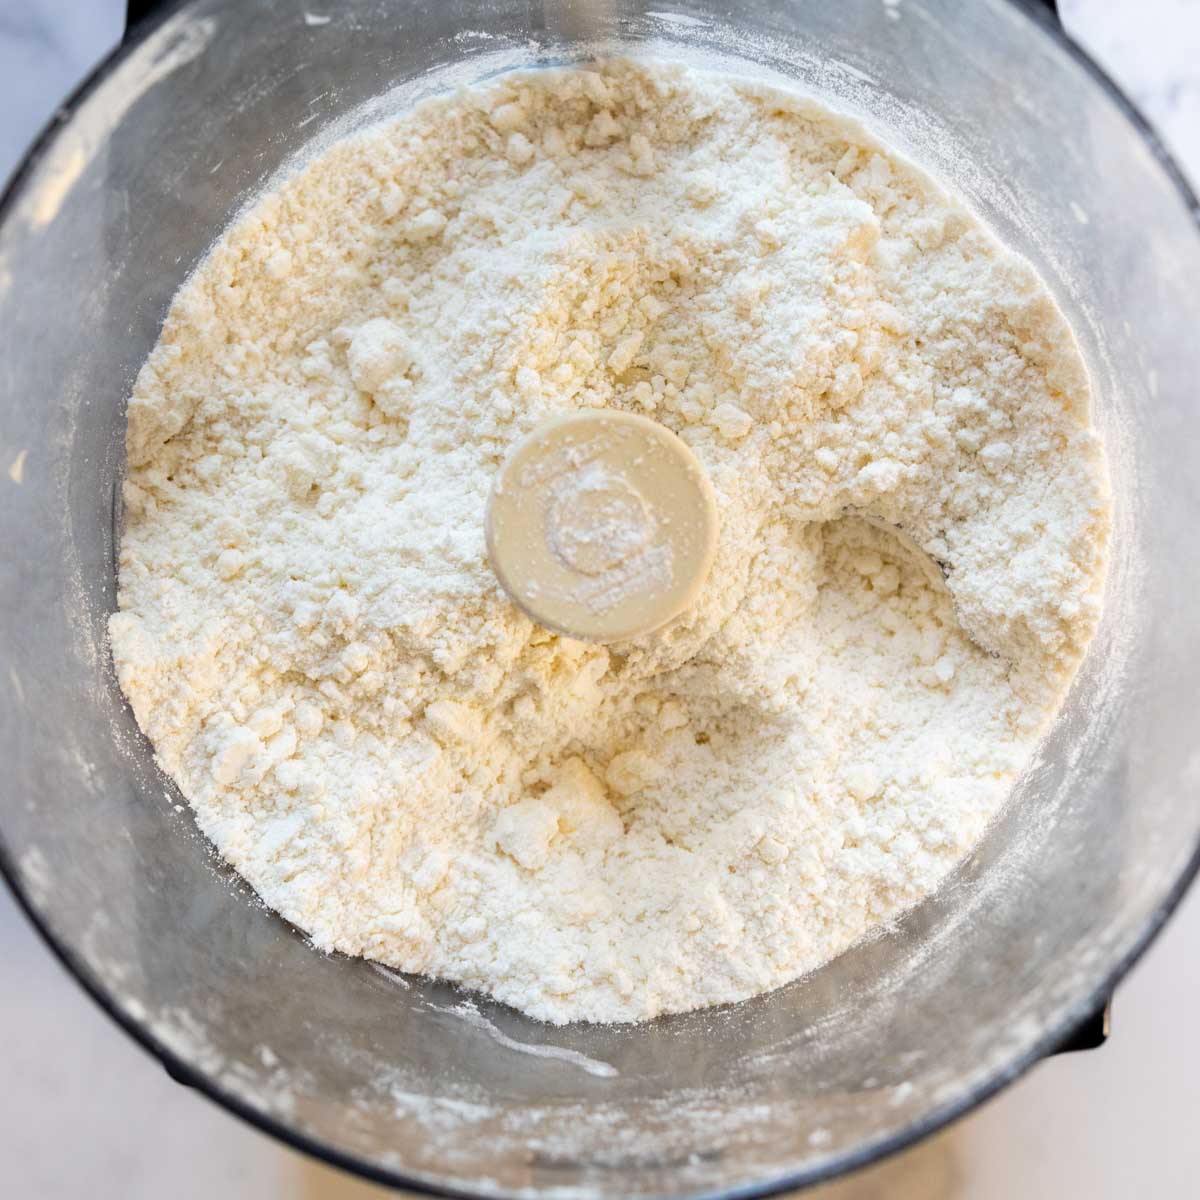
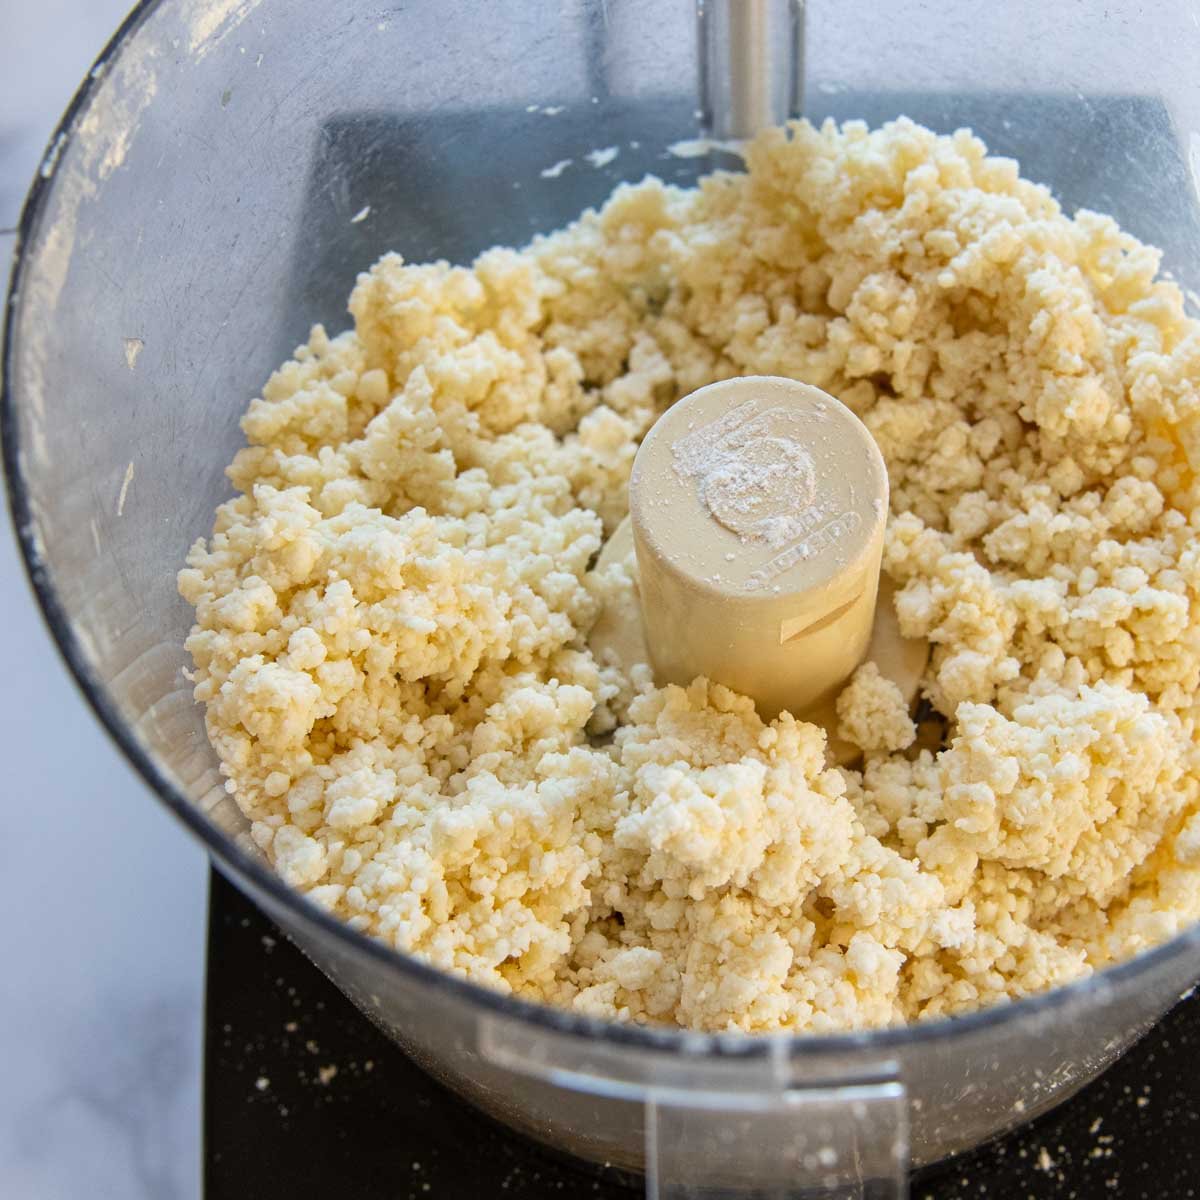
First put the dry ingredients in and mix together. Add the partially-frozen butter and work into the flour with a pastry blender or pulsing in a processor until it’s evenly incorporated and sandy looking.
Finish with wet ingredients
Finally, add the liquids and work in until the dough is moistened and small dough clumps appear.
Pro Tip: To check if you have enough liquid, clump and flatten a small bit of dough. If it doesn’t stick together, is crumbly, or breaks apart easily, add a small dash of ice water. Pulse a few times and recheck. If the dough is too wet or sticky, add a dash of flour. Pulse a few times and recheck.
Wrap and chill
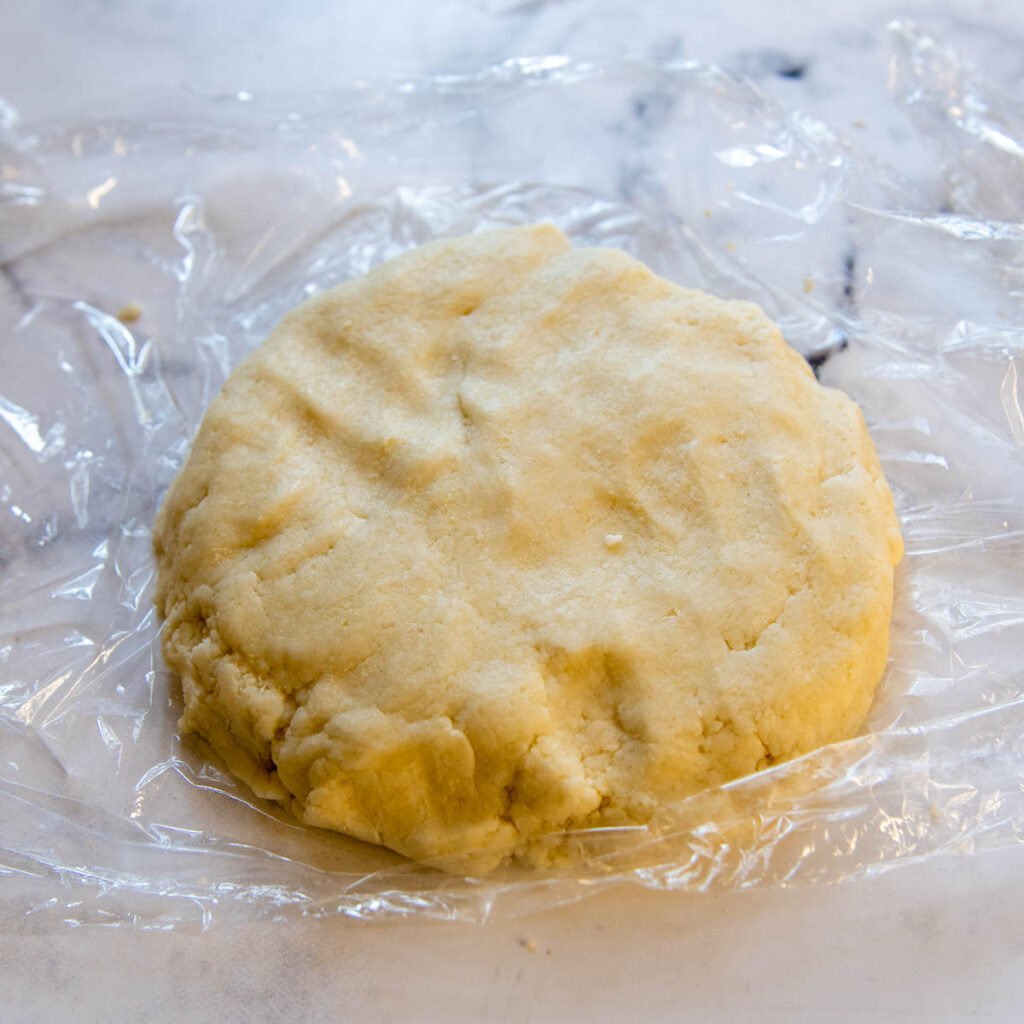
Now it’s time to chill and rest the dough before rolling. Lay a large piece of plastic wrap on the counter, transfer the dough onto it, and shape into a disc, about 1 inch thick. Wrap tightly and refrigerate for 1 hour or freeze for 30 minutes.
Pro Tip: Wrapped pie crust dough may be refrigerate for 1-2 days. If storing longer, place the wrapped disc in a freezer ziplock bag and freeze up to 1 month. Thaw in refrigerator overnight.
Easy Tips For Rolling With Success!
- I find rolling in a silicone pie bag works best because the dough doesn’t stick, no additional flour is needed, and it’s easy to shape. If you don’t have one, use two large pieces of parchment paper. Plastic wrap may be used, but it has a tendency to stick to the dough more.
- If the dough is too cold it will be hard to roll and break apart. Let it sit on the counter for 5 minutes and try again.
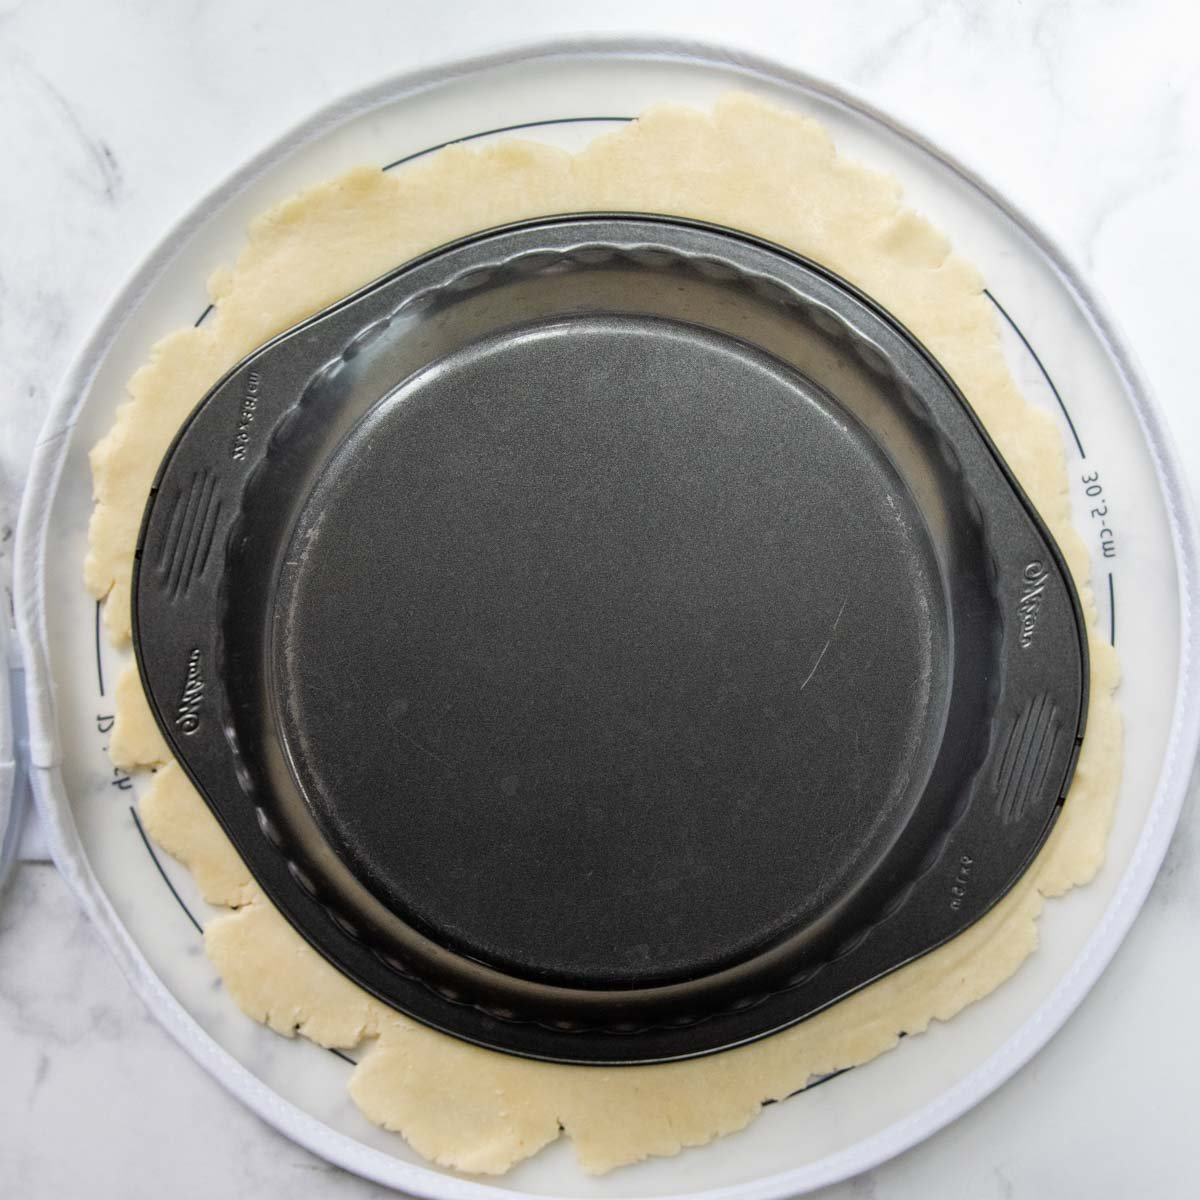
- When you are rolling, press down in the middle and push the dough out from center. This will ensure the middle not being too thick, while edges are too thin.
- Rotate the pie dough as you are rolling so it forms a perfect circle. If one side is bigger than the other, cut some dough off and add it to the smaller side of the circle.
- While rolling, the dough may warm, which causes the parchment paper to stick. If this happens, place rolled pie crust, with parchment still on, in the refrigerator for 5 minutes so butter re-solidifies and releases from the paper.
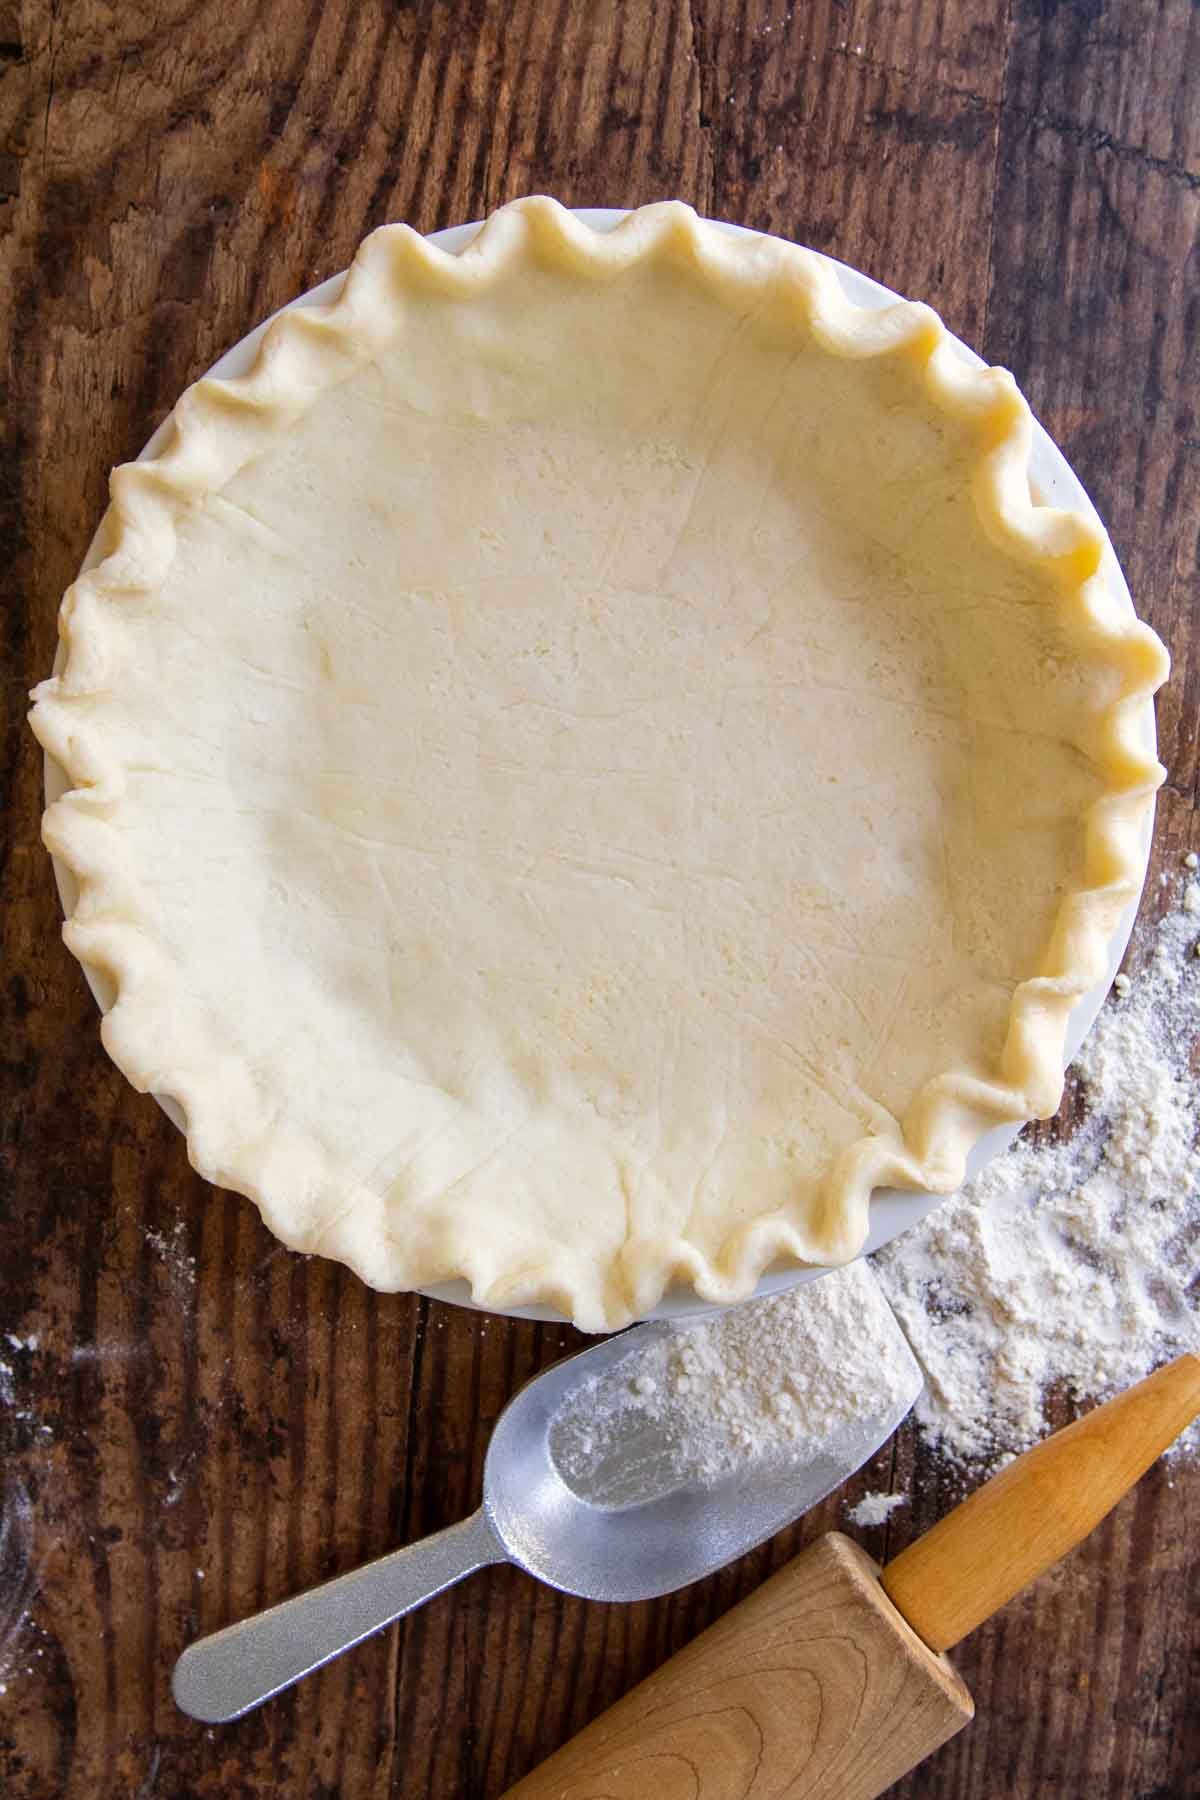
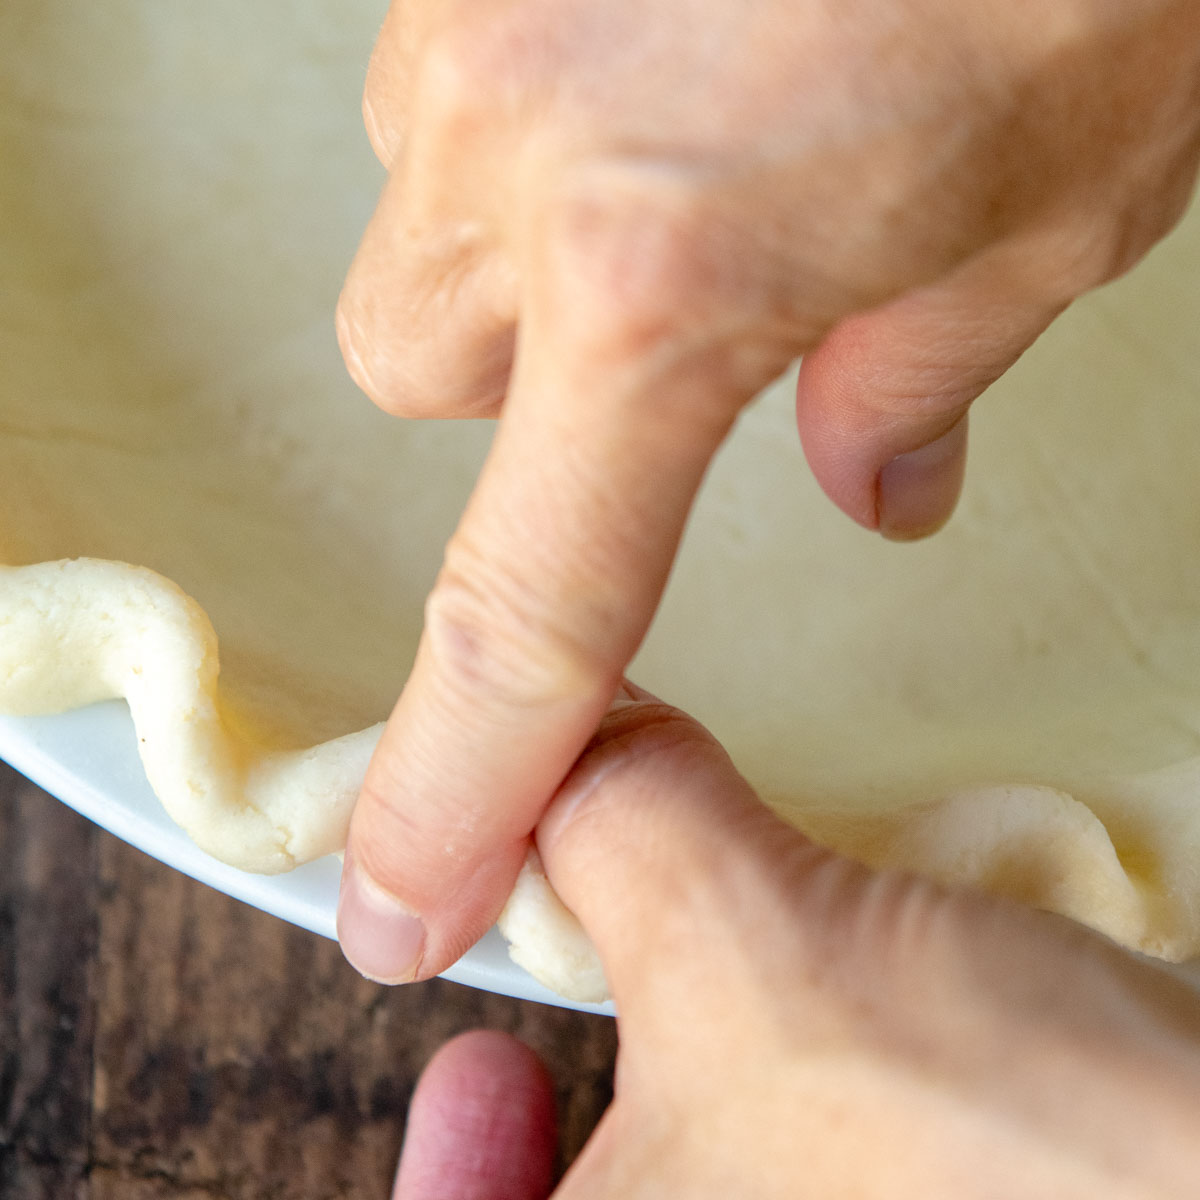
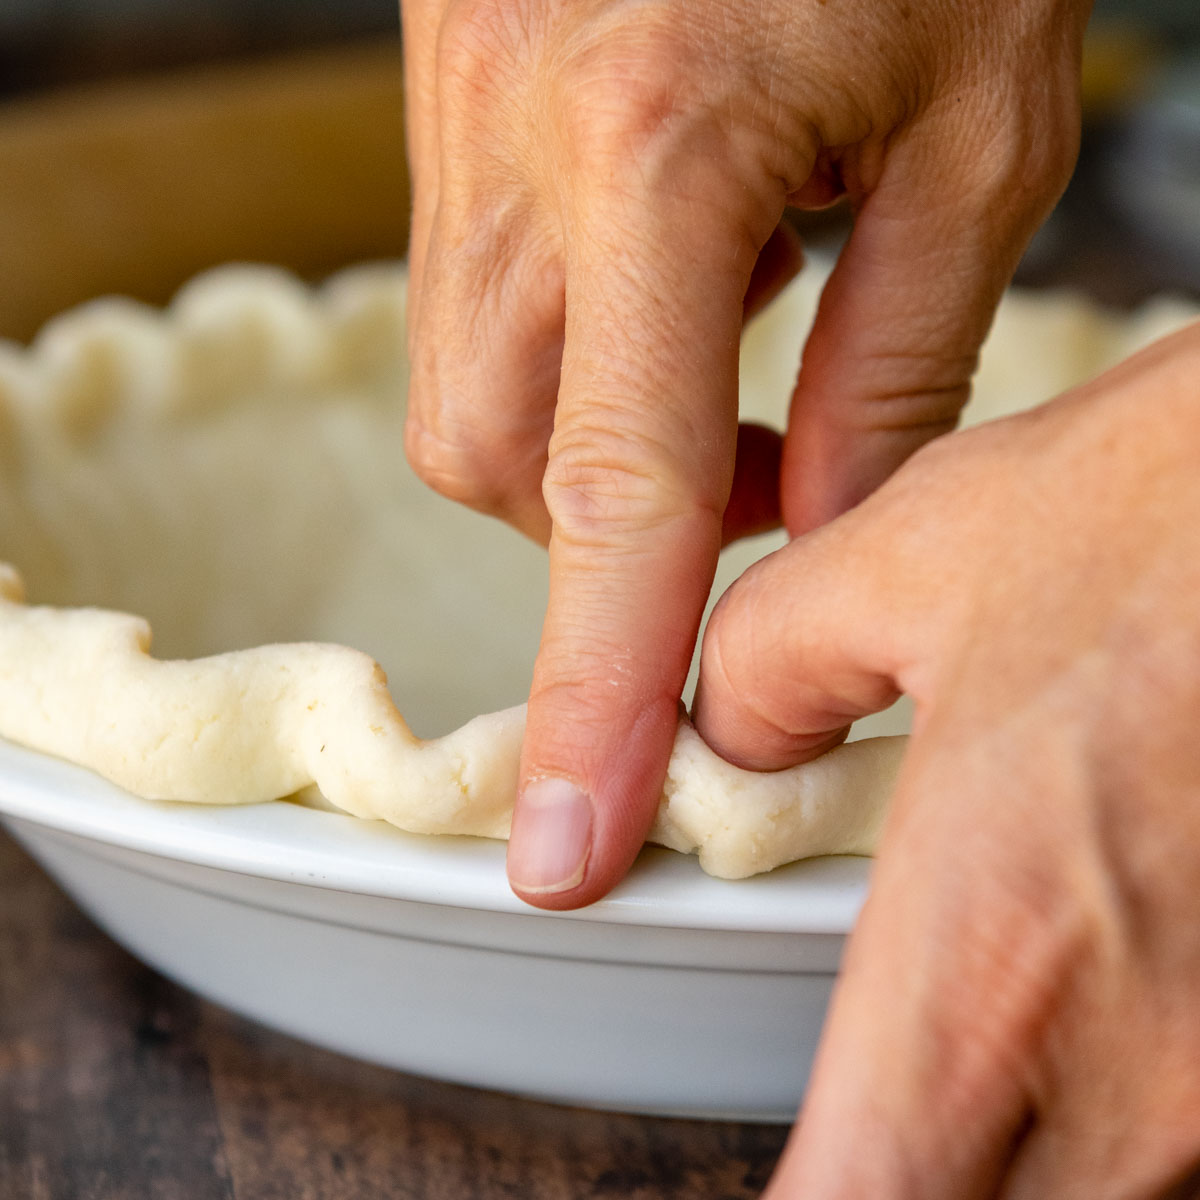
- Once the dough is turned over in the pie dish use kitchen scissors to trim off excess dough around edges. If some edges need more dough to fold under, press on some of the clipped-off pie dough.
- Use two fingers to flute into a decorative. For a shiny crust brush the exposed edges with an egg wash before adding filling.


Baking Methods
Once the dough is rolled out and shaped in your pie pan, move the dish to the freezer for 15 minutes or up to 1 hour. When the dough is chilled and firm, add the pie filling and bake according to the recipe.
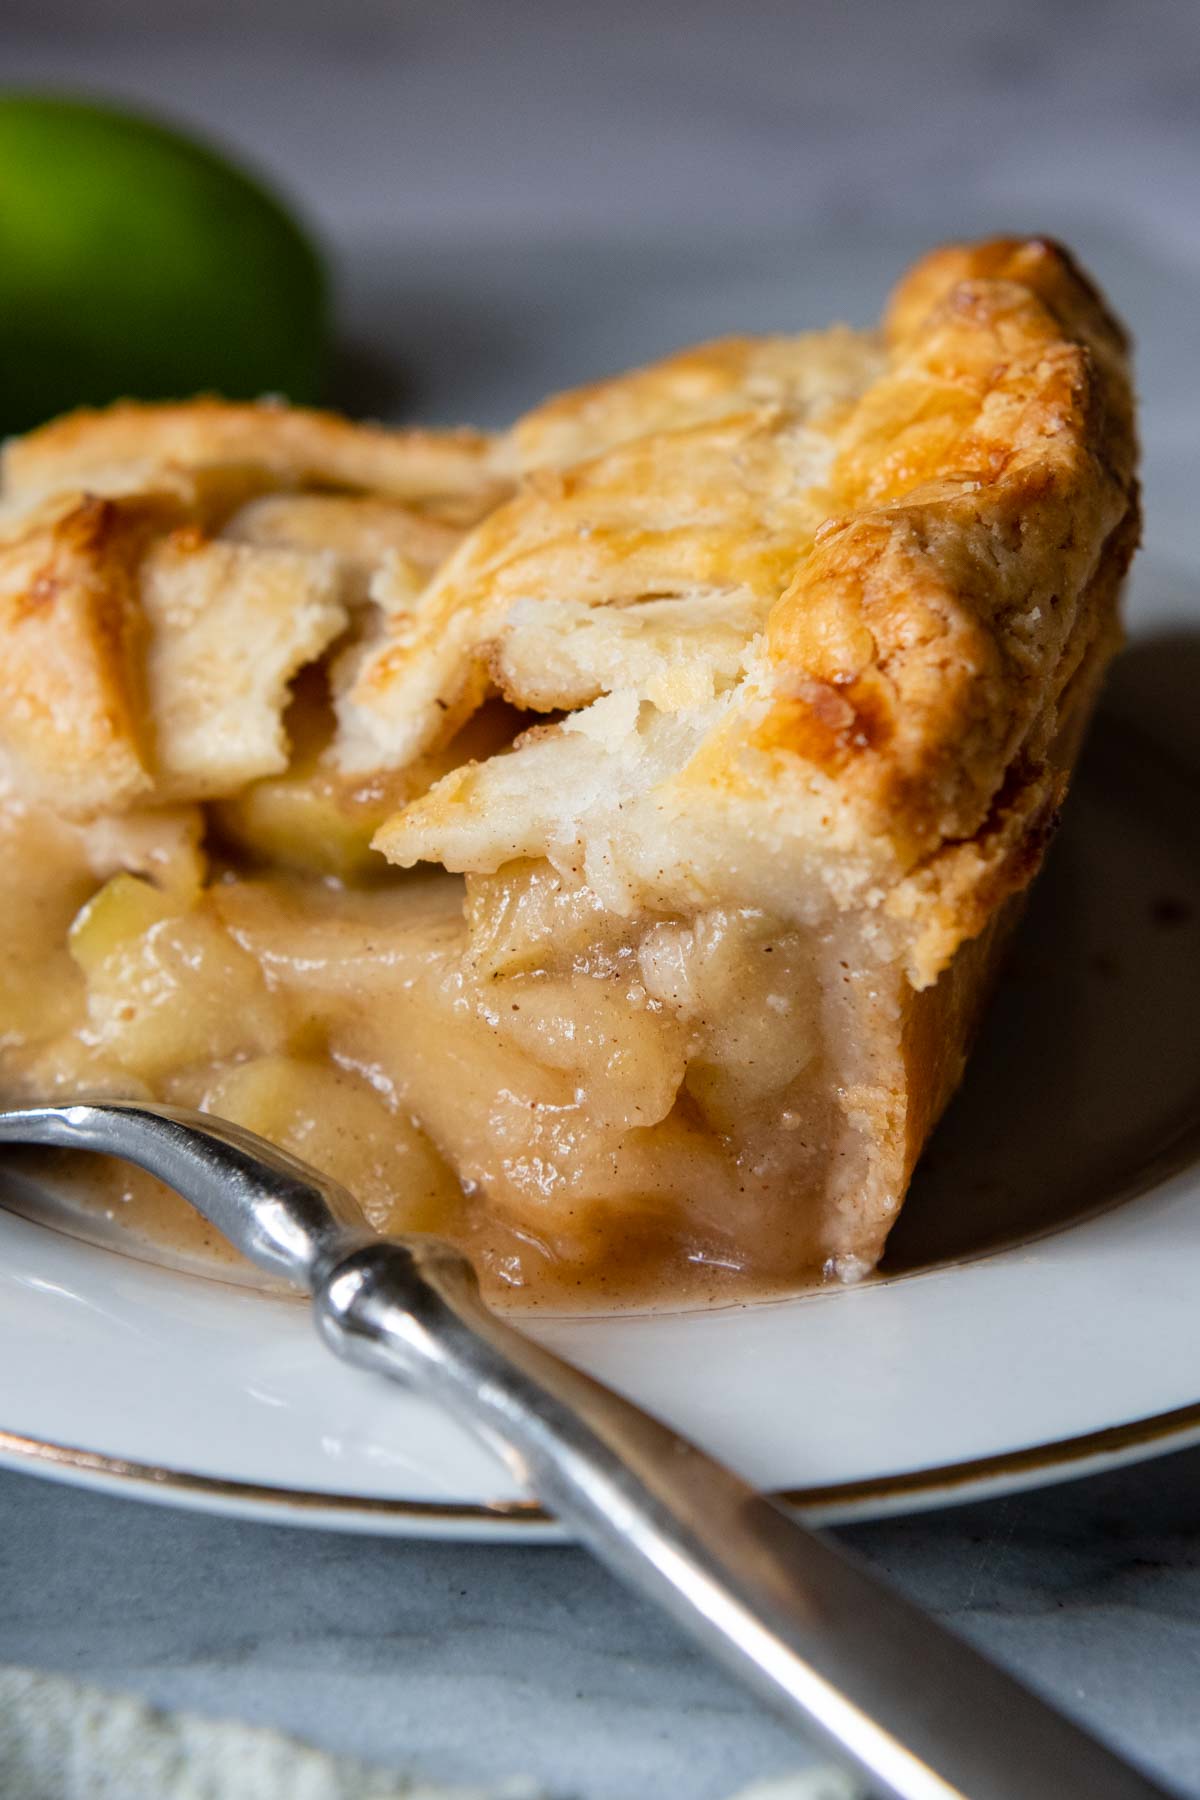
- Double or Lattice Crust – This recipe yields enough for single crust pies, so you would have to double the ingredients and divide into two discs to refrigerate. For a lattice top, follow the tutorial on this homemade gluten-free apple pie recipe. For a double crust, invert the top crust over the filling and trim edges, if necessary. Seal the top and bottom edges together, tucking under, and then use your finger and thumb to make a decorative edge.
- Partially Baked Crust – Some recipes call for a partially baked crust before filling. Preheat the oven to 375ºF. Place a pie weight on the bottom of a chilled crust or line the bottom with a piece of parchment paper and top with dried beans. Bake on the middle rack for 15 minutes, rotating halfway through.
- Blind Baked Crust – Before filling, preheat the oven to 375ºF. Place a pie weight on the bottom of a chilled crust or line the bottom with a piece of parchment paper and top with dried beans. Bake on the middle rack for 25 minutes, rotating halfway through, and protecting the edges. For a browner bottom crust, remove the pie weight for the last 10 minutes baking.
Note About GF Flours
I’ve tried this recipe with three different store-bought gluten-free flour blends. Below are my pie crust making and tasting notes using three popular flours, but also check out the comments below to see what else has worked for readers.
- Recommended: Cup 4 Cup Gluten Free Flour – I’m a huge fan of this flour for gf pie crusts and all baking. It rolls out well and yields a flaky, tender texture. Plus, the taste is so much like regular flour, no one suspects it’s gluten free.
- Bob’s Red Mill Gluten-Free 1 to 1 Baking Flour – This flour was very easy to work with and rolled out well. However, the texture was a bit more chewy, not as flaky, and slightly more dense than Cup4Cup. The flavor had an off-putting aftertaste.
- King Arthur Measure-for-Measure Gluten-Free Flour – I had the hardest time with this one. The dough was dry so I had to add more liquid to get it to bind together. The baked texture was chewy and dense, probably from the starch to liquid ratio being off.
Save this recipe to your pinterest board!
Let’s be friends on Pinterest! I’m always sharing great recipes!
Did you make this recipe? I love hearing from you! Leave a star rating and comment below the recipe card. It helps others when searching for recipes and I appreciate feedback from our community. You will always hear back from me! -Melissa

Best Gluten-Free Pie Crust (Flaky, Tender, Easy To Roll)
Ingredients
- 8 tablespoon (113 g) unsalted butter, cut into small cubes and frozen for 10 minutes
- 2 ½ tablespoons ice water
- 1 ½ tablespoons sour cream
- 1 ½ teaspoon apple cider vinegar
- ¾ PLUS ⅔ cup (194 g) gluten-free flour, I highly recommend Cup4Cup gluten-free flour
- 1 ½ teaspoon granulated sugar
- ½ teaspoon salt
Equipment
Instructions
Food Processor (OR Stand Mixer with Paddle Attachment)
- Place the cubed butter in the freezer for 10 minutes. Mix together the cold water, sour cream, and vinegar in a small bowl. Place the liquids bowl in the refrigerator until you are ready to use.8 tablespoon unsalted butter, 2 ½ tablespoons ice water, 1 ½ tablespoons sour cream, 1 ½ teaspoon apple cider vinegar
- Pulse or mix on low speed the flour, sugar, and salt together until mixed.¾ PLUS ⅔ cup gluten-free flour, 1 ½ teaspoon granulated sugar, ½ teaspoon salt
- Process the butter into the flour mixture until well incorporated, evenly dispersed, and without large chunks.
- Add the liquids to the food processor or stand mixer and combine until the flour becomes moistened and small dough clumps appear. Tip: To check if you have enough liquid, clump and flatten a small bit of dough. If it doesn’t stick together, is crumbly, or breaks apart easily, add a small dash of ice water. Pulse a few times and recheck. The dough should come together easily.
- Turn the dough onto a large sheet of plastic wrap and flatten into a thick 1" disk. Wrap tightly and refrigerate for at least 1 hour or freeze for 30 minutes. Before rolling out, let sit on counter 5 minutes so it is easier to work with.
By Hand Method:
- Mix together the cold water, sour cream, and vinegar in a small bowl and place in the fridge until ready to use. Freeze the butter for 10 minutes until very cold.
- In a large bowl whisk together the gluten-free flour, sugar and salt.
- Use a pastry blender, fork, or fingers to cut and knead butter into the dough until it is well incorporated throughout.
- Add half the liquids and knead with fingers or a fork. Pour in the remaining liquids. Knead until the dough starts to come together and the liquids are well mixed with flour.
- Turn the dough onto a large sheet of plastic wrap and flatten into a thick 1" disk. Wrap tightly and refrigerate for at least 1 hour or freeze for 30 minutes. Before rolling out, let sit on counter 5 minutes so it is easier to work with.
How To Roll Out Crust:
- I find rolling in a silicone pie bag works best because the dough doesn’t stick, no additional flour is needed, and it’s easy to shape. If you don’t have one, use two large pieces of parchment paper. Plastic wrap may be used, but it has a tendency to stick to the dough more.
- Place the unwrapped dough disc in middle. Use a rolling pin to press and spread the dough from the middle out. Roll into a circle slightly larger than your pie dish. (See tips in recipe notes for rolling out crust)
- Remove the top paper, and invert into the pie plate. Remove the second paper. Tip: If the dough has warmed while rolling, it may be trickier to take the paper off. If this happens, leave the paper on, and stick the whole thing in the fridge for 5 minutes. Once the crust is chilled again it's much easier to pull off the paper. If the dough is too cold and the crust breaks, let it sit on the counter for a minute first before trying again.
- Trim off excess dough around the edges. If some edges need more dough to fold under, press on some of the clipped off pie dough. Tuck the overhang dough under to meet edge of pie dish. Using both forefingers, flute edges by pressing one down and one up next to each other.
- Wrap loosely with plastic wrap and place in freezer 15 minutes, or up to an hour, until chilled. Fill and bake according to recipe directions, or see recipe notes for a partially or fully baked crust.
Notes
Best tips For Rolling Out Crust
- If the dough is too cold it will be hard to roll and break apart. Let it sit on the counter for 5 minutes and try again.
- When you are rolling, press down in the middle and push the dough out from center. This will ensure the middle not being too thick, while edges are too thin.
- Rotate the pie dough as you are rolling so it forms a perfect circle. If one side is bigger than the other, cut some dough off and add it to the smaller side of the circle.
- While rolling, the dough may warm, which causes the parchment paper to stick. If this happens, place rolled pie crust, with parchment still on, in the refrigerator for 5 minutes so butter re-solidifies and releases from the paper.
- Once the dough is turned over in the pie dish use kitchen scissors to trim off excess dough around edges. If some edges need more dough to fold under, press on some of the clipped-off pie dough.
- Use two fingers to flute into a decorative. For a shiny crust brush the exposed edges with an egg wash before adding filling.
Dairy-Free
For a gluten-free dairy-free or vegan pie dough, plant-based butter sticks or shortening may be substituted, but will affect the taste and flakiness. I also recommend cutting the salt by half if using plant-based butter. Replace the sour cream with a dairy-free substitute.Storing / Freezing
Wrapped dough may be refrigerated up to 1 day. Longer than that, place the wrapped disc in a freezer ziplock bag to freeze for 1 month. Thaw in refrigerator overnight. Recipe adapted from America’s Test Kitchen: The How Can It Be Gluten Free Cookbook.This post contains affiliate links. My opinions are always my own. If you purchase a product through an affiliate link, I make a small commission – at no cost to you. Read full disclosure policy here.


My mom made this crust for a double crust strawberry pie. It was delicious. The kids gobbled it up without any complaint about it being gluten free.
So glad the kiddos love it. Thanks so much for sharing, Laura!
Best,
Melissa
Hi sounds good but I can’t use sour cream,. In addition to being Celiac I am also lactose Intolerant :(.
Oh, that’s gotta be a bummer, Neil. You can swap out dairy-free yogurt for the sour cream if you have any of that on hand!
Best,
Melissa
Hi, i have guests coming this year who can’t cave gluten, rice, or soy. Would this work with a homemade gf flour blend using tapioca, millet, and oat flours?
Hi Adriane,
I’m not sure how that would work out, but I do have alternative gluten-free pie crusts, like you can make a pecan crust or an almond flour crust. Those recipes I have tested and they are delish!
Thanks. I’ll have to see if those will work. They also can’t have dairy, so i will need to use plant butter
What does the sour cream do for the crust?
Hi Sara,
It adds more acidity, which tenderizes the flour, making it more flaky. It also helps build structure. GF flour has a harder time holding on to all the fat from the butter (which is why sometimes things can turn out greasy). It gives the starches something additional to bind to.
Best,
Melissa
That’s really good to know- thank you!
Hi. Melissa, I used cup 4 cup gluten free
Was the crust frozen briefly before baking? Perhaps the butter became too warm. I wish I could be of more help. I haven’t had this happen to me. Did it bake okay?
Why is the pie dough have so much butter bubbling up on the crust as it is baking? I followed the recipe as you have it. I was also wondering if you could add an egg to the liquid mixture?
Hi Vern,
This sounds like the starches in the GF flour blend had a hard time absorbing the fat. I’m curious which brand you used? I’m not sure about the egg. I see other GF recipes use one, but if you added it to this you would have to adjust the dry ingredients as well.
Best,
Melissa
Do I need to pre bake the crust for a pumpkin pie?
Hi Marion,
I have a gluten-free pumpkin pie recipe that walks you through specifically how to bake a pumpkin pie with this crust so you get a nice crispy bottom. Enjoy!
Best,
Melissa
Used King Arthur gluten free flour and the crust turned out great. Can this recipe also be used with regular flour?
Hi Lois,
Great question, but I would use a traditional pie crust recipe for regular flour. The amount of moisture added is specific to GF flour because it absorbs liquids differently then wheat flour.
Best,
Melissa
Excellent crust; really good flavor, texture and mouth feel and pretty easy to roll out. Not having the silicone bag, I used two silicone mats which worked very well.
So lovely to hear, Susannah! Thank you so much for taking a moment to let me know!
Best,
Melissa
This pie crust recipe did not work for me.. Never could get my King Arthur flour to even hold together much less roll out. I added more milk, ice water sprinkled on my dough. Ended up just pressing it into the pie pan. It’s in the oven now with dry edges. I’m sure some could make it work but not me. I measured and followed as close as I could.
I’m really sorry to hear that, Frances 🙁 What King Arthur flour did you use? It’s confusing, but they have a couple different ones and one doesn’t have xanthan gum in it, which would be why the crust didn’t hold together. It’s never fun to use expensive ingredients, precious time, and not have something turn out, so I’m so sorry!
Best,
Melissa