
Make the best gluten-free pecan pie, guaranteed to outshine all others! This homemade recipe has a buttery, flaky crust filled with an easy ingredient pecan pie filling to make this recipe undeniably perfect. Using a dash of molasses counterbalances the sweetness, while adding a little cornstarch guarantees the filling to set every time!

Want to Save This Recipe?
Enter your email below & we'll send it straight to your inbox. Plus you’ll get affordable and easy gluten-free recipes delivered each week!
Gluten-Free Pecan Pie Recipe – Perfectly Sets Every Time!
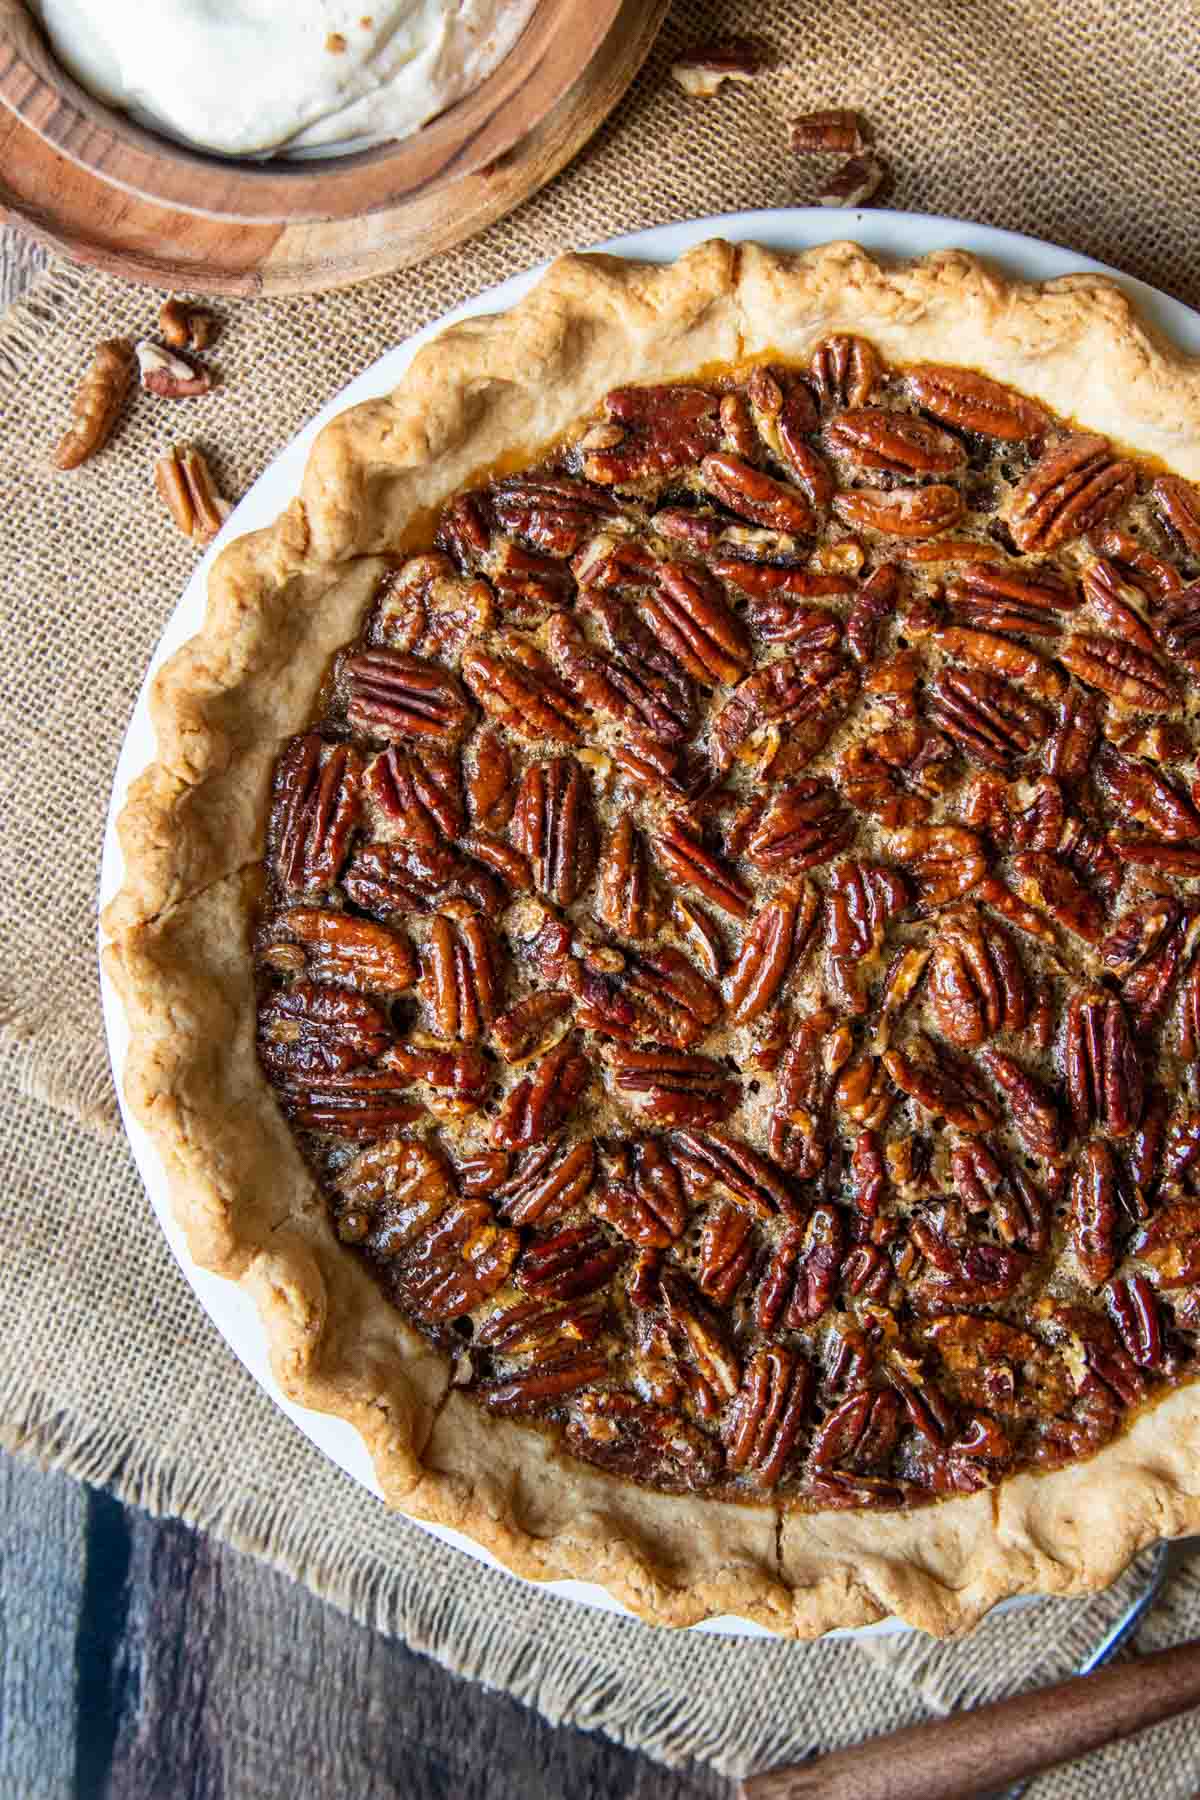
Rich, sticky, homemade pecan pie is an essential dessert to have around the holidays. Whether your guests follow a gluten-free diet or not, no one notice a difference between this gluten-free pecan pie and the traditional version they grew up on!
The key to making the best GF pecan pie is a buttery, flaky pie crust that will fool even the toughest skeptics. Therefore, I use the this fail-proof gluten-free pie dough recipe to hold the pecan filling.
It’s easy to roll out and a taste that can’t be beat, so I use it for everything from homemade gluten-free pie recipes to savory treats like this family-favorite gluten free chicken pot pie.
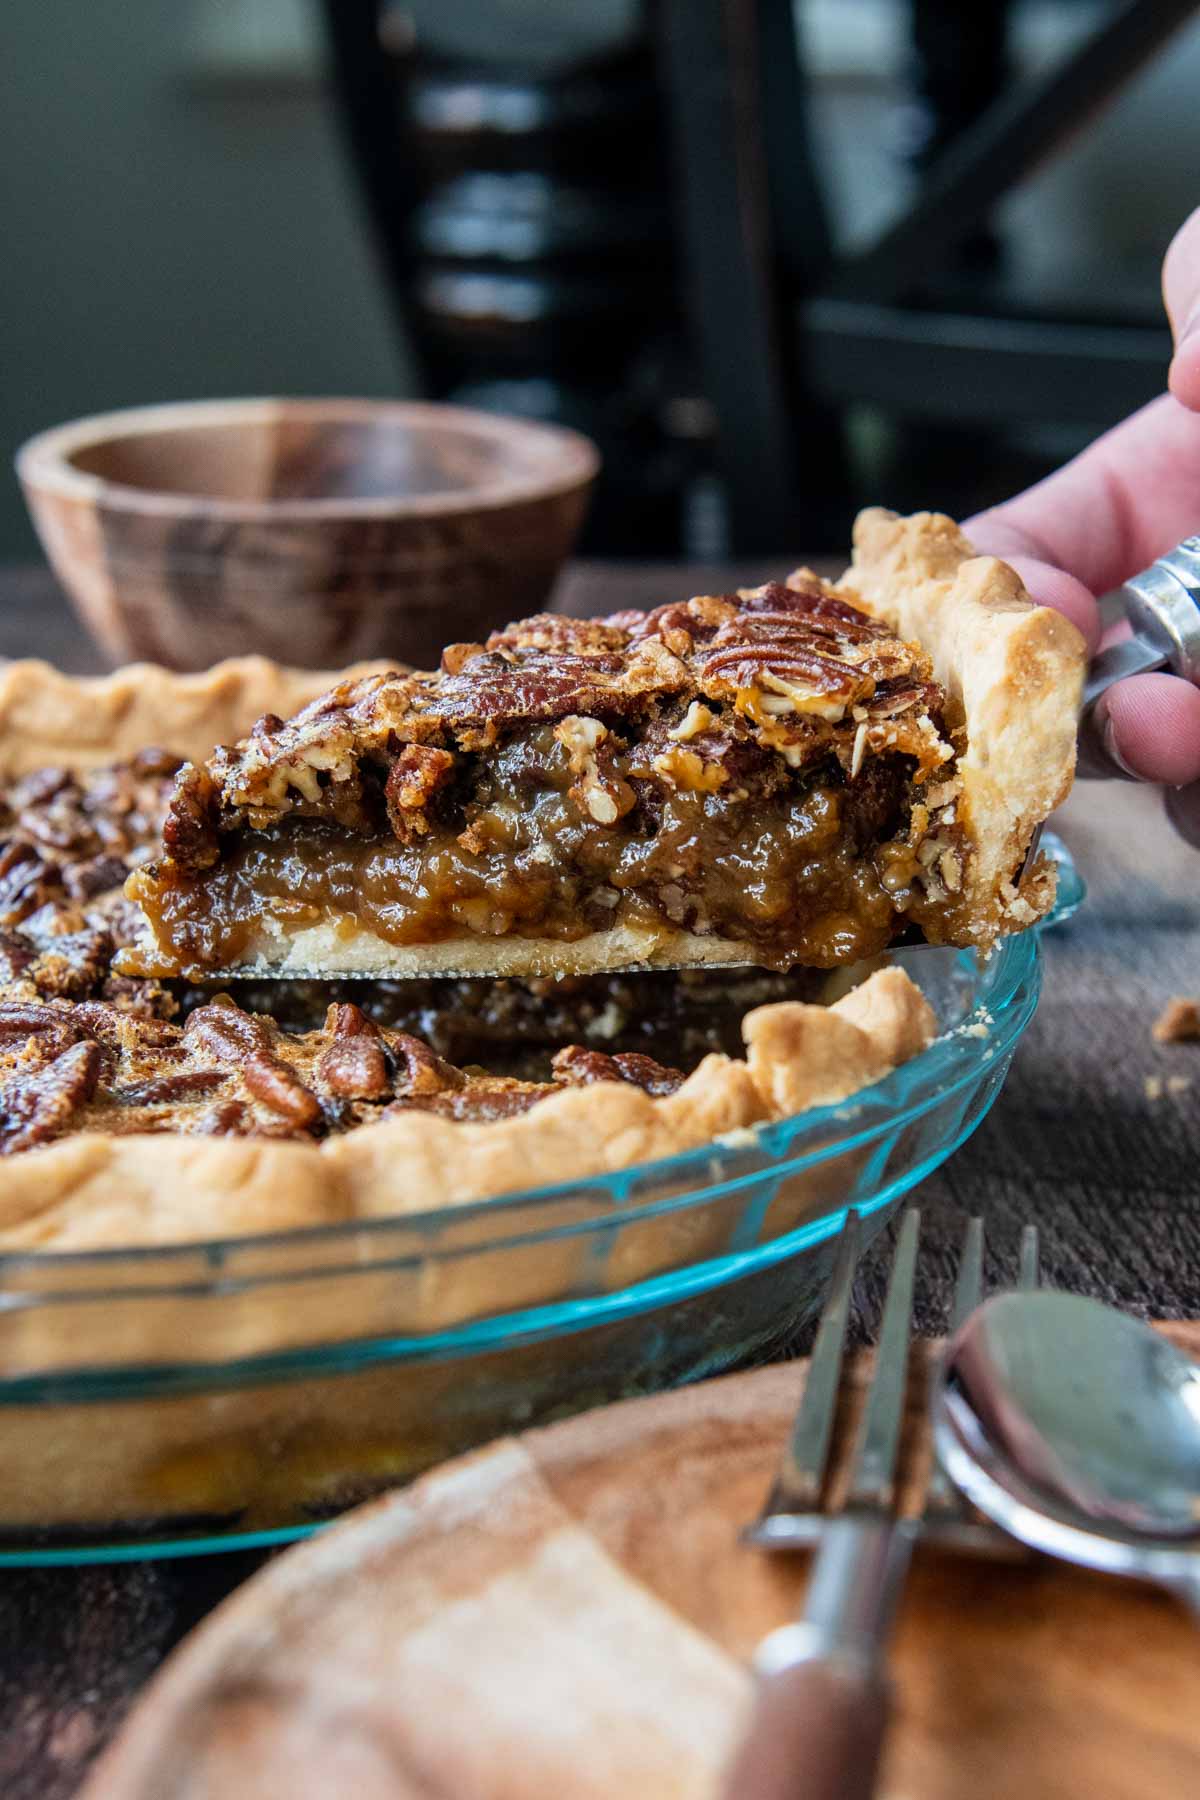
A common complaint when making a from-scratch pecan pie is having a filling that doesn’t set, meaning it’s too thin or runny to slice. Some traditional recipes rectify this by adding a bit of flour to the filling.
When making a gluten-free pecan filling, the flour can be swapped out with cornstarch. I prefer to use cornstarch, rather than a GF flour blend, because the various mixture of starches leads to inconsistent results. Some gluten-free flours work better as thickeners, while others are better for gluten-free baking.
The other problem I wanted to overcome when testing this recipe was an overly sweet, syrupy taste, something almost too rich to consume. To fix this, the recipe uses a few easy tricks!
First of all, simply adding less brown sugar is a great start. Adding a tablespoon of molasses further cuts the sweet taste and adds a nice complex flavor. Finally, using a generous amount (entire 10 ounce bag) of salty pecans is a great contrast to the sweetness.
Below I share more of my gluten-free baking expertise, including tips for a perfectly golden GF crust, how to tell when the pie is done, and step-by-step photos to ensure your gluten-free Thanksgiving dessert turns out perfectly!
Free Guide! 5 easy tips for baking like a gluten-free pro!
Simple hacks for fail-proof gluten-free dishes every time!
Ingredient Tid Bits
- Pecans – Use whole or chopped pecans, or a mixture of both. If you’d like to do a decorative design on the top with the nuts, set some aside before adding filling. Place reserved pecans on top in any preferred arrangement, and then bake.
- Eggs – I don’t recommend using substitutes with this recipe to make an egg-free pecan pie. Instead, follow a vegan pecan pie recipe.
- Dark Corn Syrup – While you can use dark and light corn syrup interchangeably in this recipe, I prefer the dark because it has a caramel, molasses flavor, which enhances the flavor. The corn syrup helps set up the pie. However, you may replace it with an equal amount of pure maple syrup, but you will also have to add 1 tablespoon gluten-free flour to the filling, helping it solidify.
- Molasses – Since pecan pies have a tendency to be very sweet, I like adding a splash of molasses to counterbalance the sugar. However, this is optional if you prefer to omit it.
- Butter – If you are looking for a gluten-free dairy-free option, simply substitute melted coconut oil or vegan butter.
- Cornstarch – Adding cornstarch makes a more solid filling, and eliminates some of the guesswork of knowing when the pie has set. It may be omitted, but you may want to take a temperature of the filling before pulling it from the oven. It should read 185-200ºF in the center.
Let’s Make This Together!
(Below shows step-by-step photos and modified instructions. For the complete recipe, along with ingredient amounts, scroll down to the recipe card.)
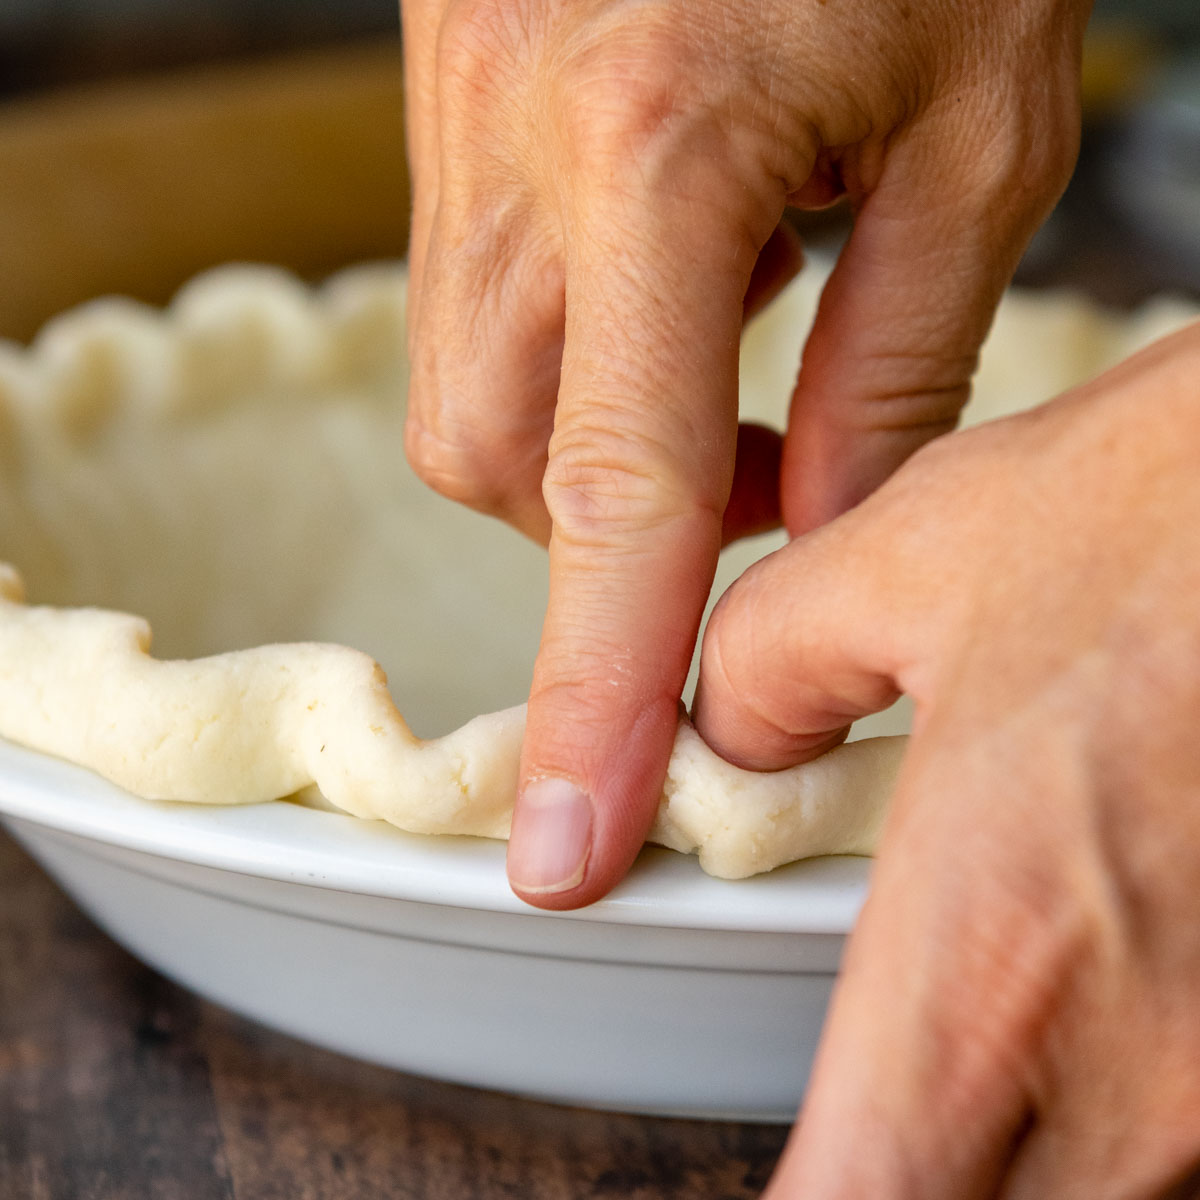
Make a legendary GF pie crust
This is my go-to crust for everything from savory to dessert pies. I walk you through step-by-step in the recipe card how to make it either in a food processor or by hand. If you are unfamiliar with how to roll out a pie crust, I added, oh so many, helpful tips and pictures to the homemade GF pie crust recipe.
Time for pecan pie filling
Once you shaped the dough in the pie pan, pop it in the freezer for 15 minutes mix together the filling. This is the easy part! First, whisk together all the ingredients in a large bowl, except the pecans.

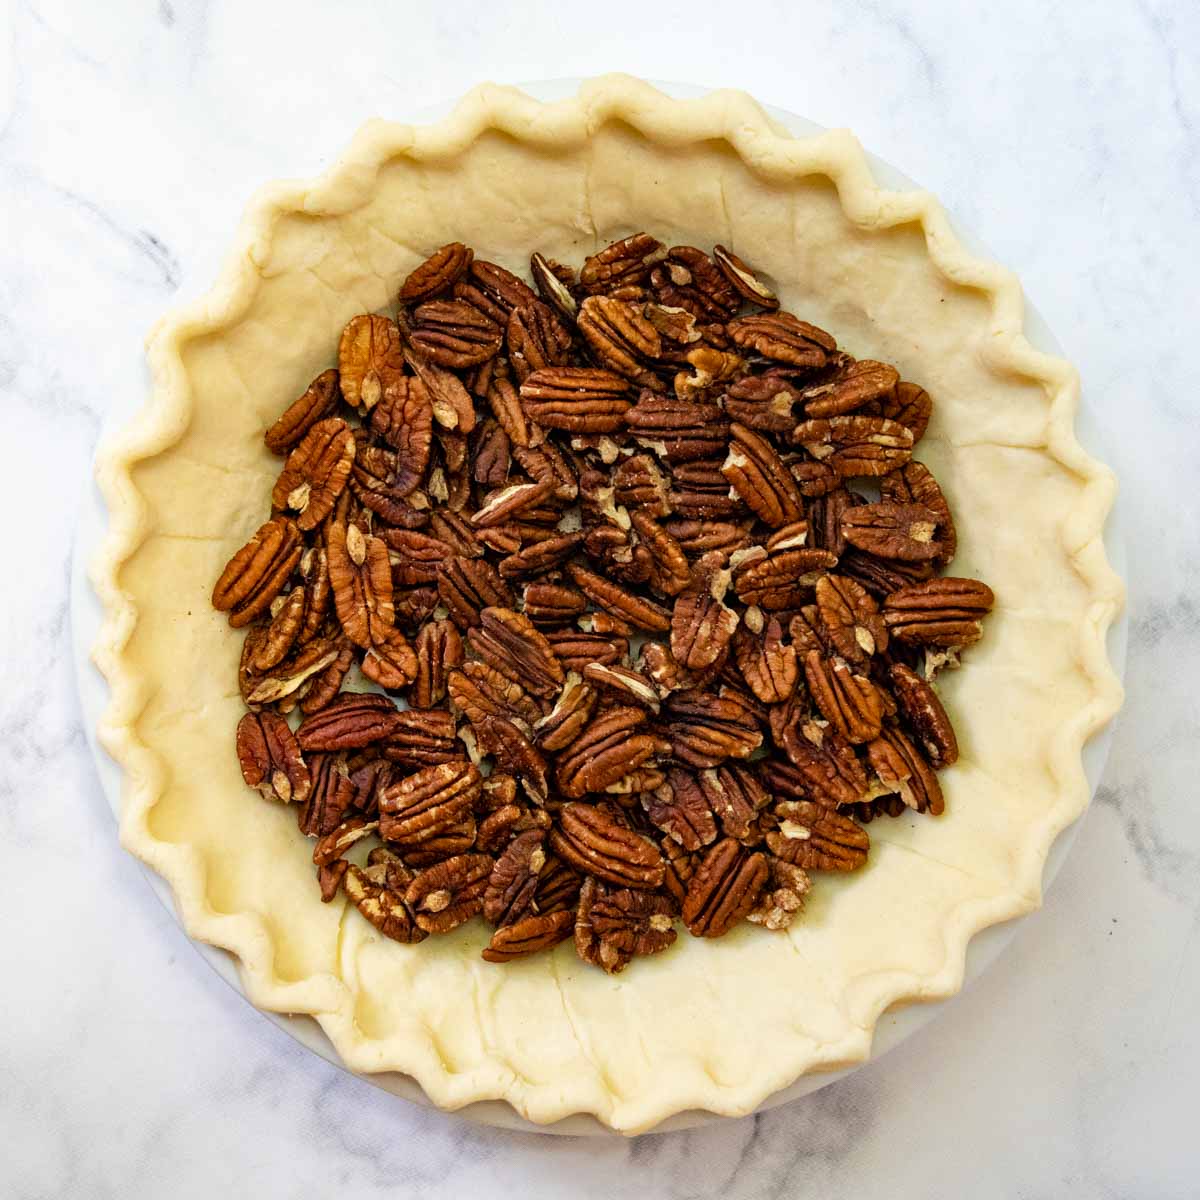
Just fill and bake
Spread the pecans on the bottom of the crust and then pour the filling over. For the baking part, first start it in 425ºF oven for 10 minutes. Then reduce to 325ºF to bake for 50-60 minutes longer. For best results, use a pie shield after 20 minutes to protect the crust from becoming overly browned.
Now is the hardest part – waiting. You’ll have to let it cool completely, at least 4-6 hours before slicing and serving, or the filling won’t be set. Then it’s go time. Enjoy.
Best Tips and Tricks
- For a dairy-free gluten-free recipe, replace the melted butter with coconut oil.
- To prevent a soggy pie crust bottom, freeze the shell for 15 minutes first and bake on the lowest rack. This homemade recipe for gluten-free apple pie also contains lots of great tips about preventing a soggy bottom crust!
- For an added twist of flavor, add 1/2 teaspoon cinnamon
- Adding cornstarch makes a thicker, more solid filling, but you may omit it if you prefer it runnier.
- Use a pie shield after 20 minutes of baking to protect the crust from becoming overly browned.
- The pie is done when the edges are set and the middle just slightly jiggles, but does not wave back and forth. For best results, use an instant read thermometer and it should read 185-200ºF in the center.
- This pie gets even better when made ahead of time, 1 to 2 days. Store it at room temperature, loosely covering with foil after it has cooled completely
Runny Filling Troubleshooting
Pecan pie filling may be runny if it was under baked or it did not have enough time to cool completely before slicing. If you have cooled your pie and realize it may have been under cooked after slicing into it, you may chill the pie to solidify the filling.
Save this recipe to your pinterest board!
Let’s be friends on Pinterest! I’m always sharing great recipes!
Did you make this recipe? I love hearing from you! Leave a star rating and comment below the recipe card. It helps others when searching for recipes and I appreciate feedback from our community. You will always hear back from me! -Melissa
Vintage Gluten-Free Pecan Pie (Slices Perfect!)
Ingredients
Gluten-Free Pie Crust
- 8 tablespoon unsalted butter, cut into small cubes and frozen for 10 minutes
- 2 ½ tablespoons ice water
- 1 ½ tablespoons sour cream
- 1 ½ teaspoon apple cider vinegar
- ¾ PLUS ⅔ cup (6 ½ ounces weight total) gluten free flour, I highly recommend Cup4Cup gluten-free flour
- 1 ½ teaspoon sugar
- ½ teaspoon salt
Pecan Pie Filling
- 3 large eggs
- 1 cup dark corn syrup
- ½ cup light brown sugar
- 3 tablespoons butter, melted and cooled
- 1 tablespoon molasses
- 1 tablespoon cornstarch
- ½ teaspoon salt
- 2 ½ cups (10 ounce package) whole or chopped pecans
Equipment
Instructions
- Place the cubed butter in the freezer for 10 minutes. Mix together the cold water, sour cream, and vinegar in a small bowl. Place the liquids bowl in the refrigerator until you are ready to use.8 tablespoon unsalted butter, 2 ½ tablespoons ice water, 1 ½ tablespoons sour cream, 1 ½ teaspoon apple cider vinegar
- FOOD PROCESSOR: Pulse flour, sugar, and salt together until mixed.BY HAND: Whisk dry ingredients in medium-sized bowl.¾ PLUS ⅔ cup (6 ½ ounces weight total) gluten free flour, 1 ½ teaspoon sugar, ½ teaspoon salt
- FOOD PROCESSOR: Process the butter into the flour mixture until well incorporated, evenly dispersed, and without large chunks.BY HAND: Use a pastry blender, fork, or fingers to cut and knead butter into the dough until it is well incorporated throughout.
- FOOD PROCESSOR: Add the liquids to the food processor and pulse until the flour becomes moistened and small dough clumps appear. If dough doesn't start to come together, add a touch more cold water. BY HAND: Add half the liquids and knead with fingers or a fork. Pour in the remaining liquids. Knead until the dough starts to come together and the liquids are well mixed with flour.TIP: To check if you have enough liquid, clump and flatten a small bit of dough. If it doesn’t stick together, is crumbly, or breaks apart easily, add a small dash of ice water. Pulse a few times and recheck. If the dough is too wet or sticky, add a dash of flour. Pulse a few times and recheck.
- Turn dough onto sheet of plastic wrap and flatten into a thick 1" disk. Wrap tightly and refrigerate for at least 1 hour or freeze for 30 minutes. Before rolling out, let sit on counter 5 minutes so it is easier to work with.
- Preheat the oven to 425ºF. Lay a large piece of parchment paper on your workspace. Place unwrapped dough disc in middle and place same sized sheet on top. Use a rolling pin to press and spread out down from the middle out. Roll out into a circle slightly larger than your pie dish.
- Remove top paper, and invert onto pie dish. Remove second paper. Tip: If the dough warmed while rolling, it may be trickier to take the paper off. If this happens, leave the paper on, and stick the whole thing in the fridge for 5-10 minutes. Once the crust is chilled again it's much easier to pull off the paper. If the dough is too cold and the crust breaks, let it sit on the counter for a minute first.
- If necessary, trim the edges so there is an even 1/2 inch overhang all around the edges. Tuck the edge under, all the way around, and then use your finger and thumb to make a decorative edge. Freeze the crust for 15 minutes while you prepare the pecan filling.
Pecan Pie Filling
- In a medium bowl whisk together the eggs, corn syrup, brown sugar, melted butter, molasses, cornstarch, and salt. Place the pecans on bottom of the chilled pie shell and pour the filling on top.3 large eggs, 1 cup dark corn syrup, ½ cup light brown sugar, 3 tablespoons butter, 1 tablespoon molasses, 1 tablespoon cornstarch, ½ teaspoon salt, 2 ½ cups (10 ounce package) whole or chopped pecans
- Bake at 425ºF for 10 minutes ON THE LOWEST OVEN RACK, and then reduce the oven to 325ºF to bake for 50-60 minutes longer. For best results, use a pie shield after 20 minutes to protect the crust from becoming overly browned. The pie is done when the edges are set and the middle jiggles just slightly, but does not wave back and forth. For best results, use an instant read thermometer and it should read 185-200ºF in the center.
- Let the pie cool completely, at least 4-6 hours before slicing and serving. The filling will set as it cools. Store leftover, loosely covered with foil, at room temperature up to 3 days.
Notes
best tips and tricks
- For a dairy-free gluten-free recipe, replace the melted butter with coconut oil.
- To prevent a soggy pie crust bottom, freeze the shell for 15 minutes first and bake on the lowest rack.
- For an added twist of flavor, add 1/2 teaspoon cinnamon
- Adding cornstarch makes a thicker, more solid filling, but you may omit it if you prefer it runnier.
- Use a pie shield after 20 minutes of baking to protect the crust from becoming overly browned.
- The pie is done when the edges are set and the middle just slightly jiggles, but does not wave back and forth. For best results, use an instant read thermometer and it should read 185-200ºF in the center.
This post contains affiliate links. My opinions are always my own. If you purchase a product through an affiliate link, I make a small commission – at no cost to you. Read full disclosure policy here.

