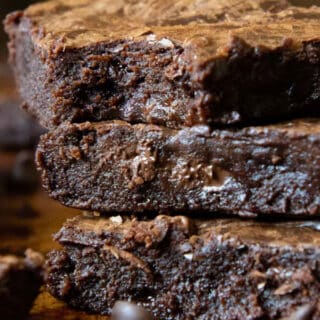
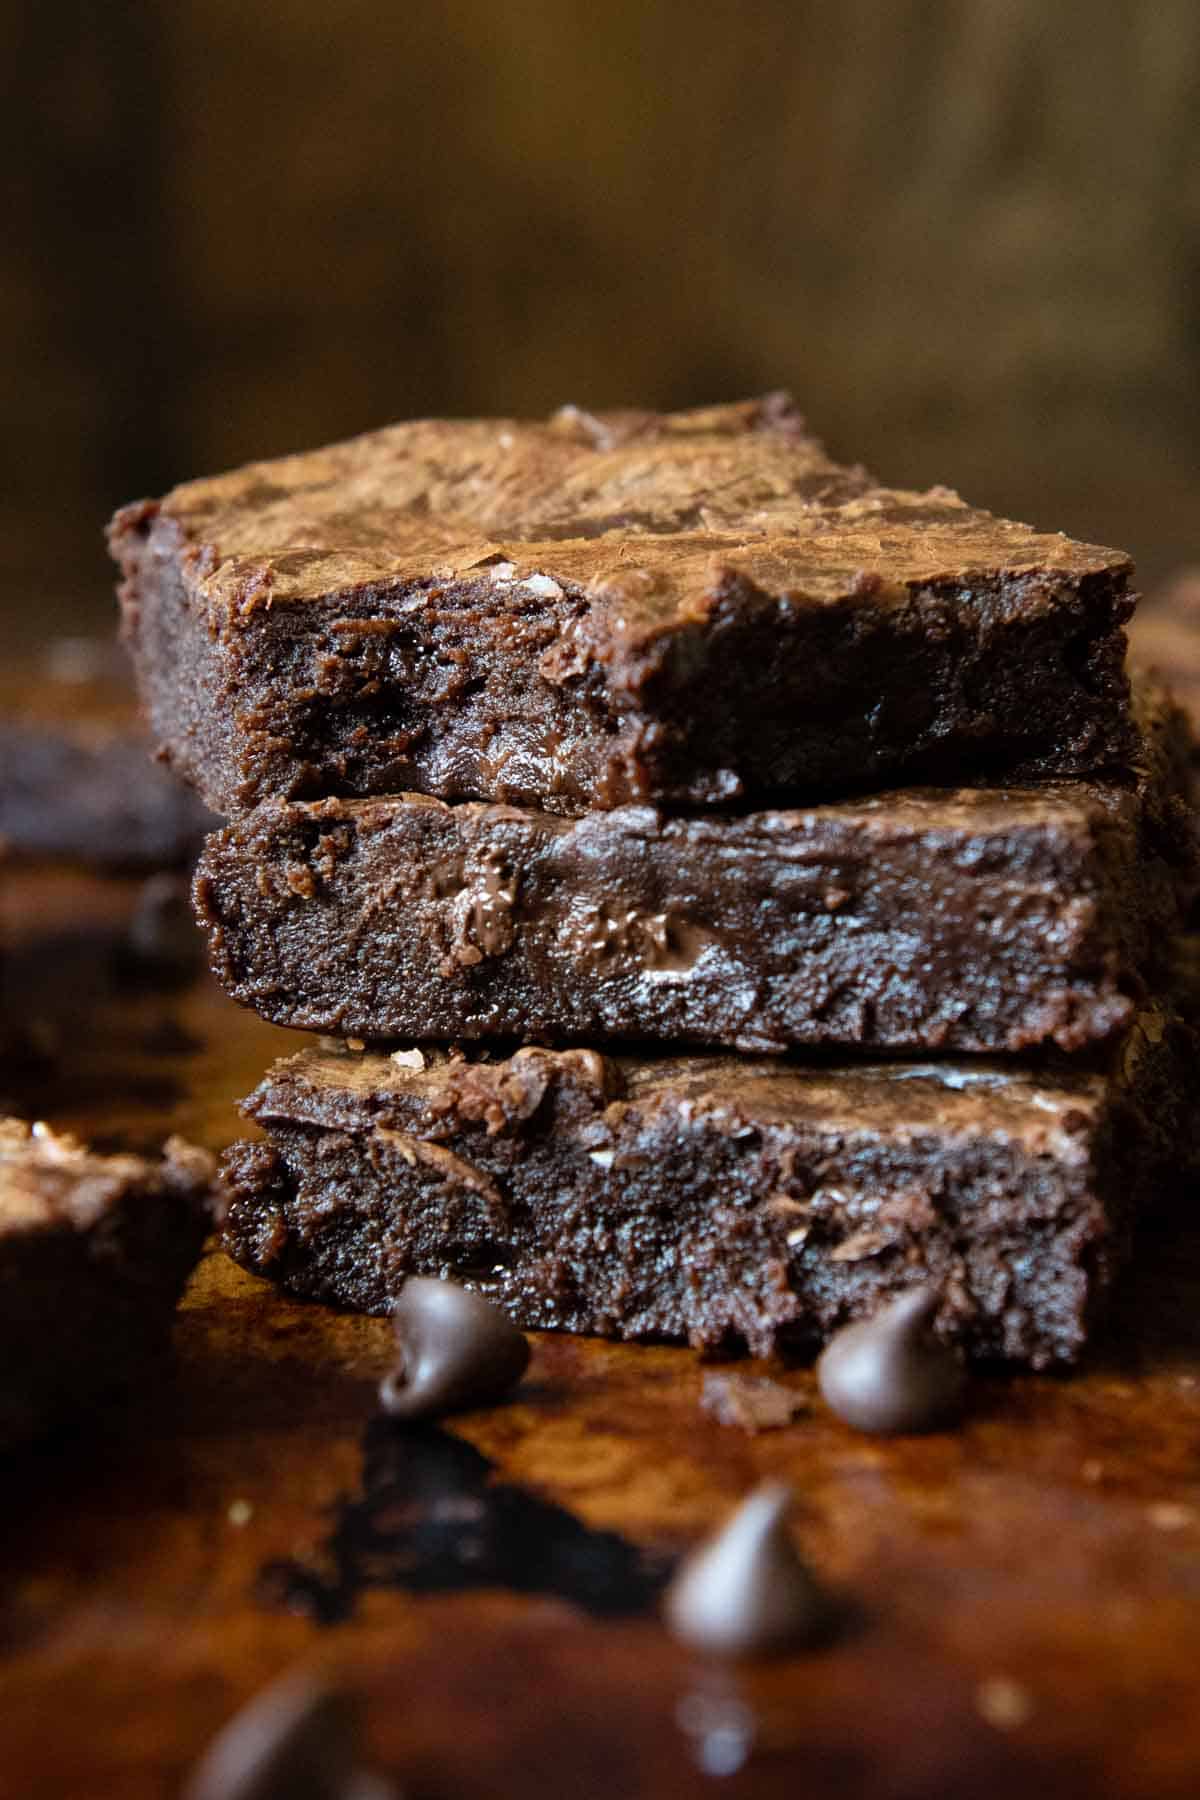
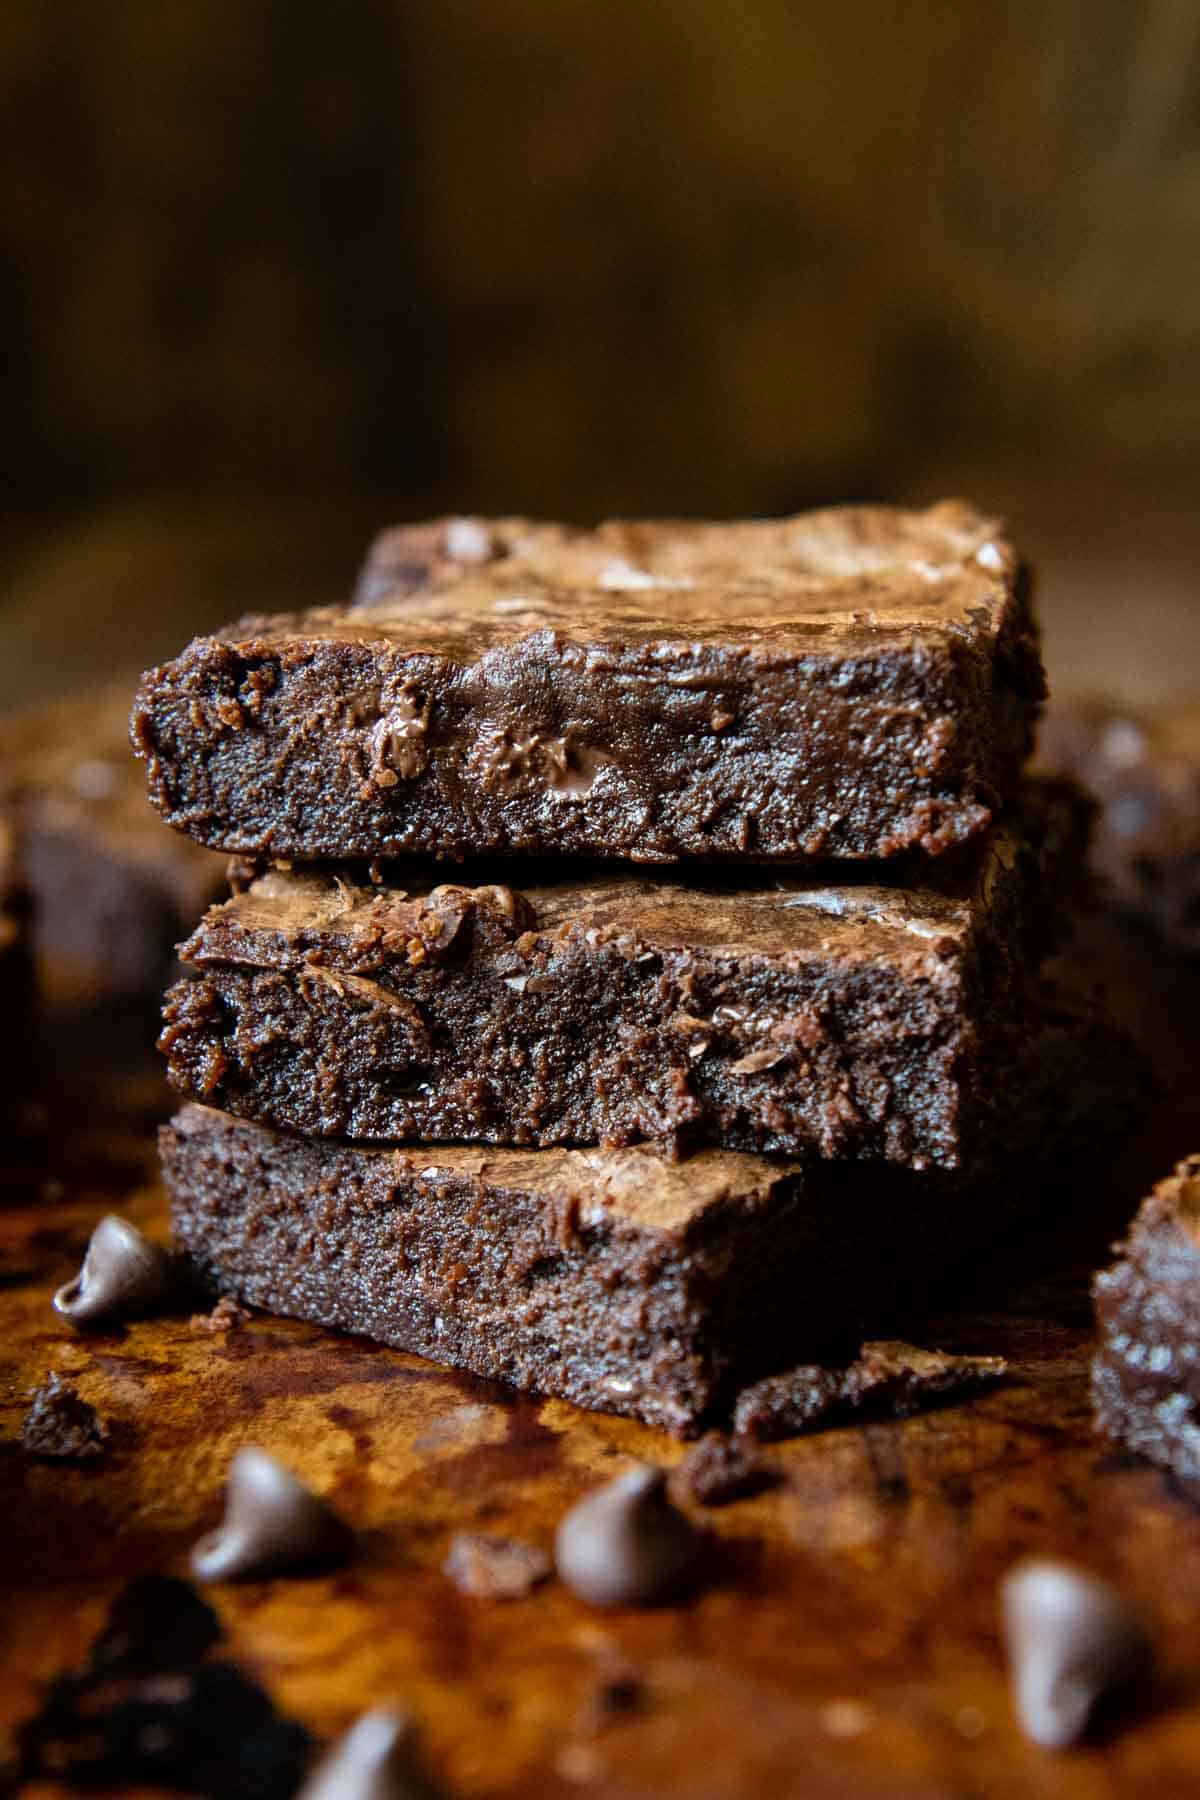
My number one goal as a seasoned gluten-free baker is to transform recipes into even better versions and these homemade gluten-free brownies are no exception! While they are made from scratch, they are just as easy as using a brownie mix and yield even better results! If you love extra fudgy brownies with chewy outer edges, a thin crackly crust and gooey moist interiors then enjoy this easy brownie recipe made with gluten-free flour.
Want to Save This Recipe?
Enter your email below & we'll send it straight to your inbox. Plus you’ll get affordable and easy gluten-free recipes delivered each week!
A Gluten-Free Brownie Recipe To End All Searches
When all-purpose gluten-free flour blends were developed, buyers were led to believe it’s was simple as swapping out GF flour in traditional recipes. While these new flours definitively made baking more streamlined, the end results weren’t always as promised.
For instance, when swapping out gluten-free flour in homemade brownies, the results can be overly greasy. This happens because GF starches don’t absorb fat as well as wheat flour. No one wants that! We deserve some damn good brownies, am I right?!
So let’s make that happen. First, using melted chocolate chips, rather than just straight cocoa powder, adds moisture along with deep chocolate flavor. BUT, adding a little bit unsweetened cocoa powder to the batter boosts chocolate flavor, and helps absorb the butter fat. Win, win.
We can’t decrease the butter because it would strip away that essential fudginess. And adding more flour would dry out the brownies. So you can stop looking. It’s the perfect homemade brownie recipe to add to your go-to best gluten-free dessert options.
Enjoy them as is, with a snowy dusting of powdered sugar, make a single serving version with this 1-minute GF mug brownie, or if you’re really looking to level up your brownie game than you have to try them as a base for gluten-free buckeye brownies. Wowzers.
This is my go-to brownie recipe! They are amazing and no one even realizes they are GF!
—Jennifer
I have made these several times over the last year plus and they always turn out amazing! This recipe is famous in my circle and people request them all the time! Thanks for sharing!
—Sarah
Free Guide! 5 easy tips for baking like a gluten-free pro!
Simple hacks for fail-proof gluten-free dishes every time!
Watch The Recipe
Let’s Make This Together!
This recipe makes a 9X13 pan of brownies. For less brownies (buy why???) you may halve the ingredients and bake in a 8X8 baking dish. This will yield slightly thicker brownies, so the baking time remains the same.
(Below shows step-by-step photos and modified instructions. For the complete recipe, along with ingredient amounts, scroll down to the recipe card.)
Fudginess starts in a pan…
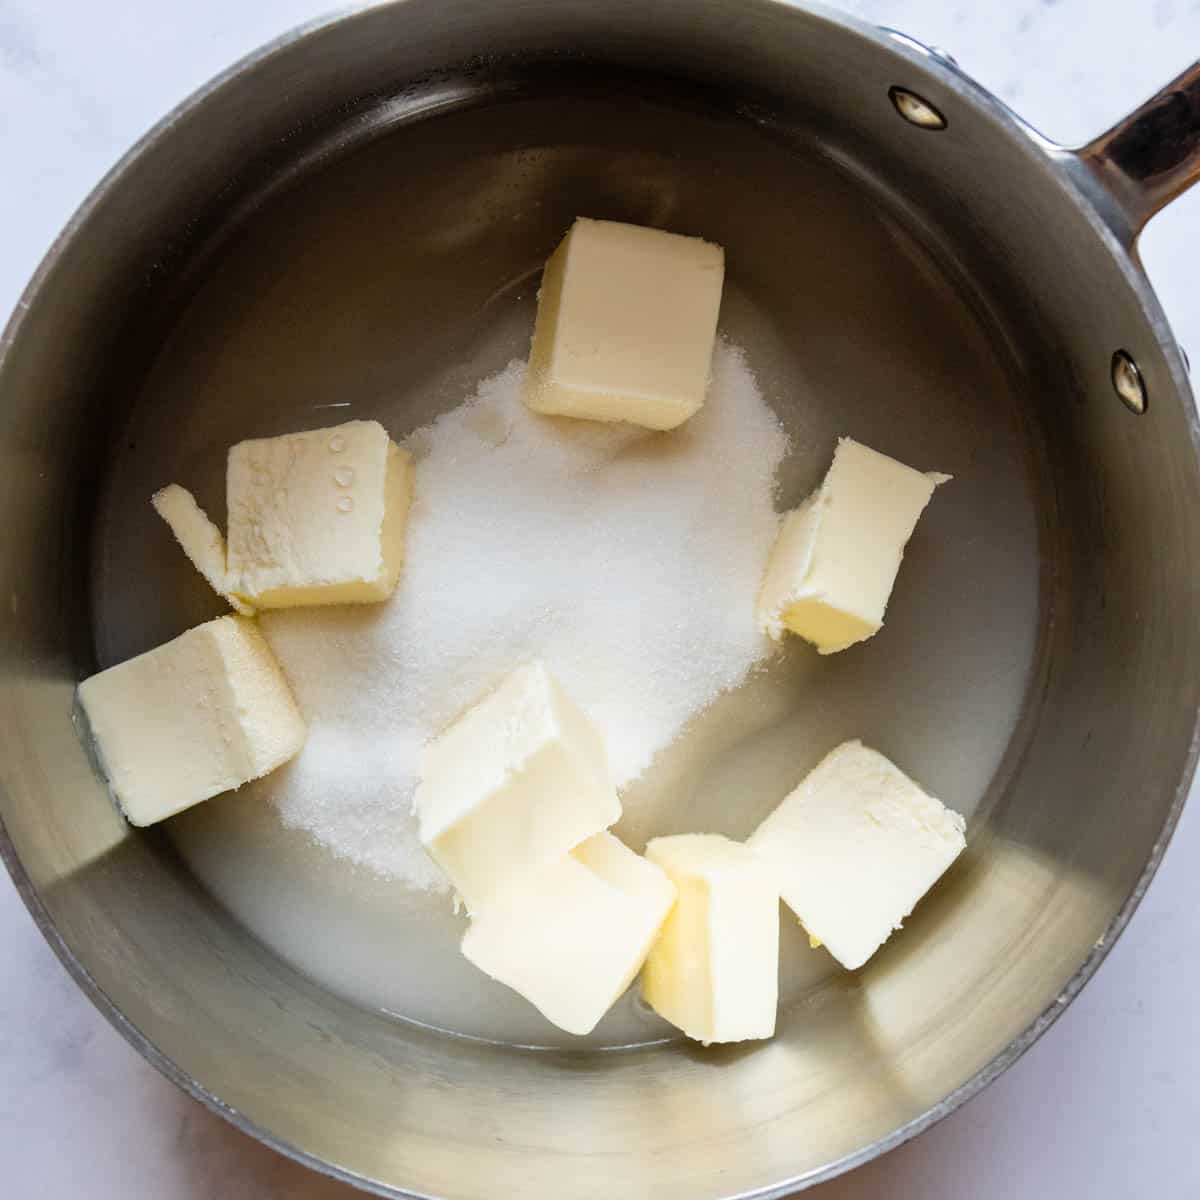
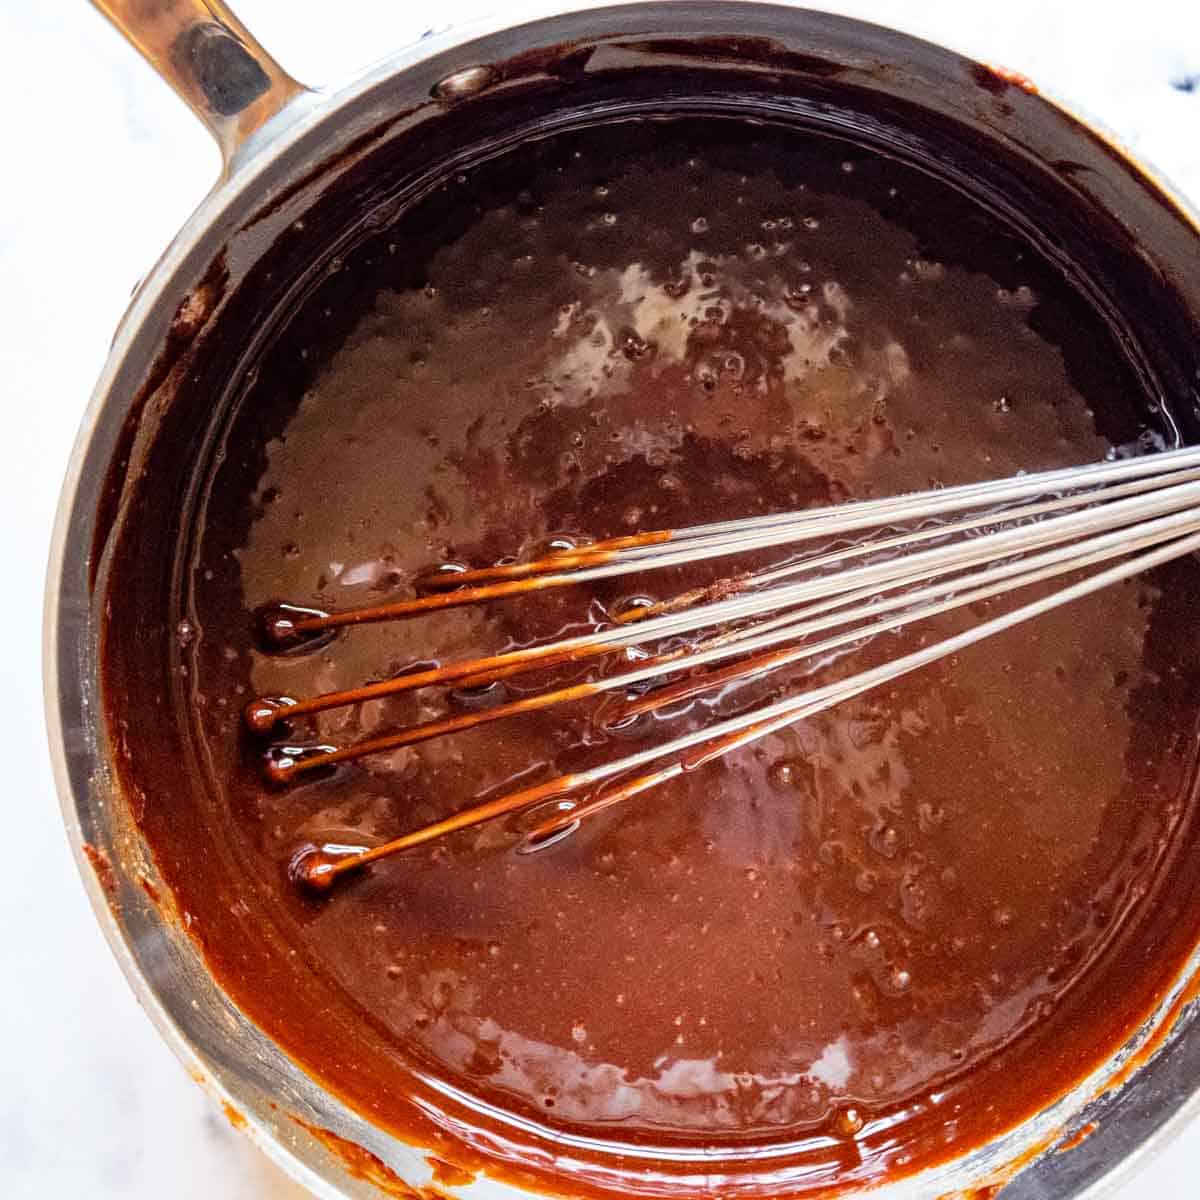
Grab a large enough saucepan to combine all the ingredients. Then, melt together the butter, sugar, and water, bringing to a low boil. Remove from heat and stir in 2 cups chocolate chips until melted.
And ends in a pan.
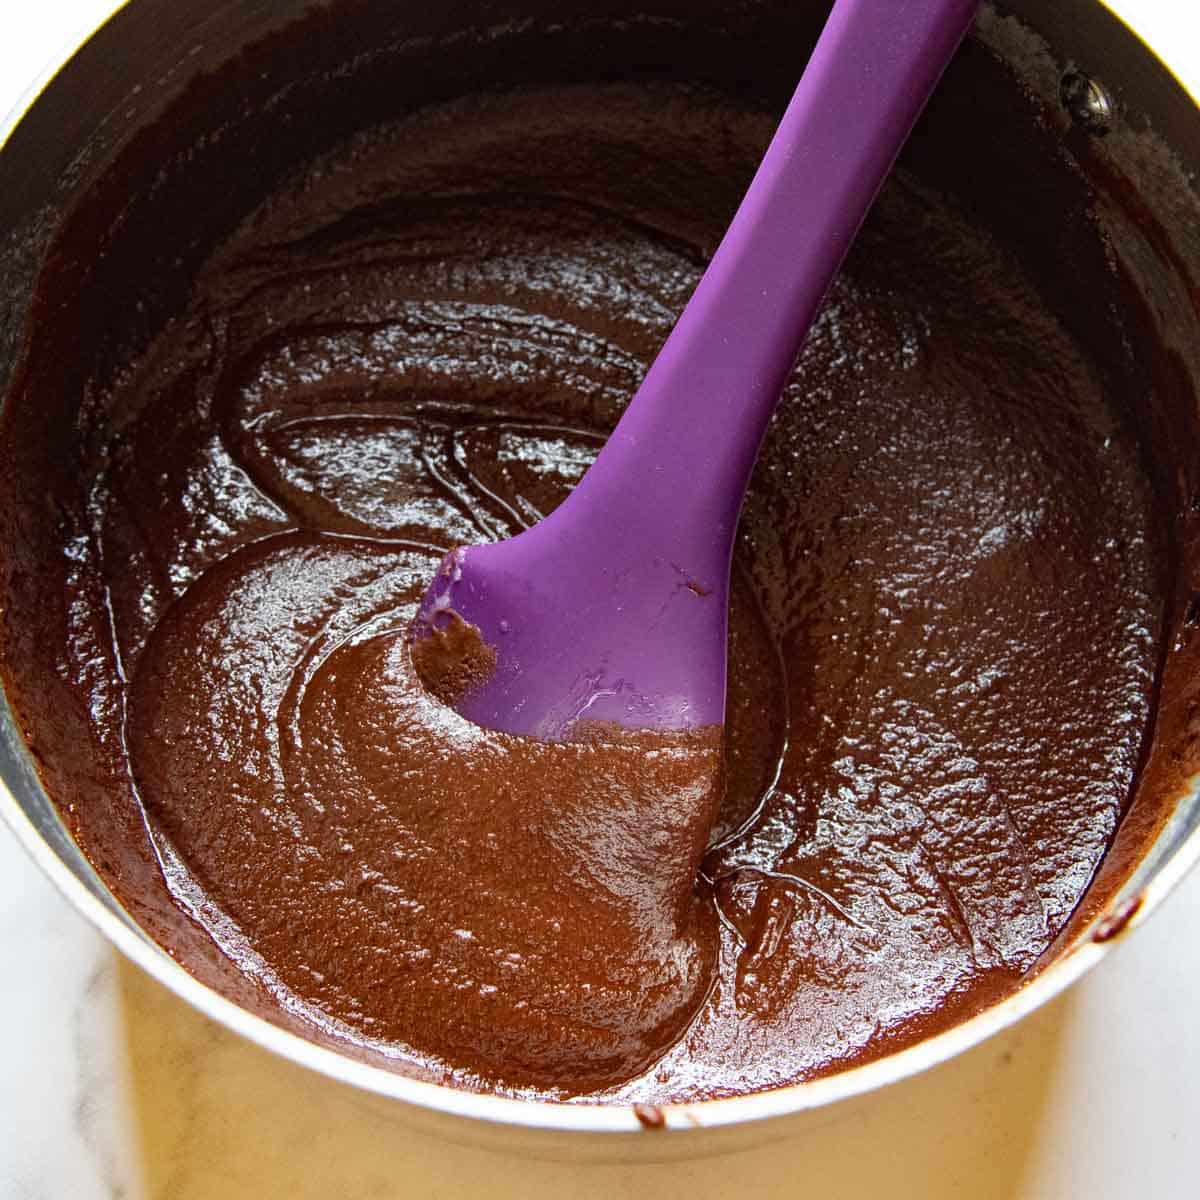
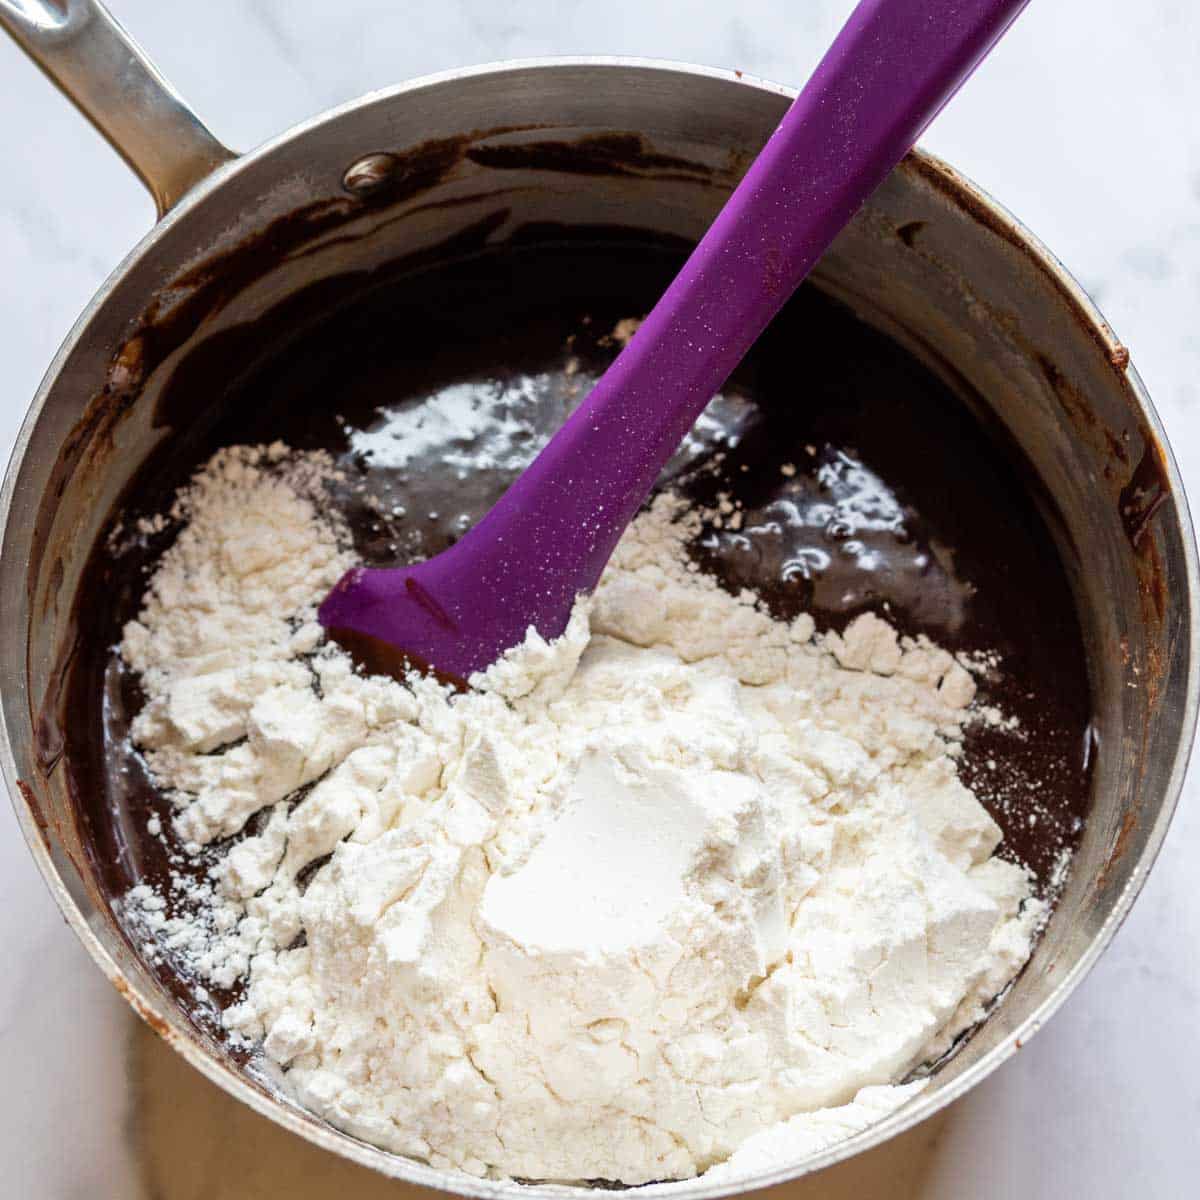
Cool that mixture slightly then vigorously whisk in the eggs and vanilla extract (that’s where your glossy, crackly tops come in). Stir in the gluten-free flour, cocoa powder, baking soda, and salt. Then it’s time for bonus ingredients, like more chocolate chips (yes please!) and nuts (yes for me, no for fam 😔).
Pour that goodness in a greased 9X13 metal pan. Bake for 35-40 minutes, or until a toothpick inserted in the middle has a few moist crumbs. Try to wait to dive in…or not.
But Are They Done??
I know. It’s always a struggle. You want a moist center, but not liquidy and underbaked. If you error on overbaking them, you risk losing moisture and a tough, dry texture.
It’s best to start checking brownies a few minutes before the recipe’s cooking time. Oven temperatures can vary and exact timing makes a difference while baking.
The edges will look and feel set before the middle cooks through. Therefore, stick a toothpick or wooden skewer in the middle to check the batter. If it comes out with wet, uncooked batter, stick them in for a few more minutes and check again. They are done when fudgy, cooked crumbs stick to the toothpick.
Bonus Brownie Tips
- For easier cutting, line the baking pan with a piece of oversized parchment paper, creased to fit along edges. Once the brownies have cooled completely, lift the parchment from the pan and transfer to a cutting board.
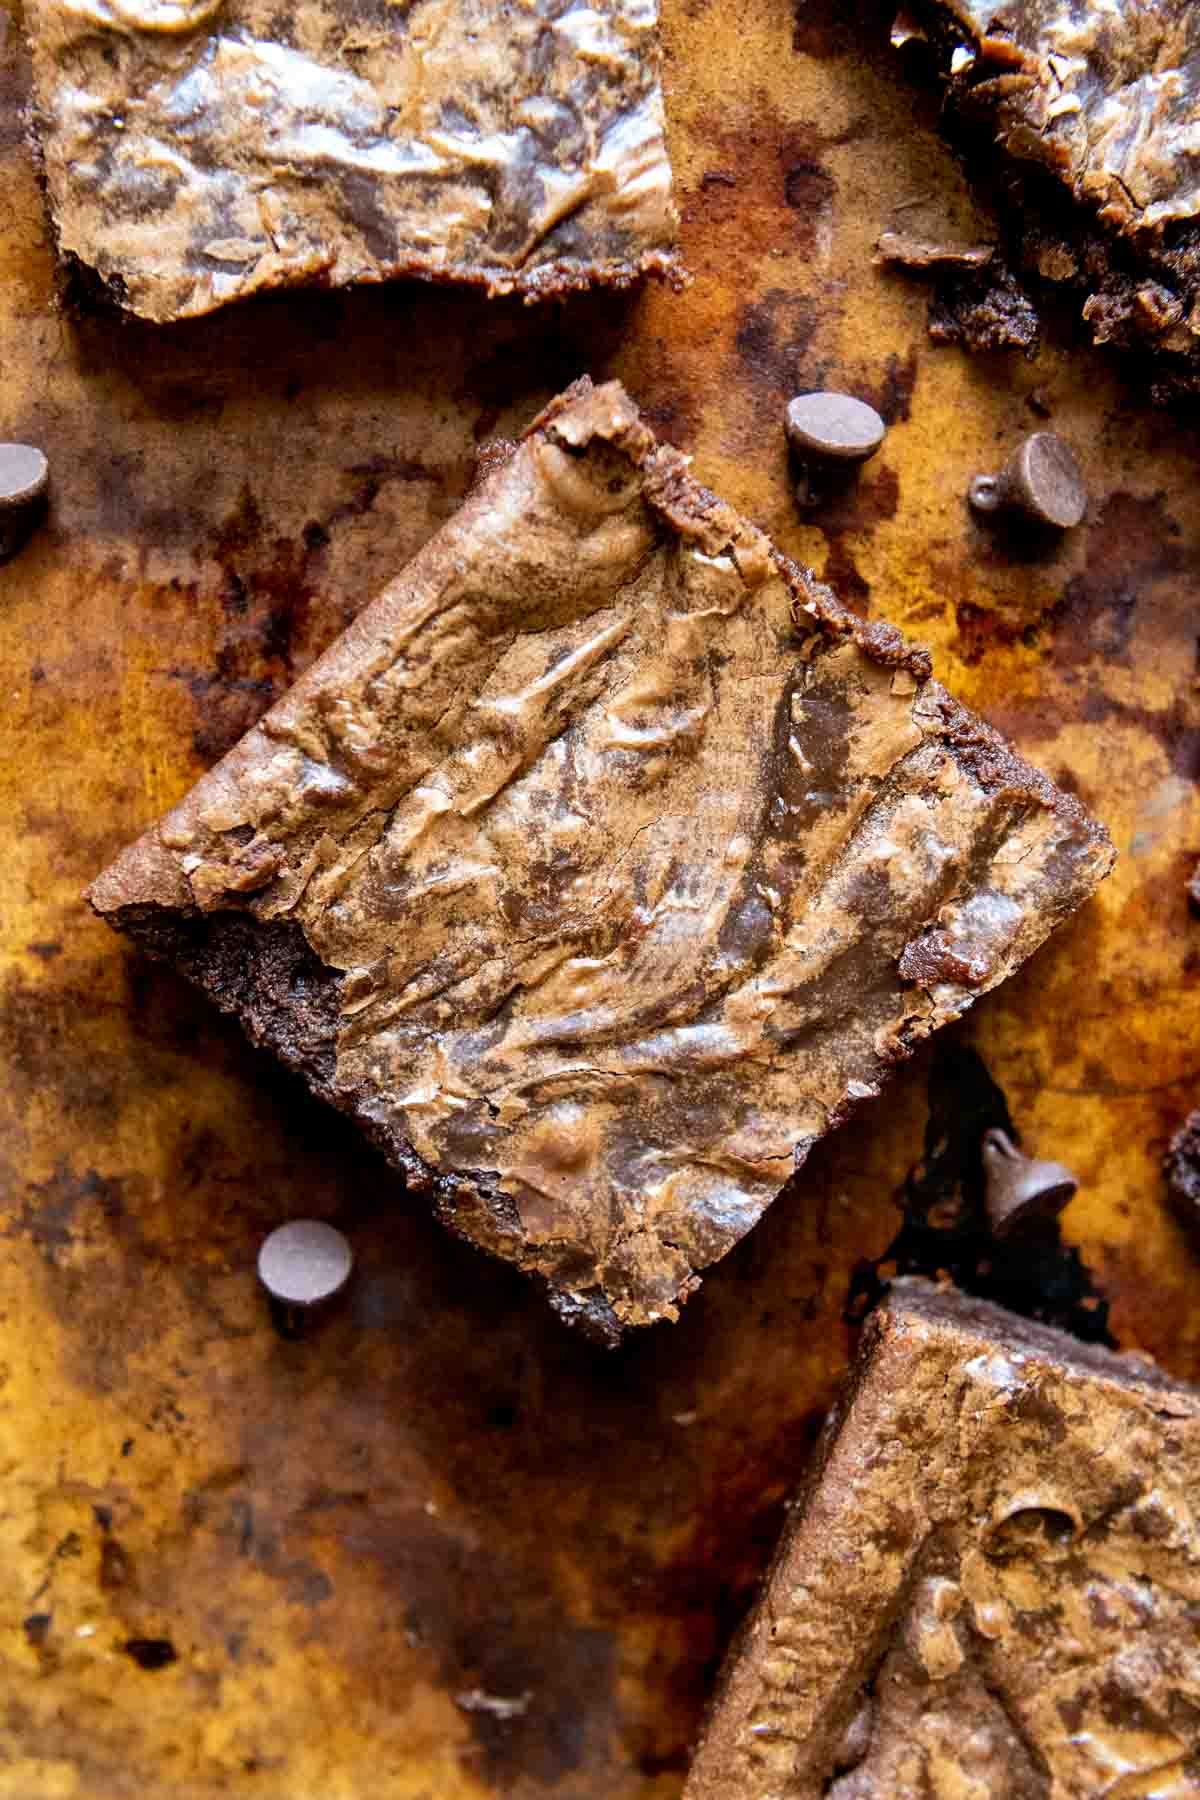
- Using a metal pan produces chewier edges because it conducts and concentrates heat around the crust.
- Achieving a thin crackly crust on brownies has to do with the sugar. Whisking the sugar with melted butter incorporates the ingredients, but not as much as when you cream butter and sugar together. Therefore, the sugar partially separates, floating to the top, and creating that shiny, crackly crust!
- Using room temperature eggs prevents them from cooking when they are mixed in the warm butter sugar mixture. If you forget to set them out before, leave them in their shells, place in a bowl and cover with hot water for 5-10 minutes.
- Baking at a lower 325ºF oven temperature extends the baking time, allowing more time for the GF starches to absorb the moisture-rich ingredients. This eliminates any gritty, ricey texture.
- Although it may be tempting, don’t cut and serve the brownies after they have been pulled from the oven. The chocolate needs time to cool and set to make for easier slicing and serving.
Save this recipe to your pinterest board!
Let’s be friends on Pinterest! I’m always sharing great recipes!
Did you make this recipe? I love hearing from you! Leave a star rating and comment below the recipe card. It helps others when searching for recipes and I appreciate feedback from our community. You will always hear back from me! -Melissa

Secret To Best Gluten-Free Brownies (Crackly Tops)
Ingredients
- 1 ½ cups (300 g) granulated sugar
- ⅔ cups (152 g) unsalted butter, cubed
- ¼ cup (55 g) water
- 3 cups (510 g) semisweet chocolate chips, divided
- 4 eggs, room temperature
- 2 teaspoons vanilla extract
- 1 ½ cups (231 g) gluten-free all-purpose flour, (I recommend Cup4Cup gluten free flour)
- ¼ cup unsweetened cocoa powder
- ½ teaspoon baking soda
- ½ teaspoon salt
Instructions
- Grease a 9X13" baking pan with nonstick cooking spray and preheat the oven to 325ºF. TIP: Baking brownies in metal pan makes them fudgier with chewy edges.
- In a large saucepan combine the sugar, cubed butter, and water over medium heat. Bring to just a boil, stirring constantly. Immediately remove from heat and stir in 2 cups chocolate chips until melted. Cool slightly, about 10 minutes.1 ½ cups granulated sugar, ⅔ cups unsalted butter, ¼ cup water, 2 cups semisweet chocolate chips
- Whisk in eggs and vanilla vigorously into chocolate mixture.4 eggs, 2 teaspoons vanilla extract
- Stir in the gluten-free flour, unsweetened baking cocoa, baking soda, and salt to the saucepan. Mix in the extra cup of chocolate chips (leave out this extra cup if you are using brownies as a base for Buckeye Turtle Brownies.)1 ½ cups gluten-free all-purpose flour, ¼ cup unsweetened cocoa powder, ½ teaspoon baking soda, ½ teaspoon salt, 1 cups semisweet chocolate chips
- Pour into prepared pan and bake for 35-40 minutes, or until toothpick inserted in center comes out with a few fudgy crumbs. Cool in pan on wire rack.
Notes
Storing and Freezing
Keep any leftovers in the pan and wrap securely with aluminum foil. Store at room temperature for up to 2 days. GF baked goods have a tendency to lose moisture quickly, so I recommend enjoying within 1-2 days. For longer storage, freeze the brownies. After cooling and cutting, wrap each individually in plastic wrap and store in a ziplock freezer bag. Alternatively freeze the whole pan before cutting. Make sure the cooked brownies are cooled completely and then wrap the pan in plastic wrap. It’s best to wrap it all the way around, like a present, to get a good airtight seal. Then cover the top with a layer of foil. Pull out the pan to thaw on the counter a few hours before servingHalving Recipe
To make a 8X8-inch pan of brownies, halve all the ingredients. The brownies will be slightly thicker, so the baking time remains the same. Start checking at 30 minutes, but can take up to 35 minutes.Dairy-Free Adaptation
Replace the butter with plant-based vegan butter sticks and reduce the salt by half. Use dairy-free chocolate chips, such as Enjoy Life. Be sure to read the label on your GF flour blend because some mixes contain milk powder. Recipe adapted from Taste of HomeThis post contains affiliate links. My opinions are always my own. If you purchase a product through an affiliate link, I make a small commission – at no cost to you. Read full disclosure policy here.


I can’t get cup for cup flour in Canada so I was wondering if Bob’s red mill would work the same. I have made your chocolate cake recipe with the boiling water and it was the best cake that I’ve made since becoming coeliac 15 years ago!! best recipe ever!!!
Yes, the Bob’s Red Mill would work fine with these. Other Canadian readers also recommend Robin Hood GF flour.
Best,
Melissa
I make these so I always have some in the freezer! They freeze great and even are good frozen. Very fudgy. The best. I had a fudgy recipe prior to dx of celiac and almost cried not having a great fudgy brownie that is made in a 9×13 not an 8×8!!
Freezing so you always have some is such a cheat code. Thank you for sharing this, Ronda!
Best,
Melissa
I made these for the first time this week-end. Gluten Free or not, this is the best brownie I have ever made! Honestly, it’s very little more trouble than a mix imo. My only suggestion is to add nuts.
Thanks, Donna! I appreciate you taking the time to leave me this note.
Best,
Melissa
These brownies I’ve just made following your recipe are fantastic – the best gf version I’ve ever made
This makes me so happy to hear, Catherine. Thank you so much for taking a moment to brighten my day!
Best,
Melissa
Hi Melissa I’m trying these to surprise my daughter in law! What brand of butter do you like using and should I use Enjoy Choc chips that are gluten free? Or what choc chips do you suggest? Thanks Terrye
Hi Terrye,
This is so sweet. She will be so grateful. What a sweet gesture. I just use Aldi butter, you won’t have to worry about that. Whatever you have on hand is great. A lot of chocolate chips at your grocery store are gluten free. I would suggest Nestle. Enjoy Choc Chips are dairy-free chips. Is she dairy free as well? Then that would change some suggestions.
Best,
Melissa
Is there any way to use a muffin pan for these?
Hi Tammie,
Ooh, great question. That sounds so good! You could use a mini muffin pan for sure. For a regular muffin pan, are you talking filling them up all the way or halfway? I would suggest about halfway, otherwise they would take too long to bake through. I haven’t experimented with the baking time, but I would guess a few minutes longer (for regular size pan). Make sure the muffin cups are well greased rather then using liners.
Best,
Melissa
These GF brownies are amazing!! You cannot tell any difference, and delicious and not out of a box! Thanks for the recipe!
Thanks Reesa! So much better than the box mix, don’t you think??
Best,
Melissa
This is my go-to brownie recipe! They are amazing and no one even realizes they are GF!
So glad to hear, Jennifer!
Best,
Melissa
I have made these several times over the last year plus and they always turn out amazing! This recipe is famous in my circle and people request them all the time! Thanks for sharing!
Hi Sarah,
I appreciate you taking the time to write and let me know! This makes so happy. I love having a good go-to brownie recipe. 🙂
Best,
Melissa
Hi am wondering if you could substitute cocoa powder for the chocolate chips 😋 has anyone tried that
Hello,
I haven’t tried it, but if you wanted to give it a go, use 1/2 cup cocoa powder. Let me know how it works out!
Best,
Melissa
Hi! I’ve made these gluten free and they are amazing, my friends ask for them at every pot luck. If I wanted to use normal flour, would I have to change anything in the recipe or the quantity of flour? Thanks!
Hi Rox,
I’m so glad you enjoyed the recipe (and your friends 🙂 )! No, you don’t have to change anything to use regular flour, but they probably won’t take as long to bake. Start checking about 5 minutes before baking time ends.
Best,
Melissa
They turned out horrible!!! Made them to the tee!!! They rose extremely high in the oven then deflated like a balloon!!! What did I do wrong??
Hi Diane,
I am terribly sorry to hear this! I’m not exactly sure what went wrong, however if they rose that high maybe too much baking soda was used? Did you use regular or gluten free flour?
Best,
Melissa
This is the best homemade brownie recipe ever. Thanks!
I agree! I’ve made these hundreds of times and they never fail me! So glad you enjoyed them as well!
Best,
Melissa
Yummy yummy yummy is all I have to say!! These are the best brownies! And so easy.
Thank you, thank you, thank you. I’ve made these brownies WAY too many time times, but they never disappoint!
Can you please advise if this recipe can successfully be cut in half? Thank you
Hi Nancy,
You can of half the recipe for 8×8 pan. On the recipe notes there are baking instructions. Enjoy!
I made this recipe and was completely blown away by how awesome they were! I will never use a brownie mix again. I’m wondering if it’s possible to use unsalted butter instead of regular butter though…. would that change the taste/texture at all?
Thank you!
Hi Heather, Thanks for taking the time to let me know how much you loved them. I just made them the other day too. I do love this recipe! Not specifying unsalted butter was an oversight by me. I went ahead and amended the recipe. Generally, with baking, if you use salted butter leave out the salt in the recipe. So you can adapt it either way
I just made these as the base for the Buckeye Turtle Brownie recipe and they did not turn out. I was a cup short on chocolate chips, so I used 2 Tbs. cocoa powder instead. They are way too dry (seems like 4 cups flour is too much), they rose very high in the glass pan (at least twice the batter height), and just didn’t have a very rich flavor. Probably my substitions and the fact I live at 6,000 ft. I also may not have beat the eggs well enough or dissolved the sugar all the way as you mentioned (wish I’d read the comments before making). I’m bummed, because I was so excited to make the Buckeye recipe, which still turned out okay despite the brownie failure. I will definitely make again, just using the Giradelli triple chocolate brownie mix that I love to ensure they turn out great.
Ok, I just reread the recipe and see that it calls for 1.5 cups flour. I feel so silly! I confused the Cup 4 Cup brand you recommended for 4 cups if flour! So sorry. I’ll have to try again sometime to get it right.
Hi Julie,
Thanks for following up. Don’t feel silly at all! I’ve had other readers confused about the Cup 4 Cup brand name. I’ve always thought it’s a silly name because people are going to use it for baking and it’s confusing when writing a recipe. I changed some wording in the recipe so hopefully other readers don’t accidentally use 4 cups of flour. 👍
Melissa, I used a glass pan. I will try metal for my third time. hahahah. I’m not giving up!! You seem to know your brownies like I do, so I know I will get this right!! keep your fingers crossed! hahahaha
Hi there. I am a brownie fanatic and when I stumbled upon your recipe, I knew I had to try it. I made these last night. Although they did indeed come out decadent and dense, I didn’t get that crunchy crackly crust that you did. My crust was the paper thin shiny crust. How long did you beat your eggs? I cant wait to make these again, but I want the crust as shown in your picture. thank you!!!
Hello,
I’m glad you enjoyed them! I agree the crust of the brownies is pretty essential for having a great brownie. First of all, I would make sure the sugar has been dissolved with the butter. Then, a crackly crust is made by beating the eggs really well, till frothy. You can beat it again when you add the cooled chocolate. Hopefully that helps! Best, Melissa
thank you Melissa. do you know that I have tried over 47 brownie recipes trying to recreate my favorite recipe that I lost years ago? Ok well, I shall try your recipe again. thank you for responding!!
ok, well, I just made another batch. they looked so beautiful when I took them out of the oven. They had that nice crust just like yours. Now, 15 minutes later, the crunchy crust has turned into a thin flaky crust. Ughhhh. I’m wondering since its so humid right now, if that has anything to do with it.
I am so bummed my recipe is not turning out to be the 48th winning brownie for you. I mean, it was named for people like you (and me)! I hear you, though. I never made the same brownie recipe twice because I was never 100% satisfied. Now this one is my absolute go to, but they have always turned out for me and I love the texture and taste 🙁
I’m stumped why the crust turned. Like you said, it is quite possible if they were sitting out in lots of humidity. Did you use a metal baking pan? I feel like that gives a better result than glass. You have no idea how much I wanted this recipe to hit it out of the park for you. Don’t give up!
Best,
Melissa
ok, well, I just made another batch. they looked so beautiful when I took them out of the oven. They had that nice crust just like yours. Now, 15 minutes later, the crunchy crust has turned into a thin flaky crust. Ughhhh. I’m wondering since its so humid right now, if that has anything to do with it.