


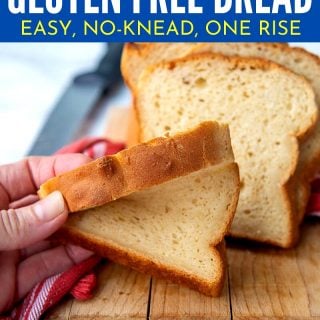
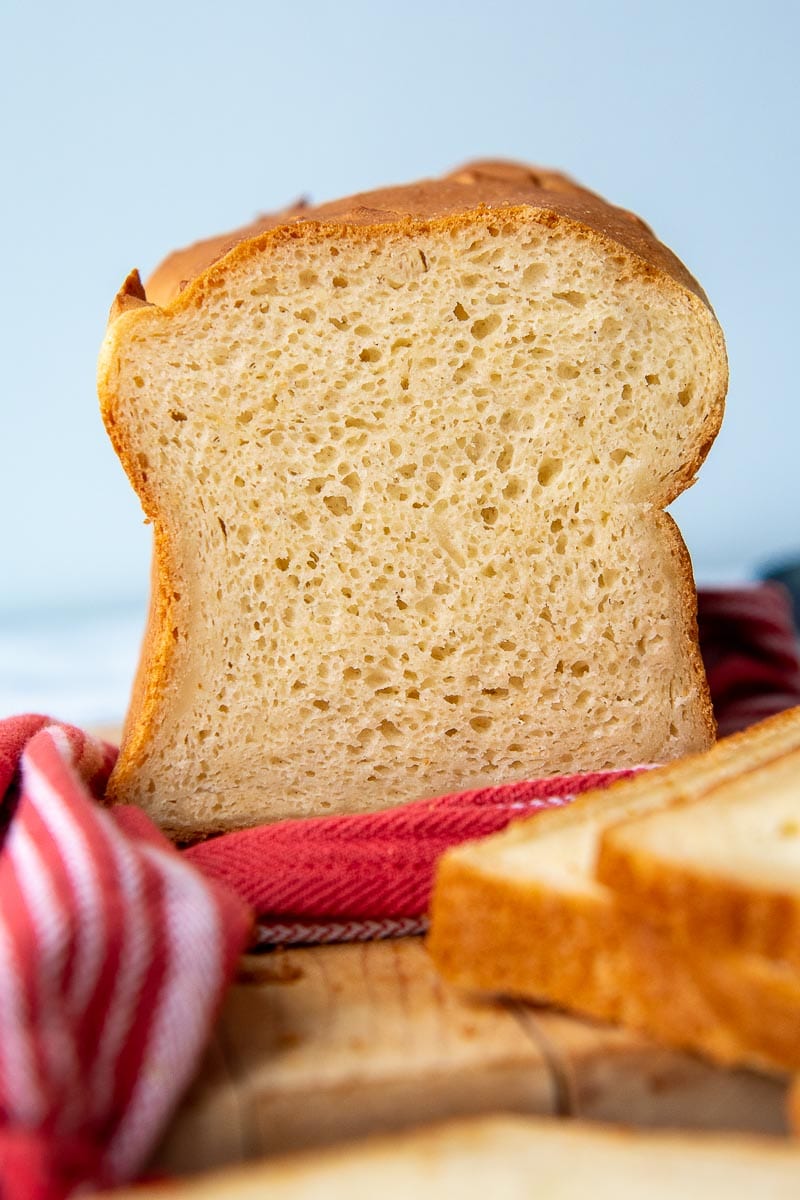
Learn how to make the best squishy soft gluten free bread easily from scratch! My homemade sandwich bread is made using *for real* simple ingredients, requires just a dump and mix, one rise, and, honestly, will be the end-all for GF bread searches. If my word isn’t good enough, read the hundreds of 5-star reviews below, or better yet, make this easy loaf today and let me know what you think!
Want to Save This Recipe?
Enter your email below & we'll send it straight to your inbox. Plus you’ll get affordable and easy gluten-free recipes delivered each week!
Hands-Down Best Gluten-Free Bread (SERIOUSLY!)
It has taken me years to fully stand behind a gluten-free bread recipe. Every homemade recipe I tried was difficult, time consuming, and yielded the most disappointing results. For the longest time, buying expensive, subpar store-bought gf bread sufficed because at least I was saving time.
So many readers, though, have asked for a great-tasting gluten-free bread. Just like when testing squishy-soft gluten-free dinner rolls or a tender, fluffy gluten-free biscuit, there have been a lot of trials, but I finally landed on a recipe that exceeds my essential criteria.
- Easy to make! It mixes together in one bowl, has one short rise, and bake.
- Simple ingredients I have stocked and ready at all times
- Quick and effortless – No one wants to spend all day making a loaf of bread.
- Most important – Tastes BETTER than any gluten free bread out there. Seriously. Read the comments below!
I wouldn’t stand behind this recipe if I didn’t feel it 100% met all these crucial elements. I know what it feels like to waste precious time and expensive ingredients, and I wasn’t about to add another recipe to that vortex!
I truly hope this recipe makes all your gluten free dreams come true, just as much as it has for me! Take a look to see how this magical bread recipe has transformed our community members’ lives, and I hope you will be so convince to start working through the rest of our highly-reviewed gluten-free bread collection!
Delicious, easy bread! I have been gluten free for over 15 years and have tried countless bread recipes. This by far is the easiest AND best tasting 👍🏼
—FancyMom
I never comment on things like this, but oh my god….I’ve tried so many gluten free recipes and none fitted me properly. But this one? AMAZING!
—Ana
Free Guide! 5 easy tips for baking like a gluten-free pro!
Simple hacks for fail-proof gluten-free dishes every time!
Ingredients Tid Bits
Since sandwich bread is an everyday staple, the ingredients should be simple, affordable, and ready to go whenever. This recipe also works perfectly for toast, grilled cheeses, or I like to use leftover slices to make homemade gluten-free bread crumbs (freeze a batch to have on hand for recipes).
- Gluten-free flour – Using a good gluten free flour (I highly recommend Cup4Cup GF flour) makes or breaks the quality of the bread. I tested the recipe with different flours to make sure it consistently turns out, but some performed handedly better than others. See below for alternative GF flour recommendations.
- Psyllium Husk Powder – I’ve made the bread multiples with and without the psyllium husk powder. It doesn’t affect the taste, but it does help maintain moisture and prevents the bread from becoming crumbly. Want to know more? Learn why psyllium helps gluten-free baking.
- Honey – Granulated sugar may be substituted, but I like the moisture the honey adds. Some readers have asked about reducing the amount of sugar, and that is fine.
- Oil – Use any preferred oil. I usually use canola, but whatever floats your boat! Or substitute the same amount of melted butter, but not for gluten-free dairy-free bread.
- (Optional) Milk Powder – This is a new addition to the recipe, so it’s completely optional, but adds moisture to the bread. Recently Cup4Cup removed milk powder from their formulation, so now when I make the bread I remove 2 tablespoons GF flour and replace it with a gluten-free milk powder. Works fabulously!
Watch The Recipe
Let’s Make This Together!
(Below shows step-by-step photos and modified instructions. For the complete recipe, along with ingredient amounts, scroll down to the recipe card.)
Mix dry and then wet – easy enough?
For best results use a stand mixer with a paddle attachment. Add all the dry ingredients – gluten-free flour, instant yeast, psyllium husk, salt, and baking powder. Once that’s combined together, add the wet ingredients – room temp eggs, oil, honey, and water.

Time to beat the dough
Now you just mix everything together on low speed. Once it’s combined, increase the speed to medium and beat for 5 minutes. This gives time to hydrate and relax the starches so your bread is soft instead of gritty. When you’re done your dough will be slightly runny and almost pourable. You’re on the right track!

Rising, but how much?
Scrape the dough into a greased bread pan. I recommend using a small pullman loaf pan because you won’t risk the bread overflowing as it bakes and it makes a nice, tall sandwich style loaf (no dinky bread slices here!) Spray a large piece of plastic wrap with nonstick spray and lay over the top of the pan. Set the pan in a warm place while the oven preheats to 350ºF, about 30-40 minutes. The bread should rise about two-thirds to the top of the pan.

How to know when it’s done and cooling tips
Remove the plastic wrap and bake the bread for 40-50 minutes, tenting a piece of foil loosely over the bread for the last 20 minutes or until the internal temperature reaches 205ºF.
I highly recommend using an instant read thermometer (the linked one is my fave!) before pulling the bread. GF breads often “look done” before they are cooked through inside, means not enough time for moisture to evaporate and a dense, gummy crumb.
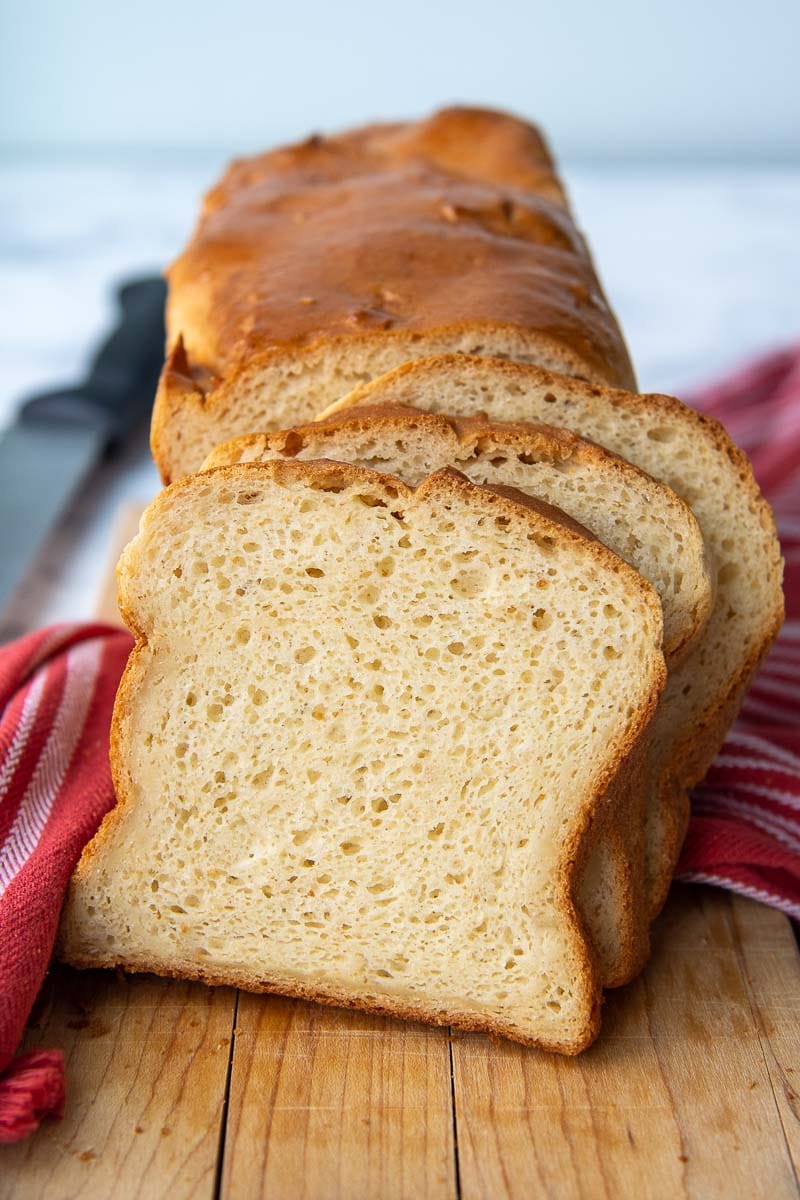
If you use the recommended pullman loaf pan, you may even want to lay the loaf on its side to cool, since the loaf is a lot taller. That way you won’t risk the bread sinking in the middle as it cools. Voila, now you have the most legit, soft and squishy sandwich bread ever!

Most Important Part – Quality Gluten-Free Flour
Once the recipe was perfected, it was tested with different gluten free flours to make sure the results were consistent. This is the process I use with many of my bread recipes, including my signature artisanal GF sourdough loaf.
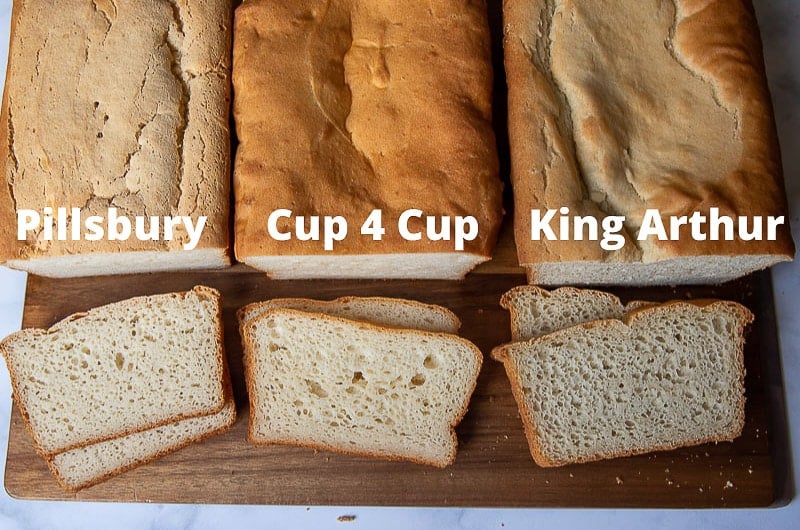
Initially I tested withCup4Cup, which rates as the top gluten free flour, King Arthur Measure-for-Measure, Bob’s Red Mill, and Pillsbury gluten free flour because some readers have been asking about its performance. However, as new blends have been introduced and formulas changed, I have expanded my tests.
From an ease and baking standpoint, they all performed well. Pillsbury had the most solid structure, which turned out to be a not very good thing. Cup4Cup was the softest, with King Arthur in between.
As far as taste, Cup4Cup was the clear winner. There was nothing “gluten free” tasting about the bread. It was soft, squishy, and slightly sweet. Since King Arthur has came out with their bread flour formula, I also found this to work very well.
King Arthur Measure-For-Measure and BRM absorbs liquid at different rates. Since I want this recipe to be accessible to many flour blends, I added some recommended adjustments to the recipe below yielding great results!
Sadly the bread made with GF Pillsbury flour went straight into the trash. It tasted like dry cardboard and was inedible. Pillsbury GF flour might work for other recipes, but definitely did not work well with this one!
If you have a question about using a different flour, other than mentioned here, I encourage you to read the comments below. A lot of readers have written in with which brands they used, and I have added my notes in the recipe card below.
Important Note About Serving
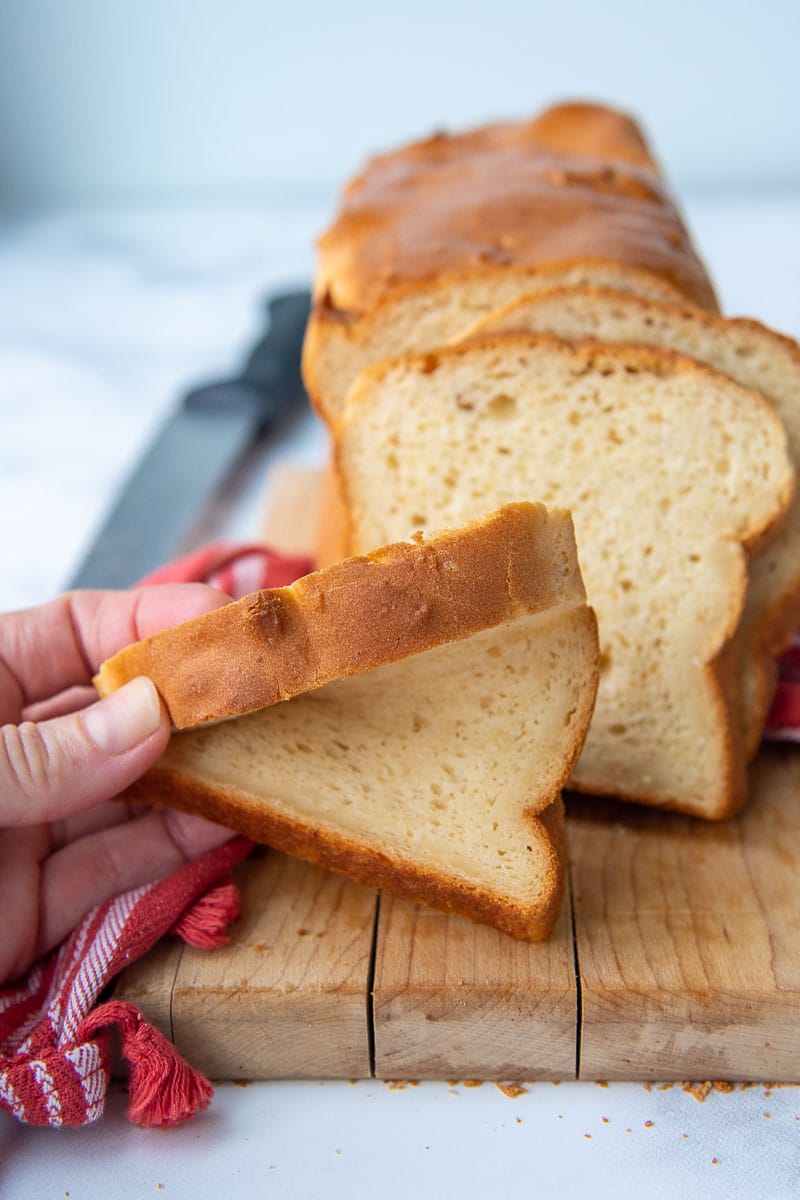
Generally GF bread requires toasting or a buttered griddle to taste good, but not with this GF bread (another reason why it’s the cat’s meow). Room temperature bread is exceptionally soft and fluffy.
However, please note, if pulling from the freezer and serving at room temp, thoroughly defrost the bread first. If it is chilled slightly it will become more crumbly.
Do I Need a Stand Mixer?
Yes and no. It definitely makes the sandwich bread recipe easier to throw together. It may be done with a hand held mixer, but since it uses a large amount of flour, it will be a lot more taxing on the mixer and yourself.
If you don’t want to invest in a stand mixer (although don’t get me started on how obsessed I am with mine!), a gluten-free bread machine would be a cheaper option and just as easy!
Save this recipe to your pinterest board!
Let’s be friends on Pinterest! I’m always sharing great recipes!
Did you make this recipe? I love hearing from you! Leave a star rating and comment below the recipe card. It helps others when searching for recipes and I appreciate feedback from our community. You will always hear back from me! -Melissa
Legit Squishy-Soft Gluten Free Bread Recipe

Ingredients
- 3 cups (438 g) gluten free all purpose flour, Cup4Cup gluten free flour highly recommended – see recipe notes for optional milk powder addition and alternative flour notes
- 1 (9 g) packet (2 ¼ tsp) instant rapid rise yeast
- 1 tablespoon (11 g) psyllium husk powder (optional), helps with bread moisture & structure (what is psyllium husk?)
- 1 teaspoon baking powder
- 1 teaspoon salt
- 1 ½* cups (338 g) warm water (110°F), *see recipe note if using alternative flour
- 2 large eggs, room temperature
- ¼ cup (85 g) honey
- ¼ cup (55 g) oil , any preferred
Instructions
- Using a stand mixer with paddle attachment, mix together gluten free flour, yeast, optional psyllium husk powder, baking powder, and salt on low speed until combined.3 cups gluten free all purpose flour, 1 packet (2 ¼ tsp) instant rapid rise yeast, 1 tablespoon psyllium husk powder (optional), 1 teaspoon baking powder, 1 teaspoon salt
- Add warm water, eggs, honey, and vegetable oil. Mix on low speed to let the dough come together, about 1 minute.1 ½* cups warm water (110°F), 2 large eggs, ¼ cup honey, ¼ cup oil
- Increase speed to medium and beat for 5 minutes, scraping down paddle and bowl halfway through. The batter will be stiff, but sticky.
- Grease a 9X4 baking pan (recommended). Pour into the pan and smooth top evenly with a spatula. Spray a large piece of plastic wrap with nonstick cooking spray. Lay the plastic, greased side down, over the pan.
- Set in a warm, draft-free place to rise until the bread reaches two-thirds to the top of the pan (do not let it go over this point because it rises more in the oven). This should take about 30 minutes. Meanwhile preheat oven to 350°F.
- Remove plastic and bake bread on middle rack for 40-50 minutes, tenting a piece of foil loosely over the bread halfway through. The internal temperature of the bread should read 205°F.
- Allow the loaf to cool for 5 minutes in the pan and then remove to a cooling rack. Allow bread to cool completely, at least 2 hours, before slicing. For best results, serve the bread at room temperature, toasted, or grilled. Chilled, cold bread has an adverse effect on texture.
Notes
Adding Milk Powder
This is a new addition to the recipe, so it’s completely optional, but adds moisture to the bread. Recently Cup4Cup removed milk powder from their formulation, so now I remove 2 tablespoons GF flour and replace it with 2 tablespoons gluten-free certified milk powder. You can do this with any GF flour blend, it doesn’t have to be C4C.Alternative Gluten-Free Flour Adaptations
KA Measure-For-Measure – I find this flour to be more absent of flavor and moisture, so adding an additional ¼ tsp salt, as well as modifying with milk powder (use method explained above) can help. I also recommend cutting the water to 1 ¼ cup + 2 tbsp (305 g) to build out the structure and prevent the bread sinking during cooling. King Arthur Gluten-Free Bread Flour – I recently tried this and loved the results! It has a great taste and nice soft texture. My only recommendation would be to cut back on the psyllium husk powder to 1/2 tbsp since it’s already in the flour’s blend. Bob’s Red Mill Gluten Free 1-To-1 Baking Flour – I worked with this flour quite a lot to try to mimic the texture with C4C. To counteract a “spongy,” wet crumb I recommend omit milk powder, cutting water to 1 ¼ cups (295 g), and adding ¼ cup cornstarch to the dry ingredients.Psyllium Husk Powder
I’ve made the bread multiples with and without the psyllium husk powder. It doesn’t affect the taste, but it does help maintain moisture, prevents the bread from becoming crumbly, and makes it softer. Psyllium husk powder is very affordable to buy, lasts a long time, and greatly improves GF breads texture because it helps absorb moisture. I recommend the psyllium listed in the ingredients because the lighter color doesn’t affect the bread. Some powders are darker, which will make GF baked goods a grayish, purple color.How to Make in a Bread Machine
Although I have not personally tried making this recipe in a bread machine, several readers have written in and said they’ve had great results using one! You will need a bread machine with a gluten-free setting. Add all the wet ingredients to the bottom of the bread baking pan. Then add the dry ingredients over that. Start the bread machine and set it to the “gluten-free” setting.Freezing / Storing
Gluten-free bread does not have the shelf life like normal bread. Refrigerating will dry it out, and is not recommended. It may be wrapped tightly and left at room temperature, but will lose optimal taste and texture quickly. For best results, slice and freeze the bread after it has completely cooled (at least 3 hours). Pull slices as needed from the freezer to defrost or toast from frozen. Generally GF bread requires toasting or a buttered griddle to taste good, but not with this recipe. Room temperature bread is exceptionally soft and fluffy. However, please note, if pulling from the freezer and serving at room temp, thoroughly defrost the bread first. If it is chilled slightly it will become more crumbly.This post contains affiliate links. My opinions are always my own. If you purchase a product through an affiliate link, I make a small commission – at no cost to you. Read full disclosure policy here.


looked amazing when it came out of the oven, and then as it cooled the center fell in. Haven;t tasted it yet
Hi Debbie,
I’m sorry to hear that. I think one or two things could have happened. Perhaps with your gluten-free flour blend, you could cut back on the water by 2 to 4 tablespoons. The other thing is, it might not have had long enough to bake and have the moisture evaporate. You can bake it about 5 minutes longer. Sometimes I turn off the oven, crack the door a bit, and then leave it in there for about 5 to 10 minutes just to make sure the structure is fully set before pulling it out. I hope this helps.
Best,
Melissa
I tried this and it was AMAZING! I used KA measure for measure and the alternative method provided.
I’ve tried numerous breads and this was the best by far!!!
Thanks for taking the time to share and comment, Joi!
Best,
Melissa
Is it possible to adjust this recipe to fill a 13 X 4″ pullman pan? If so, could you suggest how much I should increase the recipe? Thanks so much.
Hi Leslie,
I haven’t tried this, but if I were to I would 1 1/2 times the recipe. You’d just have to make sure your mixer can handle the 4 1/2 cups of flour and work all the ingredients together well.
Best,
Melissa
Thanks so much, Melissa! I’m going to try it since I have that size pan and not the smaller one. I’ll let you know how it turns out! I have a KitchenAid stand mixer, so it should be able to handle the flour. 🙂
Thanks again for getting back to me,
Leslie
I’m so happy with this recipe, it comes out great every time. I’m wondering could I make cinnamon raisin bread from this recipe? What changes would I need to make?
Thanks!
Hi Jane,
Yes, in fact I created this GF cinnamon raisin bread from this recipe!
Best,
Melissa