
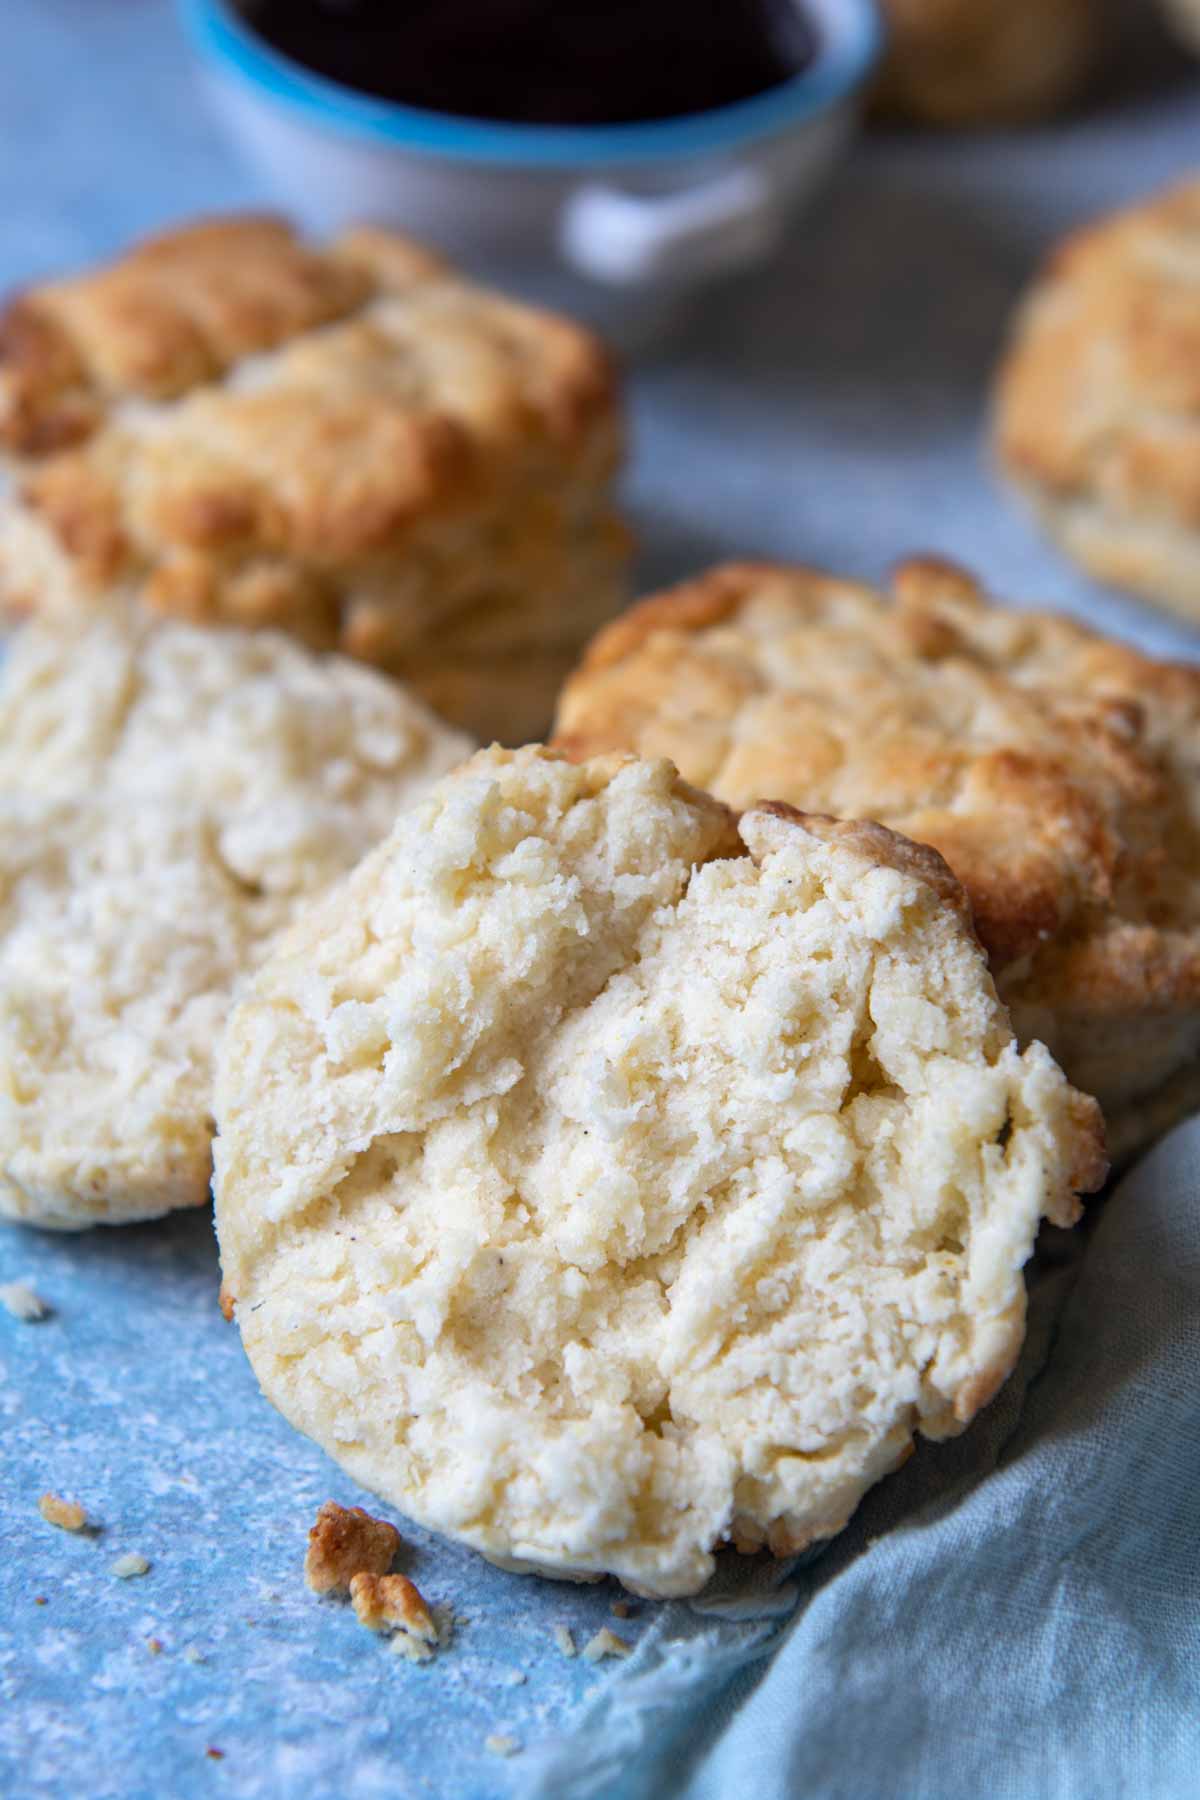
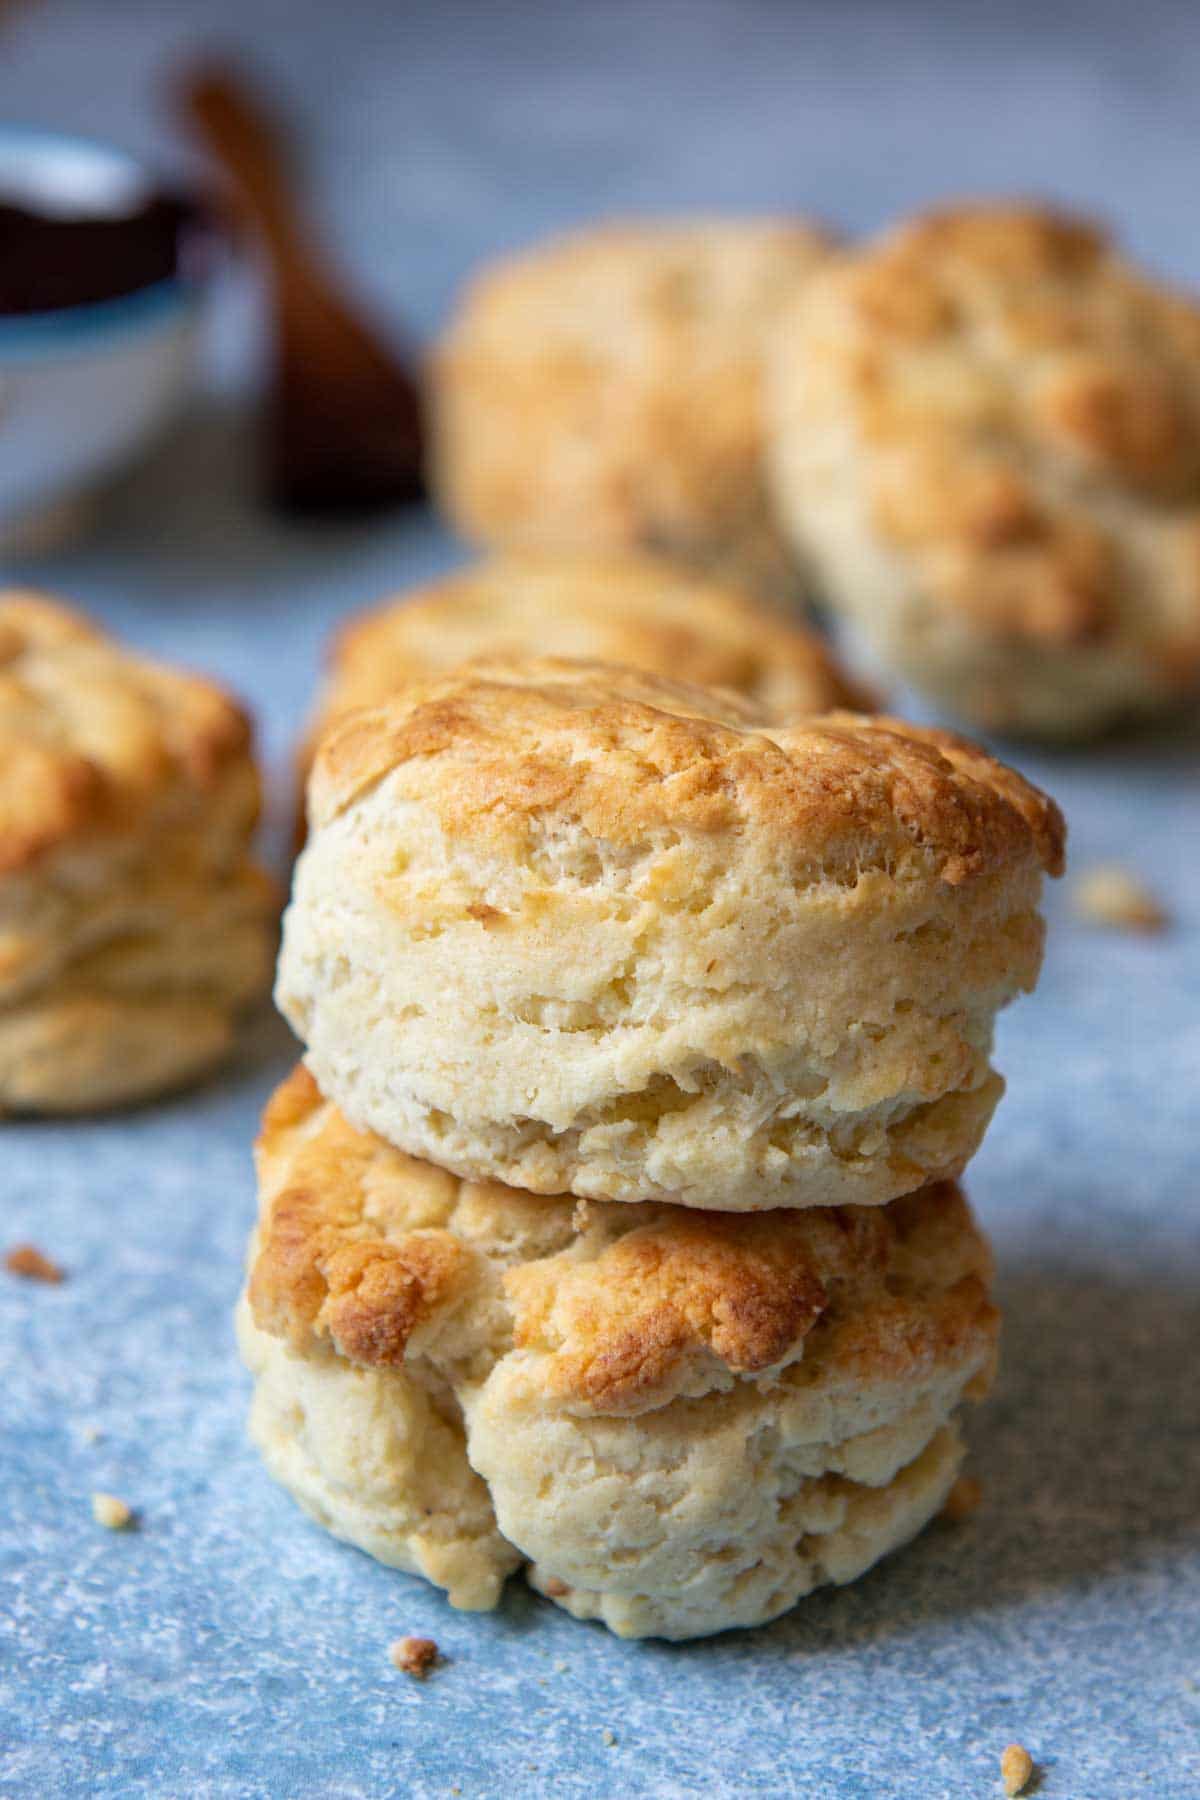
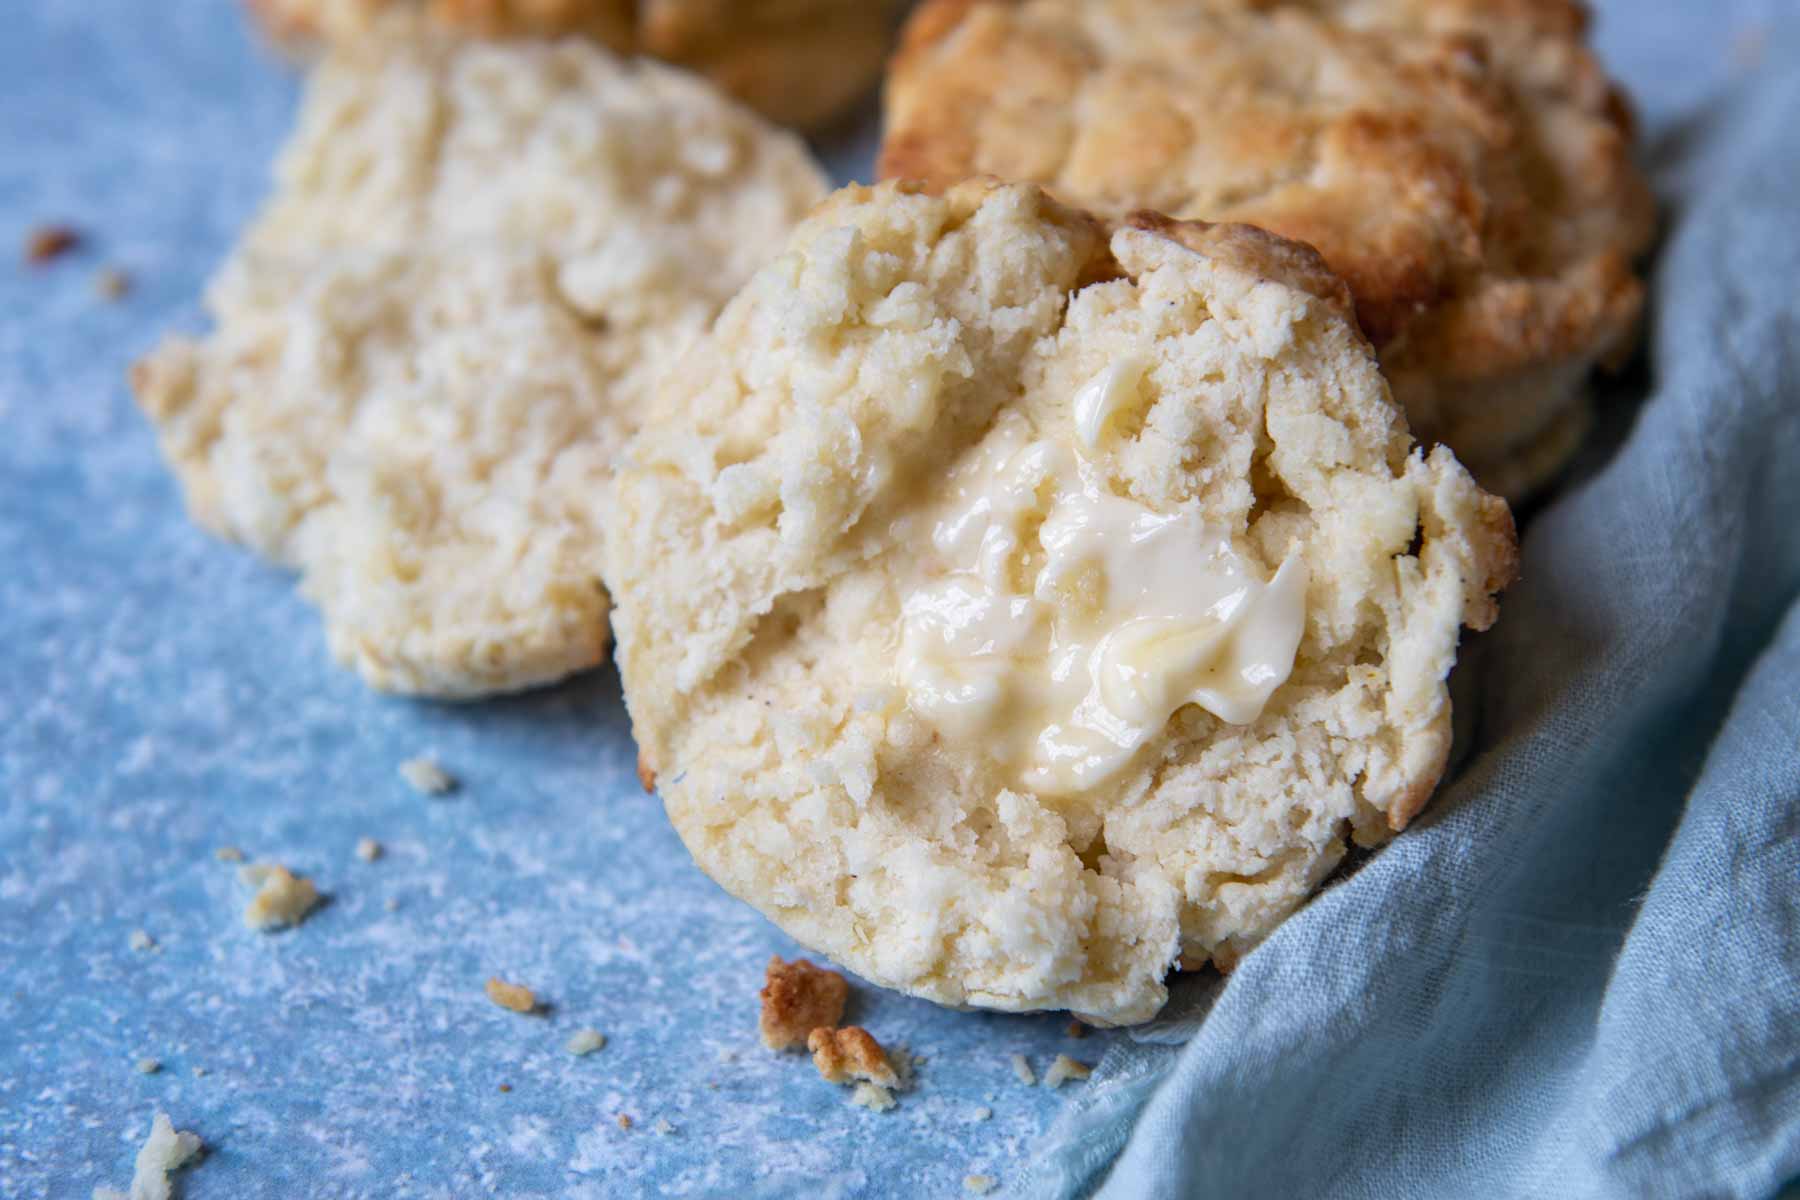
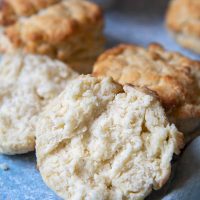
Ready in less than 1-hour, these homemade gluten-free drop biscuits are baked with all-purpose gluten-free flour. Rather than buttermilk, this recipe uses plain yogurt for terrific texture! For best results, once the biscuit dough is ready, cover it in a bowl, and let it sit at room temperature for 30 minutes before baking. The biscuits will emerge from the oven soft, tender and oh so fluffy!
Want to Save This Recipe?
Enter your email below & we'll send it straight to your inbox. Plus you’ll get affordable and easy gluten-free recipes delivered each week!
Soft, Tender Gluten Free Biscuits Recipe
If you have had trouble finding a light, fluffy, and tender gluten-free biscuit recipe, you are in luck! I’ve made this recipe countless times through the years because and always have a batch on hand in my freezer.
What makes these my go-to homemade GF biscuits? First of all, they are quick and easy to make with no rolling or shaping. Drop biscuits mean you stir together the dough, drop them on a baking sheet and bake. Easy peasy!
Plus, they use versatile ingredients right in your kitchen. While an essential ingredient, yogurt, gives their signature fluffy texture, without weighing down the crumb, sour cream may easily be swapped out. The remaining ingredients used to make gluten-free biscuit dough should be right there waiting for you!
Lastly, the southern-style, buttery flavor and texture cannot be beat. Believe me when I say nothing I’ve ever made from this tastes like an inferior version of the gluten-full recipe. Gluten-free sausage gravy for biscuits is a match made in heaven, or serve them with sweet jam, honey, creamy grits, or a side of eggs!
While I adapted this recipe from one of my favorite cookbooks, America’s Test Kitchen: The How Can it Be Gluten Free Cookbook, below I share many more helpful tips, such as ingredient swaps, how to bake for the most tender results, and the ideal GF flour to use.
I have been gluten-free for about 10 years. This is the best recipe I have tried for drop biscuits. Thank you!
—Donna
This is by far the best gluten-free biscuit recipe I have ever tried I made the GF gravy with it and I am in heaven I have truly missed my biscuit and gravy on Sundays . 😁😁
—Renee
Free Guide! Receive a Free Gluten Free Breakfasts Cookbook
TOP 5 Highest Rated Recipes!
Ingredient Tid Bits
- Gluten-Free Flour – When developing my homemade gluten-free bread recipe collection I’ve found using a quality GF flour blend is paramount to a recipe’s success. I tested the top brands with this recipe and blind taste testers found Cup4Cup to be superior because of it’s neutral taste and tender crumb.
- Yogurt – This is where the versatility comes in. I’ve used whole-milk, low-fat, and even vanilla yogurt, all with great results. Don’t have yogurt? Sour cream may also be substituted. Yogurt works better than buttermilk in GF biscuit recipes because moisture has a harder time being absorbed in gluten-free starches. It gives moisture without the dense, gummy texture of baked goods oversaturated with liquid.
- Lemon Juice – If you don’t have fresh lemons on hand, simple swap out apple cider or white vinegar in the same amount. Using some sort of acid replicates the buttermilk biscuit taste.
- Fat – The recipe uses a combination of chilled butter and vegetable oil to help saturate and coat the gluten-free flour starches. Using only one or the other will lead to a overly dry or greasy biscuit.
Watch The Recipe
Let’s Make This Together!
(Below shows step-by-step photos and modified instructions. For the complete recipe, along with ingredient amounts, scroll down to the recipe card.)
Whisk the dry and cut in butter.
In a large bowl whisk together all the dry ingredients. Then it’s time to work in the butter using a pastry blender, a fork, or even your fingers. You’ll want the butter to be mixed in enough so the mixture is sandy, without large clumps of butter.

Add wet ingredients, stir, and rest.
In a separate small bowl whisk oil, egg, yogurt, optional milk, and lemon juice together. Pour those wet ingredients into flour / butter mixture and then just stir it to combine until a nice, soft dough forms.
Now it’s time to chill the dough for 30 minutes. This gives time for the GF starches to soak up the moisture and fat, so they biscuits are soft and tender, instead of dry and gritty. Easy, but crucial step for success!

Seriously easy shaping method.
If you are intimidated by making biscuits from scratch, then you are going to love how easy these are to shape. Grease a 1/3 measuring cup with cooking spray and scoop out dough evenly into the cup. Plop it onto parchment-lined baking sheets and you are done!

Bonus baking tips
These biscuits bake at a high oven temp, so we want to insulate the bottoms from burning before the tops are done. Instead of baking on a single baking sheet, place one inside another so you have a double layer. Bake in a 425°F oven for about 15-17 minutes, rotating halfway through, then enjoy immensely!
Also, with any baking, it’s a good idea to keep one of these inexpensive oven thermometers on your oven rack. Ovens are calibrated differently and vary from the temperature set, adversely affecting baking times and results.
Before baking, check the reading on the thermometer and adjust the set temperature accordingly to reach the temp called for on the recipe. No one likes burned (or undercooked) biscuits!

Tips for Extra Fluffy Gluten-Free Biscuits
Save yourself from dense, dry biscuits or dense and gummy one’s overly saturated with liquid. Below are my top GF baking tips to make the drop biscuits of your dreams!
- Instead of buttermilk, use yogurt. Since gluten-free flour doesn’t absorb liquid as well, buttermilk causes them to spread too much. Yogurt maintains the structure while adding fat. This is a similar trick used with cream cheese in gluten-free pound cake made from scratch.
- Resting the dough. Mix everything together, cover with plastic wrap, and let sit at room temperature for 30 minutes. This allows time for the flour to hydrate and not be gritty.
- Placing the biscuits closer together on the baking sheet. Biscuits become more tender because of the trapped steam bouncing off the biscuits and being absorbed from their “neighbor” on the baking sheet.
More Recipe Modifications
- You may substitute sour cream for the yogurt with great results. I’ve also substituted vanilla yogurt without affecting the taste.
- If you don’t have lemon juice on hand, substitute any variety of vinegar.
- Easily turn these biscuits into gluten free strawberry shortcake by following the linked recipe. Serve with fresh fruit and whipped cream for the ultimate summer dessert!
- Enjoy a favorite again by adapting them into gluten free cheese scones, which taste just like Red Lobster’s Cheddar Bay Biscuits! Garlic and cheese are mixed into the biscuit dough.
Save this recipe to your pinterest board!
Let’s be friends on Pinterest! I’m always sharing great recipes!
Did you make this recipe? I love hearing from you! Leave a star rating and comment below the recipe card. It helps others when searching for recipes and I appreciate feedback from our community. You will always hear back from me! -Melissa
Seriously, THE BEST Fluffy Gluten-Free Biscuits
Ingredients
- 2 cups (307 g) gluten free all purpose flour, I recommend Cup4Cup gluten free flour
- 4 teaspoons baking powder
- 1 teaspoon sugar
- ½ teaspoon salt
- ¼ teaspoon baking soda
- 3 tablespoons (42 g) butter, chilled and cut into small pieces
- ¾ cup (184 g) plain yogurt
- ¼ cup (61 g) milk, optional, see recipe notes
- 1 large egg
- 2 tablespoons (27 g) vegetable oil, or any preferred oil
- 2 teaspoons lemon juice, I've substituted vinegar for this with good results
Instructions
- Whisk the flour, baking powder, sugar, salt, and baking soda in a large bowl. Add the chilled butter pieces to the flour mixture. Use a pastry blender, fork, or fingers to cut butter into the flour until small, pea-size pieces remain.2 cups gluten free all purpose flour, 4 teaspoons baking powder, 1 teaspoon sugar, ½ teaspoon salt, ¼ teaspoon baking soda, 3 tablespoons butter
- In a separate small bowl whisk together the yogurt, optional milk, egg, oil, and lemon juice. Stir the yogurt mixture into the flour mixture until no flour pockets remain and thoroughly combined. Cover the bowl with plastic wrap and let sit for 30 minutes at room temperature. This allows the starches to blend with the liquid, making the dough tender and easier to shape. Meanwhile, preheat the oven to 425ºF.¾ cup plain yogurt, 1 large egg, 2 tablespoons vegetable oil, 2 teaspoons lemon juice, ¼ cup milk
- Place one baking sheet inside a second so you have a double layer, and line the top baking sheet with parchment paper. Grease a ⅓ cup measuring cup and scoop a heaping amount of biscuit dough into it, pressing down slightly. Drop onto the prepared baking sheet, spacing biscuits about 1 inch apart in the center of the sheet (this traps a little extra steam between the biscuits and makes them more tender). Spray measuring cup between each scoop of dough.
- Bake until golden, about 15-17 minutes, rotating pan 1/2 way through. Cool the biscuits on a wire rack and cool for 5-10 minutes before serving.
Notes
Optional Milk
Since Cup4Cup has changed their formula, I’ve found the biscuit dough to be drier. Therefore I recommend adding ¼ cup for biscuits to hold their shape, up to ½ cup if the dough is still dry, or you prefer a softer biscuit with more spread.Baking From Frozen
Here’s a tip from a reader! After freezing baste them lightly with olive oil (or melted butter). Pop them in the microwave to quickly defrost until completely thawed and starting to rise. You can also leave them at room temp for a longer defrost. Bake as directed.Storing, Freezing, and Reheating
Generally gluten-free breads have a tendency to dry out quicker, especially biscuits because they contain less moisture. For that reason, if these aren’t eaten the same day, I freeze any leftovers. Make sure they are cooled completely before freezing so ice crystals don’t form on them. After cooling, wrap each one individually and place in a gallon freezer bag. Freeze up to 3 months. Thaw at room temperature or defrost in the microwave. They are best served warm. To reheat, wrap in a slightly damp paper towel and microwave for 15 seconds, or until warm. If they are left at room temperature, make sure they are in an airtight container and avoid refrigerating. Adapted from America’s Test Kitchen: The How Can it Be Gluten Free CookbookThis post contains affiliate links. My opinions are always my own. If you purchase a product through an affiliate link, I make a small commission – at no cost to you. Read full disclosure policy here.


These biscuits are fantastic! I made them in conjunction with Melissa’s gf sausage gravy recipe and it did not disappoint! I have been gf for over a year now, and have several family members who are also gf. I’m getting ready to make a big batch of these biscuits and bring the stuff for the gravy to have for breakfast while camping. Thanks so much for sharing!
I’m so happy you love the biscuits (and gravy)! Such a good idea to make ahead for camping. Thanks for sharing, Rebecca!
Best,
Melissa
I have a question for this recipe? I made a double batch of this recipe cooked 3 of them while fresh, then placed the rest on a cookie sheet and let them freeze for 2 hours then wrapped them and put them in a freezer bag. Should I let them defrost at room temp and then cook or just stick them in a hot oven? I stuck them in a hot oven they were delicious but did not rise like the ones I had freshly made. Any suggestions for me temp I used was 375 for about 23 minutes they were fluffy inside. I again used cream fraiche for the yogurt and butter infused olive oil instead of butter. They have a really good taste hubbie went back for more.
Hi Glenda,
Sorry I missed this question and the delay! I haven’t baked these from frozen, but if I was I would have done exactly what you did and baked directly from frozen. That is what I do for my GF scones recipes. Is there a reason you used 375 for the temp? The recipe calls for 425. I higher oven temp is typical for biscuits for a short, quick rise.
Best,
Melissa
I absolutely love this recipe! I had to leave the butter out due to high cholesterol (me) and used cream fraiche instead. I doubled the recipe and I used one extra tbsp of milk like you suggested and it was perfect. It was so easy to do with the cream fraiche I could pat them out and cut them out on my mat. Like your recipe said I let it rest for 30 minutes and I could tell they had already expanded. I hope you don’t mind me experimenting with your biscuits, last week when I learned of my cholesterol I just wanted to cry because I love to cook with butter. Your recipes let me incorporate my cream fraiche (which I make homemade, just 2 ingredients) and has been a true godsend for my celiac disease. I can love breads again. Thanks again.
I’m so glad you experimented, did what you needed to do for yourself AND loved the recipe, Kyocera! And I really appreciate you sharing the details!
Best,
Melissa
Absolutely love these!
Thank you!!
Best,
Melissa
Hello,
I’m not only gluten free but I am also dairy free. Do you have any suggestions for yogurt substitutions in this recipe? Is it ok to use oat milk in place of the regular milk? I would love to try out this recipe. I love biscuits!
Hi Karina,
Yes, I’ve had many readers swap out DF substitutes. Oat milk will work, dairy-free butter, and for the yogurt you can use dairy-free yogurt or dairy-free sour cream, whichever is easier for you to get!
Best,
Melissa
Thank you so much for creating these recipes! These biscuits turned out perfect!! I followed the recipe. Best I’ve ever had. I froze the leftovers, then heated them individually in the microwave, split them open, and toasted them. Best biscuits I’ve ever made.
Comments like this make be so happy! Thank you for sharing your experience with me, Anita!
Best,
Melissa
I followed the recipe exactly and my biscuits turned out bitter. The appearance and texture were both A+ but the taste was awful. No amount of jelly or honey could compensate. I will retry this recipe with a few tweaks such as slightly more sugar and salt, and using all butter instead of butter and oil. If that doesn’t work I will try reducing the baking powder, which seems like a lot.
Disappointing outcome but the recipe is not without its merits!
Hi Kitty,
If the biscuits tasted bitter, it sounds like it was an ingredient. Are you sure you used baking powder and not baking soda?
Best,
Melissa
The biscuits are so soft and beautiful. I made the recipe exactly as you stated. I added 1/2 tsp of xantham gum to the King Arthur’s flour. I used white vinegar instead of lemon juice. They are so good! Cooked in an iron skillet. It did take a lot longer to cook them. But they are so so good!!! I love the recipe!!! Thank you!!
I appreciate you taking the time to share your experience, S Stilley! Thank you!
Best,
Melissa
Love this recipe. The biscuits are delicious. I make a double batch ever other week. I also make the sandwich bread too.
This is so great to hear, Glenda! Thank you!
Best,
Melissa
I made these tonight, they were dry and very crumbly. Im not sure what I did wrong? I am DF, so I used DF sour cream & DF butter. I’m wondering if freezing the butter & grating it in would work better?
Hi Danielle,
Gosh, I’m sorry to hear that. It’s so disappointing when expensive ingredients are wasted. It could be the DF ingredients, but a lot of my readers swap out DF ingredients and don’t seem to have a problem with the results. I’m wondering what GF flour was used? Perhaps yours absorbs more moisture, so the amount needed to be cut back.
Best,
Melissa
I used cup 4 cup. Im going to try it again, but this time I’ll sift the flour (vs just whisking it), and ill cut the butter into bigger pieces (I diced them really small) and get a pastry blender thing instead of a fork. I might also try using just a little bit more sour cream / yogurt. We’ll see! I’ve been enjoying your recipes, this was the first one that wasn’t perfect. I have hope!
This recipe is so good! I didn’t have yogurt so I substituted whole milk and added a couple tsp of butter. Also used AC vinegar. Tender fluffy biscuits the family loved.
Sounds great, Terry! So glad you were able to improvise with what you had on hand.
Best,
Melissa
I don’t know if you’re familiar with Bojangles Bo-Berry biscuits, but my husband loves them and he has Celiac. So it was his birthday and I decided to take this biscuit recipe and try to turn it into them. I added 5 tablespoons of sugar, a whole bag of dried blueberries, and about a 1/2 cup of milk because the blueberries made it too dry. Baked according to your directions and put a glaze made from powdered sugar and milk on them. He loved them! The kids did as well. Thank you for your great recipes.
Delicious
I appreciate you take the time to leave this comment, Harleen!
Best
Melissa
I used sour cream (because I was out of yogurt) and Bob’s 1-1 G/F flour. Fantastic biscuits! Thank you!
Thanks for sharing, Jeri! So glad you like them.
Best,
Melissa
Perfect biscuits, even without using an egg (aqua faba replacement). And I used my own gluten free flour mix. I’m thrilled. Thank you for this!
Love to read this, Patricia! Thanks for leaving me this note.
Best,
Melissa
Oh, my, I’ve been looking for a viable, gluten-free biscuit recipe for several years now. Further, it needed to be egg free. I replaced the egg with aqua faba and the biscuits are so perfect!!! Thank you for this!
Thank you, Patricia! I appreciate you taking the time to comment.
Best,
Melissa