
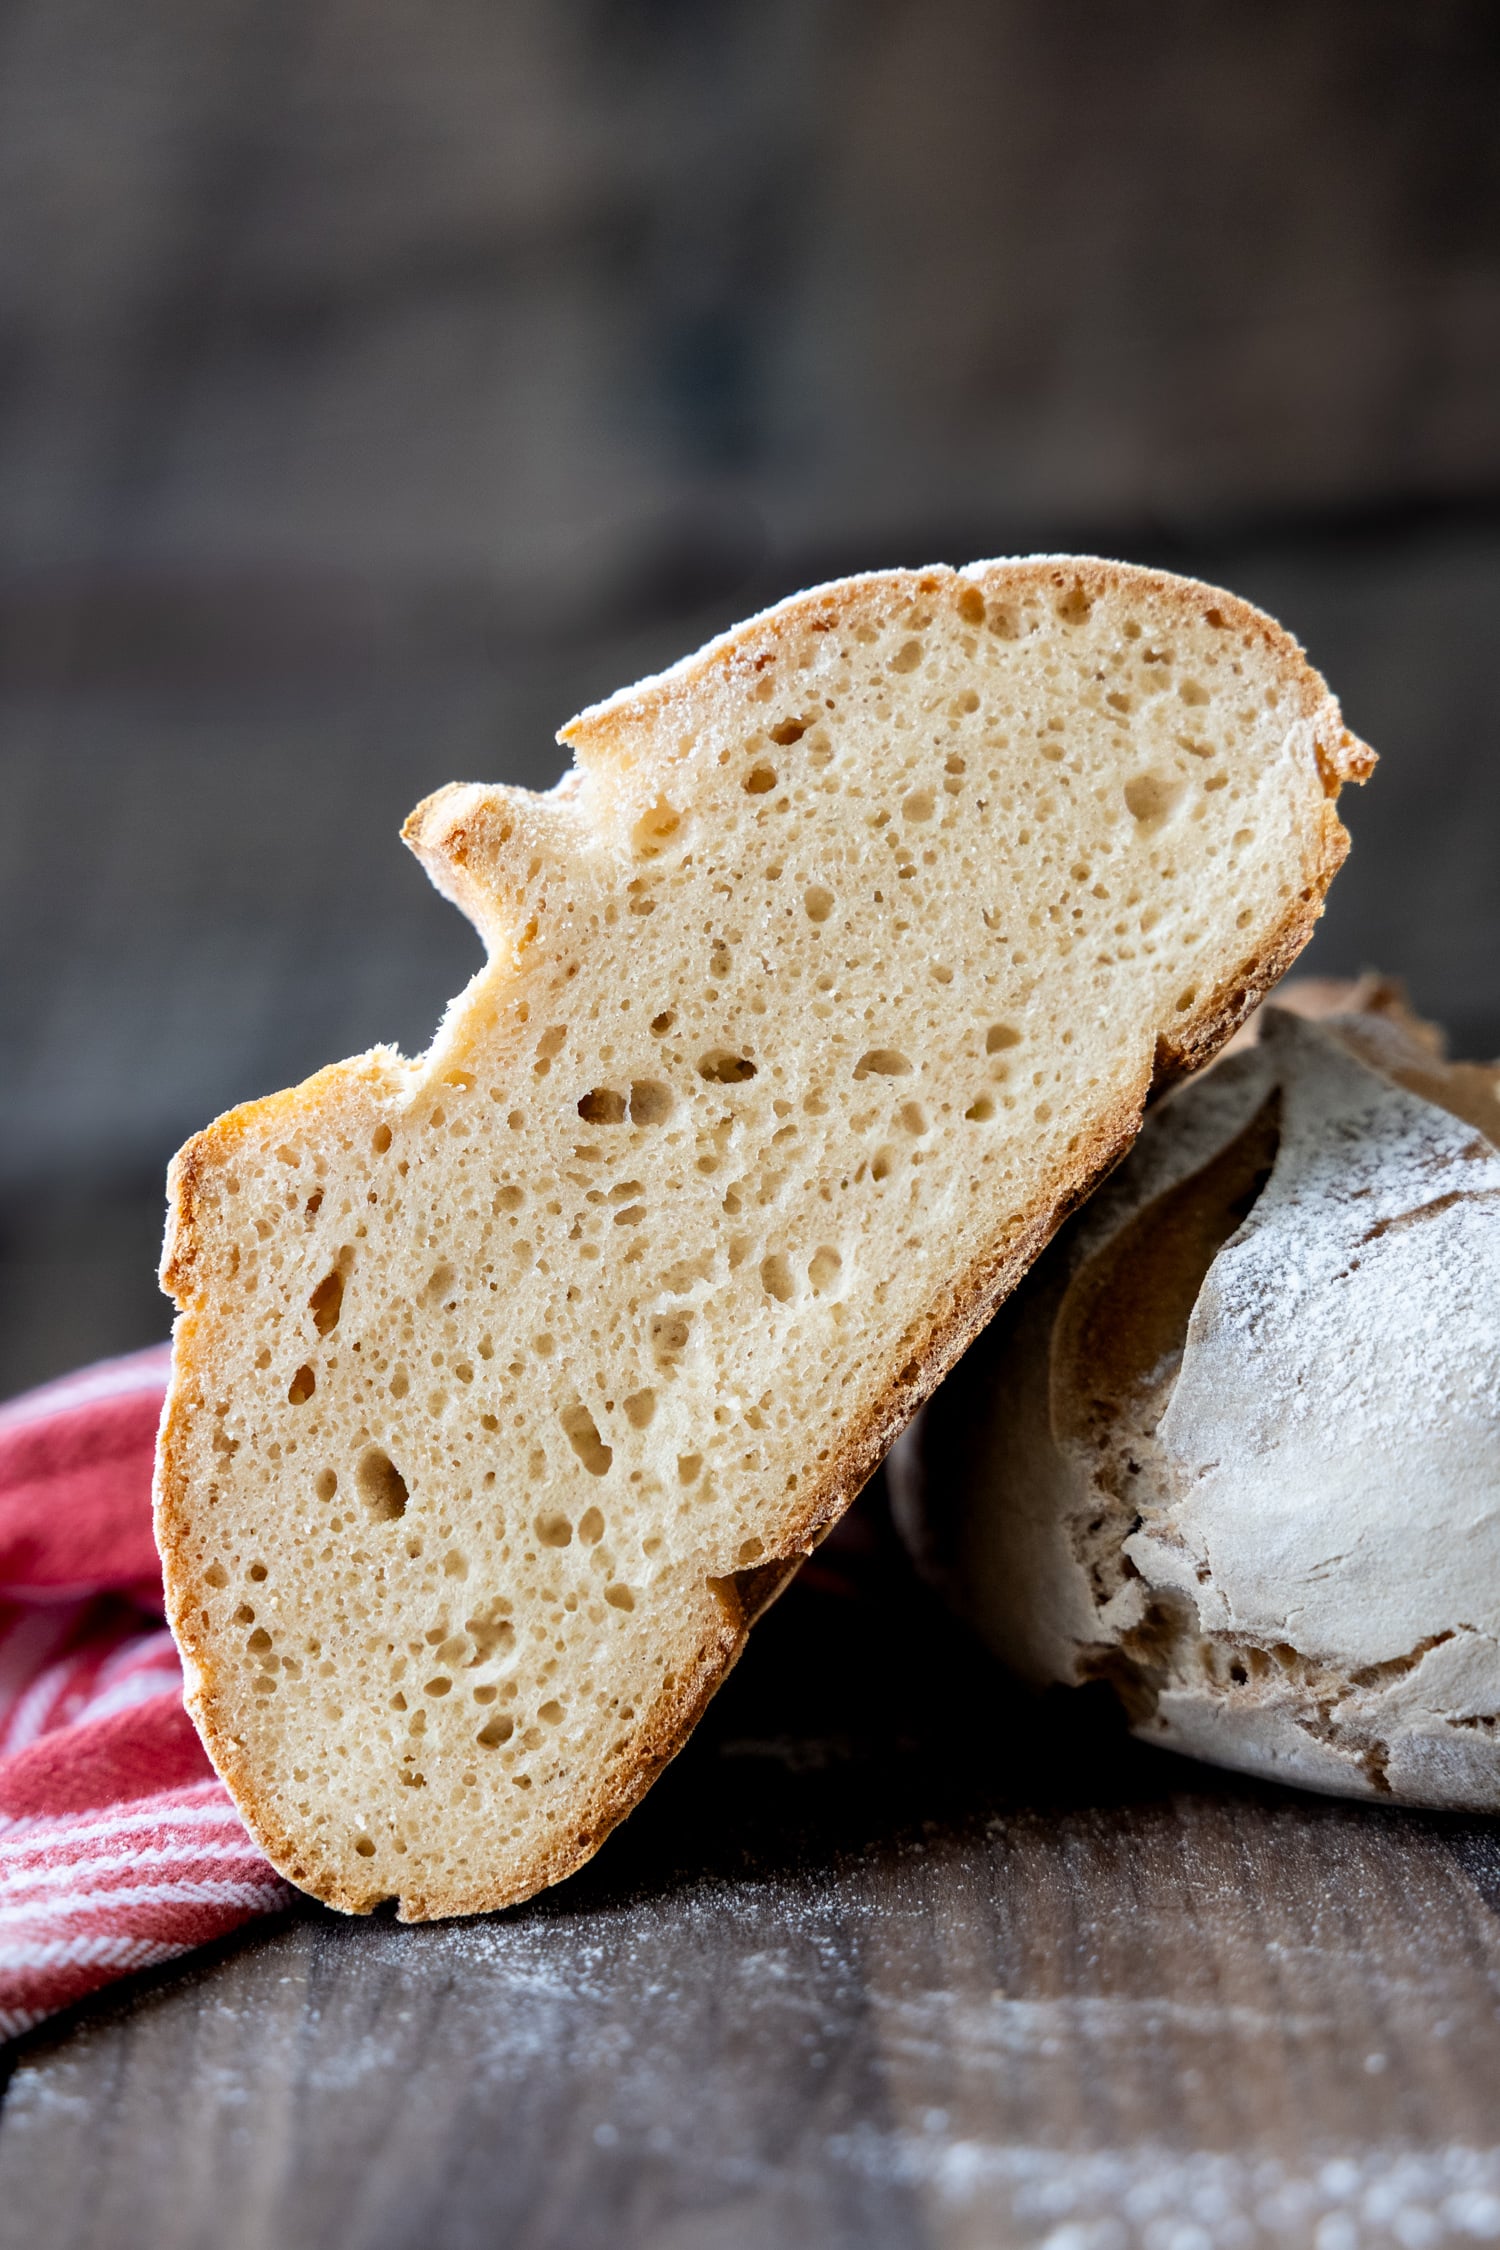
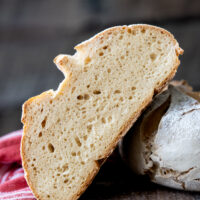
If you have been intimidated to make a fresh homemade gluten-free sourdough bread, I’m telling you there is nothing simpler! My exhaustively-tested recipe requires minimal effort or planning. It starts with a cold sourdough starter, cold oven, and magically bakes into a gloriously squishy loaf with a signature crusty, chewy shell.
Want to Save This Recipe?
Enter your email below & we'll send it straight to your inbox. Plus you’ll get affordable and easy gluten-free recipes delivered each week!
World’s Bestest and Easiest Gluten-Free Sourdough (Seriously!)
If my trash could talk it would say, “Not another failed GF sourdough loaf!” I went through all the bags of GF flour, going back to the mixing bowl time and again until I achieved the perfect taste and texture to compliment my collection fail-proof gluten-free bread recipes.
Along the way I made plenty of boneheaded mistakes (hence, all the tips in the recipe card below👇) so you don’t have to. Despite the frustrations, there were some big wins for those of us who rely on gluten-free bread recipes. For instance, how freakishly easy making an artisan-style gluten-free sourdough actually is.
First of all, the hardest part is just making sure you added all the ingredients to the bowl. If you can read and measure, you are perfectly capable of making a legit bakery-style sourdough boule. Making a sourdough with gluten-free flour does require certain kitchen equipment, but I go over that below – what is needed and what you can skip.
How does this GF sourdough recipe stand out from the rest? First of all, I removed the roadblocks that usually got in my way, like planning ahead to activate a sourdough starter, a fussy long, process, or complicated ingredients. My sourdough is made with all purpose gluten-free flour, you can dump a cold starter in, and you don’t even have to preheat the oven. And all without sacrificing taste or texture!
What’s Necessary and What’s Not
If some of this equipment is a roadblock for you, jump over to my 5-star gluten-free Italian bread recipe, which this recipe was adapted from but doesn’t require anything special. Below I will go over what’s nice to have, what it can be swapped with, and general ingredient tid bits.
- Gluten-free flour – I tested the recipe with a few popular brands and in the recipe card below added any adaptations to make for a stellar loaf. Like my squishy soft gluten-free sandwich loaf, I’m a big fan GF bread recipes being versatile!
- Potato starch – I love the simplicity of using all purpose GF flour blends, but for breads I find swapping out a small portion of it with a lighter starch makes a lighter, airy crumb without drying it out.
- Soda water – I like how this opens up the crumb more, but if you don’t have any on hand, use tap water.
- Psyllium husk powder – Essential for making the dough shapeable without having to add extra flour, which dries out the crumb. I recommend using the linked brand so the bread stays white instead of turning purplish, which darker psyllium brands will do.
- Stand mixer – The dough gets pretty stiff, so I don’t imagine a hand mixer would work well. If you have a bread machine, the ingredients could be combined in there before transferring out to rise.
- Banneton, lame, cloche – Of these the only thing necessary for a nice crusty shell is some sort of bread cloche, but if you have a dutch oven that works just as well. I have a cast iron round baking pan with a ceramic dome to cover it. A lame can be swapped out for a sharp knife and a banneton can be a bowl lined with a large piece of parchment.
Free Guide! 5 easy tips for baking like a gluten-free pro!
Simple hacks for fail-proof gluten-free dishes every time!
Let’s Make This Together!
(Below shows step-by-step photos and modified instructions. For the complete recipe, along with ingredient amounts, scroll down to the recipe card.)
Zero planning dump, mix, and shape!
When testing my sourdough recipe I tried it with an activated starter (meaning I took my starter from the fridge the day before baking, added flour, and waited for it to get bubbly again) and a cold starter straight from the fridge. To my great surprise, it didn’t matter. If you have a good, active sourdough starter, just take it from the fridge, stir, and add to the other ingredients.
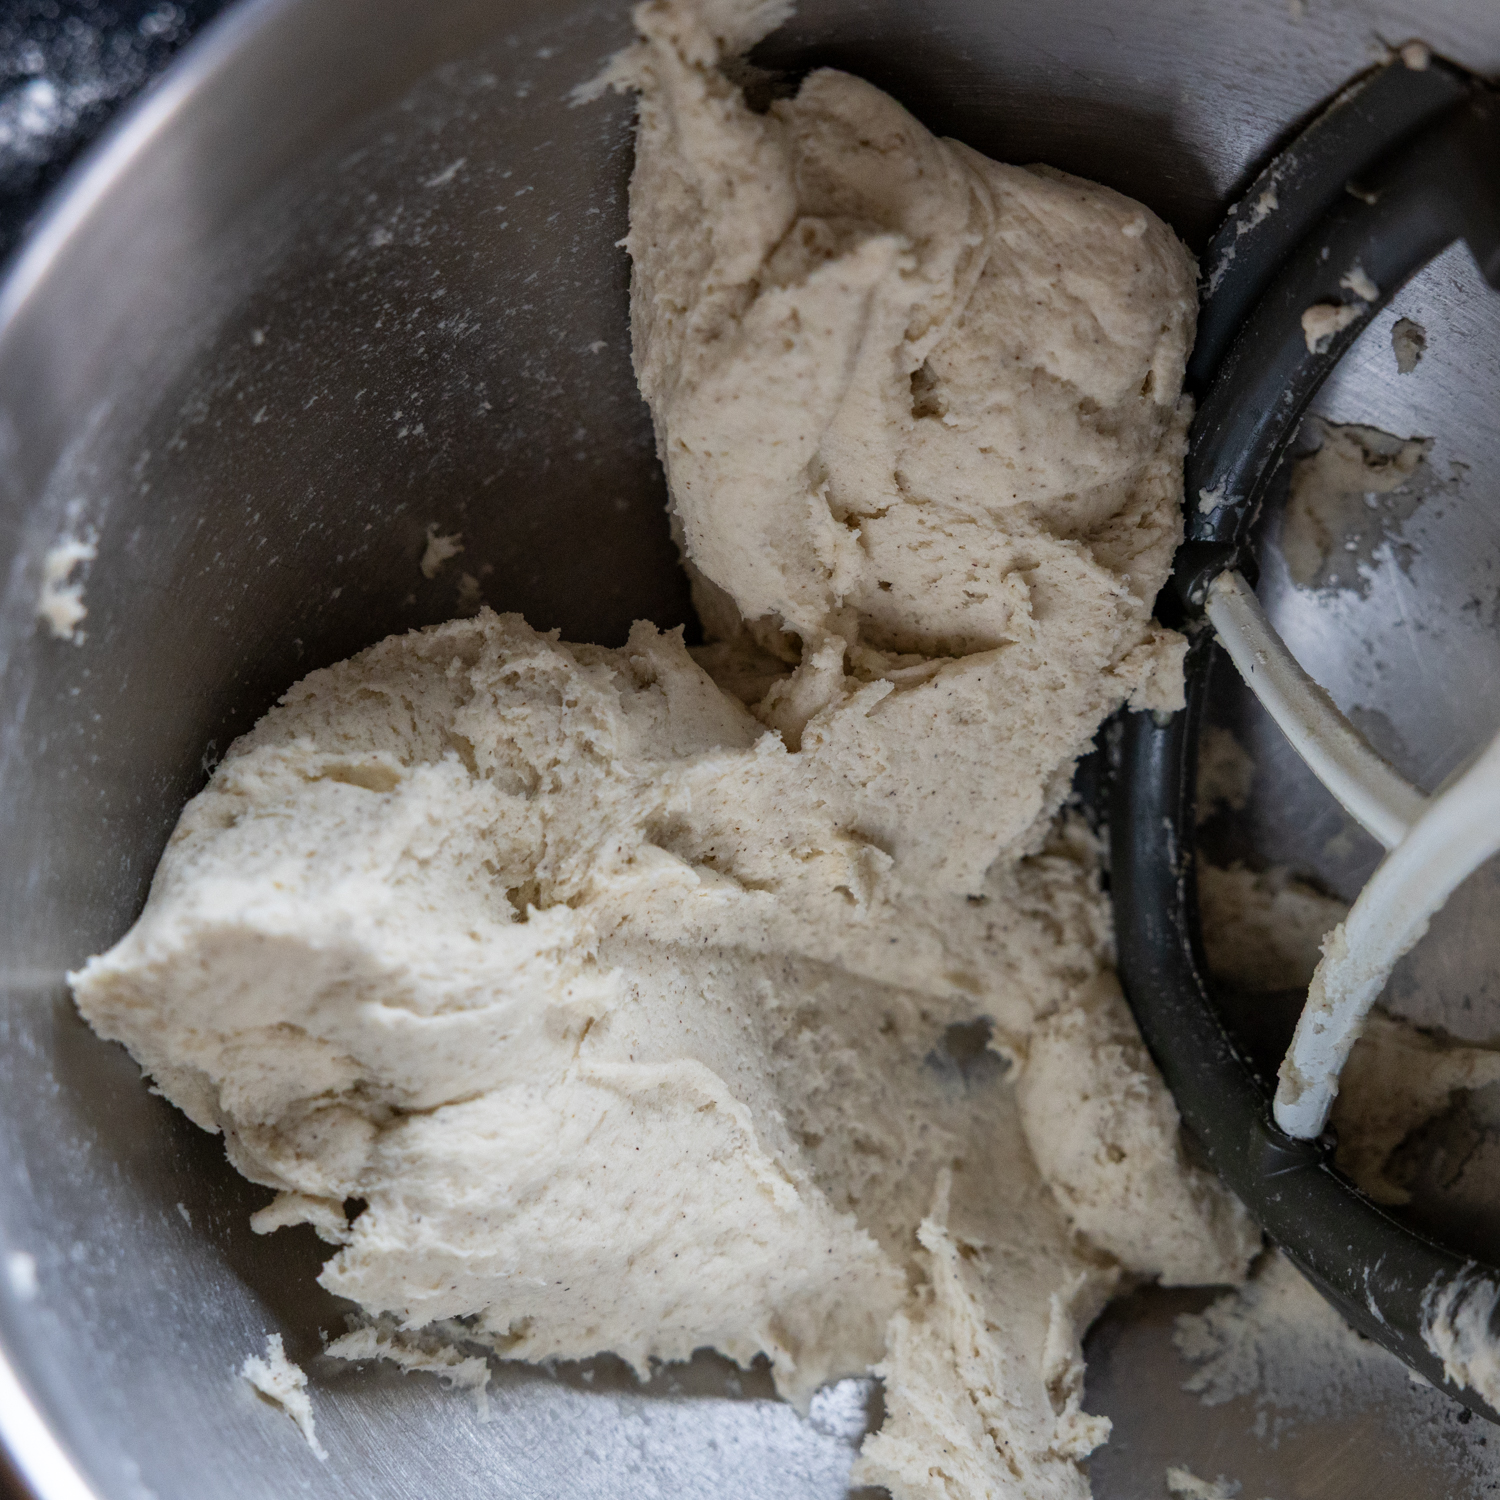
Dump all the ingredients into a mixing bowl of stand mixer fitted with a paddle attachment. I would double check you have everything added because I have forgotten some ingredients I didn’t realize until too late. Mix together for about 4 minutes and you will have a stiff, yet slightly sticky dough.
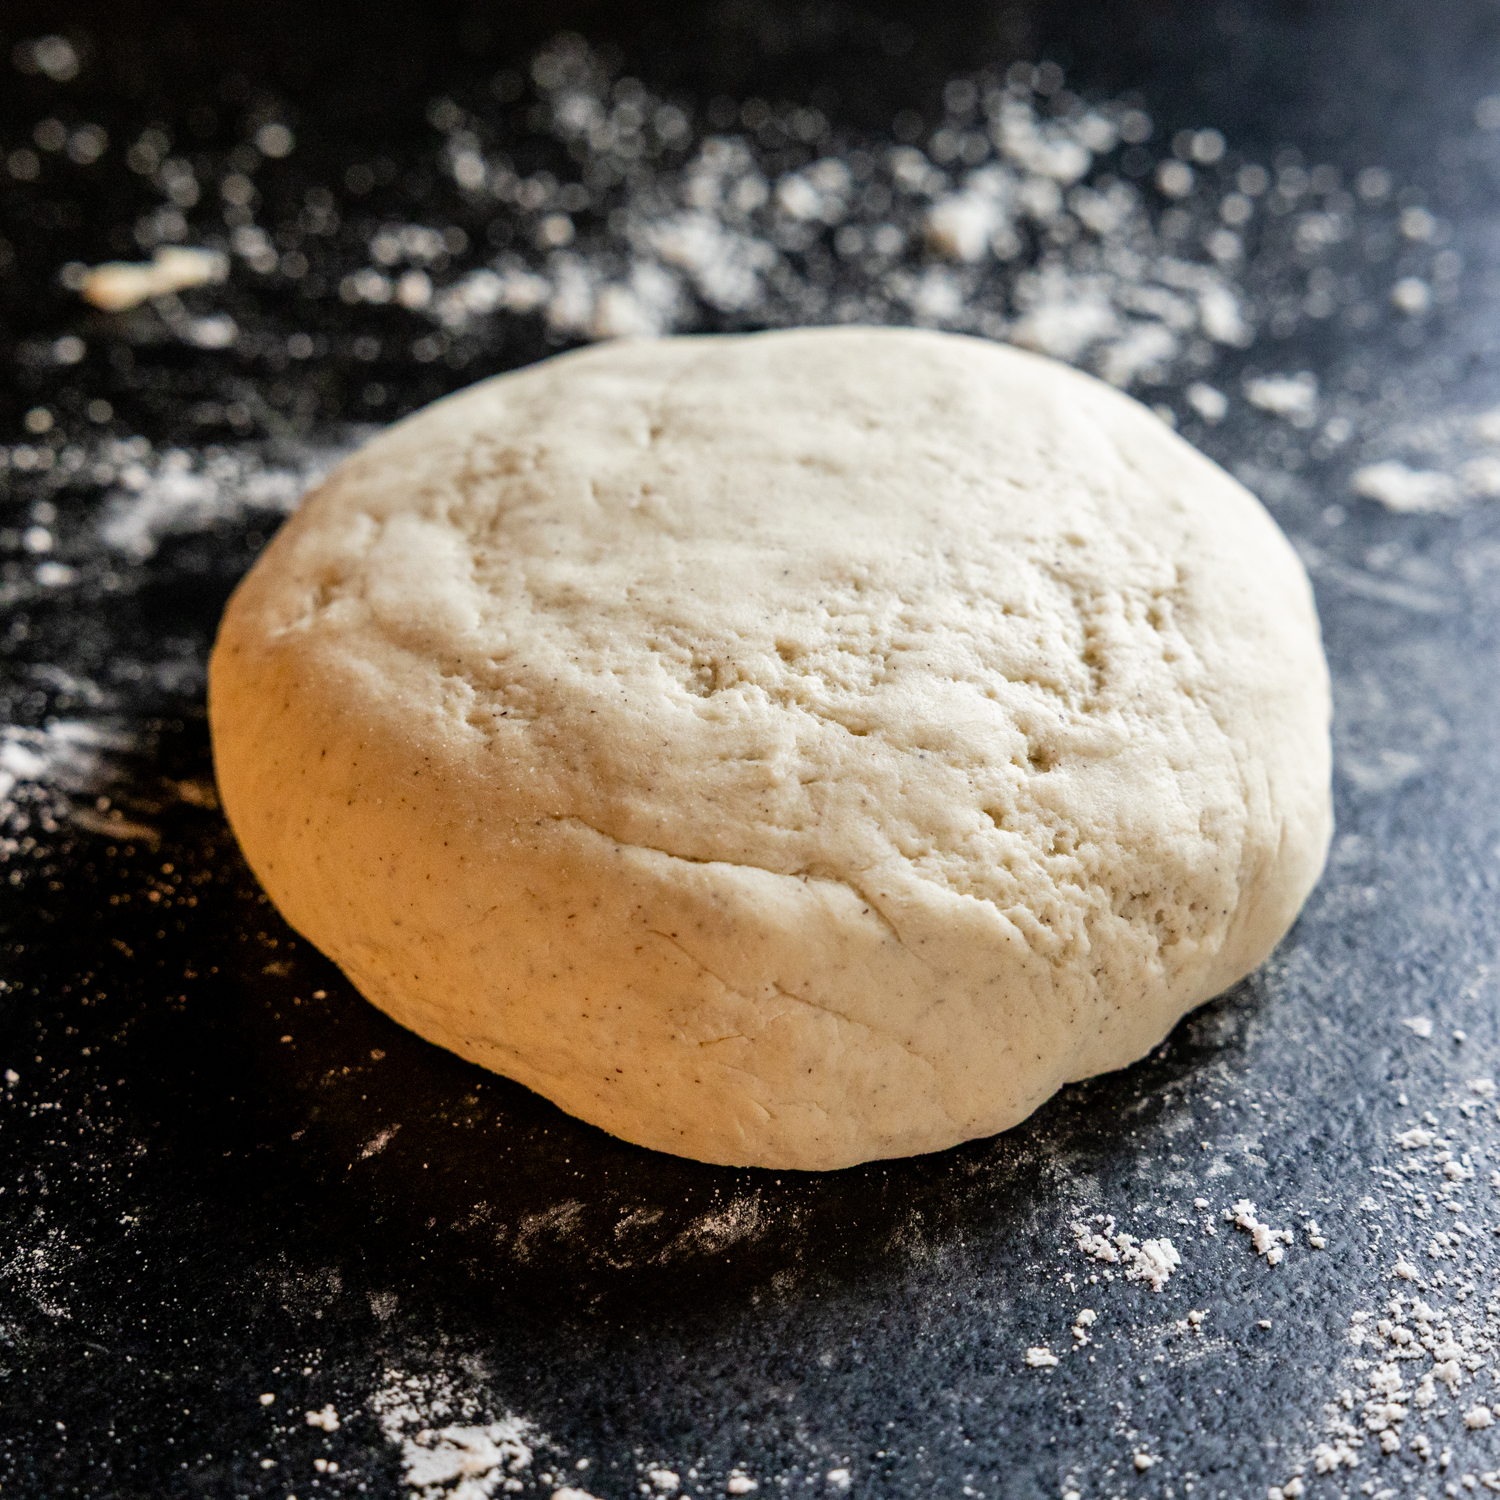
To shape it for rising I just sprinkle a little GF flour on your work surface, scrape the dough onto it, and use floured hands to shape it into a thick disc. It shouldn’t take much extra flour to do this. That’s it. Hardest effort is done!
Two rises – why?
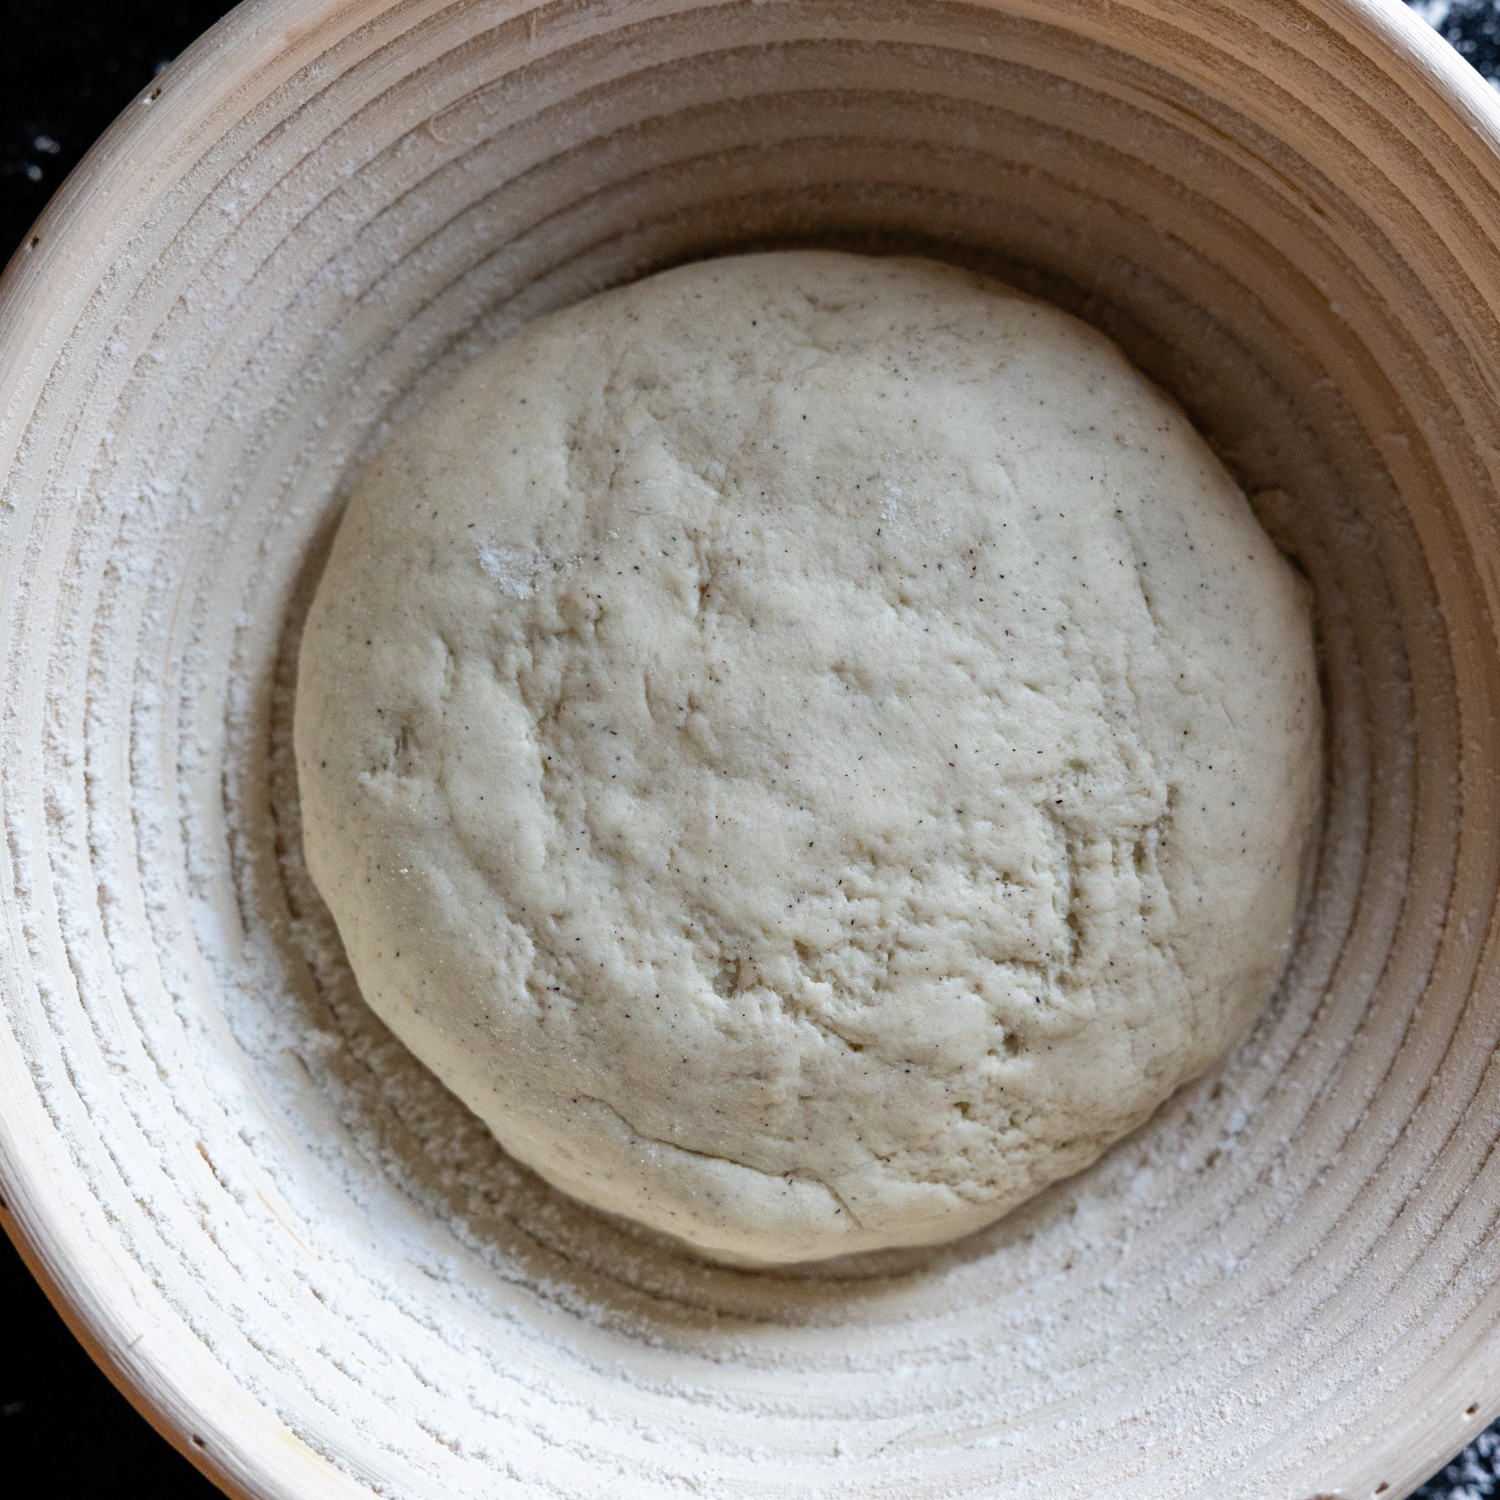
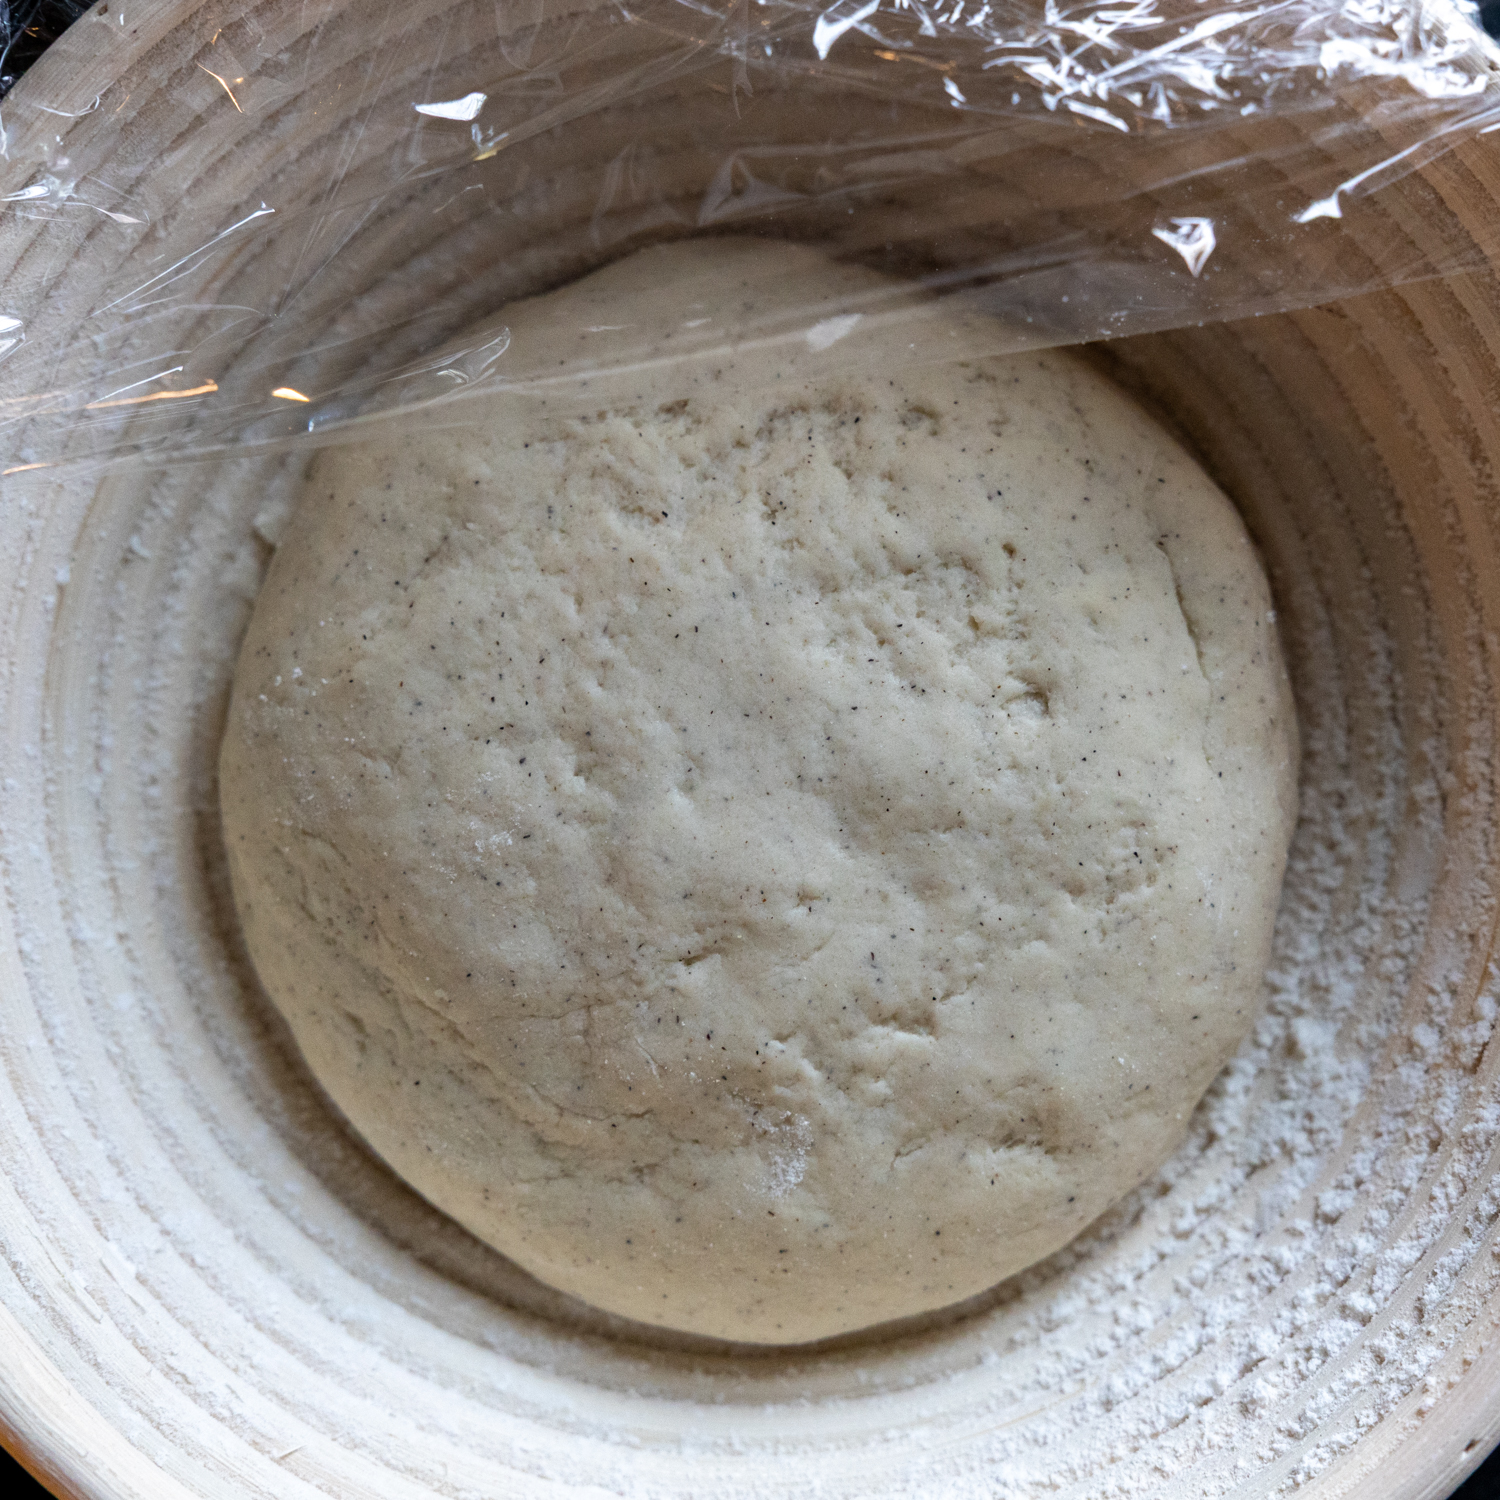
Transfer the shaped boule to a floured banneton or to a mixing bowl lined with a large piece of oiled parchment paper. Cover securely with plastic wrap and let it rise at room temp for 4-6 hours.
To get a nice airy crumb, it’s best if it rises in a slightly warm environment, so be sure it’s not too cold or drafty. This first rise reactivates the starter and fermentation.
Transfer it to the fridge for another 4-6 hours at least, but I usually just do this overnight. You can see from the second pic below sourdough made with gluten-free flour doesn’t rise much. That’s totally fine! The magic happens in the oven.
The second cold rise prevents the bread from overproofing, but extends sourdough activation to enhance the flavor. This is what develops into that signature sourdough taste.
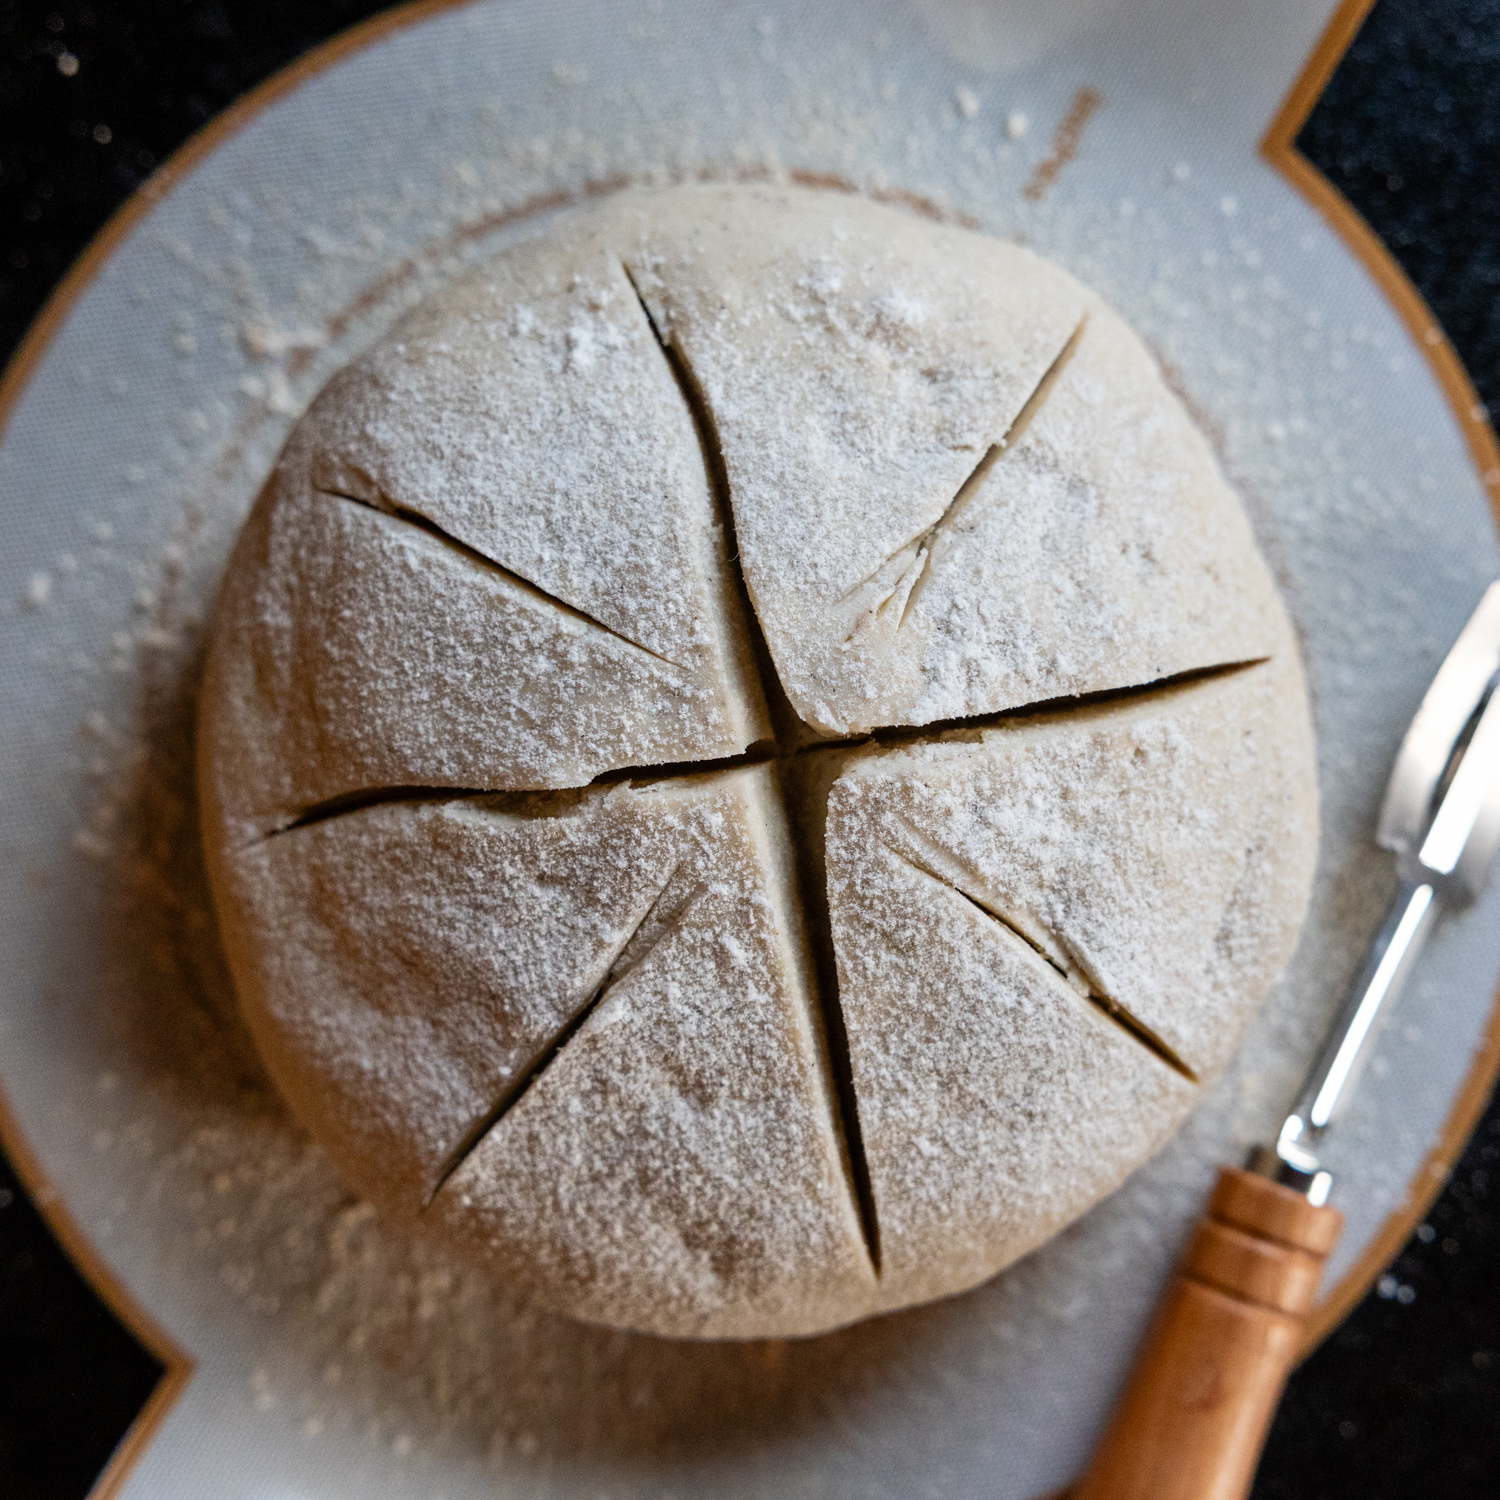
Score and cold oven bake (with important reminder)
Here’s where you can learn from my mistakes. First of all, score the bread pretty deeply, about 1/2-3/4-inch deep. The bread rises very rapidly and this allows for expansion. You can make some shallower slashes around it.
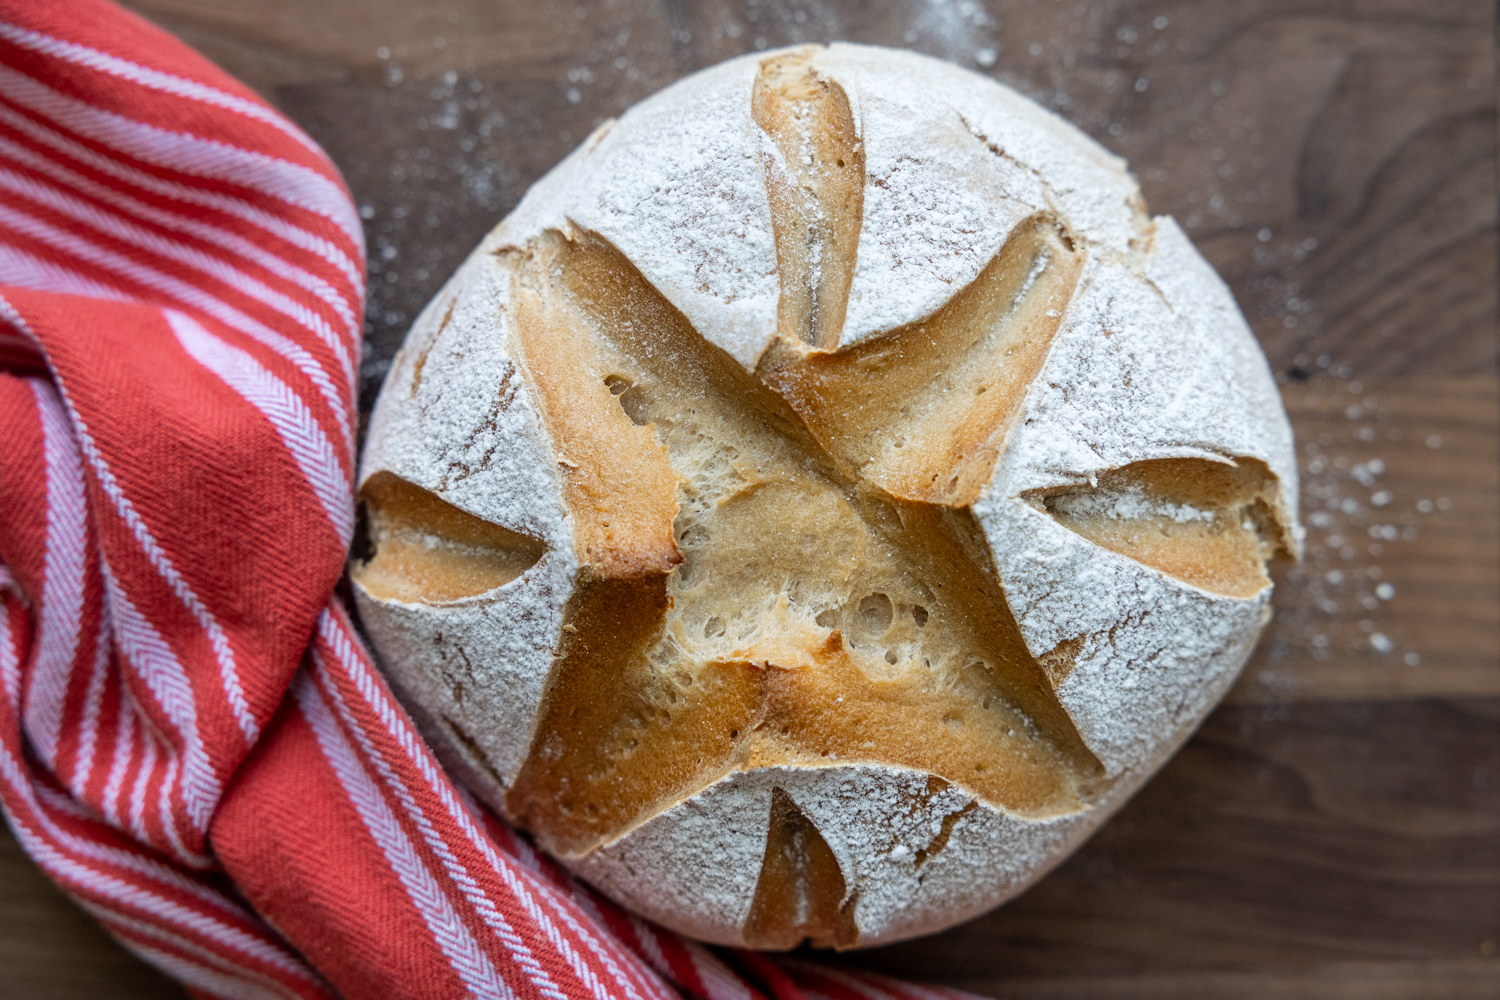
Transfer the bread to dutch oven or cloche, lined with parchment or a silicone sling. Place in a cold oven and turn it to 450℉. Set a timer for 40 minutes, then reduce the oven to 350℉, remove the dome, and set the timer for 30 minutes.
I am embarrassed 🫣 to say how many times I have turned off the 40 minute timer, reset it for 30, removed the dome and have forgotten to turn down the oven temp. Bread baking for 70 minutes at 450℉ is not the outcome you want. Now I just add a sticky note every time. Problem solved!

Tell Me About Timing
The good news about making homemade sourdough is you don’t really have to babysit it, especially with a gluten-free recipe. The risk of overproofing is minimal and extending the rise time, just builds the flavor. However, it does require some planning ahead…
Same day bread – Mix the dough first thing in the morning and let it rise at room temp for 4 hours. Around midday transfer it to the fridge for at least another 4 hours and bake that evening.
Overnight bread – Mix it at any point in the day and let it rise at room temp for at least 4 hours, but I’ve done up to 8. Transfer to the fridge overnight and bake the next morning or anytime that day.
While this recipe makes a more traditional style boule, the dough can be shaped into any form, even into a bread pan. If not having a crispy outer crust is of no importance to you, you can skip baking it in a dutch over or cloche. Just be sure to score the bread well to allow for rapid expansion when it bakes.
Save this recipe to your pinterest board!
Let’s be friends on Pinterest! I’m always sharing great recipes!
Did you make this recipe? I love hearing from you! Leave a star rating and comment below the recipe card. It helps others when searching for recipes and I appreciate feedback from our community. You will always hear back from me! -Melissa
10-Minute Gluten-Free Sourdough Bread (Silly Easy!)
Ingredients
- 1 ½ cups (220 g) gluten free all purpose flour , see recipe notes for recommended brands
- 3 tablespoons (30 g) potato starch
- 2 tablespoons (23 g) psyllium husk powder , helps with bread moisture & structure (what is psyllium husk?
- 120 grams (120 g) sourdough starter , cold or activated
- 1 teaspoon (5 g) baking powder
- 2 teaspoons (14 g) salt
- ¾ cup (178 g) soda water , see recipe notes for any adjustments based on GF flour used
- 1 large egg
- 1 tablespoon (18 g) honey
- 1 tablespoon (13 g) olive oil
- 1 tablespoon (16 g) apple cider vinegar
Equipment
Instructions
- Using a stand mixer with paddle attachment, mix together all the ingredients on low speed until combined. Increase the speed slightly and beat for 3-4 minutes, scraping down the paddle and bowl halfway through. The batter will be thick and stiff, but still slightly sticky.1 ½ cups gluten free all purpose flour , 3 tablespoons potato starch, 2 tablespoons psyllium husk powder , 120 grams sourdough starter , 1 teaspoon baking powder, 2 teaspoons salt , ¾ cup soda water , 1 large egg, 1 tablespoon honey , 1 tablespoon olive oil, 1 tablespoon apple cider vinegar
- Scrape the dough out onto a lightly gluten-free floured surface and use floured hands to shape the dough into a smooth ball / thick disc shape.
- Transfer to a floured Banneton or bowl lined with a large piece of lightly oiled parchment paper. Cover with plastic wrap and let it set in a draft-free place for at least 4 hours, up to 8 hours. The dough will look barely risen, and that's totally normal.
- Transfer the covered Banneton or bowl to the fridge to rise overnight, or at least 4-6 hours.
- When ready to bake, remove from the fridge and transfer to a parchment lined dutch oven or bread cloche. Use a lame or sharp knife to deeply cut the top crosswise, about ½-¾ inch deep, so it has room to rise rapidly. Make some shallower cuts around those. Place the lid on and transfer to a cold oven.
- Turn the temperature to 450℉ and set the timer for 40 minutes. Remove the lid, set timer to 30 minutes, AND TURN DOWN OVEN TO 350℉.
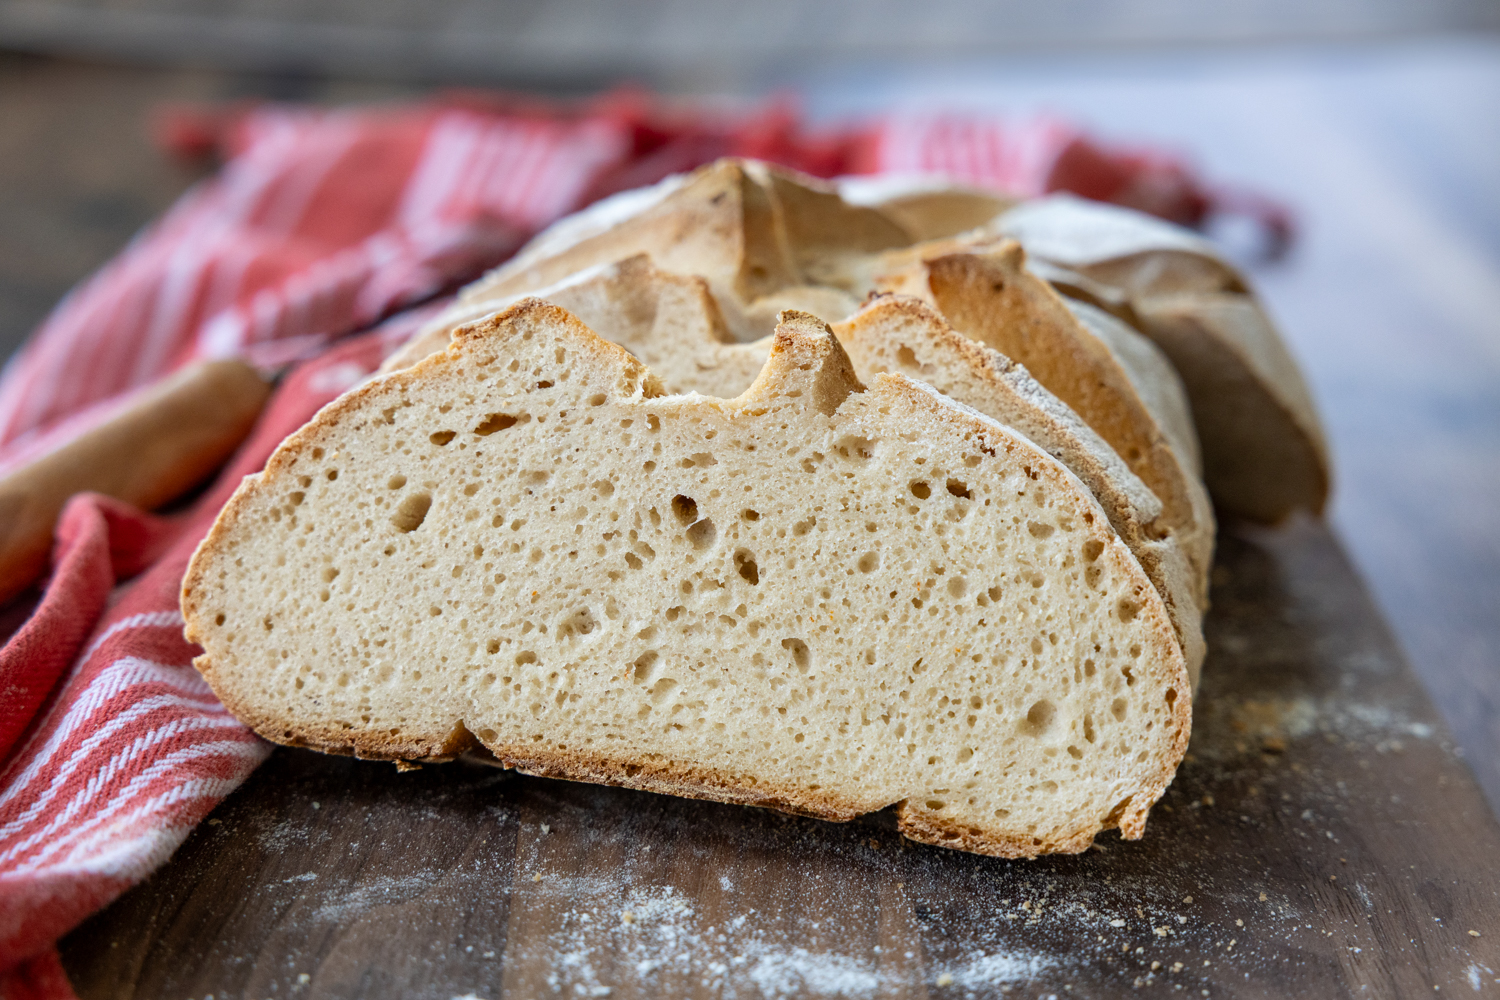
- After 30-35 minutes, if I feel like it could use a few more minutes, turn off the oven and let it sit in there for 5 minutes before removing to a cooling rack. If baking in a bigger oven, this helps. If using a smaller oven, you can pull it after the 30 minute timer.
- Let the bread rest for at least 1 hour before slicing. This will help the extra moisture redistribute into the crumb so it's nice and fluffy.
Notes
Gluten-Free Flour Recommendations
Cup4Cup – This is what I did the majority of my tests with and nothing has to be adjusted. I prefer the taste of C4C the best, but King Arthur GF Bread Flour slightly wins out for texture. King Arthur Gluten-Free Bread Flour – I really liked how the bread turned out with this and it’s more affordable than C4C. Since the blend contains psyllium, reduce the amount to ½ tablespoon psyllium husk powder. King Arthur Gluten-Free Measure-For-Measure – No adjustments are needed and the crumb sets up fine. However, although this is the most affordable GF flour, I find the taste to be pretty flavorless. You could add a touch more salt. If using a GF flour not listed here, I would start with slightly less soda water, about ½ cup, and add in a tablespoon at a time until the dough is stiff, but moveable. In other bread recipes Bob’s Red Mill 1-to-1 seems to require less liquid, so that will probably be the case here too.This post contains affiliate links. My opinions are always my own. If you purchase a product through an affiliate link, I make a small commission – at no cost to you. Read full disclosure policy here.


I just made this recipe again and got even better results. The rise and crumb are amazing and I achieved the best ear that I’ve ever been able to produce using GF recipes. I wish I could post a photo of it. Thank you Mama G!!!
Thanks David, I really appreciate you taking the time to let me know. I would love if people could add pics to the comments!
Best,
Melissa
This is definitely a very easy recipe and I got great delicious results. I doubled the ingredients after reading your comments to bake in my bread cloche. Always great recipes from MamaG!
Thanks so much, David! I really appreciate you taking the time to leave me this note.
Best,
Melissa
This makes a very small loaf. Can the recipe be doubled to make a full size loaf?
Hi Pat,
I believe so. To be honest, I was hesitant about the size at first too and experimenting with using 2 cups of flour and making adjustments from there. However, I did find that the deeper slashing really gets the loaf to expand during baking, so I went back to the smaller amount of flour. If you are doubling ingredients, just be sure the loaf is well scored all over.
Best,
Melissa
When adding in cheese, fresh garlic, etc, note that additional baking time is required after lowering temp to 350
Hi Pat, good to know! How much longer did it need? You can also turn off the oven after 30 minutes and let it sit in there for another 5-10 so it continues baking a little more gently.
Best,
Melissa
Oh the oven needs to stay on at least 15 minutes more
I have to say that I’ve made quite a few of your recipes, and this new recipe is proofing as I write. Wondering when it’s a good time to include add-in’s such as cheese, fresh garlic, diced pepperoni? I think I’d like to try these additions next batch! Thanks for your wonderful recipes (cinnamon raisin bread, hot dog buns, Italian bread, etc!). I’ve made them all and each recipe comes out wonderfully!
Hi Pat,
Oh lovely to hear! I would just dump them in with all the other ingredients. No need to complicate things! Thank you for your kind words. It means a lot 🙂
Best,
Melissa
Hi can you tell me how to make the sour dough starter?
Hi Sandra,
Yes, of course! Check out my beginner-friendly GF sourdough starter and all the details are there!
Best,
Melissa
Do you have a recipe for a gluten free starter for your sourdough? Is there one that you usually use?
Hi Rhonda,
I have a lot to say on that, so I will be including it in a separate post coming out later this week or next!
Best,
Melissa
Hi Melissa, I’m looking forward to making this GF sourdough! I don’t have a GF starter . Hoping you can shed some light on this. Love your work! Thank you for putting so much effort into perfecting the recipes for us!
Hi Cassie,
My apologies on the delay! I needed to gather some more pics for my sourdough starter recipe, but it’s good to go now!
Best,
Melissa
Thank you so much! Can’t wait to make it this weekend! You are the best!