
Need an easy, back pocket recipe for sugar cookie icing? Learn how to make cookie frosting that hardens into a glossy, shiny glaze coating. This kid-approved recipe uses four simple ingredients (with no meringue powder!), takes five minutes to make, and makes decorating a breeze for all ages.

Want to Save This Recipe?
Enter your email below & we'll send it straight to your inbox. Plus you’ll get affordable and easy gluten-free recipes delivered each week!
Best Sugar Cookie Icing That Hardens
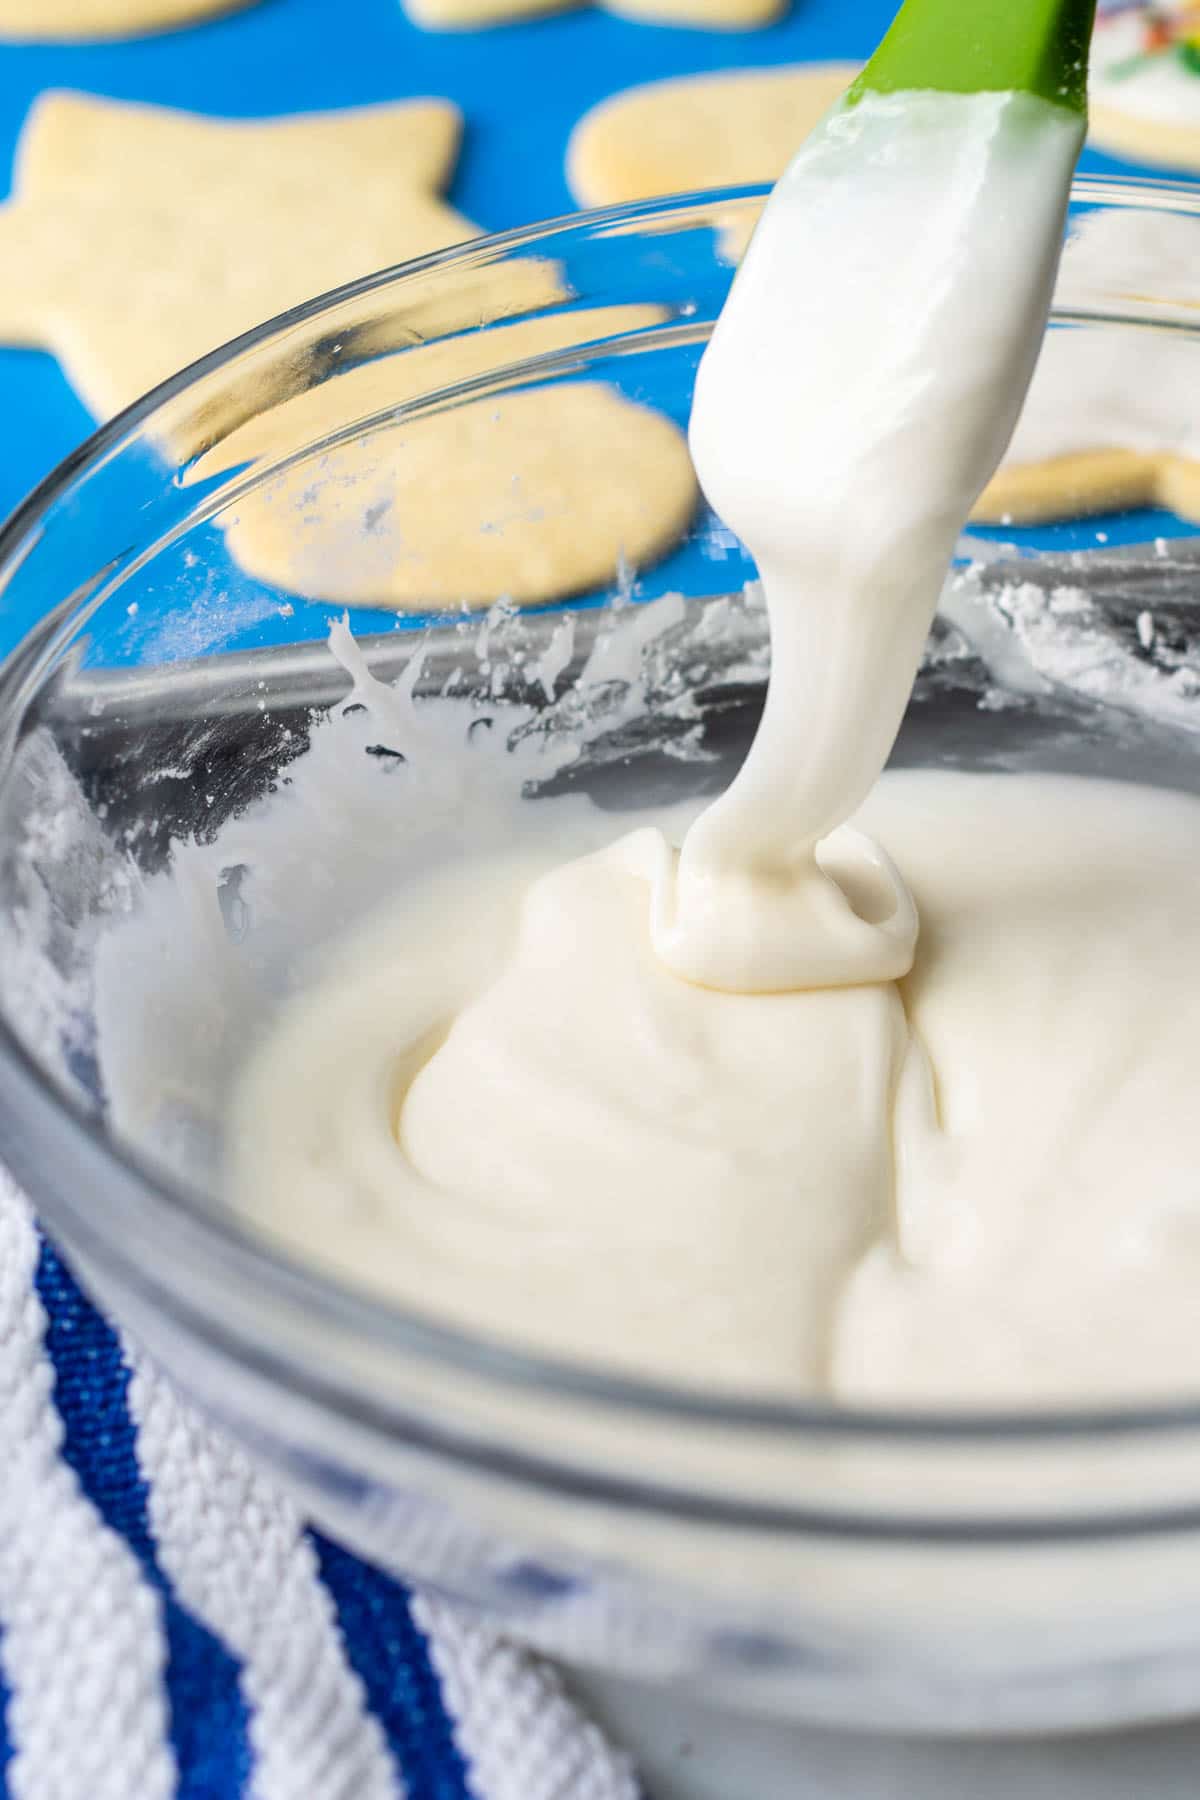
The trick for how to make hard icing glaze is in the ingredients. A mixture of powdered sugar, milk, and light corn syrup blends together to make smooth, perfect sugar cookie icing.
The small amount of corn syrup achieves a shiny, glossy surface, and thickens the frosting to make for easier decorating. When it dries with the milk and powdered sugar, you are left with hard frosting. The trick is to leave the cookies set for at least 12 hours for the frosting to set up.
Unlike a fluffy buttercream frosting, there is no butter or fat in the recipe, so it hardens similarly to royal frosting. But unlike royal icing, which uses egg whites or meringue powder, the ingredients are right in your pantry.
This recipe is so easy and really does dry quickly and shiny. I have avoided icing cookies for years because of the time and trouble but with this recipe it’s so easy! For the holidays I used peppermint extract. Did this with the ladies at church and they loved it! We just used small spatulas (honey, cheese spreaders, etc.) instead of trying to pipe it and it worked great!
—Wendy
Free Guide! 5 easy tips for baking like a gluten-free pro!
Simple hacks for fail-proof gluten-free dishes every time!
Why is this THE Sugar Cookie Icing?
Christmas would not be complete without my mom’s tried-and-true rolled sugar cookies making an appearance. This cookie icing was an integral part of our holidays, and deemed the best over the years.
While Mom rolled, cut, and baked the cookies, we were tasked with covering the kitchen with frosting and sprinkles. Sometimes some of it even landed on the cookies.
These homemade with love creations were often gifted to teachers and neighbors, and since the icing hardens into a beautiful glassy surface it’s durable enough to be wrapped and transported. It’s like a sugar force field for cookies.
(Now that I’m pondering it…that’s most likely why Mom sent us with her famous homemade peanut brittle and paper bag microwave caramel corn for teacher’s gifts. They’re also delicious and durable!)
I now enjoy this same tradition with my own kids, but instead use this recipe for gluten-free sugar cookies that tastes just like the old-fashioned ones Mom made!
Let’s Make This Together!
(Below shows step-by-step photos and modified instructions. For the complete recipe, along with ingredient amounts, scroll down to the recipe card.)
Just mix – it’s that simple
Add the powdered sugar to a bowl. If you don’t want lumps, you can sift it first, but honestly I never do this. I just stir a little more vigorously. Add the milk, holding back a bit, corn syrup, and almond extract.
Stir until no lumps remain and icing is smooth and glossy. You’ll want it to thickly fall off the spoon. If it’s too thick, stir in the remaining milk.
If making different colors of icing, divide into separate bowls and add food coloring. Gel coloring will be more vibrant, liquid dye more muted. There’s nothing wrong with pink Santas, though!
Time to decorate…with options
If I’m making this with kids, we just take small spreaders and smooth it on the cookies. We might even pull out some toothpicks for “detail” work, but that’s about as complicated as we get.
Looking for a more profesh, leveled-up cookie decorating? Then I suggest transferring the icing into piping bags with tips. I fold the bag over a tall glass cup and then scoop the frosting in.
Use a round decorating tip to outline the cookie with icing. With that same tip, fill in the outline until it’s all covered and absolutely lovely looking. A small knife or toothpick helps smooth over any gaps.
If using sprinkles, for either method, decorate immediately. The top layer will harden quickly. Be real proud of yourself – those are some good looking cookies!


How Long Does it Take To Harden?
It will take 12-24 hours for the icing to harden, depending on the thickness of the frosting. For best results, set decorated cookies on a baking sheet in a single layer and leave overnight.
Before stacking, wrapping, or storing make sure the icing is hard throughout. The top layer will feel hard to the touch first before it dries throughout. Then they may be stacked and stored. Enjoying the cookies can happen at any time – doesn’t need to be hard for that!
Can I Make This Without Corn Syrup?
Yes…and no. The recipe may be adjusted to omit the corn syrup and add 1-2 teaspoons additional milk for the right spreadable consistency.
However, corn syrup is what achieves that glossy finish. It also prevents the icing from being runny, which makes decorating and spreading the frosting on the cookies easier.

Wondering what kind of food coloring to use? Gel food coloring is highly pigmented so you can achieve very bright colors. This works best with powdered sugar icing since it is bright white. Otherwise, a lot of food coloring would have to be added to offset the white. Liquid food dye works best for pastel colors because you don’t need to add as much to the frosting. It is also readily available at any grocery store.

Save this recipe to your pinterest board!
Let’s be friends on Pinterest! I’m always sharing great recipes!
Did you make this recipe? I love hearing from you! Leave a star rating and comment below the recipe card. It helps others when searching for recipes and I appreciate feedback from our community. You will always hear back from me! -Melissa

Simplest Sugar Cookie Icing That Hardens (Shiny)
Ingredients
- 2 cups powdered sugar
- 6-8 teaspoons milk
- 4 teaspoons light corn syrup
- ½ teaspoon almond or vanilla extract
- food coloring, optional
Equipment
Instructions
- Add the powdered sugar to a medium bowl. Add 6 teaspoons milk, corn syrup, and extract. Stir vigorously until icing is smooth and no lumps remain.2 cups powdered sugar, 6-8 teaspoons milk, 4 teaspoons light corn syrup, ½ teaspoon almond or vanilla extract
- If needed, add additional milk to thin icing. Test the desired consistency for spreading by lifting a spoonful from the bowl. It should drizzle back down slowly and mound gently.
- If making colored icing, divide into small bowls and stir in food colorings. (See recipe notes for tips on decorating.)
- Spread icing on cookies and immediate decorate with sprinkles, if using. Transfer decorated cookies to a baking sheet and let sit for 12-24 hours to harden completely before stacking and storing.
Notes
Icing Sugar Cookies
- Pipe an outline of icing around the edges. This makes a dam for clean icing edges.
- Use the same tip to fill in the middle. A small knife or toothpick helps smooth over any gaps.
- If using sprinkles, decorate immediately. The top layer will harden quickly.
- Set cookies on baking sheets to fully harden. This will take 12-24 hours, depending on the amount of frosting used.
More Tips and Modifications
- Start with adding the minimal amount of milk. Add more if the icing is too thick to spread.
- If frosting is too thin add more powdered sugar. To thicken icing add additional milk.
- The almond extract may be substituted for vanilla, lemon, maple, coconut, peppermint or orange extract.
- In place of the milk, non-dairy milk, lemon juice, or water may be used.
This post contains affiliate links. My opinions are always my own. If you purchase a product through an affiliate link, I make a small commission – at no cost to you. Read full disclosure policy here.


Going to use this today to decorate cookies with the grands!
That’s my favorite thing to hear! Have so much fun with the kiddos. Sprinkle explosion everywhere!
Best,
Melissa
Thank you for sharing! I received details via AI search and wow, how easy it was to make and boy did it not disappoint. I love this recipe!!
Thank you, Becca! It’s great to know that AI helped you find this recipe and I appreciate you taking the time to comment.
Best,
Melissa
We’ve been using this recipe to decorate our holiday cut out cookies for several years now—they always turn out beautifully and SO delicious, too! We use almond extract and everyone always comments how tasty they are. The glossy finish is so special and everyone from young to old has fun on cookie decorating day!
Love this so much, Megan! Thank you for taking the time to let me know. Merry Christmas!
Best,
Melissa
Can’t wait to try this on my sugar cookies!!