Gluten-free whoopie pies are an indulgent New England treat with cake-like cookie sandwiches filled with soft vanilla filling, a copycat version of the Amish-style treats. If you love Suzy Q’s or Ding Dongs, get ready for the next level of homemade gluten-free goodness!
Want to Save This Recipe?
Enter your email below & we'll send it straight to your inbox. Plus you’ll get affordable and easy gluten-free recipes delivered each week!
Hands-Down BEST Gluten-Free Whoopie Pie Recipe
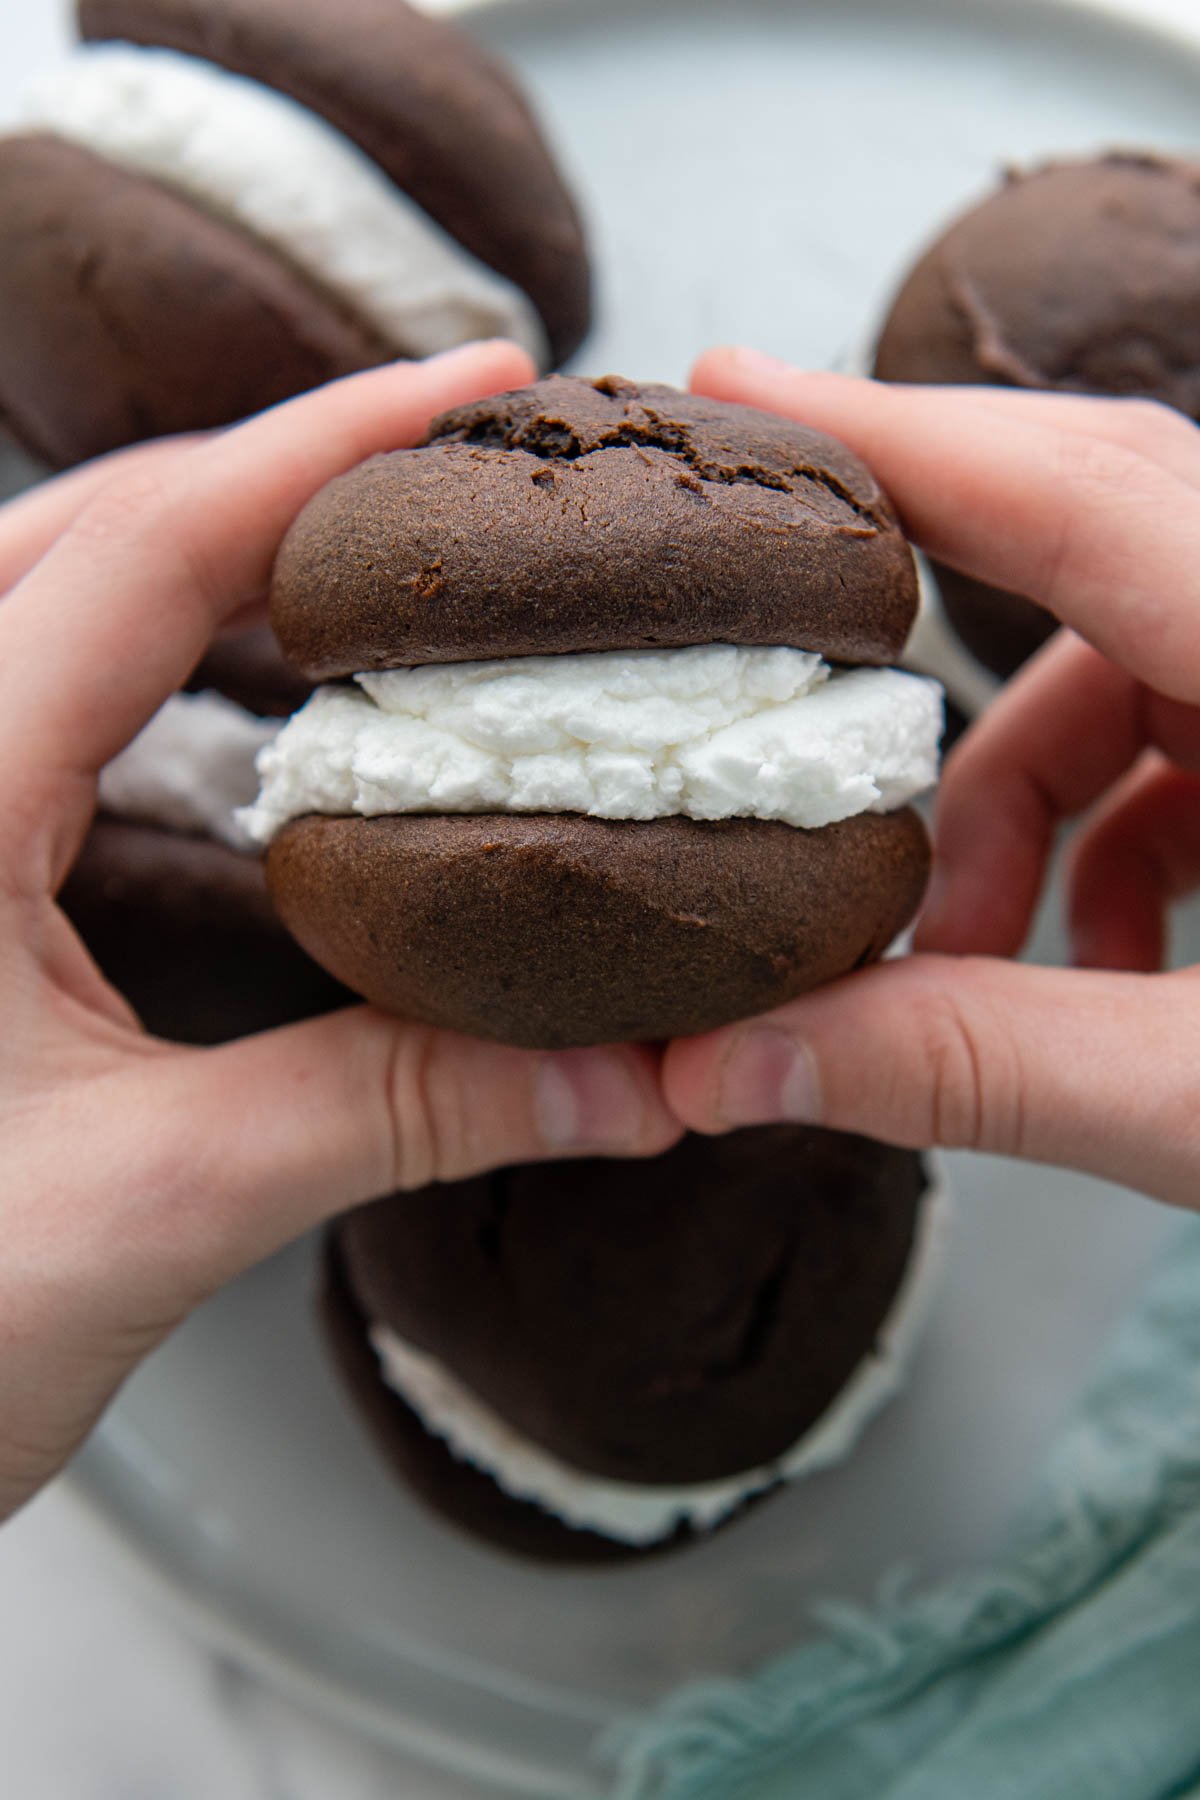
Homemade gluten-free chocolate whoopie pies are an irresistible treat, also known as “gobs” in Amish country and Maine. The cakes are richly chocolate, similar to devil’s food, and not overly sweet. The filling, on the other hand, is like clouds of fluffy, sweet goodness.
Whoopie pie recipes are traditionally stuffed with an airy white filling, but may also contain vanilla buttercream, cream cheese frosting, or marshmallow fluff buttercream. I am partial to the filling I first experienced in Lancaster, Pennsylvania, which is included in this copycat recipe!
These came out just like Momma used to make. Even the filling was spot on.
—Julia
Free Guide! 5 easy tips for baking like a gluten-free pro!
Simple hacks for fail-proof gluten-free dishes every time!
Ingredient Tid Bits
The most import thing to keep in mind when making this gluten-free whoopie pie recipe is the type of gluten-free flour used makes a HUGE DIFFERENCE! I tested the recipe several times and my number one recommended flour, Cup4Cup, just doesn’t work well for this recipe.
It contains too much cornstarch, which prohibits the cookies from spreading. Therefore, I recommend using King Arthur Measure-for-Measure. I will continue testing the recipe with other flours, but you find another one works, please leave me a comment below!
- Gluten-Free Flour Blend – Brand very much matters here for spreading! I recommend King Arthur Measure-for-Measure gluten-free flour for authentic results, or a blend that doesn’t contain cornstarch.
- Unsweetened Cocoa Powder – These have a very rich, dark chocolate taste which compliments of the sweetness of the filling. Dutch-process cocoa powder may also be used for a smoother chocolate flavor.
- Buttermilk – For dairy-free whoopie pies, replace the buttermilk with a non-dairy milk with 1 tablespoon replaced with vinegar. Let sit for 5 minutes and stir before using.
- Oil – I use canola oil, but vegetable oil or melted coconut oil may also be used. I don’t recommend melted unsalted butter, which will affect the texture.
Watch The Recipe
Let’s Make This Together!
(Below shows step-by-step photos and modified instructions. For the complete recipe, along with ingredient amounts, scroll down to the recipe card.)
Easy batter and “magic” ingredient
In a large mixing bowl beat together the brown sugar, oil, buttermilk, egg, and vanilla extract until well combined. Add the remaining dry ingredients and beat again.
Now it’s time for the “magic.” Slowly pour in boiling water while mixing on low speed. This is the secret “ingredient” for a moist, deceptively homemade gluten-free chocolate cake! Hot water helps saturate the starches, aerates the batter, making the cake light and fluffy instead of gritty.

Divide and quick bake
For quick and even cookies, I really recommend using a cookie scoop, either medium-sized for smaller ones, a large scoop for giant, bakery-style cookies. Divide onto parchment-lined baking sheets about 2 inches apart. Bake for 10-12 minutes in a 350ºF oven. Cookies are done when a toothpick inserted in the center comes out clean, and the tops start to crack lightly.


Legendary Whoopie Pie Filling (Amish-Style)
Below I share the whoopie pie filling reminiscent of the traditional Amish treat. I love this soft, airy filling so much it is also featured in two other old school dessert recipes – Homemade Hostess Ding Dong Cake and a giant Little Debbie’s oatmeal creme pie cake.
Fluffy goodness
In a heatproof medium-sized bowl whisk together egg white with ½ cup of powdered sugar. You’ll need to gently heat the egg white, so it’s safe to eat. Place the bowl over a pot of barely simmering water. Whisk for about 3 minutes, until the white is hot to touch or 140°F.
Remove from heat and cool slightly before blending in the shortening and rest of the powdered sugar. This will take about 4 minutes to get a nice airy texture.

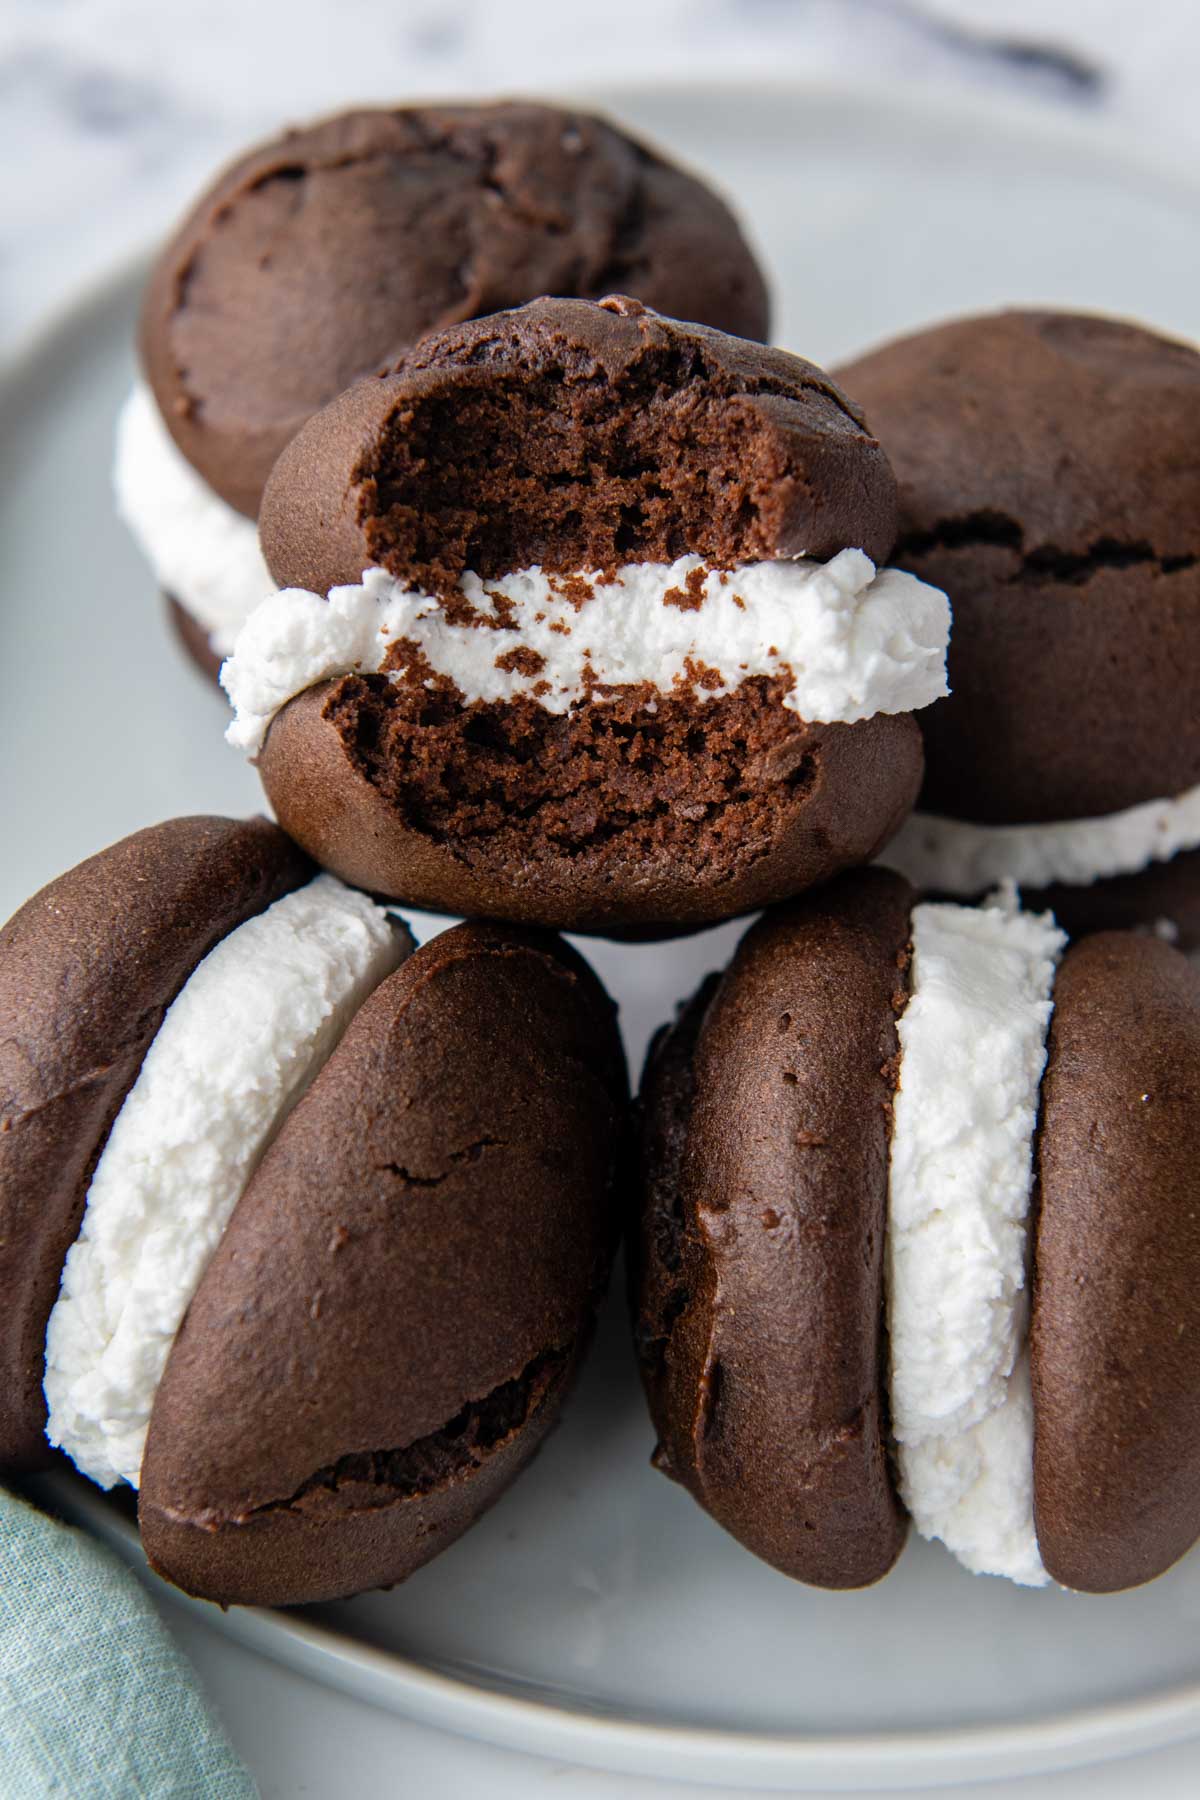
Best part – the sandwich!
Lay half the cooled cookies, with bottom side up, on the baking sheets. Use the same size cookie scoop as you did to portion out the cookies, and scoop out the filling. Top with another cookie and push down slightly so the filling spreads to edges. Heaven awaits!

- In a heatproof medium-sized bowl whisk together egg white with ½ cup of powdered sugar. Place the bowl over a pot of barely simmering water. Whisk the egg white and powdered sugar continually about 3 minutes, until egg whites are hot to touch or 140°F. Remove from heat and cool slightly.
- Add the vanilla extract and remaining powdered sugar to mixing bowl. Beat until smooth.
- If using a stand mixer, switch to a paddle attachment. Add the shortening and mix on high speed for 4 minutes, until very light and fluffy.
- Lay half the cooled cookies, with bottom side up, on the baking sheets. Use the medium cookie scoop to portion out the filling on top of the cookies. Top with another cookie and push down slightly so the filling spreads to edges.
Yummy Variations
Traditional Pennsylvania whoopie pies contain two soft chocolate cookies with a fluffy, white filling, similar to what is in Hostess Cupcakes.
This filling, made with vegetable shortening and egg white, rivals in popularity with marshmallow filling, made with marshmallow fluff and butter, and is commonly enjoyed in Maine, New Hampshire, and Massachusetts.
If you prefer a buttercream filling, replace the shortening in the filling recipe with butter or follow this fluffy buttercream recipe. For double chocolate whoopie pies use fluffy chocolate buttercream.
Whoopie Pie Size and Shaping
I highly recommend using cookie scoops for evenly-sized cookies, to divide the batter up quickly, and to bake evenly. A medium scoop was used for the images in this post. It will yield 12 “mini” whoopie pies. For the authentic bakery-style treats, I would use a large cookie scoop. This will make 7 total pies.
Another option would be to use whoopie pie pans, which have shallow large openings, similar to a muffin top pan. If you’d love a copycat whoopie, just like those at a Pennsylvania bakery, this would be a great option!
Save this recipe to your pinterest board!
Let’s be friends on Pinterest! I’m always sharing great recipes!
Did you make this recipe? I love hearing from you! Leave a star rating and comment below the recipe card. It helps others when searching for recipes and I appreciate feedback from our community. You will always hear back from me! -Melissa

Easy Gluten-Free Whoopie Pies (Authentic Recipe)
Ingredients
Chocolate Gluten-Free Whoopie Pies
- ¾ cup packed light brown sugar
- ½ cup vegetable oil
- ½ cup buttermilk , (see recipe notes for dairy-free milk substitution)
- 1 large egg
- 1 teaspoon vanilla extract
- 1 ¾ cup gluten-free all-purpose flour blend, (King Arthur GF Measure-for-Measure had best results for spreading)
- ½ cup unsweetened cocoa powder
- 1 teaspoon baking soda
- ½ teaspoon salt
- ½ cup boiling water
Whoopie Pie Filling
- 1 egg white
- ½ teaspoon vanilla extract
- 2 cups powdered sugar, divided
- ¾ cup shortening
Instructions
- Preheat the oven to 350ºF. Line baking sheets with parchment paper or silicone baking mats. Set aside.
- In a large mixing bowl beat together the brown sugar, oil, buttermilk, egg, and vanilla extract until well combined.¾ cup packed light brown sugar, ½ cup vegetable oil, ½ cup buttermilk , 1 large egg, 1 teaspoon vanilla extract
- Add the flour, cocoa powder, baking soda, and salt. Beat again until well mixed. Slowly add the boiling water while mixing on low speed. Once the water has been incorporated, increase the speed to medium-high and mix for 1 minute.1 ¾ cup gluten-free all-purpose flour blend, ½ cup unsweetened cocoa powder, 1 teaspoon baking soda, ½ teaspoon salt, ½ cup boiling water
- Use a medium-sized for smaller-sized cookies, a large scoop for giant, bakery-style cookies. Portion them out onto the prepared baking sheets about 2 inches apart. Bake for 10-12 minutes, turning halfway through baking. Cookies are done when a toothpick inserted in the center comes out clean. Cool on sheets for 5 minutes, then transfer to a wire rack to cool completely before filling.
Filling
- In a heatproof medium-sized bowl whisk together egg white with ½ cup of powdered sugar. Place the bowl over a pot of barely simmering water. Make sure bottom of the bowl isn't touching the water directly and should be sitting a few inches above. Whisk the egg white and powdered sugar continually about 3 minutes, until egg whites are hot to touch or 140°F. Remove from heat and cool slightly.1 egg white, 2 cups powdered sugar
- If using a stand mixer, switch to a paddle attachment. Add vanilla and remaining powdered sugar to mixing bowl. Beat until smooth.½ teaspoon vanilla extract
- Add shortening and mix on high speed for 4 minutes, until very light and fluffy.¾ cup shortening
- Lay half the cooled cookies, with bottom side up, on the baking sheets. Use the same size cookie scoop to portion out the filling on top of the cookies. Once the filling is distributed with scoop, go back and divide up the remaining. Top with another cookie and push down slightly so the filling spreads to edges. See recipe notes for storing tips.
Notes
Why did my whoopie pies not spread out?
This most like has to do with the brand of gluten-free all purpose flour used. While this recipe will taste fine with a variety of gluten-free flour blends, it will affect how much they spread. Typically I recommend Cup4Cup GF flour for baked goods, it contains too much cornstarch, which prohibits the cookies from spreading. Therefore, I recommend using King Arthur Measure-for-Measure gluten-free flour.Dairy-Free Modification
Replace the buttermilk with a non-dairy milk with 1 tablespoon replaced with vinegar. Let sit for 5 minutes and stir before using.Storing and Freezing
These are best served at room temperature to keep the filling soft and fluffy. Store in an airtight container in a single layer, or stack between sheets of wax paper. If not enjoying the same day they are made, I recommend freezing until ready to serve. To freeze, place in a single layer on a lined sheet pan. Freeze until solid. Once frozen, stack between sheets of wax paper and freeze in an air tight container. Wrap the container with plastic wrap to protect from freezer burn. Freeze up to three months. Thaw at room temperature for 2 hours so the filling becomes soft again. The cakes will defrost before the filling comes to room temperature.This post contains affiliate links. My opinions are always my own. If you purchase a product through an affiliate link, I make a small commission – at no cost to you. Read full disclosure policy here.


they turned out so good, light and fluffy frosting with a good cookie texture! thank you!
Thanks for leaving me this note, Avery! I appreciate it.
Best,
Melissa
I’m so hoping to love this cause the Amish will be pies are probably my favorite thing and since having to go gluten-free, I was looking for that next best thing. I made them exactly like the recipe and it was very lackluster for me the first batch and the second batch cooked entirely different and even altered the time to see if one will be better. And as far as flavor goes, it just tasted like cocoa powder, and a little dry.. might try it again. It makes some adjustment somewhere
I’m so sorry to hear of a lackluster experience. 🙁 Which GF flour blend did you use?
Best,
Melissa
Wow! Awesome recipe that was easier than it looked at first. Cleanup?, well that’s another story. Thanks!
Thanks, Bob! So glad you loved the recipe!
Best,
Melissa
These are easily the best whoopie pies I’ve ever made (and I’ve tried a lot!). Wondering if you know how this recipe would work with all purpose flour?
Hi Melissa,
I’m sorry I wish I could help, but I couldn’t say. I haven’t tested it with AP flour. However, you could use a “regular” recipe for the cakes and use this filling. Nailing the filling in whoopie pies is key (as a huge connoisseur myself).
Best,
Melissa
I bought some new Wilton whoopie pie pans at a yard sale last summer (for 50 cents!) and just now got around to trying them out. I bake for a weekly snack giveaway at a local university and do mostly allergen-friendly recipes. This was SUCH an easy recipe to make. I turned it vegan by using coconut milk instead of buttermilk and a flax egg instead of chicken egg. I filled with a vegan buttercream. You’d never know there were any subs made. They were delicious! Thank you for an easy and tasty recipe!
That’s an awesome find, Sandra! It’s great that you were able to modify the recipe as needed. I’m so glad you took the time to share!
Best,
Melissa
I’m allergic to- Milk, wheat, corn, sesame seeds, peanuts, soy beans, white beans, butter beans, hazel nut, Brazil nuts, almonds, pecans & shrimp. I’m to Avoid “All” seafood & nuts.So with that being said… What gluten-free products am I supposed to use? For baking & cooking. Any help would be appreciated!
I’m so sorry, Christine. This sounds very overwhelming for sure. Have you tried oat flour recipes? It sounds like you are looking for a safe flour since GF mixes have cornstarch. The other option would be to make your own GF flour blend to use in recipes. This would be a little more experimentation on your part, but I would start with some of these gluten-free oat flour recipes because they are pretty easy!
Best,
Melissa
I found a diy flour blend with rice flour, potato starch, Tapioca Starch, , xanthan gum, and whey protein for bread flour. I use guar gum instead of xanthan gum and animal free egg protein in place of the whey. For all purpose flour it is rice flour, Tapioca Starch, potato starch, corn starch, milk powder, and xanthan gum. Again I use guar gum in place of xanthan. I omit corn starch and put more potato starch. And in place of the milk powder I use rice protein mixed with pea protein. Or coconut milk powder
I just made these. I used evaporated coconut milk that I soured with vinegar in place of the buttermilk, and I don’t use shortening so I subbed butter for the shortening. They were so so good!!!! My husband, who grew up eating these with gluten and shortening made by the Amish, loved them. He said they were almost as good. Just a little more crumbly from the gluten free flour.
So lovely to hear, Amanda. Thank you so much for taking the time to share!
Best,
Melissa
What kind of shortening do you use? I want to avoid crisco. Would Nutiva work?
Hello,
I don’t think that would be a problem. Enjoy!
Best,
Melissa
These came out just like momma used to make. Even the filling was spot on.
Music to my ears, Judith! What flour did you use?
Best,
Melissa
Made these today. Have gotten two thumbs up from my family. Taking them to a BBQ tomorrow. Living in NH I made a Fluff frosting. Recipe was very easy to follow. I think that the boiling water does make a difference. Will make these again.
Thank you so much, Lisa! I appreciate you taking the time to let me know. 🙂
Best,
Melissa
Did these today. My filling wasn’t quite right- I used a hand mixer instead of the stand mixer. The cookies are perfect.. They rival the whoopies here in Lancaster, PA.
Yay, Wendy! That’s quite the compliment. 🙂
Best,
Melissa