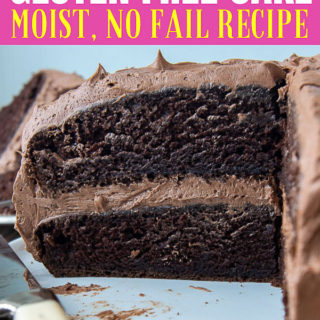
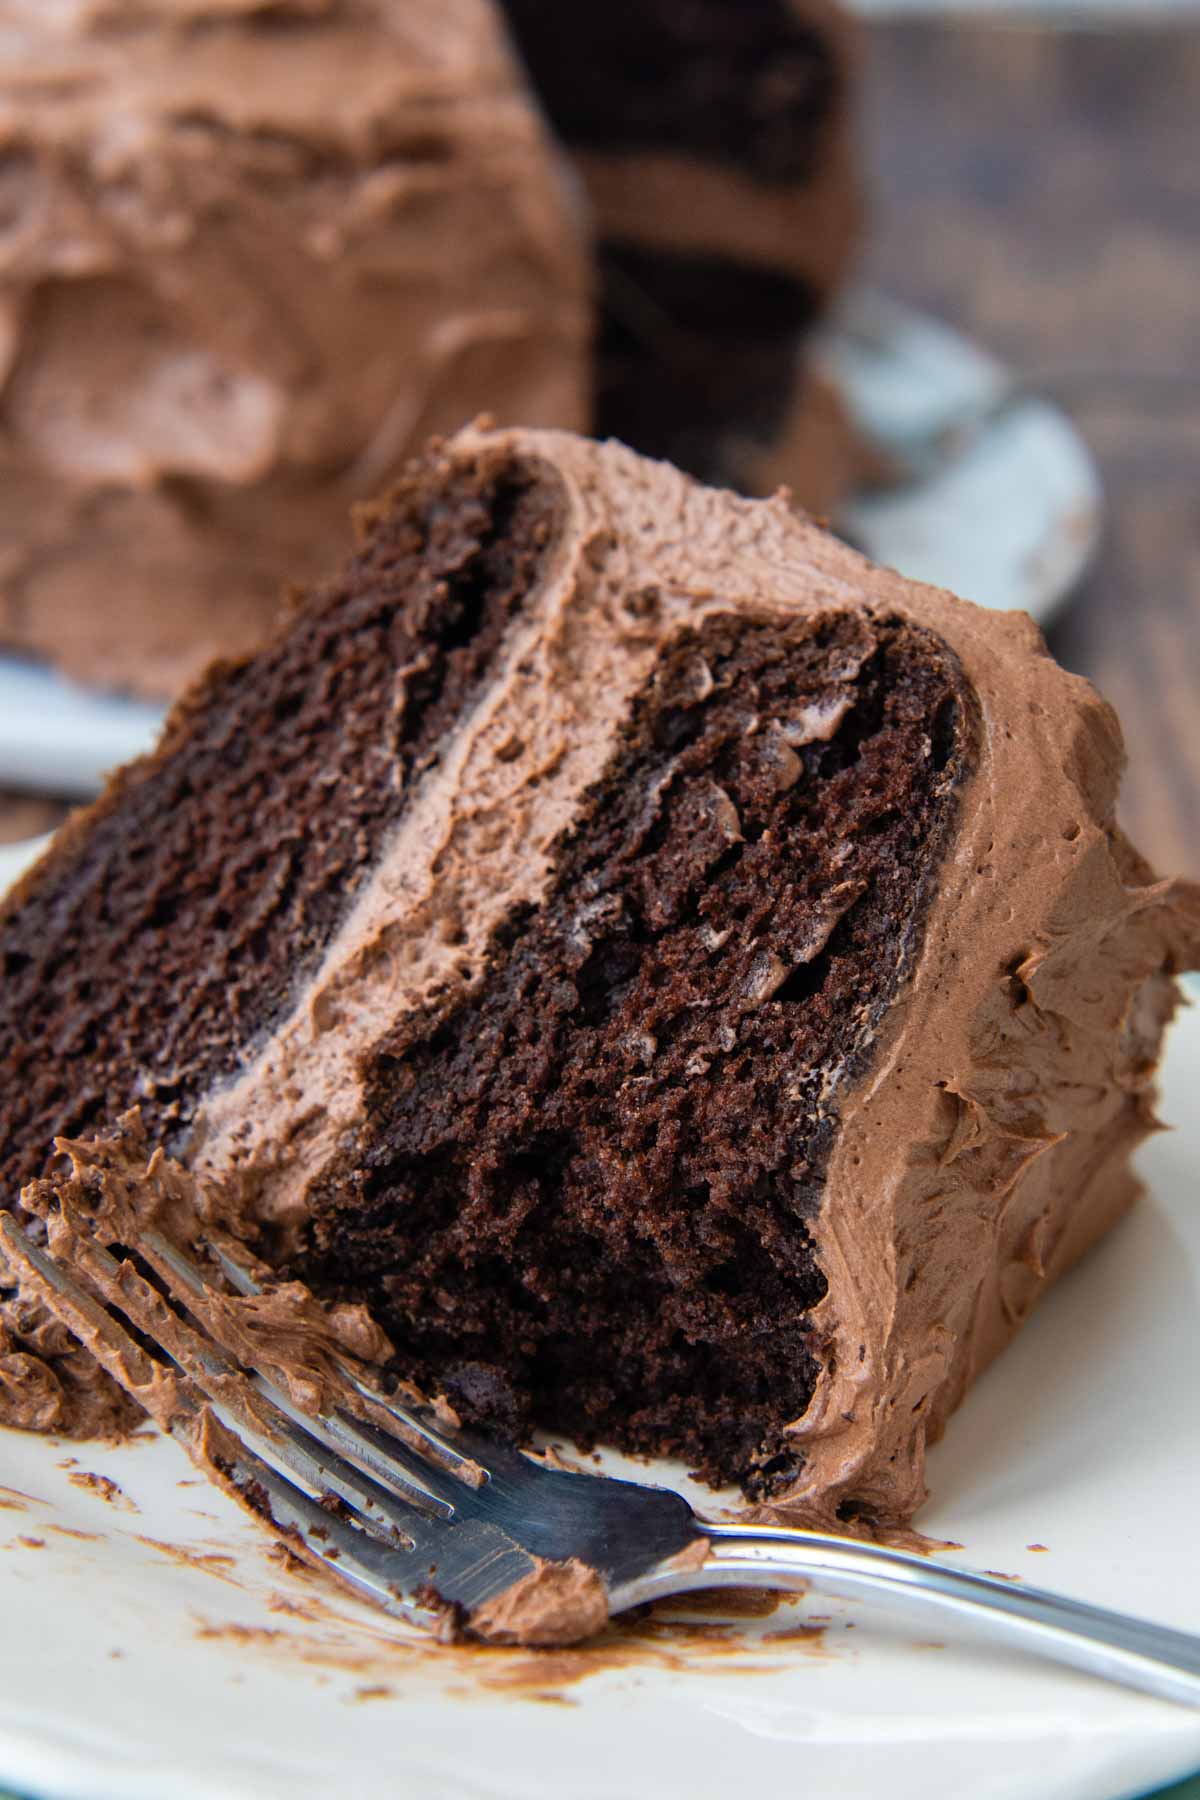
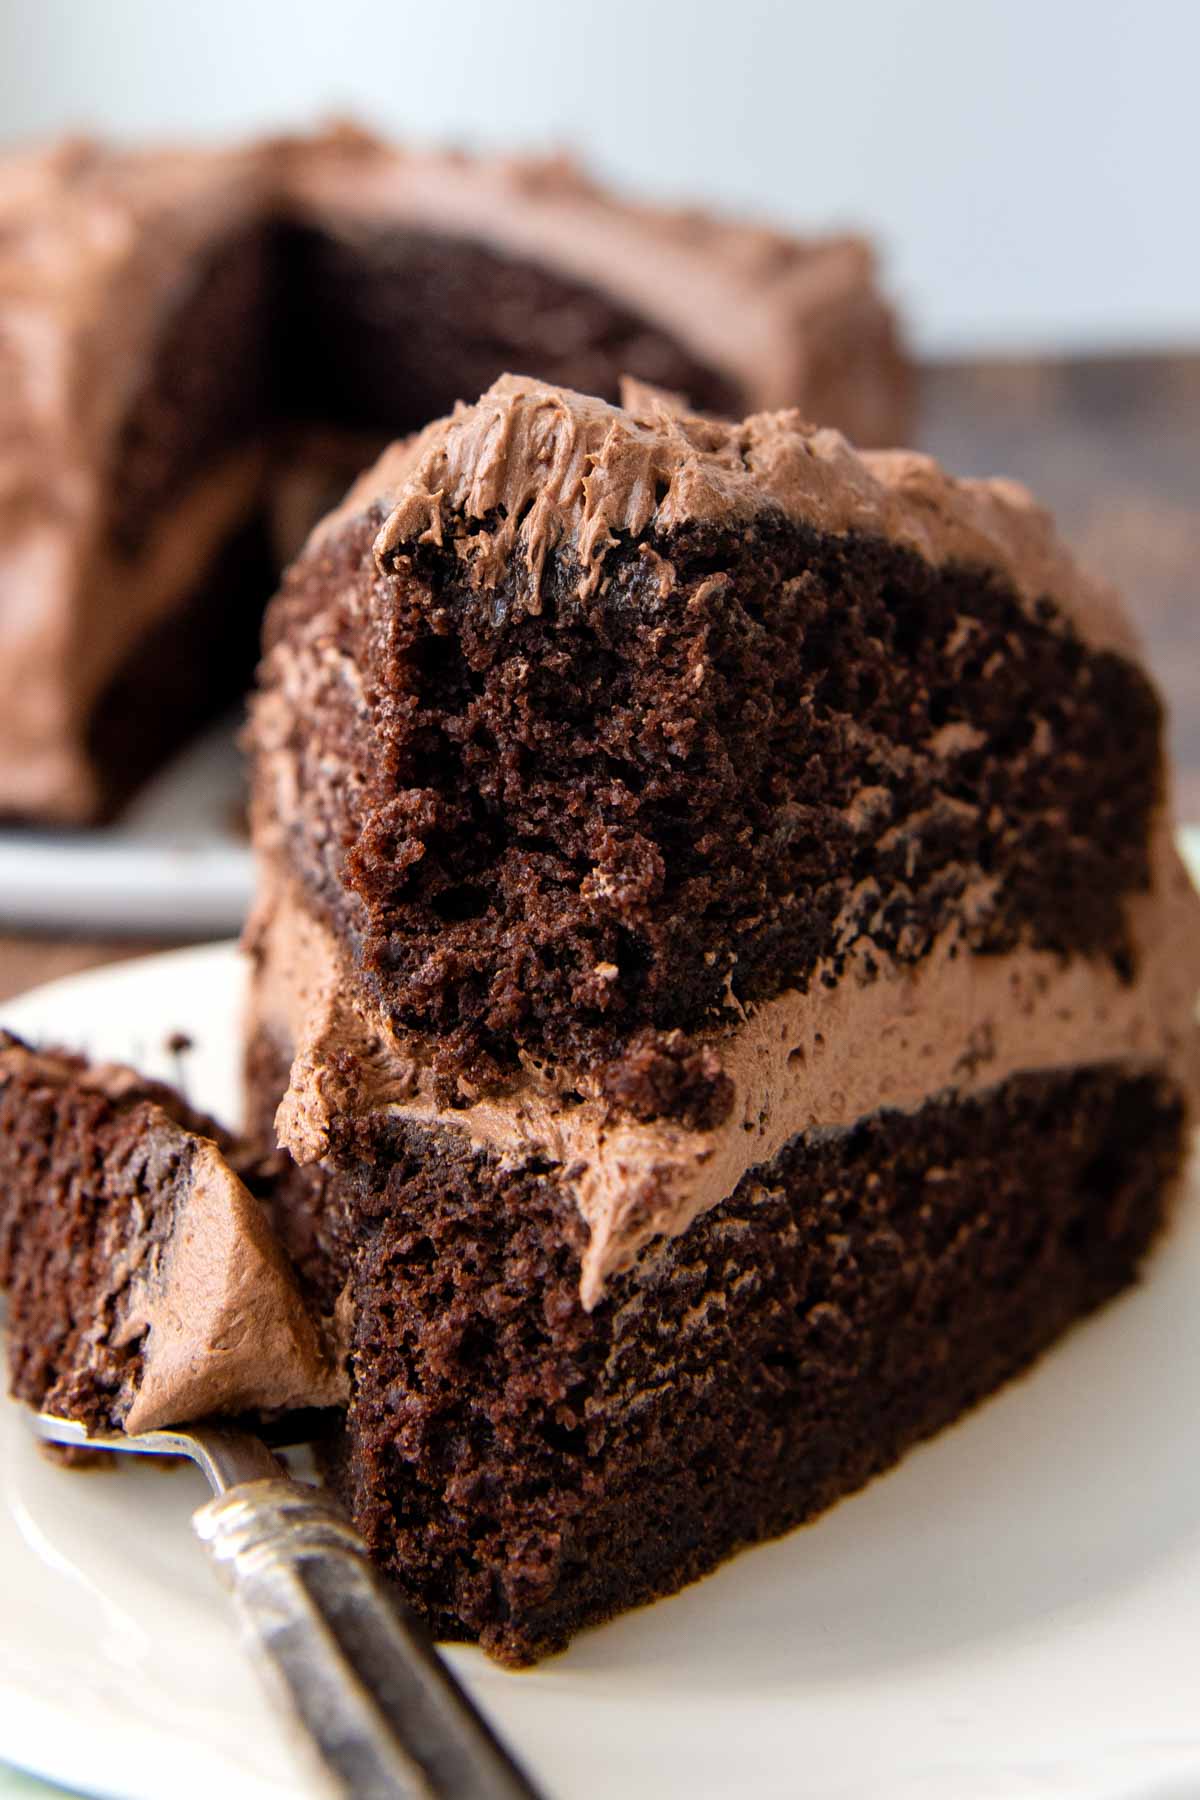
Learn how to bake the best and most moist gluten-free chocolate cake with this an easy to follow, no-fail recipe. What makes the cake so moist? Boiling water in the cake batter. It helps saturate the starches, aerates the batter, making the cake light, fluffy and moist instead of gritty. Find out for yourself why this GF cake recipe has earned hundreds of 5-star reviews!

Want to Save This Recipe?
Enter your email below & we'll send it straight to your inbox. Plus you’ll get affordable and easy gluten-free recipes delivered each week!
Hands-Down Best Gluten-Free Chocolate Cake Recipe
Whether you are new to gluten-free baking or a seasoned veteran, we all need need an easy, homemade gluten-free chocolate cake recipe to fool even the toughest critics. Every time I serve it, no one suspects anything but an old fashioned, moist, from-scratch recipe.
I’ve made it as a GF birthday cake, for celebrations, and as a base for many other creations in my complete gluten-free cake collection, like Ding Dong cake and this epic cookies and cream gluten-free ice cream cake.
It’s my most often made dessert because it’s quick to throw together and consistently turns out fabulous. So what’s the trick? Why does this chocolate cake made with cocoa powder beat out the rest?
First, the recipe uses commonly stocked pantry items, like GF all purpose flour, unsweetened cocoa powder, eggs, milk (or dairy-free), and vanilla. Since it uses oil, rather than butter, not only can it be easily adapted to a dairy-free gluten-free recipe, but the crumb stays moist.
Second, it’s just as easy as using a cake mix with even better results! Simply dump all the ingredients in, mix, and bake. It’s impossible to mess up this gluten-free chocolate cake!
Lastly, it uses a magical special ingredient to give superior results. Boiling water helps saturate the gluten-free starches, eliminating any grittiness, activates the chocolate for a rich, deep flavor, and aerates the batter. Once the hot water mixes in with the cake batter, it jump starts the baking powder and baking soda for an extra fluffy texture.
Some recipes rely on sour cream for extra moisture, but when making a chocolate cake with all-purpose gluten-free flour it’s as simple as adding a cup of hot boiling water!
Read on to learn how to make the best from-scratch layer cake, with bakers tips, workable ingredient swaps, and variations for sheet cake, cupcakes, and dairy-free. It’s all here! Then morph this easy layer cake into other show stopping desserts, like my family’s most requested gluten-free Black Forest cake.
I have the same praise as everyone does, its the best chocolate cake I’ve made period!
—Heather
We actually like this cake better than our favorite chocolate cake with regular flour. This GF cake is so moist and delicious! Thank you for this wonderful recipe!
—Rebecca
Free Guide! 5 easy tips for baking like a gluten-free pro!
Simple hacks for fail-proof gluten-free dishes every time!
Ingredient Tid Bits
- Gluten-Free Flour – I use and recommend Cup4Cup gluten-free flour blend, but many readers have written in adding the different flour blends they have used with success. Check out the comments below. 👇
- Unsweetened cocoa powder – Use regular or Dutch-processed cocoa for richer chocolate taste, which is my preferred.
- Milk – Any kind works here, regular or non-dairy milk, such as almond milk.
- Vegetable oil – Coconut oil or any preferred oil may be substituted.
- Boiling water – Secret “ingredient” for a moist, deceptively gluten-free cake! It helps saturate the starches, aerates the batter, making the cake light and fluffy instead of gritty.
Let’s Make This Together!
(Below shows step-by-step photos and modified instructions. For the complete recipe, along with ingredient amounts, scroll down to the recipe card.)
Easy peasy cake (Seriously!)
Making a homemade gluten-free cake does not have to be complicated to get absolutely fabulous results. Pinky promise.
First, mix the dry ingredients together in a large bowl. Add the eggs, milk, oil, and vanilla and stir to combine. You are almost there…
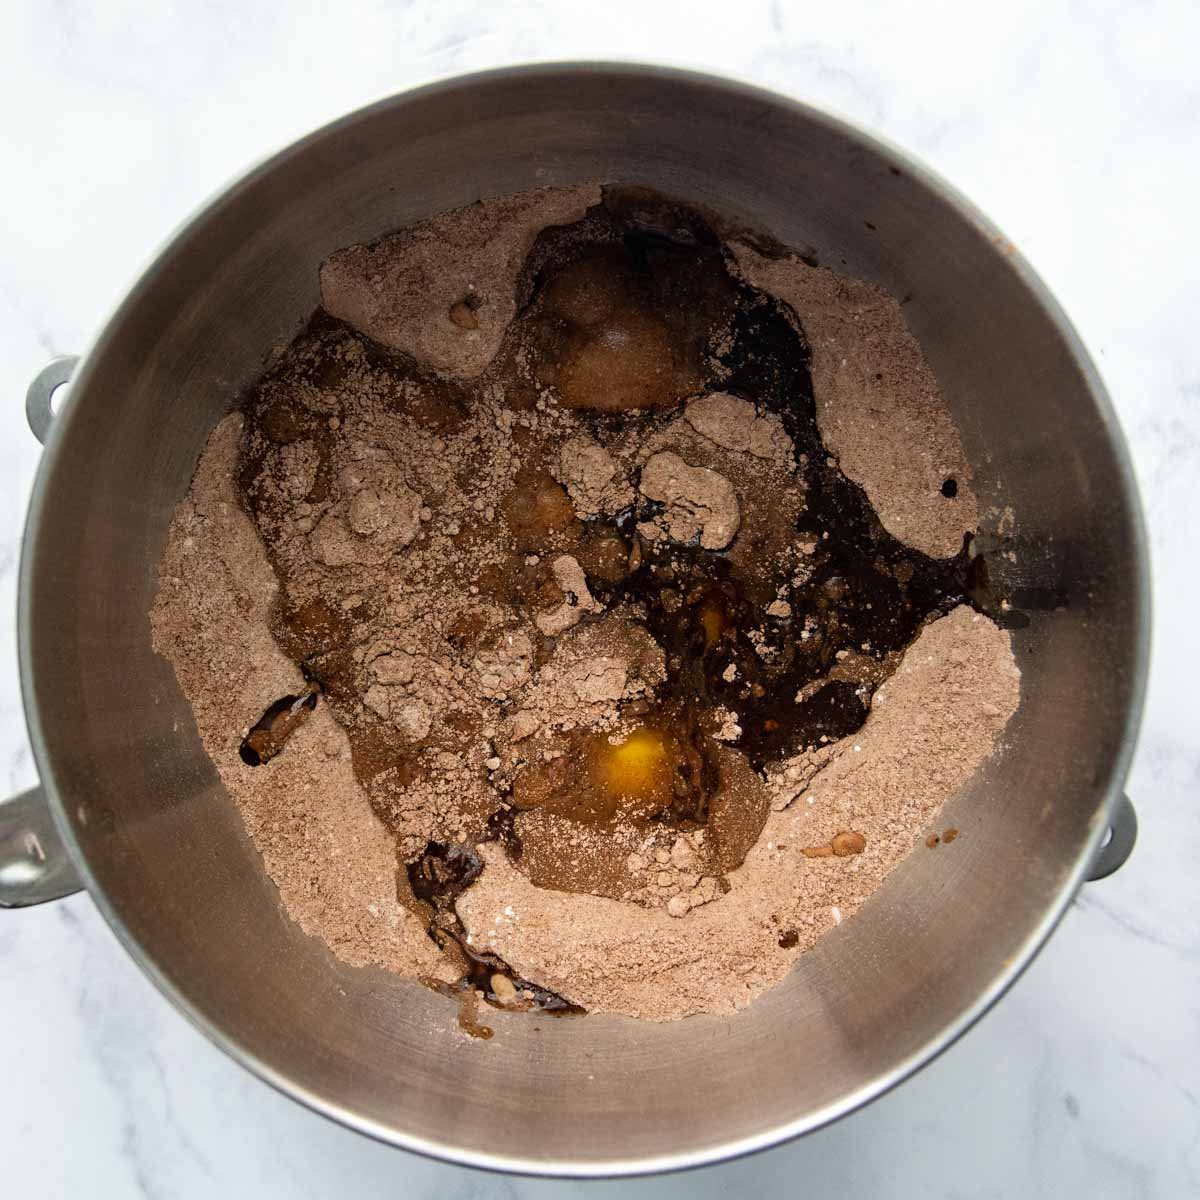
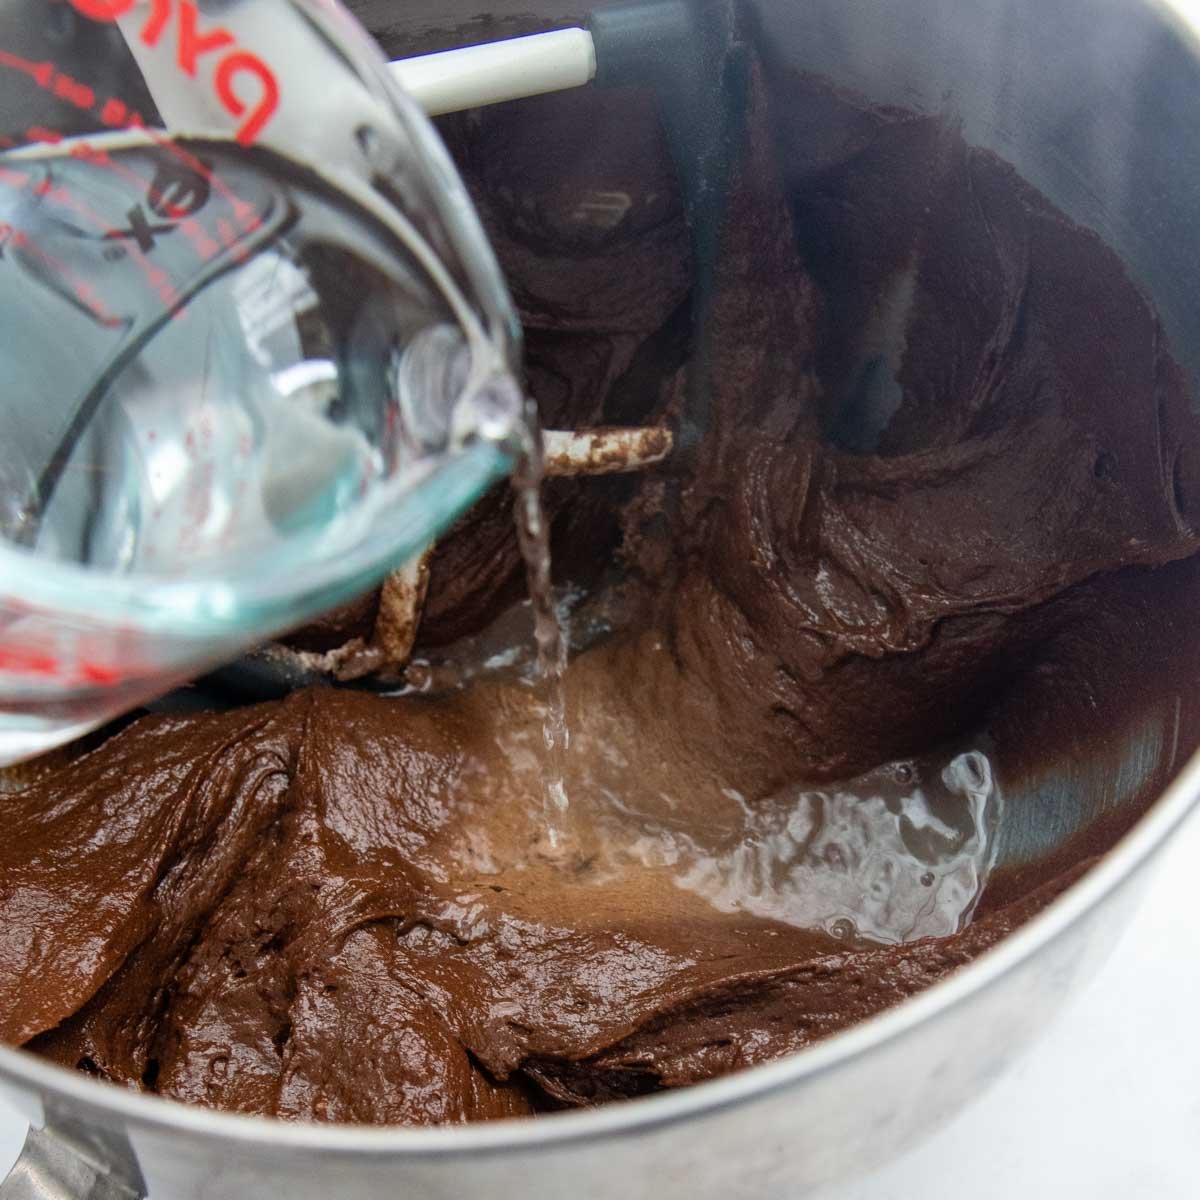
“Magic” ingredient time!
While mixing on low speed, slowly add boiling water. Once it’s mixed it, up the speed to high, and mix for 1 minutes. The boiling water activates the cocoa for a richer taste, saturates the GF starches so they aren’t gritty, and makes an extremely moist crumb. See, it’s magic!
Recently I started letting the cake batter rest in the pans for 10 minutes before baking. I find this helps set up the structure of the cake so it doesn’t sink in the middle or get a “wrinkly” top. If you have the extra time, I highly recommend it!
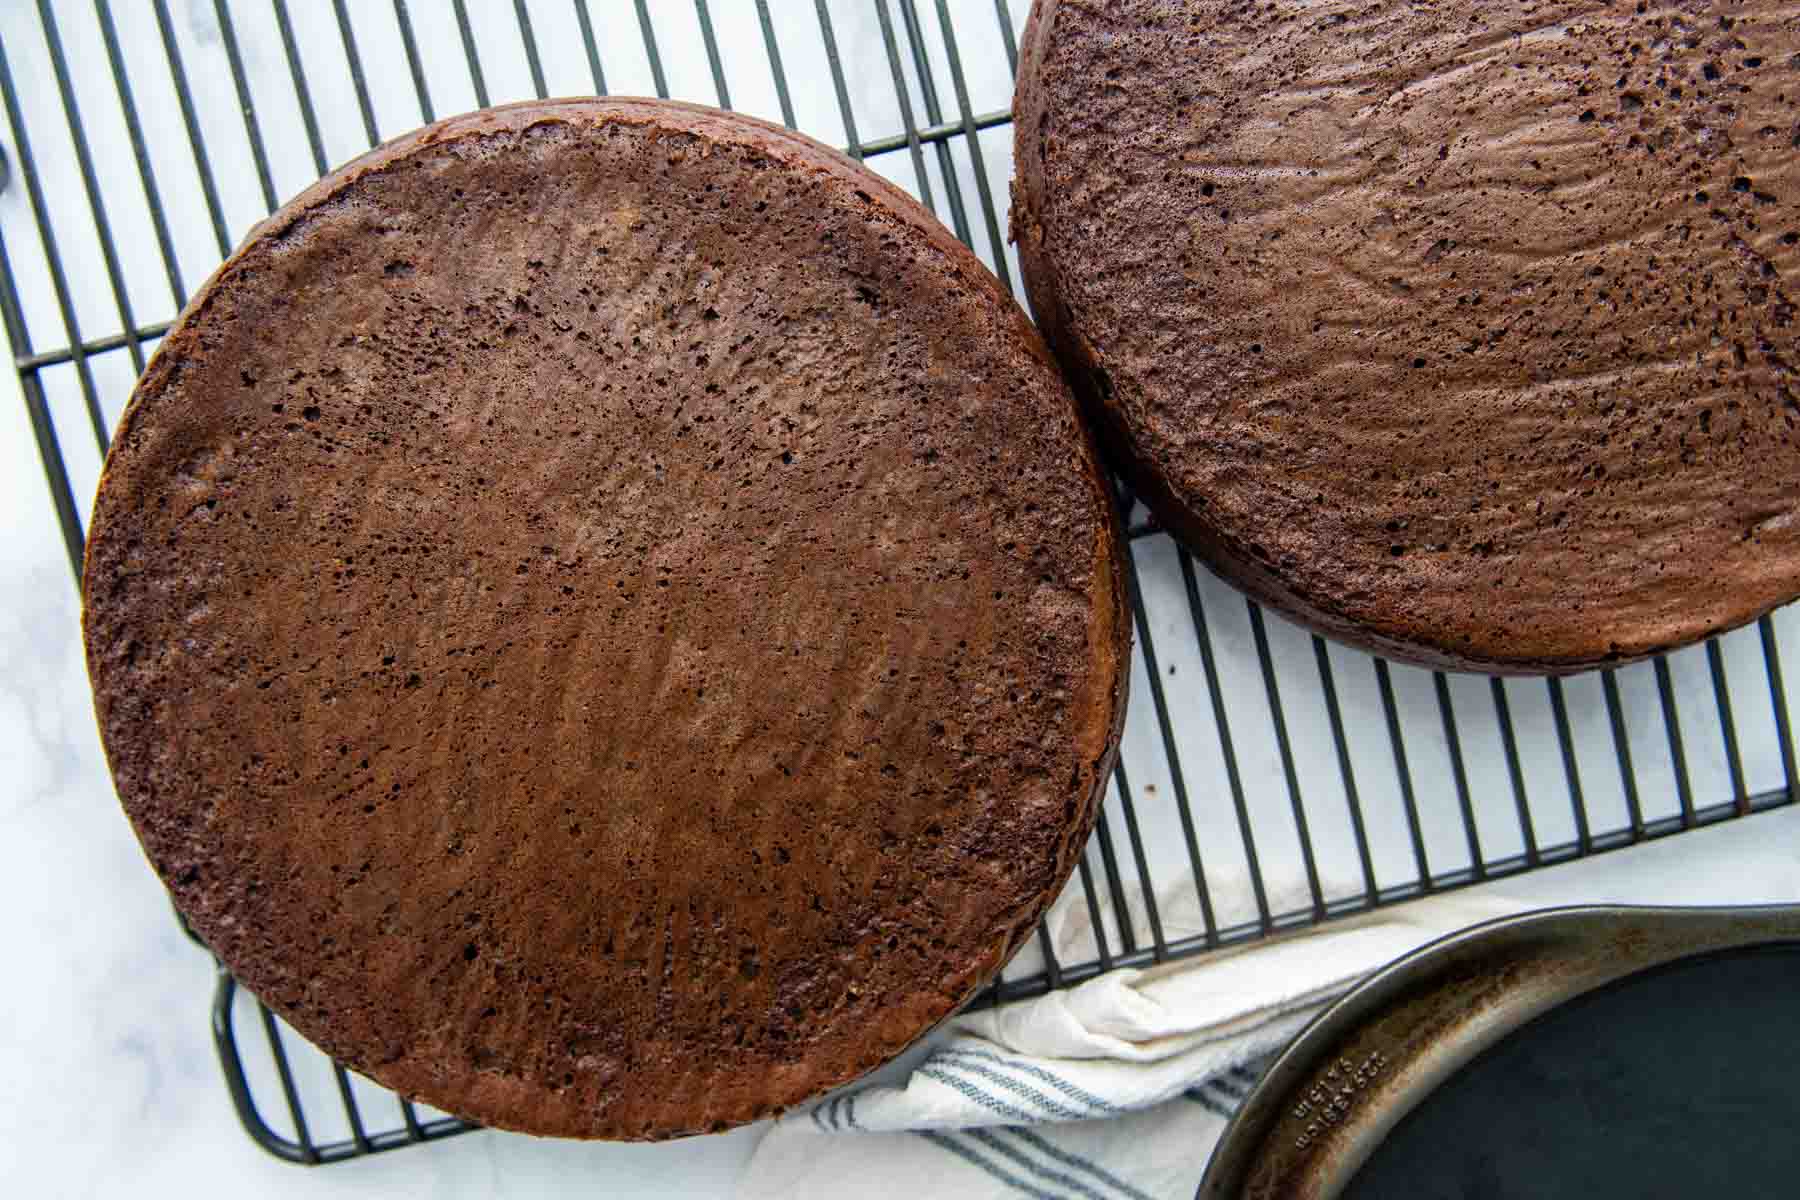
Bake, cool, frost, and enjoy (immensely).
With GF cakes you can error on slightly overbaking because you want to make sure all the moisture has evaporated. Otherwise as the cake cools, it will sink in the middle. Make sure the tops are fully set, especially in the middle. I like to use this cake tester because it grabs more of the crumb for an accurate testing.
Cool in the pans for 5 minutes, then turn onto a wire rack to cool completely before frosting. Your kitchen will smell like heaven. You’re welcome.
What’s Cake Without Frosting!
You’ve made your cake, now let’s get serious about the next delicious step, which decadent frosting all you going to smother all over this beauty…Just be sure to let it cool completely before frosting or you will have the dreaded sliding cake layers. 😳
If chocolate overload speaks to you, then this uber fluffy chocolate frosting with an unexpected ingredient is a must try. For those of you how love a black and white combo, try my go-to recipe for the world’s fluffiest buttercream frosting. Other options include a chocolate ganache, cream cheese or sour cream frosting, whipped cream, this silky peanut butter glaze.
Pro Tips for a Moist GF Cake
- Use cake baking strips to not only keep the cake moist, but they prevent uneven layers, which can be tricky to frost and hold shape.
- The less sugar you use, the drier the cake will be. Please note while the amount of sugar may be reduced, it will dry out the cake slightly.
- This cake recipe is more forgiving when it comes to baking time, but you still don’t want to overbake. Check by inserting a toothpick into the middle. It should have some moist crumbs, without being liquidy. If you are unsure, turn off the oven and let the cake sit for 1-2 minutes before removing.
- Enjoy the cake at room temperature. Although some frostings have to refrigerated, I highly recommend setting cakes out for several hours before serving to reach room temp. Gluten-free cakes especially have a tendency to dry out in the refrigerator.
Can I Use A Different Baking Pan?
Of course! For cupcakes follow the baking directions on this easy gluten-free chocolate cupcakes recipe. If you’d rather make a sheet cake, pour all the batter in a greased 9X13 inch baking pan and bake for 45-50 minutes.
Save this recipe to your pinterest board!
Let’s be friends on Pinterest! I’m always sharing great recipes!
Did you make this recipe? I love hearing from you! Leave a star rating and comment below the recipe card. It helps others when searching for recipes and I appreciate feedback from our community. You will always hear back from me! -Melissa

Legit Moist & Easy Gluten-Free Chocolate Cake
Ingredients
- 2 cups (292 g) all purpose gluten-free flour, (I highly recommend Cup4Cup gluten free flour)
- 2 cups (400 g) granulated sugar
- ¾ cup (75 g) unsweetened baking cocoa , dutch-processed preferred
- 2 teaspoons baking powder
- 1 ½ teaspoons baking soda
- ½ teaspoon salt
- 1 cup (245 g) milk or non-dairy milk
- ½ cup (107 g) oil, any preferred
- 2 large eggs
- 2 teaspoons vanilla extract
- 1 cup (240 g) boiling water
Instructions
- Preheat oven to 350º F. Prepare two 9-inch cake pans by spraying with cooking spray, lining pans with cut-to-size parchment on bottom, and then spraying the parchment. Set aside.
- In a large bowl add flour, sugar, cocoa, baking powder, baking soda, and salt. Whisk to combine or, using your paddle attachment on stand mixer, mix until combined.2 cups all purpose gluten-free flour, 2 cups granulated sugar, ¾ cup unsweetened baking cocoa , 2 teaspoons baking powder, 1 ½ teaspoons baking soda, ½ teaspoon salt
- Add milk, oil, eggs, and vanilla to flour mixture. Mix on medium speed until well combined. Reduce speed to low and slowly add boiling water to the cake batter. Once the water is mixed in, increase to high speed and mix for 1 minute.1 cup milk or non-dairy milk, ½ cup oil, 2 large eggs, 2 teaspoons vanilla extract, 1 cup boiling water
- Distribute cake batter evenly between the two prepared cake pans. (Tip: Letting the cake batter rest in the pans for 10 minutes before baking helps set up the structure of the cake so it doesn't sink in the middle or get a "wrinkly" top. If you have the extra time, I highly recommend it!) Bake for 30-35 minutes, until a toothpick inserted in the center comes out clean.
- Remove from the oven and cool in pans for 10 minutes. Turn cakes onto wire rack to cool completely before frosting with fluffy vanilla buttercream or chocolate buttercream.
Notes
Dairy-Free Modification
The only recipe adaptation you’ll have to make is replacing the milk with a dairy free milk, such as almond milk, soy milk, or coconut milk. If you prefer using coconut oil, that may also replace the vegetable oil. Some flour blends do contain milk powder, so be sure to read the ingredient labels.Using Different Baking Pans
Gluten Free Cupcakes To make bake this cake as cupcakes follow Incredible Gluten Free Chocolate Cupcakes recipe. 9X13 Sheet Cake To make a sheet cake instead of layer cake make the batter as written. Spray a 9X13 baking pan. (Let the batter rest in the pan for 10 minutes before baking. I find this helps set up the structure of the cake so it doesn’t sink in the middle or get a “wrinkly” top. If you have the extra time, I highly recommend it!) Bake at 350 for 45-50 minutes or until toothpick inserted in middle comes clean. Cool on wire rack completely before frosting.Freezing and Storing Tips
Gluten free cakes do not stay fresh as long as regular cakes. Therefore, if you don’t plan on freezing the cake, make it no more than 24 hours ahead of time. Freezing Unfrosted Cake Layers: Wrap each completely cooled layer securely in plastic wrap. Transfer wrapped layer to a gallon freezer bag and freeze up to 3 months. When ready to use, remove from freezer bag and thaw wrapped cake at room temperature for 1 hour. Freezing Frosted Cake: Assemble the cake with filling and frosting. Transfer whole cake to the freezer so frosting solidifies. After the frosting is frozen, wrap the cake securely with plastic wrap. Cover plastic wrap with foil and freeze up to 3 months. Thaw cake overnight in refrigerator. Carefully remove plastic wrap and foil. Continue to thaw at room temperature for 5-6 hours. Freezing Cake Slices: Slice the leftover cake in serving sized portions. Wrap each piece in plastic wrap and freeze in a single layer on a baking sheet. Once the pieces are solid, transfer slices to a gallon freezer bag or airtight container. Thaw pieces on the counter for 1 hour or defrost in the microwave at 20% power, carefully avoiding overheating and melting the frosting. Adapted from Add a PinchThis post contains affiliate links. My opinions are always my own. If you purchase a product through an affiliate link, I make a small commission – at no cost to you. Read full disclosure policy here.


This is the best gluten-free chocolate cake I’ve ever tasted. It’s dangerous.!!!
Haha! Thanks so much for sharing, Cusano Jan!
Best,
Melissa
Would 25-30 min, be a good cook time for a half sheet pan? I’m aiming to cut out small rounds with a cookie cutter.
Hello,
I would say 20-25 minutes and start checking at 20. My Texas sheet cake recipe takes 22-24 minutes to bake. Enjoy!
Best,
Melissa