
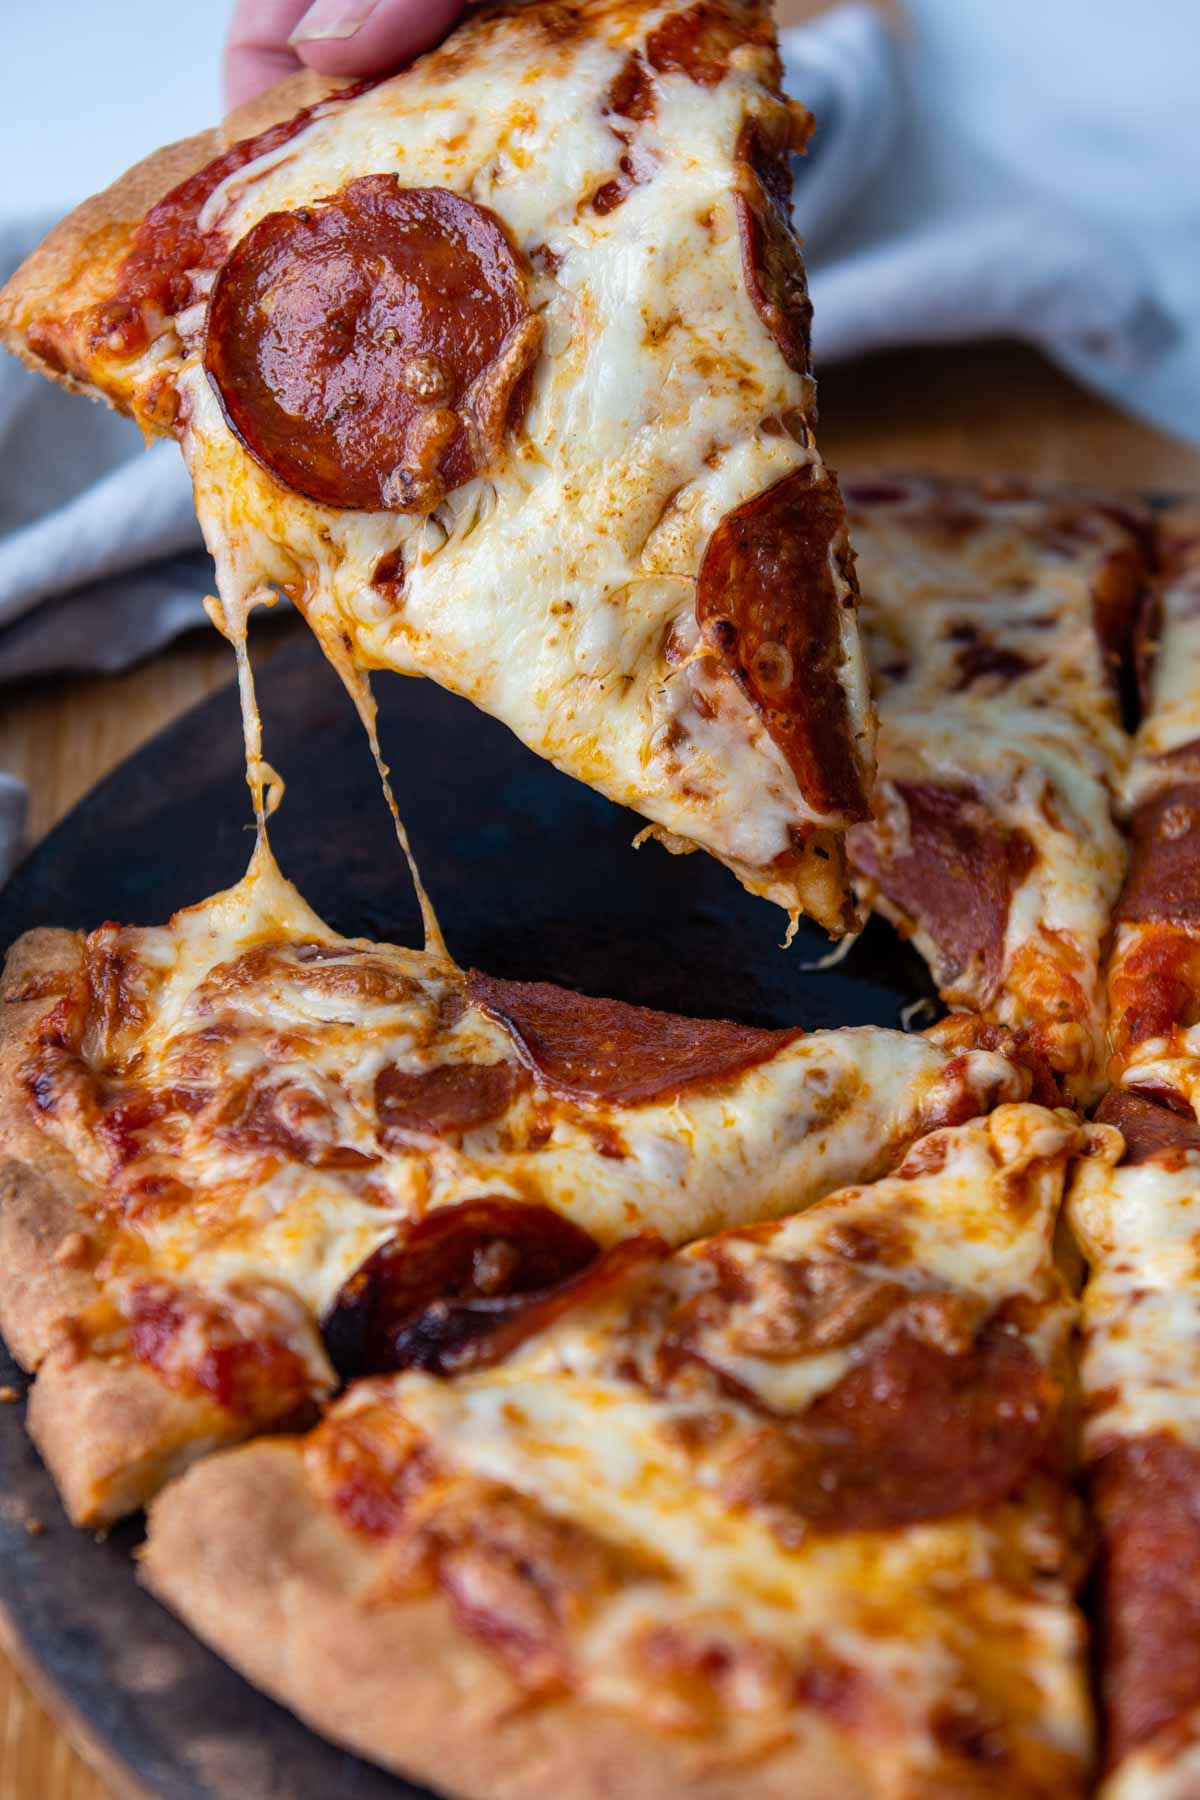
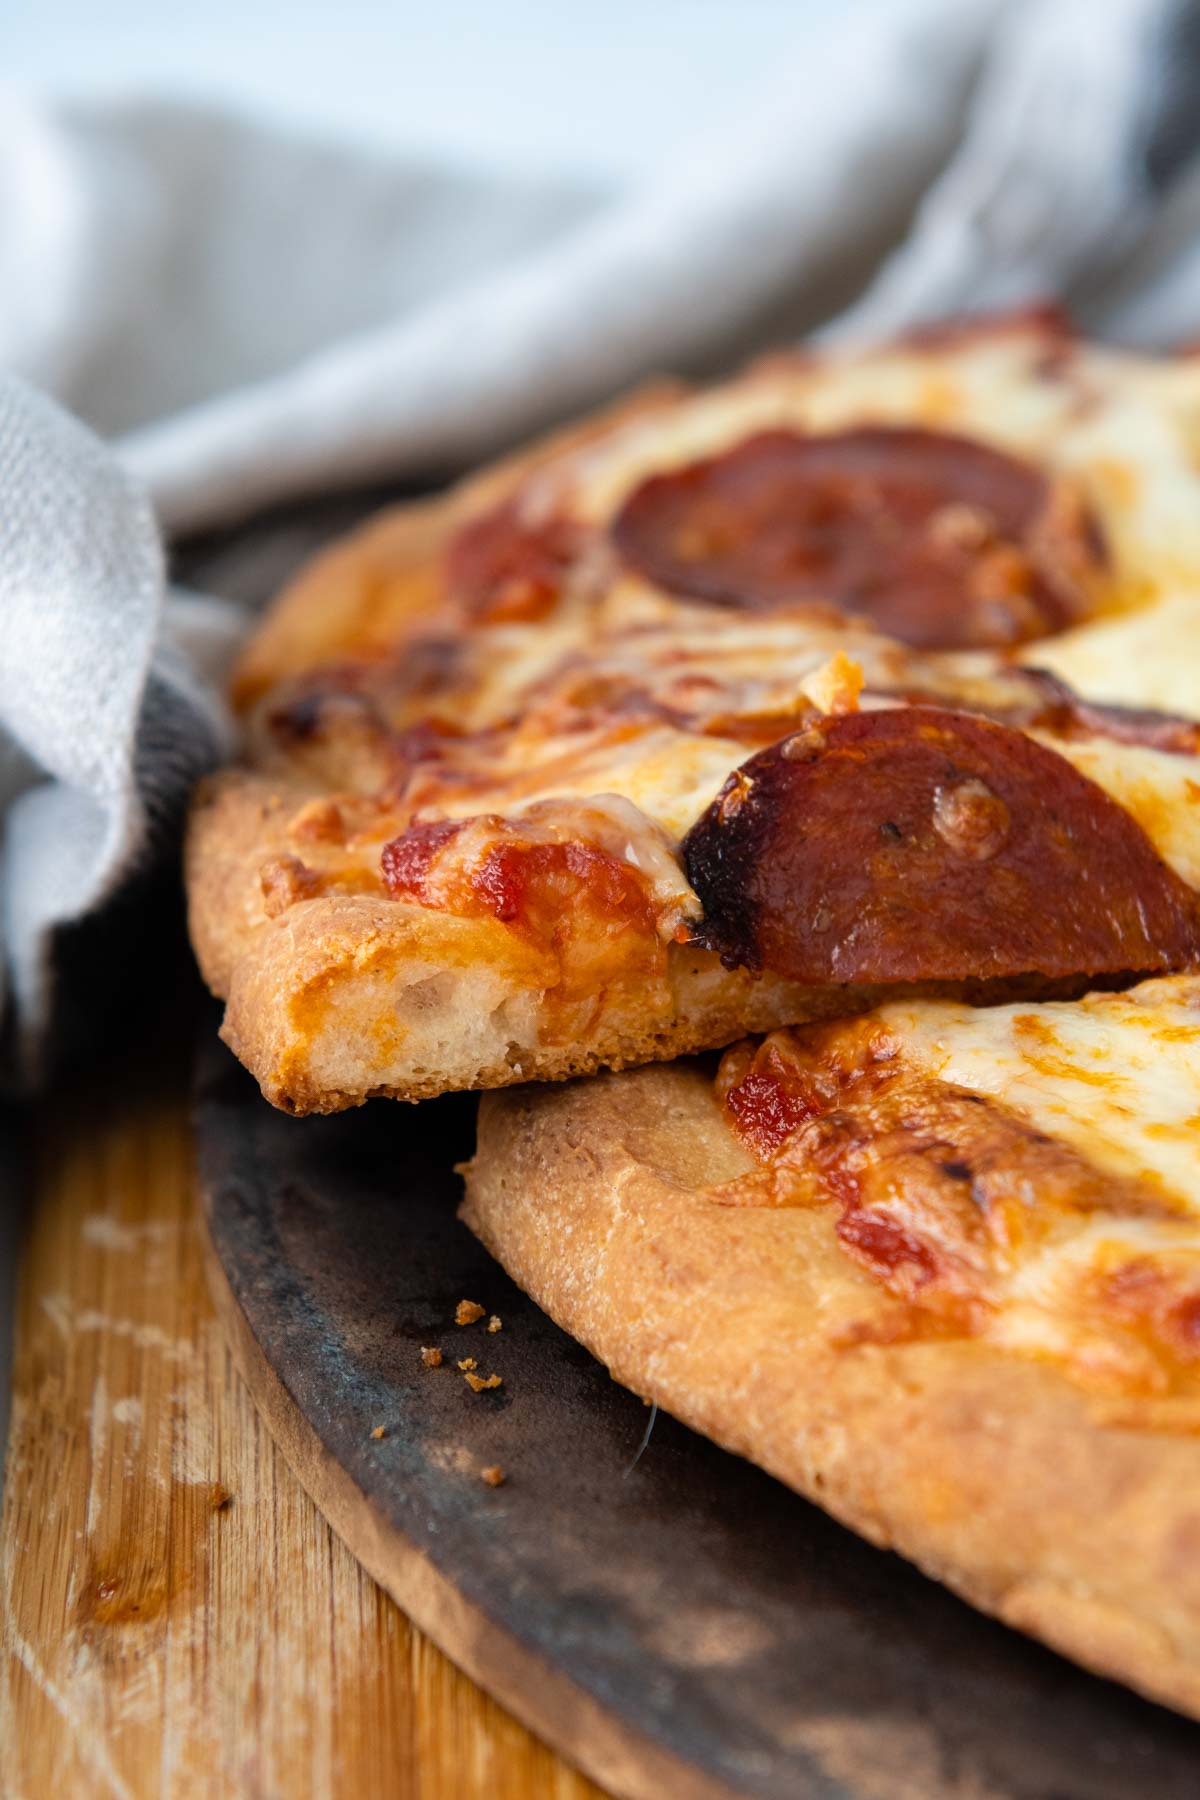
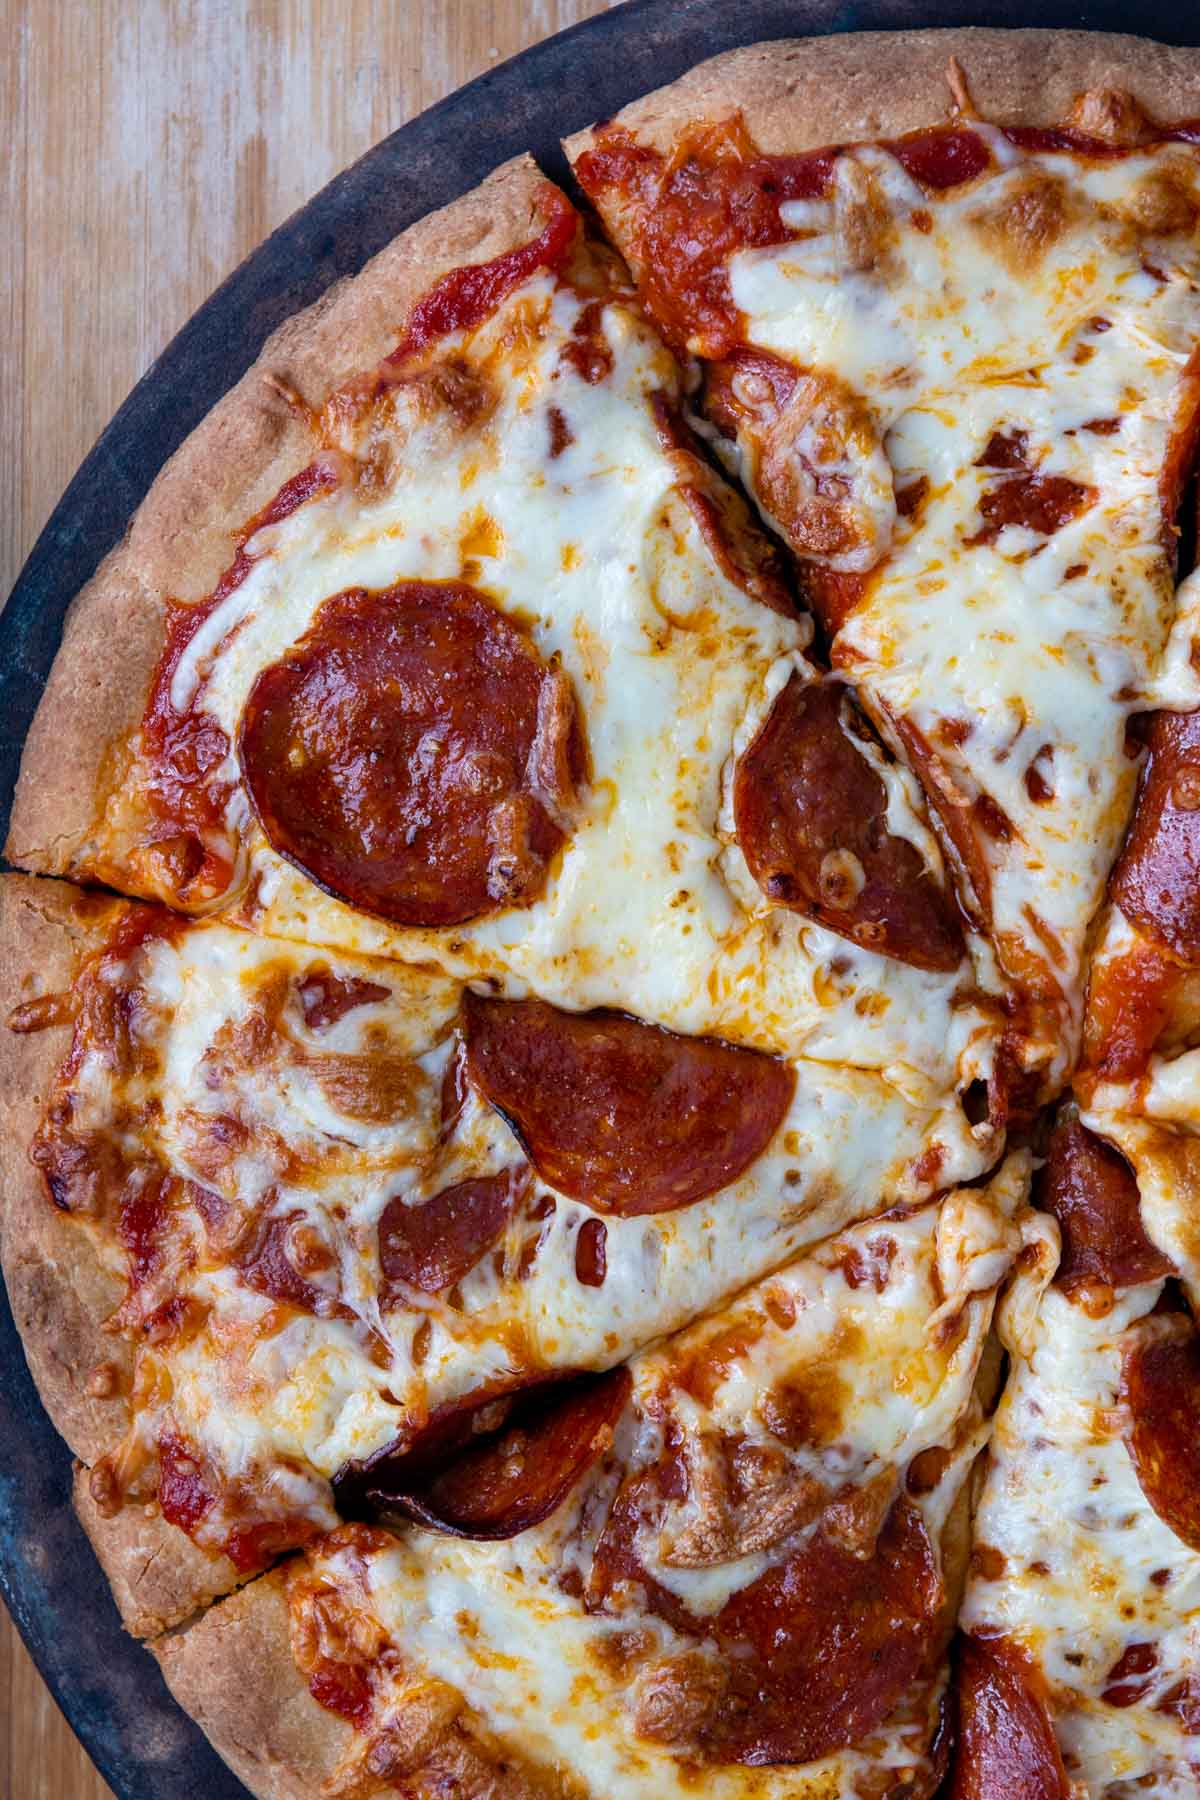
Whether you’re new to gluten-free baking or a seasoned pro, my recipe for gluten-free pizza crust is about to become your go-to. It delivers everything you want in a homemade crust: soft, fluffy texture, golden crisp edges, and just the right amount of chew. Made from a recipe-tested blend of gluten-free flours and psyllium husk, it’s sturdy enough to hold generous layers of pizza sauce, cheese, and your favorite toppings without falling apart.
Want to Save This Recipe?
Enter your email below & we'll send it straight to your inbox. Plus you’ll get affordable and easy gluten-free recipes delivered each week!
This Gluten-Free Pizza Crust Recipe WORKS
I already know what you’re thinking. After you take a peek at this homemade crust recipe there will be thoughts, like, “She wants me to bake it how long?!” and “How could this dough possibly turn out as good as she claims?!”
You gotta trust because I was right there with you. I first came across this gluten-free pizza dough recipe in a handy resource when I transitioned to a gluten-free diet, America’s Test Kitchen: How Can It Be Gluten-Free Cookbook. When I read through the recipe process initially I had similar no-way thoughts.
But after working many ATK recipes, I quickly learned they knew what they were talking about. In fact, their techniques inspired tons of my own gluten-free bread and baking ideas, which led to my published GF cookbook. (Toot, Toot 😊)
So, let’s work through through this recipe. Although the pizza crust is made with gluten-free flour, it has some little ingredient friends to avoid the dreaded cardboard crust outcome. Swapping out some of the GF flour with another starch keeps the crust light and fluffy, instead of dense and chewy.
When testing these doughy soft gluten-free pizza rolls, I used a small amount of potato starch to do the trick. But for gluten-free pizza crust, adding a bit of almond helped with moisture and cut chewiness, since the recipe doesn’t have eggs or butter. (Bonus! It’s also happens to be dairy-free and vegan as well.)
Besides that, you’ll notice this dough also uses another touch of magic – psyllium husk. Why? It greatly enhances structure, elasticity, and a stretchy texture. All the things we need with for bomb-diggity homemade GF crust.
That all makes sense, right? Where does the questioning come in? Well…the dough comes together super fast, just dump and mix. The extra time? I’ll walk you through below. Remember to trust.
After trying many other recipes for a year, this is my go-to recipe for GF pizza! It’s easy and is consistently delicious! I make this gluten free pizza for everyone when my daughter with celiac visits, and no one misses the wheat pizza–it’s THAT GOOD.
—Kate
Free Guide! Receive a Free Gluten Free Dinners Cookbook
TOP 5 Highest Rated Recipes!
Let’s Make This Together!
(Below shows step-by-step photos and modified instructions. For the complete recipe, along with ingredient amounts, scroll down to the recipe card.)
Couldn’t be easier – dump and mix
In a stand mixer, use a paddle attachment to combine the dry ingredients – gluten-free flour (I use and highly recommend Cup4Cup GF flour for best results), almond flour, psyllium husk powder, baking powder to give a boost of rise and loftiness, salt, and yeast.
Slowly pour in the warm water and oil. Mix until it’s combined and then beat at medium speed for 5 minutes. The dough will be sticky, but don’t worry. Remember you don’t have to knead or work it with your hands!

Plan ahead for rise time
Now scrape down the dough into the middle of the bowl. Cover it with plastic wrap and let rise in a warm, draft-free place for 90 minutes. I know, that’s a long time, so you’ll need to plan ahead. It’s done when the dough is slightly bubbly inside.

Let’s shape the dough
First preheat the oven to 325°F. You’ll need a pizza stone or baking sheet lined with greased parchment paper.
Scoop the dough into the center of paper and use a greased silicone spoon to spread it into a circle, until it’s about a 11 ½” diameter.
Bake it at that lower oven for 45-50 minutes. Yep, you read that right. The crust will be firm to the touch and start to brown underneath.


Finish up with sauce, toppings, and final bake
Now it’s time to do all the homemade pizza night things. Take the empty stone, place it in the oven and preheat it to 500°F. I like to assemble my crust on a peel so I can easily transfer it to the hot stone.
Spread your crust with all the goodness – sauce, cheese, and toppings. Slide it onto the hot stone for a quick bake, 8-10 minutes. The crust will be a deeper golden brown and the cheese nice and bubbly. Dig in, then comment below how this pizza crust is actually the best gluten-free recipe ever! 😎

What Kind of Equipment Do I Need (And Not Need)?
To replicate those pizza parlor dreams of a crispy crust with a doughy soft interior, I highly recommend using a stone. I like this particular pizza stone because it’s circular, serving as a guide for dough shaping, but you can also find rectangular ones, which work fine too.
If you do not have a stone, preheat a baking sheet or pizza pan in the oven. While it won’t make as crisp as a crust, it’s better than using a cold pan.
To assemble the pizza and move it onto the hot stone, a pizza paddle or peel is helpful. Otherwise it’s tricky to transfer the unbaked pizza without disturbing the toppings. But, if you don’t have one, place your parchment on a rimless baking sheet or turn a rimmed baking sheet over and slide it on that way.
Let The Extra Time Work For You! Make-Ahead Friendly
Yes, there are two rounds of baking, but this works out great for you! After the initial bake you can pile on the toppings and bake again immediately, or choose to use this as a make-ahead crust. Either let it stand at room temp for several hours or freeze for later use.
If you plan to bake the pizza later, move the parbaked crust to a wire rack to cool completely. Wrap with plastic wrap and let it sit at room temperature up to 4 hours. Or wrap securely in plastic, cover with aluminum foil, and freeze up to 3 weeks. When ready to bake, assemble and bake from frozen.
Save this recipe to your pinterest board!
Let’s be friends on Pinterest! I’m always sharing great recipes!
Did you make this recipe? I love hearing from you! Leave a star rating and comment below the recipe card. It helps others when searching for recipes and I appreciate feedback from our community. You will always hear back from me! -Melissa

Crispy, Doughy Gluten-Free Pizza Crust (No Knead!)
Ingredients
- 1 ⅔ cup (257 g) gluten-free all purpose flour
- ¼ cup (25 g) almond flour, for best results, but may also sub additional GF flour
- 2 teaspoons (8 g) psyllium husk powder, what is psyllium husk?
- 1 ¼ teaspoon baking powder
- 1 teaspoon salt
- ½ teaspoon instant yeast
- 1 ¼ cup (275 g) warm water
- 2 tablespoons (28 g) olive oil
Equipment
Instructions
- In the large mixing bowl of a stand mixer, use a paddle attachment to combine on low speed gluten-free flour, almond flour (or additional flour), psyllium husk powder, baking powder, salt, and yeast.1 ⅔ cup gluten-free all purpose flour, ¼ cup almond flour, 2 teaspoons psyllium husk powder, 1 ¼ teaspoon baking powder, 1 teaspoon salt, ½ teaspoon instant yeast
- Continue mixing on low speed and slowly pour in water and oil. Mix until combined. Increase the speed to medium-high and beat for 5 minutes. The dough will be a sticky batter.1 ¼ cup warm water, 2 tablespoons olive oil
- Use a rubber spatula to scrape all the dough into the center of the bowl. Cover securely with plastic wrap and let rise in a draft-free place for 90 minutes. When using a spoon to look inside the dough, it should be bubbly.
- Preheat oven to 325°F. Line a pizza stone with parchment paper. If you do not have a pizza stone, line a large baking sheet with parchment. Spray the paper with cooking spray to grease.
- Transfer the dough into the center of the prepared stone or pan. Use a liberally greased silicone spoon to spread the dough into a circle. Continue greasing the spoon, or the top of the pizza dough, to spread out into a 11 ½" circle. If desired, use greased fingers to shape the edges into a raised crust.
- Bake for 45-50 minutes, or until the dough is firm to the touch and slightly starts to brown underneath.
- If assembling and baking the pizza crust later, move to a wire rack to cool completely. At this point it may sit at room temperature for 4 hours or wrap securely in plastic, cover with aluminum foil, and freeze up to 3 weeks. When ready to bake, assemble and bake from frozen.
- When ready to make the pizza, place the pizza stone in the oven and then preheat to 500°F. (See recipe notes if you do not have a pizza stone.) Transfer the parbaked crust to pizza peel for an easy transfer to the hot stone.
- Spread on pizza sauce, cheese, and toppings. Slide the pizza onto the hot stone using the pizza peel. Bake for 8-10 minutes, or until the crust has browned and the cheese is bubbly.
Notes
Making without pizza stone
If you do not have a stone, preheat a baking sheet or pizza pan in the oven. While it won’t make as crisp as a crust, it’s better than using a cold pan. A rimless baking sheet would also work instead of using a pizza paddle to slide it on.freezing and storing
Although this recipe does take some time on the front end for rising and baking, it is freezer-friendly and may be baked right from frozen! You can also make two crusts at once. Then freeze one for a quick and easy Friday pizza night! To freeze, cool completely, wrap securely in plastic, and then cover with aluminum foil. Freeze up to 3 weeks. When ready to bake, assemble and bake from frozen. To store, let it sit at room temperature for 4 hours after the initial bake, or wrap securely in plastic.Tips to Remember
- The gluten-free pizza crust texture and ease is helped by some essential pizza-making equipment. Using a pizza stone achieves a crispy crust, while a pizza paddle makes for a flawless transfer to the hot oven.
- When shaping the pizza dough, be sure it is spread out to at least a 11 ½” circle. Using a baking sheet limits the diameter, making a thicker crust. Therefore, a round stone (best) or pizza pan is recommended.
- Since the crust is par-baked, it could be used for grilled pizza as well!
- The dough is easy to work with as long as it is liberally greased. Keep nonstick cooking spray or a pastry brush and olive oil handy when shaping.
This post contains affiliate links. My opinions are always my own. If you purchase a product through an affiliate link, I make a small commission – at no cost to you. Read full disclosure policy here.


Hi I’m making my crust the day before. Do I understand that you do not preheat the pizza stone for the first 90 min bake? Thanks for your help.
Hi Irene,
No, only for the second short bake. It makes the crust crispier in the short baking time.
Best,
Melissa
Melissa, if I’m preppingv these to eat within the next day or two should I refrigerate after cooled or just freeze and bake from frozen? How would I bake from fridge? Thanks, still loving this recipe but trying to get ahead with feeding many mouths.
Hi Julie,
Although the recipe has a long bake time, it’s really great for meal prep! I always bake direct from frozen unless you aren’t eating it that day.
Enjoy!
Melissa
I only have whole psyllium husk. How to use it (without having to spend more for powder) in the pizza recipe?
Hi Pat,
I would use 1 tablespoon of whole husk for this recipe. Enjoy!
Best,
Melissa
I made this recipe for my grandson and DIL and it was a perfect crust!
Thank you, Fran! I appreciate the note!
Best,
Melissa
Hi Melissa, when I change the recipe quantity it does not change the gram measurements. Is there a way to update that? It would be great as I cooking bigger batches.
Hi Julie,
I manually put in the grams because I don’t trust what the recipe will auto convert the volume to metric. Moving forward I think there is a way I can override it so it will do the conversion. I will try it with this recipe and let me know if it works. I will still include the grams in the ingredient list just so people know that is a possibility as well.
Best,
Melissa
Ok, from the main recipe page when I 2x the recipe it does show grams doubling. But when I click to print, that page no longer shows any grams. Before it would show grams but not update when the quantity was changed. I guess I’d prefer it to show grams from the print screen then I can just multiply as needed. I hope that makes sense. I was updating the slices to 32 to make 4 crusts. It was a huge batch! I think I let it rise too long and the crusts were a bit thick, I probably could have made 5! We tried one from frozen the next day and it tasted great! Definitely a big step up from the store bought GF, fun for my kids to make too.
Any thoughts on baking these on a rectangular baking sheet? I think that would save even more time.
Hi Julie,
Okay this is helpful. Let me see if I can change something in my print settings. I’m not sure I have control over this, but I will look into it for sure! Yes, I think you can do a baking sheet. I would double the recipe and that would equal one sheet pan.
What are you mixing the dough in? Making four times the recipe at once could have an affect on the consistency and texture unless you have a very large, heavy duty mixer, like a Bosch. You might just want to stick to doubling the recipe and mixing in two batches, if that makes sense.
Best,
Melissa
I figured out the print / metric think! It should work now. Sorry, I won’t have on this on all my recipes, but I will slowly roll it out as I add and update new recipes.
Best,
Melissa
It’s no longer showing metric on the card or when I go to print. You may ought to change it back to how it was before. Thanks for your help.
I’m trying it on a baking sheet today!
Hi Julie,
I’m so glad you wrote. Yes, I had to turn it off because it was wrecking havoc on all my other recipes, doing auto-conversions that weren’t correct. I will go in now and add the manual grams again so you have those and unfortunately you’ll just have to do the math to scale it. My apologies!
Best,
Melissa
Thank you! Our pizza was even better this time around. I actually swapped out a bit of flour for the milk powder and kept back about 1/4 cup of flour for a double batch. I used 2 half sheet pans and it turned out great. Happy kids and now I’m not buying costco gluten free pizza for every pizza Friday!
can I assume you used the flour blend from the Americas test kitchen gluten free book
Hi Michelle,
No I use Cup4Cup GF flour for the recipe. It’s linked in the ingredients.
Best,
Melissa
Hi Melissa,
I made this pizza dough yesterday and I have to say I was a little skeptical after reading the directions because at the end, the dough is a thick batter. Well, I have to tell you, the pizza dough is delicious. This is about the third pizza dough recipe I tried and hands down, it is the best. I was so excited because I had a crispy bottom and the dough raised nicely (not totally flat and heavy) like some others. Thanks for turning out a great pizza dough recipe….just yummy. Sondra
I’m so glad you gave it a try and loved it. Thank you, Sondra! I appreciate you taking the time to comment.
Best,
Melissa
After trying many other recipes for a year, this is my go-to recipe for GF pizza! It’s pretty easy, and is consistently delicious! I make this GF pizza for everyone when my daughter with celiac visits, and no one misses the wheat pizza–it’s THAT GOOD. (IMPORTANT: You really do need to use Cup4Cup flour. Use another brand and you’ll have an unworkable consistency.)
Thanks for your helpful feedback, Kate! I appreciate it and love that your mixed diet family can all enjoy it!
Best,
Melissa
Hi! I’d like to try this tomorrow for the football game. 45-50 minutes seems an awfully long time to partake the crust. Will it still be soft? And only 1/2 tsp of yeast? Thanks!
I know, it does seem like a long time, but yes the crust is definitely still soft. It has a smaller amount of yeast because the baking powder helps it rise and give an airier texture. I hope you give it a try and let me know what you think!
Best,
Melissa
I thought the pizza was good, my husband thought the crust was hard to chew. The dough did not rise in the 90 minutes. It was very easy to spread on the parchment paper on the stone. I just didn’t get a very consistent depth of dough and could have spread it out a little more. The crust didn’t brown but I thought it was ok. My stone is a very old PamperedChef stone (that is black by now) and has a heat tolerance of 450 degrees so I baked my pizza at 450. I did use Cup4Cup and oatmeal whirled in my LilOscar rather than almond flour.
We had pizza night tonight. My husband made his usual two pizzas and my daughter and fellow Celiac were going to eat store bought GF pizza. I remembered this pizza recipe and I have it the jackpot. I liked that it only made one crust, its an easy recipe to make as I need it. The instructions on par baking were clear which has been a problem with other recipe I’ve tried, the baked pizza was crisp and could handle all the toppings I put on. My daughter and I ate the whole pizza, it was so delicious. Thank you.
Thank you so much, Christine. Eating a good GF pizza is a well deserved win for us after all the subpar substitutes. Sometimes when I make it I double the recipe and freeze one (after parbaking) so it’s an even quicker treat next time we have pizza night.
Best,
Melissa
I have a cast iron sheet tray. Would this work instead of the pizza stone?
Yes! I have a cast iron pizza pan I use too and it works fabulously
forgot the rating
really good
the best we have tried yet
thanks for the recipe
Appreciate it so much! Thanks for taking the time to write, Louise!
Best,
Melissa
Thank you, Melissa, for another great gluten free recipe. We just finished eating this delicious crispy pizza for dinner and loved it. It was easy to make following your directions. For some reason it takes longer for my breads and dough to rise than the prescribed time but that isn’t a problem at all. Worth the wait!
Thank you so much! I’m so happy you are enjoying the recipes, particularly this one! A great GF pizza crust was something I found hard to come by and I feel like this one doesn’t disappoint! I usually raise things in my oven with a “proof” setting, so it’s a little warmer than just sitting in a kitchen.
Best,
Melissa
Hi, I would love to give this recipe a try but I don’t eat grains. So could I use 1 2/3 of almond flour and 1/4 coconut flour?
Hi Lori,
Not with this recipe, but I just published an almond flour pizza crust recipe that would work for!
Best,
Melissa
This was so easy to make and so delicious! Thank you for a great recipe that even my non-GF husband loved!
Yay! Love this, Cheryl! Thank you so much for letting me know!
Best,
Melissa
I am so grateful for the notes on Pizza crust. Thank you for sharing this recipe.
You’re so welcome! Enjoy, Jeriann!
Best,
Melissa