
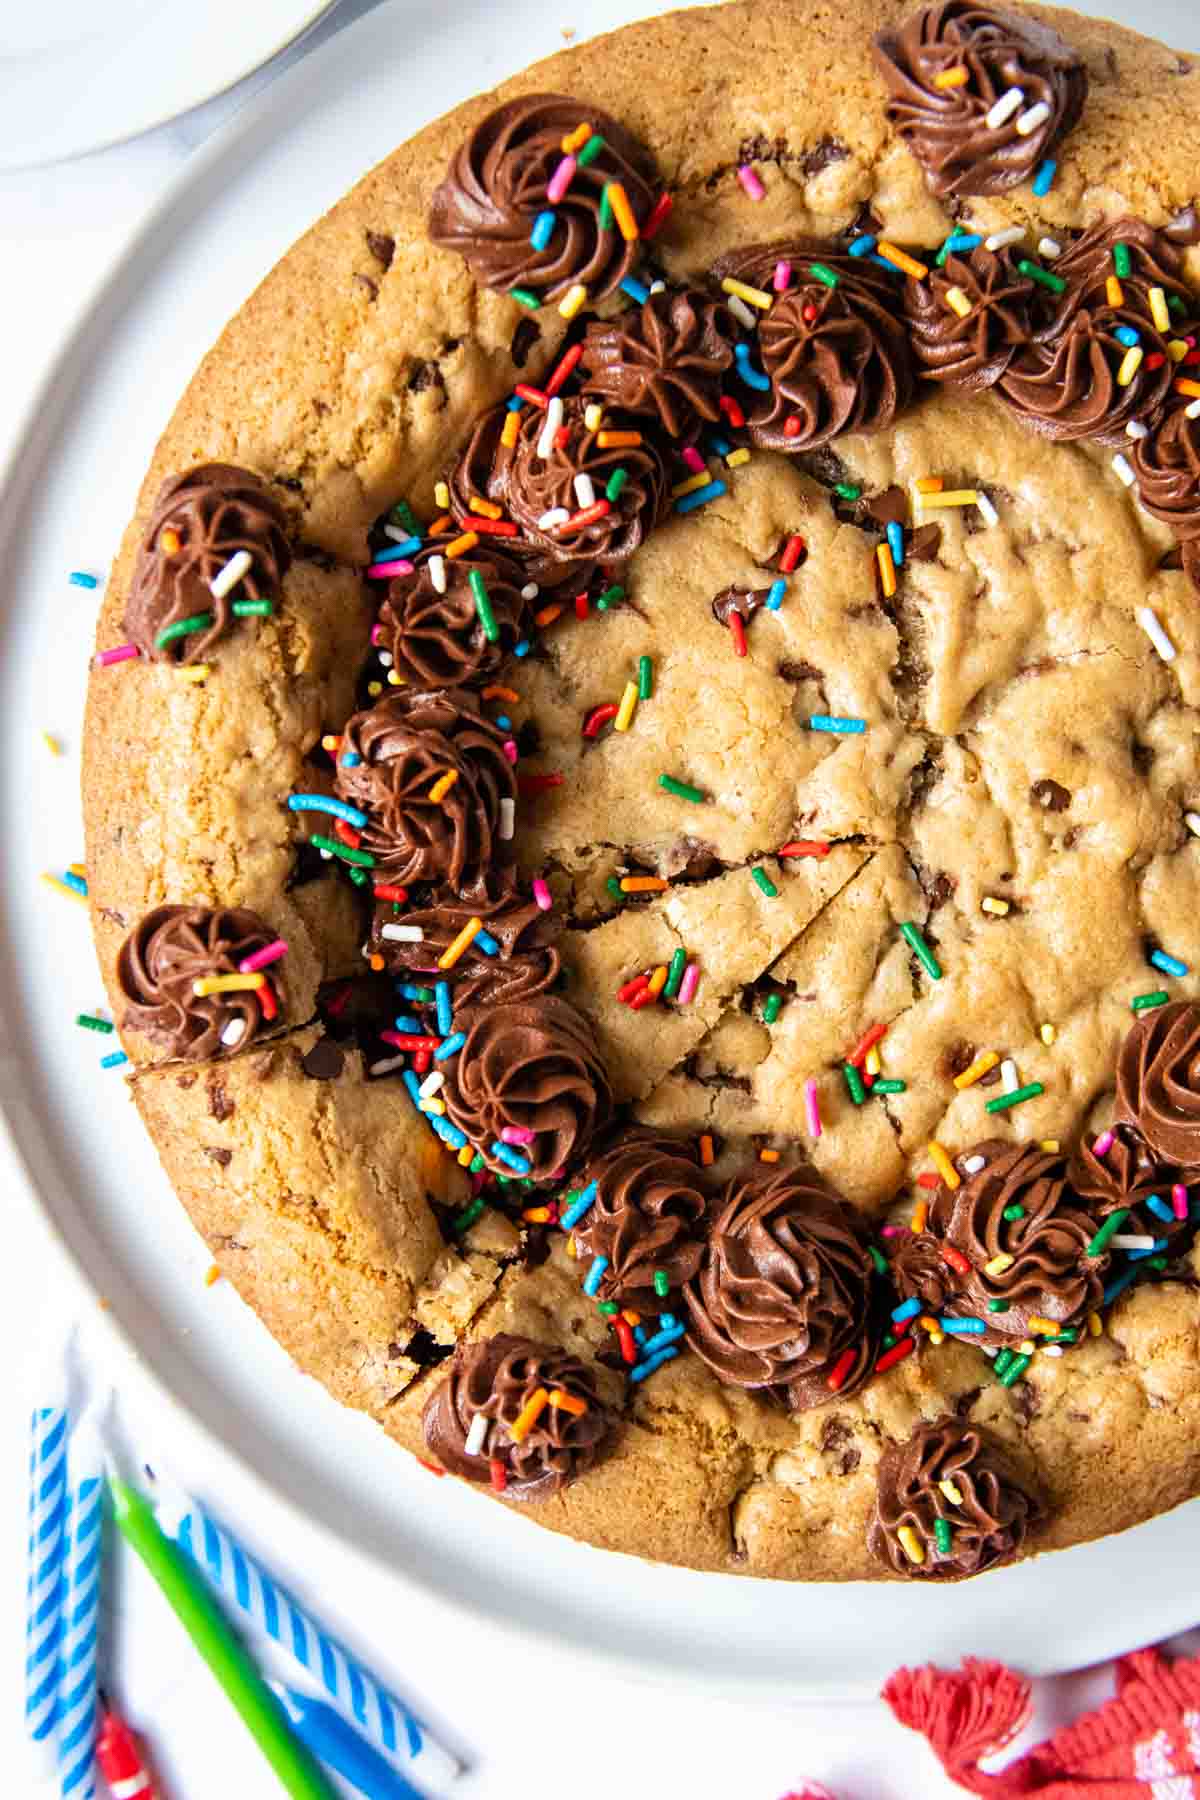
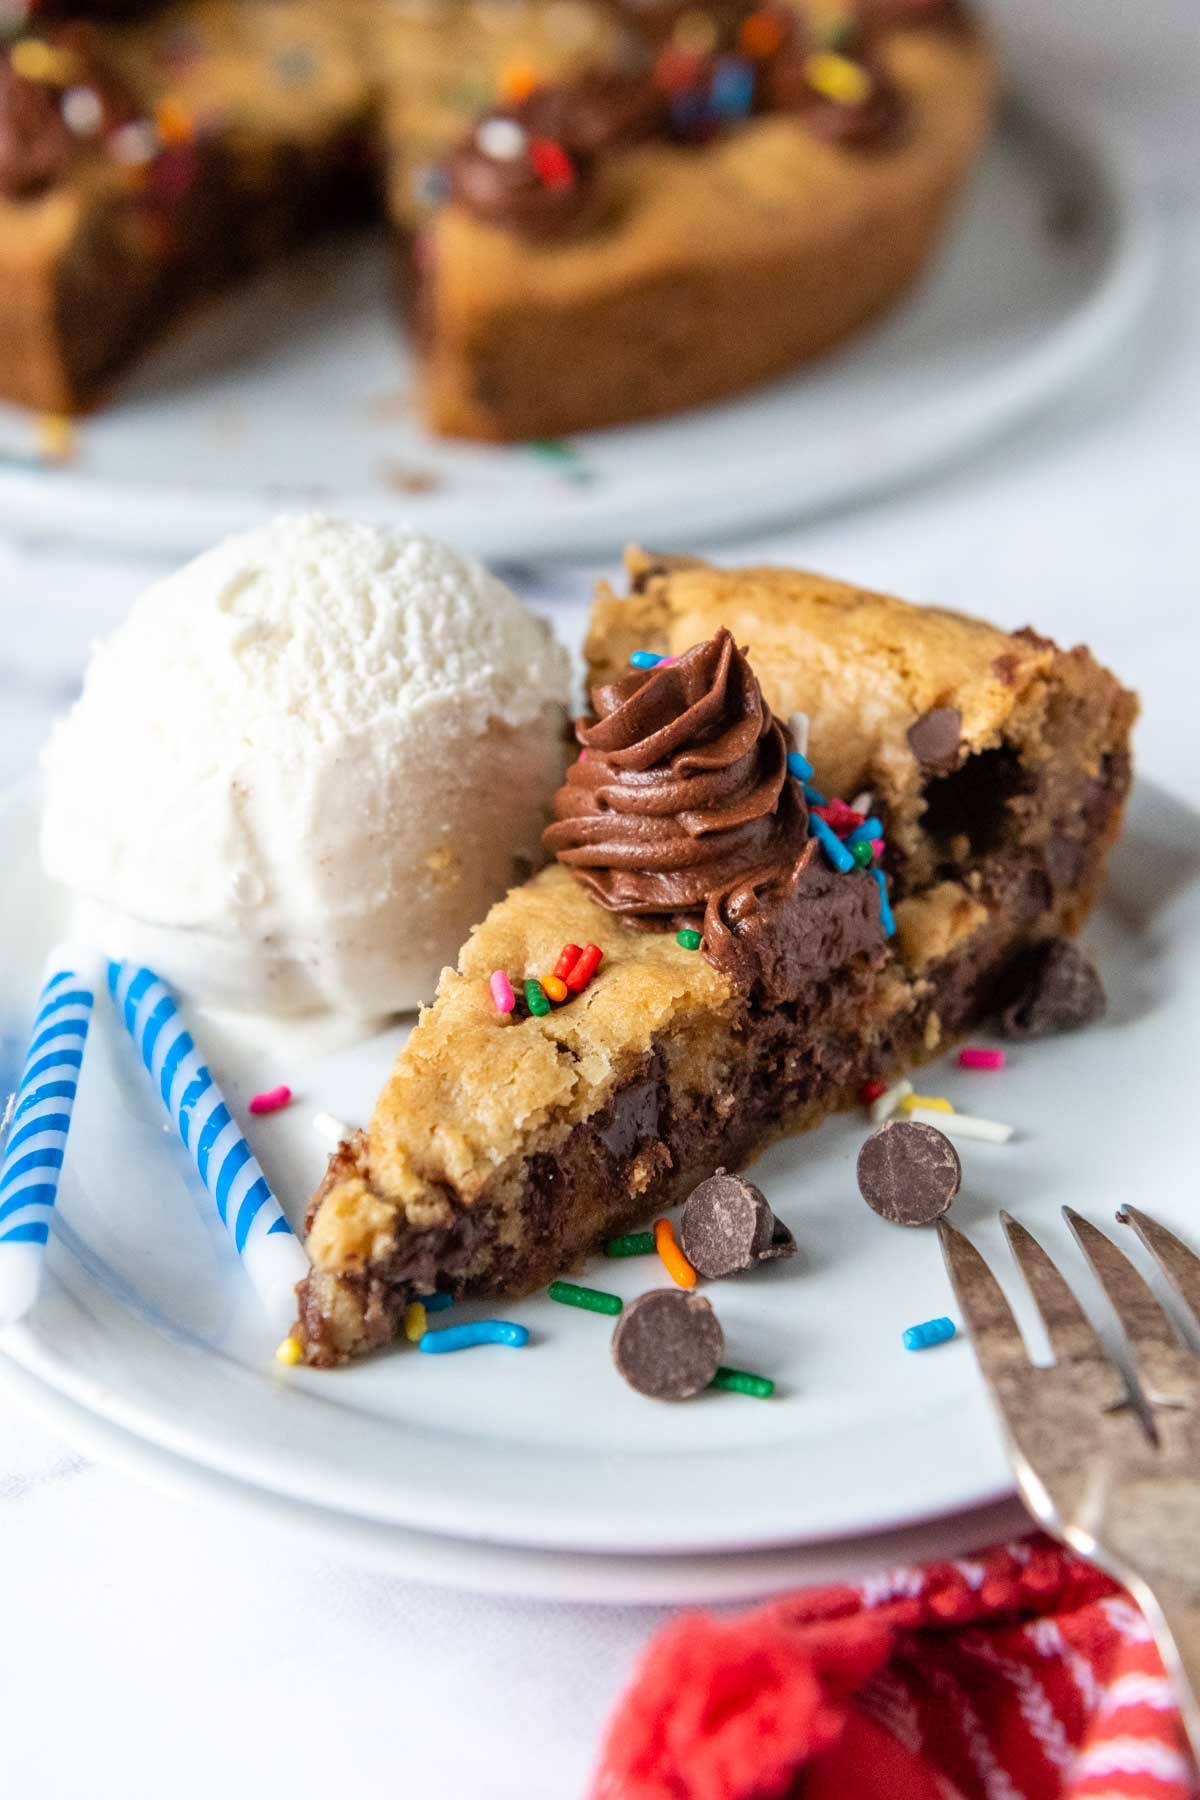
A giant gluten free cookie cake with festive frosting swirls is the ultimate birthday and special occasion dessert — gooey, soft, and straight-up mall food court nostalgia you can make from scratch. Resting the dough is my secret for keeping it perfectly chewy and completely grit-free. Watch it become the talk of the party when everyone learns it’s deceptively gluten free!
Want to Save This Recipe?
Enter your email below & we'll send it straight to your inbox. Plus you’ll get affordable and easy gluten-free recipes delivered each week!
Best Retro Gluten-Free Cookie Cake Recipe
Let’s take a nostalgic trip back to the 80s when shopping mall food courts beckoned to you with the ultimate indulgence – a giant chocolate chip cookie cake. This treat permeated your senses with enticing fresh baked smells, sugary decorations, and celebratory buttercream messages.
Unfortunately then and even now, gluten-free cookie cakes, just like copycat gluten-free crumbl cookies, isn’t something we can easily step out and buy. However, this homemade gluten-free chocolate chip pizza makes it something we can effortlessly make in only 30 minutes!
This easy recipe is a culmination of expert baking tips highlighted in all my homemade gluten-free dessert ideas and this viral gluten-free chocolate chip cookie recipe to make a supersized, giant cookie cake perfect for parties, birthdays, or any celebration!
This pizza cookie (AKA pizookie) screams celebrations! I’ll show you how easy it is, along with tips for the best gluten-free flour to use, how to decorate, and why resting the dough makes the best texture.
Best cookie cake I’ve had in my life. 10/10 recommend. Made sure not to overcook it and the slight doughiness in the center was perfect. Love me a soft chewy cookie. So easy too! Only cookie cake recipe I’ll ever use from here out. Make it now!!
—Laci
Free Guide! 5 easy tips for baking like a gluten-free pro!
Simple hacks for fail-proof gluten-free dishes every time!
Ingredient Tid Bits
- Softened butter – Use room temperature butter, rather than melted, to coat the gluten-free starches making the crumb soft and chewy rather than greasy.
- Gluten-free flour – My preferred brand, Cup4Cup, has cornstarch in the mix which makes the cookie cake soft. If your GF flour blend doesn’t contain cornstarch, add 2 teaspoons cornstarch to the dry ingredients.
- Chocolate chips – When making chocolate chip treats I like to use a mixture of regular baking chips with miniature chocolate chips. This disperses the chocolate evenly, making sure gooey, melty chips are in every bite!
Let’s Make This Together!
(Below shows step-by-step photos and modified instructions. For the complete recipe, along with ingredient amounts, scroll down to the recipe card.)
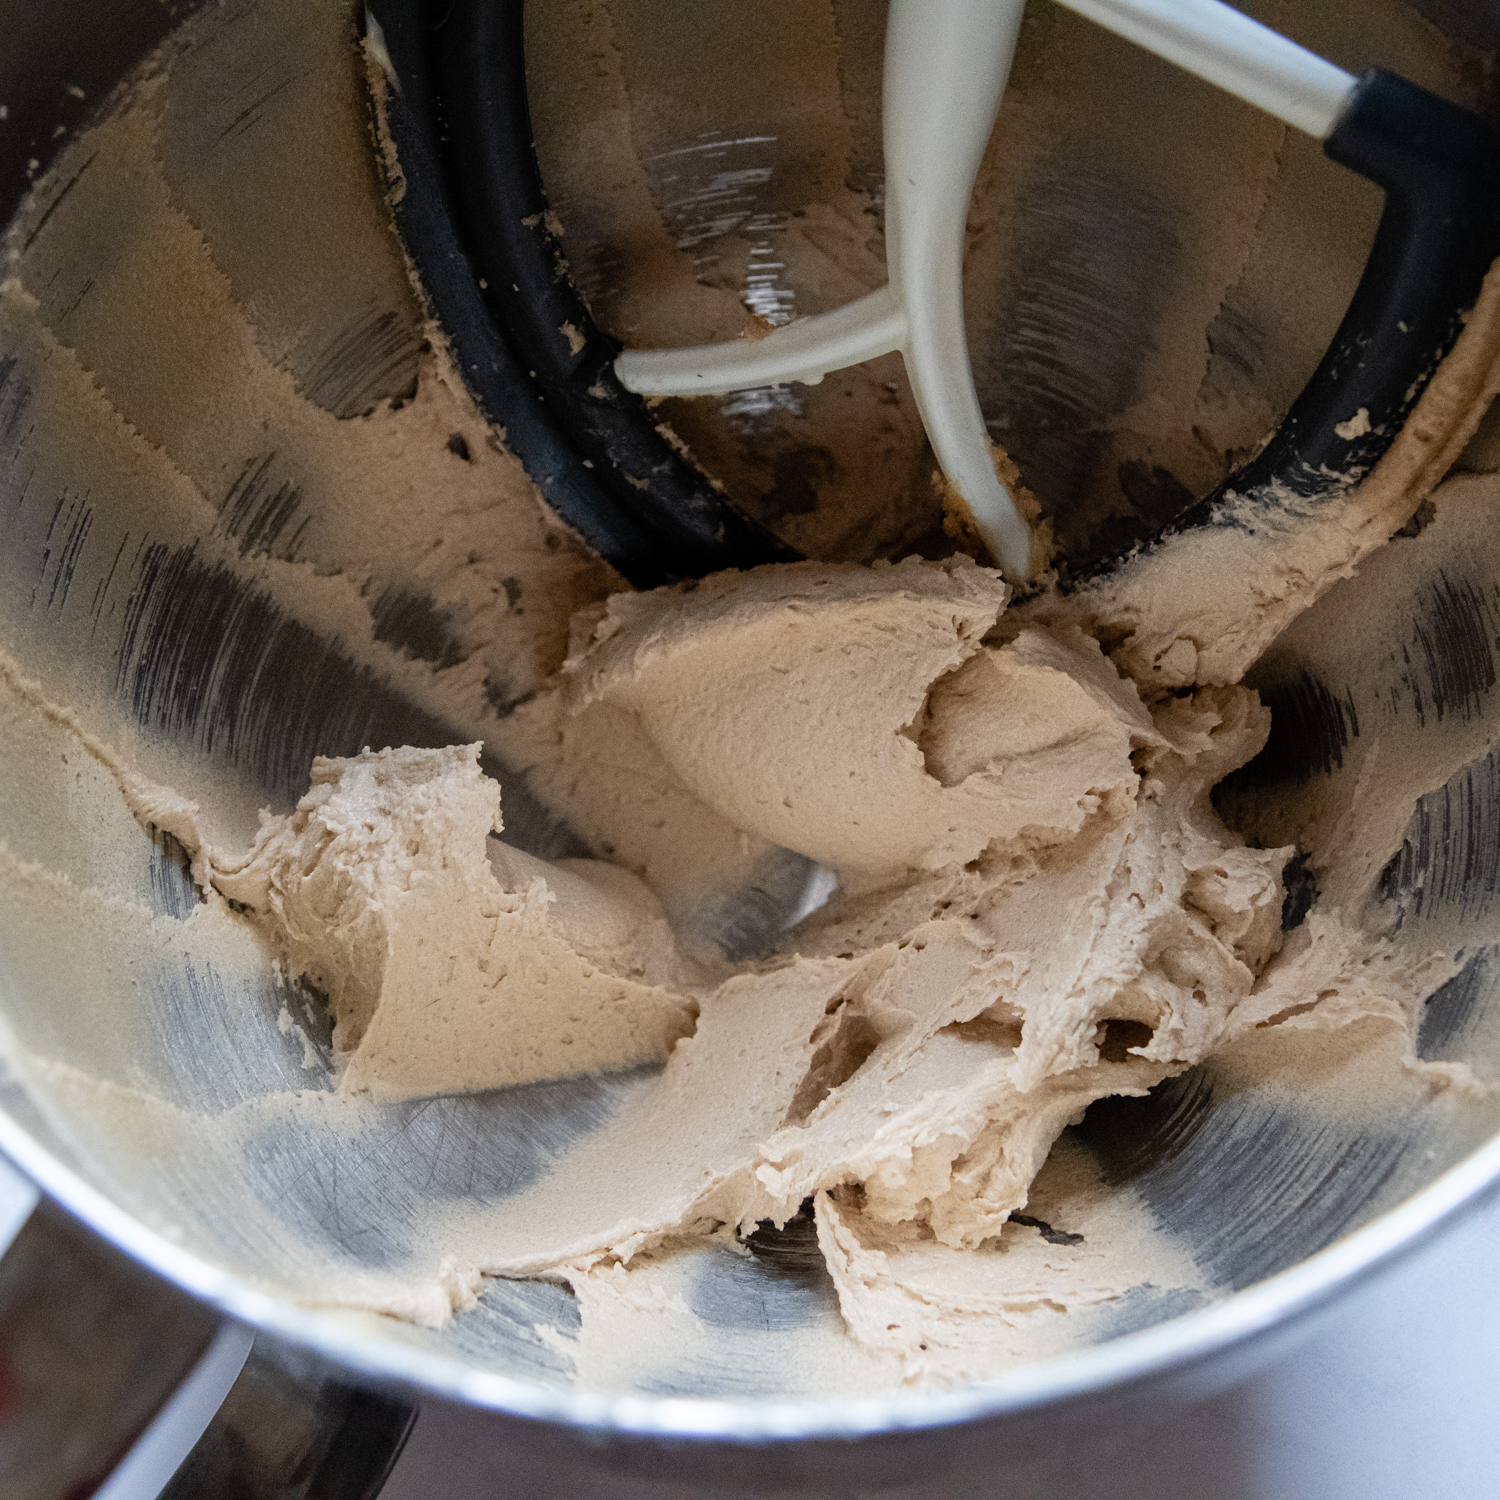
Cream butter and sugars…the right way
In a large mixing bowl or standing mixer with paddle attachment, cream the softened butter and brown sugar together until light and fluffy, about 3 minutes. Sometimes bakers make the mistake of just blending the butter and sugars together until they are mixed. Continue beating past that until your mixture looks a lot fluffier.
Then it’s time to add in the egg, egg yolk (using one whole egg with a yolk helps with binding and keeps a chewy cookie texture rather than cakey), and vanilla extract. Beat again until well combined.
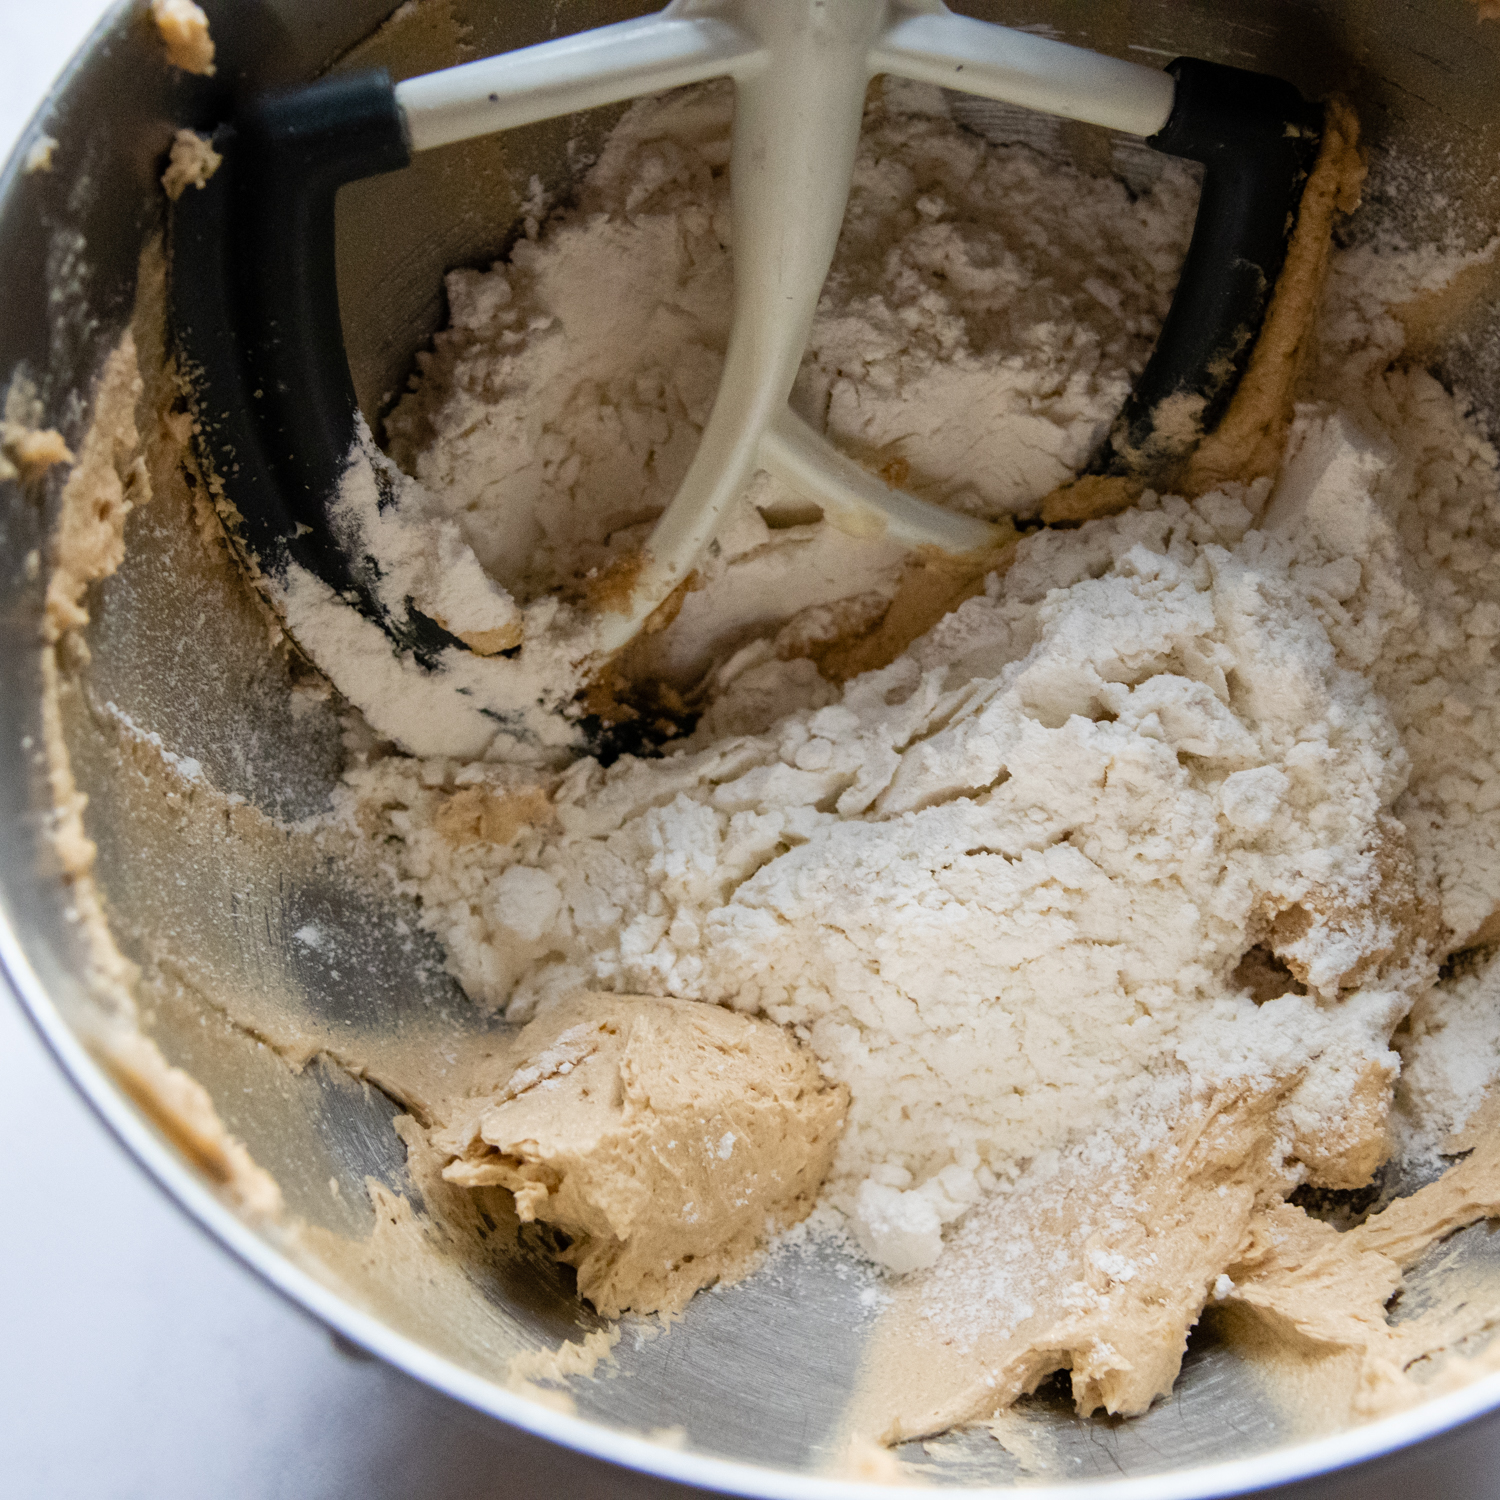
Add in dry ingredients
Slowly mix in the gluten-free flour, baking soda, and salt. Once no flour streaks remain, stir in the chocolate chips on low speed. That’s pretty much it. How easy was that?
Spread, short rest, bake
Transfer the cookie dough to a greased 9-inch round cake pan and spread evenly. When experimenting with my gooey and chewy GF cookie bars I found resting the dough for 15 minutes before baking eliminates grittiness, so this is a tip I recommend.
Bake for 25 minutes, or until the edges are firmly set and a toothpick comes out without wet dough. Cool completely on a wire rack before decorating with buttercream frosting. More tips on that below!

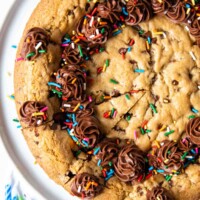
Decorating Tips
To make a festive dessert or birthday cake, mix up easy chocolate frosting to decorate or write a special message. Use a piping bag and open star tip for rosette edges and a writing tip for messages. This affordable cake decorating kit contains everything you need!
The included chocolate buttercream frosting makes enough for a decorative edge and/or a cake message. However, if you choose to make this fluffy vanilla buttercream, instead half the recipe.

Save this recipe to your pinterest board!
Let’s be friends on Pinterest! I’m always sharing great recipes!
Did you make this recipe? I love hearing from you! Leave a star rating and comment below the recipe card. It helps others when searching for recipes and I appreciate feedback from our community. You will always hear back from me! -Melissa
Big, Soft & Chewy Gluten-Free Cookie Cake Recipe
Ingredients
- ½ cup (113 g) unsalted butter, room temperature
- 1 cup (234 g) packed light brown sugar
- 1 large egg
- 1 egg yolk
- 2 teaspoons vanilla extract
- 2 cups (307 g) gluten free all purpose flour, I recommend Cup4Cup GF flour blend
- 1 teaspoon baking soda
- ½ teaspoon salt
- 1 cup (170 g) semi-sweet chocolate chips
- ½ cup (85 g) miniature chocolate chips, (or omit and use 1 ½ cups regular chocolate chips)
Chocolate Frosting
- 4 tablespoons (57 g) unsalted butter, room temperature
- 2 tablespoons (13 g) unsweetened cocoa powder
- 1 cup (120 g) powdered sugar
- 1 ½ tablespoons milk
- pinch salt
- (optional) gluten-free sprinkles, for decorating
Equipment
- Piping Bag & Tips
Instructions
- Preheat the oven to 350ºF. Grease a 9-inch cake pan with nonstick cooking spray. For best results, like the bottom with cut-to-size parchment paper for easy removal.
- In a large mixing bowl or stand mixer with paddle attachment, cream together the butter and brown sugar together until light and fluffy, about 3 minutes.½ cup unsalted butter, 1 cup packed light brown sugar
- Add the egg, egg yolk, and vanilla extract, beating until well combined.1 large egg, 1 egg yolk, 2 teaspoons vanilla extract
- Slowly mix in the gluten-free flour, baking soda, and salt. Once no flour streaks remain, stir in the chocolate chips on low speed.2 cups gluten free all purpose flour, 1 teaspoon baking soda, ½ teaspoon salt
- Transfer the cookie dough to the prepared pan and spread evenly. Bake for 25-27 minutes, or until the edges are firmly set and a toothpick inserted in the middle comes out without wet dough. Cool completely on a wire rack before removing from pan and decorating with frosting.1 cup semi-sweet chocolate chips, ½ cup miniature chocolate chips
Chocolate Frosting
- In a medium bowl add all the buttercream frosting ingredients. Mix on low speed until combined. Increase speed to medium high and beat until fluffy.4 tablespoons unsalted butter, 2 tablespoons unsweetened cocoa powder, 1 cup powdered sugar, 1 ½ tablespoons milk, pinch salt
- If too thick add a dash of milk. If the frosting is too thin, add a little more powdered sugar.
- Place a wire rack over the cooled cookie cake pan and invert onto the rack, so the bottom of the cake faces up. Peel off the parchment paper. Place a serving platter on top of the overturned cake and flip onto the platter so it is right side up.
- Transfer the chocolate frosting into piping bag with an open star tip. Decorate the edges with rosettes. If desired, add sprinkles to the frosting and top of cake.
Notes
Alternative Baking Pans
If you wish to replicate a bakery-style giant cookie cake, you will need one of these inexpensive cookie can pans. Make sure it’s 11.5-inch diameter and not a pizza pan, which is slightly larger. You will need to reduce the baking time about 10 minutes if using a cookie can pan since the dough will be spread thinner. The edges should be firmly set and a toothpick inserted in the middle should come out without wet dough. Using a 9-inch cake pan will serve about 10-12 small slices and a cookie cake pan 12-14 larger slices. An 8-inch layer cake pan may also be used, but you will have to bake it about 2-3 minutes longer.Storing and Freezing
Store cookie cakes at room temperature, covered with aluminum foil. For best taste and texture, consume within 1-2 days. Gluten-free baked goods have a tendency to lose moisture quickly, becoming dry and crumbly. Therefore, I recommend freezing leftovers or making the cake ahead, freezing until the day you plan on serving it. The cake may be decorated with buttercream and frozen until solid. Once the cake and frosting is firm, wrap securely with plastic wrap and cover with foil. Freeze up to 2 months. When ready to serve, remove wrapping and place on a serving platter to thaw at room temperature about 2 hours. Recipe adapted from Sally’s Baking AddictionThis post contains affiliate links. My opinions are always my own. If you purchase a product through an affiliate link, I make a small commission – at no cost to you. Read full disclosure policy here.


I made this cake for my daughter’s 14th birthday and it was a HIT! Even my carnivore diet neighbors couldn’t resist. It was soft, chewy and perfect with vanilla ice cream.
Thank you Angela! And a very happy birthday to your daughter. Excellent “cake” choice!
Best,
Melissa
Do you think it would still be tasty swapping coconut sugar for the brown? And can I swap the powdered sugar with a non-refined sugar?
Hi Tessa,
I don’t think that would be a problem. It might affect the texture slightly, but it will still taste great!
Best,
Melissa
Best cookie cake I’ve had in my life. 10/10 recommend. I used cup4cup. Made sure not to overcook it and the slight doughiness in the center was perfect. Love me a soft chewy cookie. So easy too! Only cookie cake recipe I’ll ever use from here out. Make it now!!
What a great compliment, Laci! I really appreciate you taking the time to make my day!
Best,
Melissa
So good! Such an easy recipe. I’ve made this three times – the second time it over baked and was still good but not as soft and gooey. Don’t over bake and you’ll be so happy! I’ve used King Arthur and Bob’s and both were delicious. Used a 9” springform pan for ease. Don’t skip the resting time! It’s a game changer. Thanks for this great recipe!
Thank you so much, Rachel! I’m so glad you found the recipe tip about resting the batter. It is a game changer and so easy to do! Just takes a little patience!
Best,
Melissa