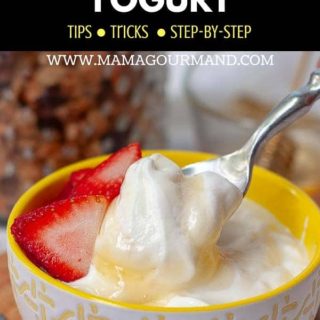
Learn how to make Instant Pot yogurt and discover all the tips and tricks out there behind that magic button. Incredibly simple-to-make Instant Pot yogurt recipe tastes smooth, creamy, and decadent, like eating a bowl of whipped cream without the calories!

Easy Instant Pot Yogurt Recipe
This homemade Instant Pot yogurt recipe has been a complete GAME CHANGER for me. Yogurt used to be just a vehicle for toppings, such fresh fruit, homemade chocolate granola, orange spiced granola, or blueberry maple syrup.
Then I finally entered the world of Instant Pot…and completely ignored that yogurt button on it. Evidently Instant Pot doesn’t know you can buy store bought yogurt already made.
But I got to thinking…I spend a lot of money on fancy organic yogurt every week. Even with the organic label, some of it still has a lot of added sugars and unfamiliar ingredients.
So I asked my au naturale sister about it because if she finds the time to make homemade marshmallows, kombucha, and hydrosol spray, I’m sure she’s tried her hand at homemade yogurt.
I was right. But she was also right about how simple it is.
(Just about how easy homemade yogurt is…Evidently she doesn’t know you can buy marshmallows already made.)
Not only is Instant Pot yogurt ridiculously easy, way more economical than buying yogurt, but it’s hands down THE BEST YOGURT YOU’LL EVER TASTE.
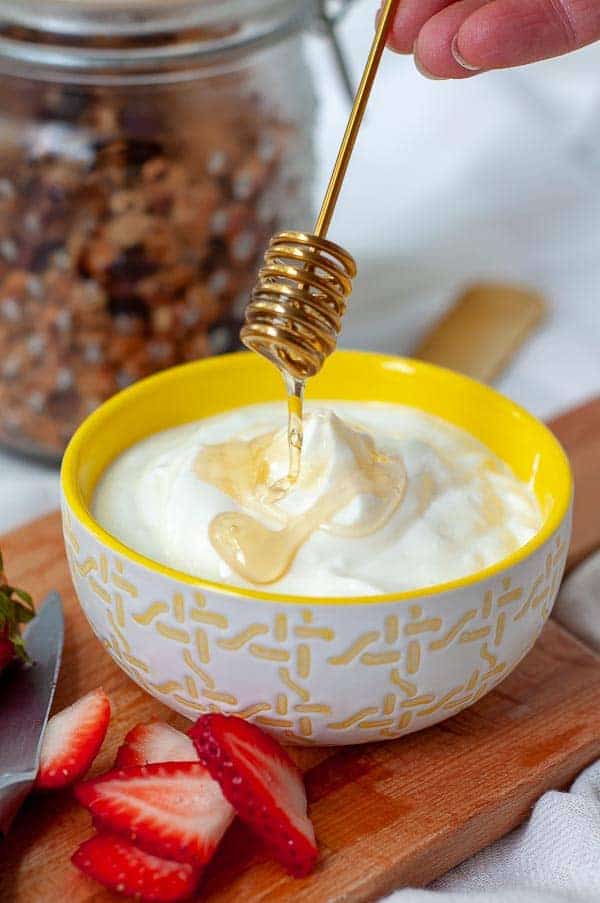
I know what you’re thinking… How Can You Be That Gaga Over The Taste of Instant Pot Yogurt?
Because it doesn’t even taste like yogurt! It’s INFINITELY more creamy, less pungent, and insanely smooth tasting. It’s like eating a bowl of whipped cream without the empty promises of starting a juice cleanse after.
What Do I Need to Make Instant Pot Yogurt?
- Instant Pot – Some Instant Pots have a simplified yogurt button, like my preferred electric pressure cooker. It will countdown the time and make sure it stays at the correct incubation temperature. The Lux Instant Pot doesn’t have a yogurt button. If you have a Lux Instant Pot without the yogurt button, you can still make yogurt! Scroll down and I show you how step-by-step.
- Thermometer – An inexpensive one will definitely do the trick. If holding a thermometer is a little too taxing for you (no judgment here), you can also the creme a la creme Mac Daddy of them all – a Thermapen that reads in 2 seconds (LOOOOOVVVEEEE mine).
- Cheesecloth – You can buy cheesecloth at a grocery store, but I absolutely love these ones from amazon. You get a ton more for the price and they are washable and reusable.
- Strainer – Any kind will do. Just set strainer lined with cheesecloth over a bowl to catch the whey (watery part separated from yogurt) and you are good to go.
- UPDATE – Since I made yogurt weekly, about a year ago I did away with the cheesecloth and strainer method and instead use a yogurt strainer. I make 1 gallon of milk at a time, so I opted for the larger one, but if you make 1/2 at a time they have those too.
How to Make Instant Pot Yogurt (Boil Method)
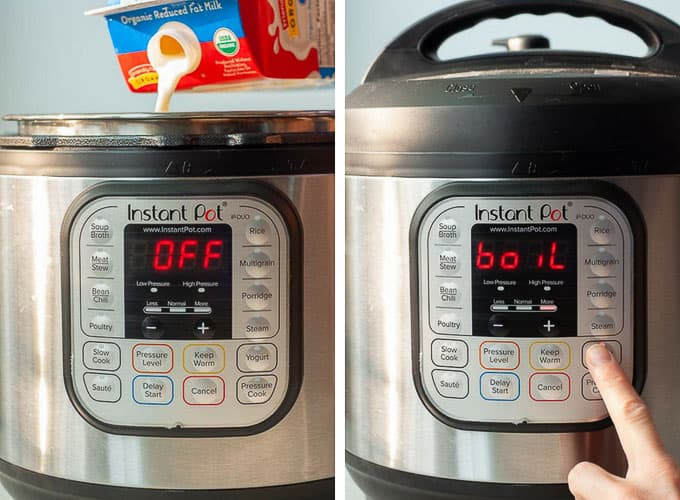
- STEP ONE: Pour cold milk in Instant Pot. You can use whole, 2%, or skim.
- STEP TWO: Press “yogurt” button until “boil” shows on screen. After about 30 minutes it will start to be and the screen will switch to “YOGT”. After boiling is completely I usually double check the temperature with a thermometer. If it hasn’t reached 180ºF yet, turn on SAUTE to heat and stir milk until it reaches the correct temperature.
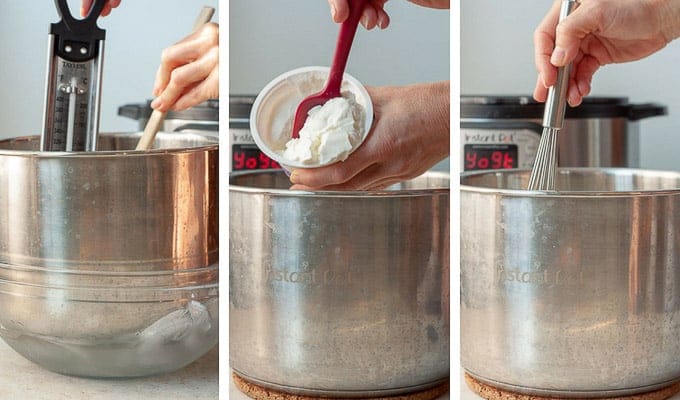
- STEP THREE: Now it’s time to bring the yogurt from 180ºF (82ºC) down to 110-115ºF (43ºC-46ºC). You can simply remove the Instant Pot insert and let it sit on the counter for about 45 minutes, stirring occasionally (make sure to keep checking temperature when you stir). Alternatively, place the insert into a bowl of ice water, stirring for about 5 minutes, or until temperature reaches 110-115ºF (43ºC-46ºC).
- STEP FOUR: Add the yogurt starter (“Starter” is a fancy term for store bought plain yogurt. Scroll down for the best brand to use.)
- STEP FIVE: Whisk to combine milk with yogurt starter.
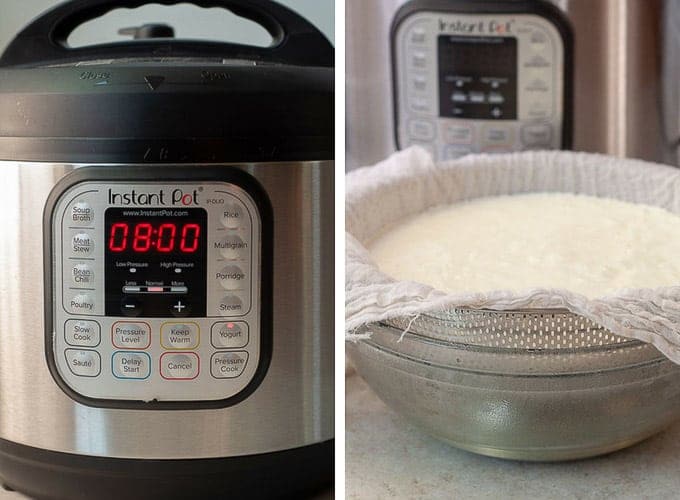
- STEP SIX: Press “yogurt” button until timer reads 08:00 (it will then go to 0:00 and count up to 8 hours). You’ll know when it’s done because it will be thick and gelatinous. If it isn’t, process for another 1-3 hours.
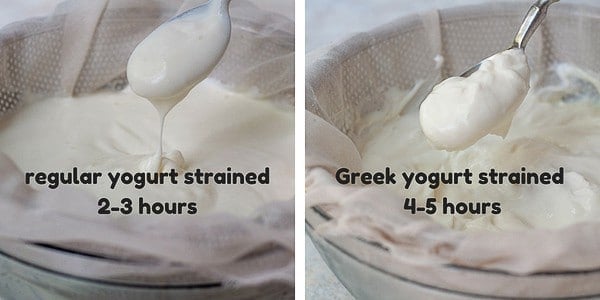
- STEP SEVEN: When yogurt is done fermenting pour into a strainer lined with a cheesecloth. Make sure there is a bowl underneath to catch the whey. Put in the fridge and strain for 2-3 hours for standard yogurt or 4-5 hours for greek yogurt.
Instant Pot Yogurt Temperature
First the milk is boiled to a temperature of 180ºF. Pressing the “yogurt” button will give you an option to automatically boil the milk. After the instant pot indicates boiling is complete, double check the temperature with a thermometer.
If it hasn’t reached 180ºF yet, turn on SAUTE to heat and stir until the milk reaches the correct temperature.
After the milk has come to a boil, it needs to be cooled down to 110-115ºF to incubate. One way to cool it down is letting it sit out for 30-45 minutes, stirring occasionally and checking the temperature.
To speed the cooling process up, you may also place the insert into a bowl of ice water, stirring for about 5 minutes, or until temperature reaches 110-115ºF (43ºC-46ºC).
The instant pot maintains the temperature of 110-115ºF for 8 hours while the milk cooks and incubates. If you own a Lux Instant Pot, scroll down to “HOW TO MAKE YOGURT WITHOUT A YOGURT BUTTON.” You can still make yogurt without the button!
How to Make Instant Pot Cold Start Yogurt (No Boil Method)
The cold start method simply uses ultra filtered milk and a couple tablespoons of plain yogurt (also known as yogurt starter). No boil yogurt can only be done with ultra filtered milk, such as Fairlife brand.
The other bonus of cold start yogurt is no straining! After the yogurt cooks for 8-10 hours, it is so thick a spoon can stand straight up in it!
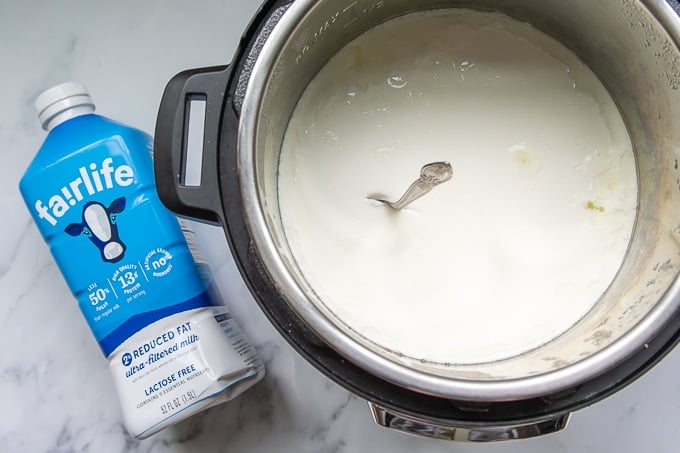
- Pour in cold ultra filtered milk, such as Fairlife into clean pot.
- Whisk in 2 tablespoons plain yogurt starter.
- Place lid on pressure cooker and press yogurt button. It will read 8:00 hours.
- Let yogurt incubate for cook time.
- When it is finished the yogurt may be eaten immediately. However, if you wish for the whey to separate, cover pot with plastic wrap and let sit for 4-8 hours in the refrigerator.
- Spoon out whey liquid, if desired, for thicker yogurt. Store in an airtight container.
Although most organic milk brands are labeled “ultra pasteurized,” the results don’t match up to Fairlife ultra filtered milk. This means Fairlife has more protein and less sugar.
Therefore, after the incubation time, Fairlife cold start yogurt will be very thick, and there’s no need to strain.
Ultra pasteurized milk brands will result in thin and watery cold start yogurt. Although the yogurt may still be strained, you won’t be left with much yogurt after the whey drains out.
What is the best Yogurt Starter to Use?
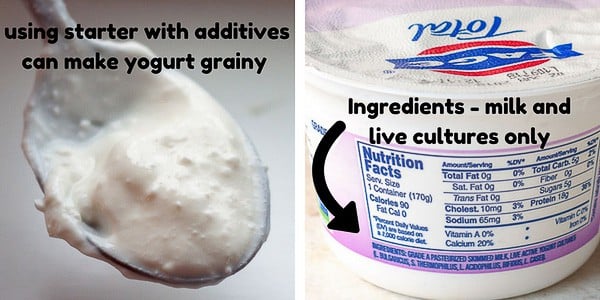
When I initially experimented with Instant Pot yogurt, I noticed I would occasionally get a grainy texture. The taste was still spot on, but the texture threw me off.
Some research brought me to a great article explaining why my yogurt was grainy. When additives are in your commercial yogurt starters, such as pectin, inulin, cornstarch, and gelatin, it can yield a grainy yogurt.
To avoid this do one of two things:
- Read the labels when using a commercial yogurt as a starter. Only use one without additives, such as Fage (even some organic brands have additives).
- Or, use your own starter from previously made homemade yogurt.
When you’re done making yogurt, freeze a couple tablespoons straight away for your next batch. You won’t have to try to remember to save some before you finish all your yogurt. Plus, it will save you from buying commercial yogurt each time.
Freezing homemade yogurt starter also insures the bacteria and cultures stay fresh and alive until you are ready to make yogurt again. Sounds kind of creepy, but it’s true.
How to Make Yogurt Without a Yogurt Button
Yes. If you have the Lux Instant Pot or another electric pressure cooker, it can still be done! Here’s how:
- Heat the milk on the stove or using “saute” function on Lux Instant Pot. Using a thermometer, heat milk until it reaches 180-185°F, whisking occasionally to distribute heat.
- Once it has 180-185°F remove from heat or remove Instant Pot insert. Cool the milk to 110-115°F using one of the techniques described above. (Refer to STEP THREE above)
- Whisk in 2 tablespoons plain yogurt starter.
- Place insert with cooled 110-115°F milk back in instant pot, which should be turned off. Make sure the lid is secure and vent is closed. Wrap the WHOLE Instant Pot with a large towel to insulate and make sure milk stays at the correct temperature. Let sit for 8 hours or overnight.
- When done, pour yogurt into a strainer lined with cheesecloth to thicken and remove some of the whey. (Refer to STEP SEVEN above)
My Yogurt Didn’t Set! Why is it runny?
Even with making homemade yogurt every week, there are still times now and again my yogurt doesn’t set and is runny. I used to just throw out the batch, shed a little tear, and start again.
However, I’ve now figured out how to avoid it in the first place and a possible way to fix it!
- It starts with the starter. First of all, make sure the cultures are at their peak. The cultures loose their oomph after a while, so either use recently opened or made yogurt. When I make a batch of homemade yogurt, I scoop out a few tablespoons and freeze it so I always have a fresh starter on hand for the next batch (it will be runny as it thaws, but that is okay!)
- Make sure you are using enough starter. For every half gallon of milk whisk in 2-3 tablespoons of starter yogurt.
- Did you add the starter? Quite a few times 🤦♀️I have boiled the milk, cooled it down, and started to cook the yogurt with completely spacing adding the starter.
- The milk shouldn’t read ULTRA PASTEURIZED on the label. For instant, Aldi brand organic and Horizon organic milk are ultra pasteurized so avoid using these.
- Take a temperature to make sure milk reaches 180ºF during BOIL stage. Unfortunately pressure cookers aren’t consistent with boiling the milk to 180ºF. If it hasn’t reached the proper temp, hit CANCEL, and press the SAUTE LOW / SIMMER. Cook and stir, checking the temperature until it reaches 180ºF.
- Sometimes it can be salvaged. If the milk still smells fine, just let it cook again for a few hours, opening the lid to check consistency every 1 1/2 hours or so. When it’s done there might be a lot more separated whey, but after straining you’ll have a perfectly good batch of yogurt.
- Sometimes it’s nothing you did wrong at all, you’re just at the mercy of the live cultures. They can be temperamental and unpredictable every once in awhile, and you’ll just be forced to move on. Feel free to shed a tear over wasted milk. It will make you feel better.
Congratulations! You’re A Total Granola Who Makes Their Own Yogurt!
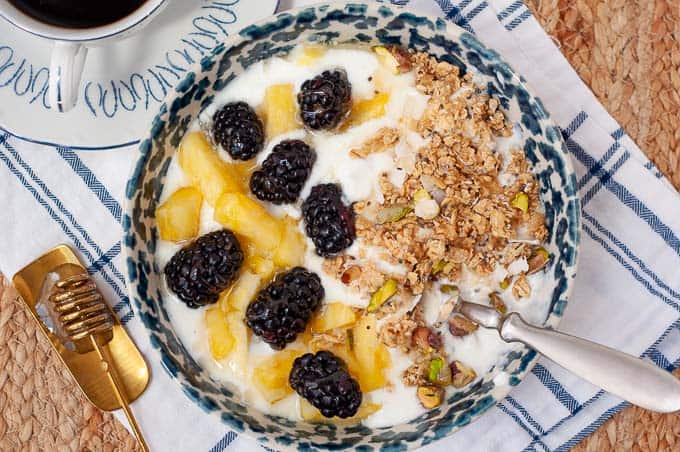
What to Add to and How to Sweeten Homemade Yogurt
Like another protein-rich recipe, Instant Pot oat groats, the sky is really the limit on what sprinkle on top.
- Gluten-free granola or chocolate granola
- Fresh fruit or sauces, such as Blueberry Syrup
- Vanilla bean paste (so freakin’ delicious) or vanilla extract – mix in 1 tablespoon per batch and then ladle into storage containers.
- Honey or maple syrup – You can drizzle on as it’s dished into bowls or sweeten the whole batch at once. Start with 1/4 cup per batch and add 1 tablespoon at a time until you reach desired sweetness.
- Nuts, like pistachios, almonds, walnuts, or Candied Pecans
- Cocoa Nibs (another fan favorite)
- Coconut
Tips, Tricks, and Trouble Shooting
- Before making the yogurt, sanitize and clean your Instant Pot with a kettle of boiling water. This will get rid of any previous dinner smells and tastes you don’t want permeating your batch of delicious yogurt.
- You can use whole, 2%, or skim milk to make Instant Pot yogurt. Skim milk may have to strain a bit longer to thicken, but is still equally delicious!
- For the BOIL METHOD, the milk carton shouldn’t be labeled ULTRA PASTEURIZED. This will result in thin and watery yogurt.
- Some tips for timing it out: Option 1 – Boil and cool the milk before bed and let it process for the 8 hours while you sleep. Option 2 – Boil and cool the milk first thing in the morning and let it process all day. Option 3 – Start in the middle of the day and let the yogurt strain overnight in the refrigerator. It will be extremely thick when you wake up, but you can always add some of the drained whey or milk in to thin it out.
- If you like your yogurt tangier, let it process for about 10 hours.
- How to know when your yogurt is done: It will look gelatinous and some of the whey will separate and be settled on top. If it doesn’t look like this, process for 1-2 more hours.
- Whisk or beat yogurt after straining to make it extremely creamy and smooth.
- Less is more when adding the starter. Add 2 tablespoons yogurt starter to a 1/2 gallon of milk. Extra starter can inhibit the growth of live cultures and might make your yogurt grainy.
- Trust me, you will forget about your yogurt straining in the refrigerator. Not a biggie, but it might end up thicker than desired. Adding the drained whey works for thinning it out. Alternatively, adding a little milk, coconut milk, half and half, or cream will make it even smoother and creamier tasting.
Intimidated by using an Instant Pot? Learn in minutes with this Easy Start Instant Pot Guide full of tips, hacks, and tricks.
SAVE THIS HOw TO MAKE INSTANT POT YOGURT TO YOUR PINTEREST BOARD!
Let’s be friends on Pinterest! I’m always sharing great recipes!
Instant Pot Yogurt
Ingredients
- 1/2 gallon milk, any percentage (make sure carton isn't labeled ULTRA PASTEURIZED)
- 2 tablespoons plain yogurt (for best yogurt starters see recipe notes or post above)
Instructions
- Pour milk into Instant Pot and make sure valve is sealed. Press "yogurt" button until it reads "boil." It takes about 30-45 minutes for milk to come to correct temperature, 180ºF (82ºC). Once it's reached 180ºF, the Instant Pot will start beeping. After boiling is completely I usually double check the temperature with a thermometer. If it hasn't reached 180ºF yet, turn on SAUTE to heat and stir until it reaches the correct temperature.
- Remove the lid and carefully remove insert. Set insert with milk on the counter for about 45 minutes to come to 110-115ºF (43ºC-46ºC), stirring occasionally. Alternatively, set insert in an ice bath and stir for 5 minutes, or until milk reaches 115ºF.
- Whisk yogurt starter into the 115ºF milk. Place insert back into Instant Pot and press “yogurt” button again until time reads 08:00. The Instant Pot will then change to 0:00 and count up until it reaches 8 hours.
- Line a colander with one layer of cheesecloth and set over a bowl to catch the whey. Pour yogurt into the lined strainer. Place everything in the refrigerator to continue to strain for 2-3 hours for regular yogurt and 4-5 hours for "Greek" style.
- TIP: If you accidentally left the yogurt straining too long and it becomes thicker than desired, simply stir some of the liquid whey drained out or additional milk back into the yogurt.
- TIP: To have a yogurt starter ready for the next batch, reserve 2 tablespoons of yogurt after straining. Freeze start in a small ziplock bag and thaw overnight in the refrigerator.
- Store yogurt in a glass jars or airtight plastic containers. Makes 1 quart (32 ounces). Yogurt will last 10-14 days in refrigerator. Each serving is 1/2 cup.
DID YOU MAKE THIS RECIPE?? DON'T FORGET TO LEAVE FEEDBACK AND/OR CLICK A STAR RATING ON THE RECIPE CARD!
Recipe Notes
WHAT IS THE BEST YOGURT STARTER TO USE?
When additives are in your commercial yogurt starters, such as pectin, inulin, cornstarch, and gelatin, it can yield a grainy yogurt. To avoid this do one of two things:- Read the labels when using a commercial yogurt as a starter. Only use one without additives, such as Fage (even some organic brands have additives).
- Or, use your own starter from a previously made batch of Instant Pot Yogurt.
Tips, Tricks, and Trouble Shooting For Making Instant Pot Yogurt
- Before making the yogurt, sanitize and clean your Instant Pot with a kettle of boiling water. This will get rid of any previous dinner smells and tastes you don’t want permenating your batch of delicious yogurt.
- You can use whole, 2%, or skim milk to make Instant Pot yogurt. Skim milk may have to strain a bit longer to thicken, but is still equally delicious!
- For the BOIL METHOD, the milk carton shouldn’t be labeled ULTRA PASTEURIZED. This will result in thin and watery yogurt.
- Some tips for timing it out: Option 1 – Boil and cool the milk before bed and let it process for the 8 hours while you sleep. Option 2 – Boil and cool the milk first thing in the morning and let it process all day. Option 3 – Start in the middle of the day and let the yogurt strain overnight in the refrigerator. It will be extremely thick when you wake up, but you can always add some of the drained whey or milk in to thin it out.
- If you like your yogurt tangier, let it process for about 10 hours.
- How to know when your yogurt is done: It will look gelatinous and some of the whey will separate and be settled on top. If it doesn’t look like this, process for 1-2 more hours.
- Whisk or beat yogurt after straining to make it extremely creamy and smooth.
- Less is more when adding the starter. Add 2 tablespoons yogurt starter to a 1/2 gallon of milk. Extra starter can inhibit the growth of live cultures and might make your yogurt grainy.
- Trust me, you will forget about your yogurt straining in the refrigerator. Not a biggie, but it might end up thicker than desired. Adding the drained whey works for thinning it out. Alternatively, adding a little milk, coconut milk, half and half, or cream will make it even smoother and creamier tasting.


Lana Love says
Hi Melissa:) AMAZING!!❤️ I spent months pouring over yogurt recipes and yesterday I became brave and tried your recipe. I followed the instructions and tips and my two-ingredient yogurt turned out better than the expensive starter I bought a few days ago! Creamy, smooth, and rich like whipped cream with a delicate flavour! I will probably never purchase yogurt for the family again!
I’m so impressed with how easy it is. I used 3.25% MF and whole-fat probiotic organic yogurt. (And I froze some for my next starter.)
I wish I hadn’t been so afraid to try it long ago! Thanks for the great tips Melissa❤️!
Melissa Erdelac says
First of all, what a fantastic name you have! You are welcome and I fully support everything you are saying. Homemade yogurt puts any ultra expensive store brand to shame! It’s so smooth tasting, you barely need to add sweetener to it. I’ve been making it weekly for years and years, have it every morning, and never get sick of it! It is so easy, once you just convince yourself to do it!
Best,
Melissa
Marlene says
Great instructions! I’ve hooked now! I’ve made it about four times now and just love it..
One question , I was wondering, after using your own starter over and over … Can you just keep using it indefinitely? Or should you introduce a new starter at some point?
My husband was wondering if the cultures and bacteria get weaker at some point?
Hope you understand my question.
Thanks!
Melissa Erdelac says
Hi Marlene,
Great question! I find if I don’t refresh my starter the yogurt starts to get a little grainy. That’s when I know it’s time for a fresh starter. I buy a small Siggi plain yogurt (or Fage), use about 1/3 of it for the new batch and then freeze then remaining 2 starters in separate bags.
Best,
Melissa
Anonymous says
Haven’t made yogurt in the instant pot yet, but your inst are so well explained that I think I can do it!
We love greek style and go through quite alot of it. My question is, is there anyway to up the protein content?
Melissa Erdelac says
I KNOW you can do it. It seems like a lot of steps, but I promise it’s not hard! The only way to up the protein is to not drain out as much whey, put then you don’t really have a greek style yogurt. Sometimes I save the discard whey and use it other things (similar to what you would add milk to), like smoothies or pancake batter. Hope this helps and let me know how it turns out!
Best,
Melissa
Jenifer says
I have been doing the cold method with Fairlife milk and I have a question about freezing 2 Tbsp from my batch to be the starter for my next batch. Do I need to thaw it before putting the reserved yogurt into my next batch? And what is the best method for that? (I.e. just leave it in the fridge? For how long?). We love this yogurt, I would just like to stop having to buy the starter. Thank you!
Jenifer says
Well I just found my answer right below my comment! Thank you!
Melissa Erdelac says
Glad you were able to find your answer! I’ve made this weekly for years. Beats anything I have ever bought and so easy!
Best,
Melissa
Ace says
Hi! Thanks for the great recipe. I’m about to make my 2nd batch!! 🙂
Question, I took out 2 Tablespoons from the first batch to use as my starter, and put it in the freezer. For this batch I’m about to make do i need to thaw the starter? Or can I throw it in frozen? Thanks again!
Melissa Erdelac says
Hi,
It needs to be thawed first, but I just set it on the counter as the milk is boiling and cooling or if you forget, stick the bag in a cup of warm water to thaw quickly. Once the yogurt thaws it will be very thin and watery, but that’s fine. You just need the starters from it and the consistency doesn’t matter!
Best,
Melissa
alyr says
Ok I don’t eat yogurt (or any animal products for that matter) and I found these instructions certainly NOT ” ridiculously easy” but I like learning things and was fascinated by all the hard work and pleasant explanation you put into this post ….THEN…low and behold in reading the comments (yep down the rabbit hole) I found what I was looking for in one of your replies? HOW TO COOK FOOD BELOW 118 degrees? On the LOW SAUTE button! So THANKS! LOL And I’m actually gonna poke around here now 🙂 (and ha ha about your sister warming milk for 8 hours – so easy to do!)
Melissa Erdelac says
Thank you so much for taking the time to write! I’m glad you found it so helpful. If I’m being completely honest, when my sister was trying to sell me on making homemade yogurt and explained the steps, I was like, “I’m out. You just said way too many things.” But then we I actually let her convince me to do it, I realized it is NOT HARD AT ALL, it just has some stages to go through. All the explanation is because I’m so obsessed with it now and I wanted to cover all the bases! Let me know if you give it a try!
Best,
Melissa
Annette Norlen says
Hi, I love this recipe! I do the cold start method. My question is I forgot about it and it sat on warm for two hours after it had finished. Is it alright or should I throw it out and start again?
Thanks, Annette
Melissa Erdelac says
Hi Annette,
I wouldn’t throw it out. I’ve definitely done this before and it has been fine. Since the lid wasn’t open, it would have still maintained the temperature for quite a while.
Best,
Melissa
Annette Norlen says
Hi , thank you so much for taking the time to research and post this article. I absolutely love it. How long is the yogurt good for?
Melissa Erdelac says
You’re welcome, Annette! I make a gallon milk every two weeks, although I have stored it up to three weeks.
Best,
Melissa
Terry says
My milk temperature got to over 200 degrees before I knew it. Will that ruin my batch?
Melissa says
As long as you cool it back down to 115 it should be fine!
Best,
Melissa
Kathi Moss says
My yogurt is only at 88 degrees when it is in incubation stages. My Yogurt is coming out slimy. I don’t get the word boil when I push the yogurt setting. My IP is brand new I have only used it 3 times and all batches are coming out the same. Is my IP malfunctioning? It shows the temp is on low? Is this correct?
Thank you Kathi from Florida.
Melissa Erdelac says
Hi Kathi,
I’m not sure which Instant Pot you have, but there is another way you can go about it. Either boil the milk on the stove or use the SAUTE feature on your Instant Pot to heat it up to 180ºF. Cool the mixture down to 115, then stir in the bit of yogurt for the starter. Transfer back to Instant Pot and cook at yogurt setting for 8 hours. You may want to check that your yogurt setting is set to 110-115ºF degrees. It should be default, but I know with mine there is a way to adjust it, so maybe that got changed?
I’m so sorry about all your wasted milk, but I admire your persistence because it really is the world’s best yogurt!
Lisa says
Could I use quart jars to cook the yogurt in?
Melissa says
Hi Lisa,
I haven’t tried this, but I don’t see why not. The milk will still have to be heated to 115F first. Place the jars on the trivet. You may want to cook the yogurt about an hour longer, since it won’t be strained after. The consistency will be more like regular yogurt, versus Greek.
Best,
Melissa
Annie says
Would it work to use plain Greek Yogurt as my starter?
Melissa says
Hi Annie,
Yes, that wouldn’t be a problem at all!
Best,
Melissa
Megan says
This is the easiest and most delicious yogurt I have ever had! Thank you so very much for the time you spent!
Melissa says
Oh, I really appreciate this, Megan! Thanks so much for taking the time to let me know!
Best,
Melissa
Maryann grant says
Good instructions! My husband eats yogurt every day, and prefers Greek, so I use my strainer, but I line it with coffee strainers! Yogurt doesn’t stick to them making it easier to transfer to containers, but it takes some practice. They are very absorbent so I even lay a few on top.
The whey is great for using instead of water: instapot dried beans, soups, waffle mix, marinade for chicken, etc.
in France they make formage blanc, my husband loves it, too, but it’s very rich! I usually make 2quarts, but mostly cream and half and half. It’s very hard to find non ultra pasteurized cream!! It’s amazing.
Melissa says
Hi Maryann,
Thank you so much for all the suggestions for uses of whey. I strain my yogurt a lot so it is very thick, so I always have so much leftover. I’ll definitely be putting some of these uses to test. I love the idea of formage blanc. Can’t wait to try!
Best,
Melissa
Dawn says
Just wanted to point out that in your instructions for the Lux you never said to add the yogurt culture. The instructions go straight from removing the insert for cooling to returning the insert, replacing the lid and wrapping for incubation.
Melissa says
Hi Dawn,
Thank you so much for pointing that out! That is definitely an important step. All fixed now!
Best,
Melissa
Jenifer says
My girls are yogurt crazy, so I want to make some strawberry yogurt for them. I know that you said to add fruit sauce, but I have no clue what that is! Haha. I need to make it strawberry flavored, but without any actual strawberry pieces in it because *kids*. Any tips on that? (I plan on trying the cold method you mentioned with the Fairlife milk.). Thank you!
Melissa says
Hi Jennifer,
Thank you so much for writing. I’d be happy to help and appreciate knowing when things aren’t clear. So you have a couple options. You could just add strawberry jelly (so no pieces) or make your own strawberry sauce to mix in or have the girls pour on top and swirl around themselves – kind of like fruit on the bottom yogurt cups. To make a strawberry sauce follow the directions for the sauce on Coeur a la Creme post, omitting the Grand Marnier. After the sauce is done you can blend it really well so there wouldn’t be any “pieces.” Let me know if you have any other questions!
Best,
Melissa
Peni says
Any chance this would work with coconut milk ? Can’t do dairy or almond milk darn it. Thank you
Melissa says
Hi Peni,
You can make yogurt in the instant pot with coconut milk, but it’s a different process because it won’t thicken like cow’s milk. You’ll also need to add a thickener, like agar flakes. For best results I would google vegan or coconut milk instant pot yogurt. Hope this helps!
Best,
Melissa
Karly says
My instapot doesn’t have a yogurt feature and your steps for that have worked beautifully. I was wondering if you know how to use the ultra pasteurized milk method without having a yogurt button? Or if that’s possible.
Melissa says
Hi Karly,
I’m glad it worked out for you! Yes, you can make the “cold start” method without the yogurt button as well. You will need the use the SAUTE “LESS” to heat the Fairlife milk to 115 degrees and whisk in your starter. Then you will need to wrap your instant pot and keep it at the same temp for the 8 hours. You can put your wrapped in the oven with the just the oven light on to keep it warm. Let me know how it turns out!
Best,
Melissa
Jeff says
The milk you have pictured for cold start is Fairlife ultra-filtered milk, not ultra-pasteurized milk. Ultra-filtered and ultra-pasteurized are two entirely different things. Don’t use ultra-pasteurized milk for cold start … only ultra-filtered.
Melissa says
Hi Jeff,
Thank you so much for taking the time to write and pointing that out. Yes, I initially referred to FairLife as ultra filtered, then switched my wording to ultra pasteurized by mistake. All fixed now so hopefully any future confusion will be avoided!
Best,
Melissa
Flechere says
Just tried for the first time making yogourt in my instant pot. I changed the rim and have a new inner pot just for these kind of recipe so the smell won’t tranfert. Your recipe was super easy. I have a glass lid Would that work for making yogourt.? I didn’t take any chance and used the big lid. Anyway just like you said i forgot it while straining the whey. Way too thick so added back some whey. My hubby was impressed. Taste really good. Thank you for the detailed recipe. Bonjour from Montreal
Melissa says
Hello!
Thank you so much for taking the time to write! The glass lid would work fine as long as it holds the temperature. It’s not pressure cooking, just maintaining that temp to activate and grow the cultures. I often just strain my yogurt overnight because I can’t squeeze it in all in one day. Then I add whey or milk to make the yogurt even creamier and mild tasting if you want to decrease the tanginess. Or I “cook” the yogurt overnight and strain in the morning. Glad you enjoyed it!
Best,
Melissa
Hannah says
Can this be done with non dairy milk?
Melissa says
Hi Hannah,
If you are okay with Fairlife lactose free milk, I know that works very well (instructions are included in the post above). If you are looking for completely vegan instant yogurt, I haven’t tested that with this recipe, but I know there are other recipes out there if you do a google search. Hope this helps!
Best,
Melissa
Bergette says
Thanks for the great recipe and clear step by step instructions. Can’t wait to try it. Question: do I cut the recipe in half for the Instant Pot Duo Mini? And what other differences might there be?
Melissa says
Hello! Yes, cutting the recipe in half will work perfectly for the Duo Mini. The cook time and everything else will stay the same. Thanks for writing!
Best,
Melissa
Nina says
My 4 yr old loves yogurt so even though I had a Bella brand I went and bought a Instant pot brand with the yogurt button. If I’m wanting to make her flavored yogurt, say strawberry I’m assuming I use strawberry extract or whatever flavor I’m making it (like how it said for vanilla). However I’m confused, do I mix the extract in before the 8 hrs or afterwards before I strain it?? Thanks in advance! Oh also can I use 1% milk??
Melissa says
Hi Nina, yes you can use any percentage milk. Just make sure it isn’t “ultra pasterized” already. All regular milk shouldn’t be, but a couple brands of organic are (like Horizon and Aldi brand). It will say on the front if it is.
When mixing in flavors (you could cook chopped strawberries with sugar and then mash or add strawberry jam) do it after you strain the yogurt. Feel free to ask any other questions!
Best,
Melissa
Anneliese says
If using an instant pot without the yogurt function can I set it to “keep warm” during the 8 hours? Or is it best to just leave it off?
Melissa says
Hello Anneliese,
No, don’t set it to “keep warm” because that temperature will be too high and kill off the active cultures in your yogurt starter. Just leave it off with a towel wrapped around it to hold it at temperature. Enjoy!
Best,
Melissa
Tiff says
Waste not want not….is there a use for the whey?
Melissa says
Yes, people do use the leftover whey because it’s loaded in protein. This is a great article giving a rundown of all the different ways you can repurpose it. https://www.theprairiehomestead.com/2011/06/16-ways-to-use-your-whey.html
Jeanne says
When your letting it strain in the cheesecloth, do you put the whole thing in the refrigerator or leave it out on the counter?
Jeanne
Melissa says
I put the whole thing in the refrigerator because I let it strain for 4-5 hours (I like very thick yogurt). Sometimes (like every single time) I forget about it and accidentally leave it in the fridge overnight. Then you just whisk in some of the collected drained whey or add milk to make it your desired consistency. Enjoy!
Melissa
Rebecca says
Just made it last night after months of being nervous and not understanding some posts about how to do it. Thanks for the great steps on making yogurt! Question…have you doubled the recipe and used a gallon at a time? Thanks!
Melissa says
HI Rebecca, I’m so glad you found the post helpful! I know what you mean about being intimidated by it. It took me a while too, but once you know the steps, it’s really not hard at all!
Yes, I double the recipe a lot. Everything reminds the same with cooking. The only thing you’ll notice a difference is it will take longer for the milk to come to boil. Add a little more of the starter will have to be used as well. Thanks for writing!
Best,
Melissa
Kristi Wheeler says
I was really excited about making yogurt myself too, since it’s pretty expensive to buy at the store. I’m so happy the Instant Pot make it so easy to make at home! I bought a second Instant Pot, since my first one didn’t have the yogurt button. I think I’m seriously in love with my homemade yogurt. I’ll never go back to store bought!
Melissa says
I hear you Kristi. I haven’t bought yogurt once since I started making this. The taste just doesn’t compare and it’s so easy with the instant pot!
Rochelle says
Just made it but it came out looking like warm milk. Only thickness is about an inch on the bottom. You said if it wasn’t right, put it back in for 1-2 hrs so that’s what I’m doing. Hope it works!!
Melissa says
Yes please follow up. I’d love to know! So this happened to my sister, but it turned out she never put in the yogurt starter (so basically she was just warming milk for 8 hours). If you are using skim milk or sometimes the yogurt cultures might not be strong enough, you can add 2-4 hours to the cooking time. Looking forward to hearing from you!
Melissa
Heather A says
Quick question. How much yogurt does the recipe yield using 1/2 gallon of milk? I’ve been toying with the idea of making my own Greek yogurt.
Thanks!
Melissa says
Hi Heather,
It makes 1 quart. I save an old quart yogurt container and use it to put my homemade yogurt in. 1/2 gallon of milk fills it perfectly. Enjoy!
Melissa
Gretchen O'Neill says
Hey! currently wanting to make it- trying to make it lactose free! (wish me luck!) but QUESTION! Maybe I missed it…. but do you have the valve set to VENTING or SEALED when you first boil it? and what about when it’s thickening? is the valve on VENT or SEALED?
Thank you so much!
Melissa says
Definitely sealed and thank you for pointing that out! Please let me know how it turns out because I’m sure other readers will be interested as well. Best of luck, Gretchen!
Ginny says
Anxiously waiting to hear about your results. I accidentally bought lactose free non-fat milk and this sounds like the perfect way to use It!
Melissa says
Gretchen contacted me and said it worked out great! So this recipe can be used with lactose free milk 🙂 -Melissa
Michele @ Queenbeebaker says
I LOVE this! I just got an Instant Pot for Mother’s Day and I’m still trying to learn how to use it. I’m so excited you posted this. How cool to make your own yogurt!
Melissa says
Thanks Michele! I was so blown away how good it was, I had to post it. I want everyone who has an Instant Pot to give it a try. It ends up being so much healthier too since the taste is so mild, you don’t really have to add much sweetener at all.