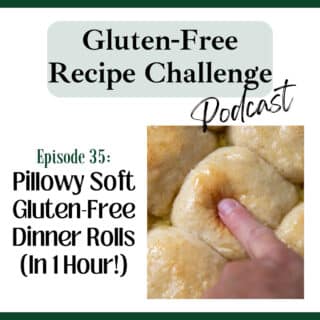
In episode 35 learn how to make the best, softest gluten-free dinner rolls in only 1 hour. These fluffy, airy, rolls not only have a superior texture, but are easy to make, even for a novice baker. Join Melissa, gluten-free cookbook author, as she shares many easy, pro tips to make this audio recipe for gluten-free rolls, and discover the secret trick to avoid dry, crumbly GF bread forever!

Listen to this episode, along with the full audio library, on iTunes, Spotify, Stitcher, TuneIn, or your favorite podcast player.
Recipes and Resources Mentioned
Recommended Equipment
- Kitchen-Aid Stand Mixer
- Flex Edge Paddle Attachment
- Instant Read Thermometer (Thermoworks)
- 8X8 Baking Pan
Recommended ingredients
Follow Along
Don’t forget to subscribe to our weekly newsletter! Besides receiving an immediate GLUTEN-FREE BAKING BONUS, this weekly newsletter gives you direct access to the newest recipes, helping you with menu planning and exclusive tips!
Transcript
Hey everyone, I’m Melissa Erdelac, host of the Gluten Free Recipe Challenge podcast and creator behind the gluten free website Mamagourmand. Here we take beloved recipes you thought you never enjoy again and transform them into easy copycat versions just as good as the originals.
Do you have any idea how many years of bread envy I have endured? If you’re listening to this? You’re probably right there with me .There’s been so many painful, traumatic moments in my life, but you know what’s the worst? Thanksgiving. You have to sit there and act all cool and nonchalant about passing over those buttery soft rolls that everyone’s going crazy over. Like, it’s no big deal, and you don’t want it eat that anyway. But you know what? Fuck that.
These super soft gluten free rolls is one of the ones that I’m most proud of. Right up there with my sandwich bread recipe. I’ve never really tried anything that remotely tastes so much like regular bread than these rolls and my family concurs. They eat the shit out of these things, if I let them. I generally freeze them and hide them away because they can eat whatever the fuck they want, so why do they need my gluten free rolls?
But also, right up there with the sandwich bread, it’s the recipe that brings me the greatest joy when I read through people’s comments after they make them. It’s almost like I should win the Nobel Peace Prize for changing people’s lives. It’s a pretty revolutionary recipe.
But, if you follow me, or you’re familiar with any of my recipes you know, I’m usually not a fan of overcomplicating things with fancy ingredients or directions. I try to simplify it as much as possible with still having great results.
These are still easy. You could still make them in one hour, start to finish, including the rising and the baking time. It mixes together without any kneading, or without really any baking expertise.
But with that being said, it does require a couple extra ingredients and a technique I don’t want you to flip out about, because even though these things might sound intimidating, they’re really no biggie.
The two extra ingredients are psyllium husk powder and then potato starch. The psyllium, which I talk about in Episode 7 and why it’s such a game changer for gluten-free breads, helps make the dough malleable without having to add a bunch of extra flour, which would dry it out.
And you can buy this on Amazon or it’s available in health food stores. It’s pretty cheap and a bag lasts me forever. However, you have to buy certain brands because… psyllium is just like, um, like a fiber supplement. So people take it for health reasons. Some brands are really brown in color, and weirdly, if you use a really brown psyllium, it turns your baked goods purple. There’s one brand that I’ve found in particular that is the lightest that I’ve come across and I’ll link to that in the show notes and then I also link to it on the recipe.
The other ingredient is potato starch and this comes in handy for gluten free breads that have to be shaped like hamburger buns or cinnamon rolls or these dinner rolls. Because they have to be shaped to get it to that point, you would have to add so much flour. Instead of adding extra flour, I substitute some of that flour with potato starch, which helps absorb the liquid, meaning you don’t have to add all the extra flour and gives it that softer texture.
The method that might throw you off is called making a roux. And a roux is just a technical cooking term for making a paste with a small amount of flour and liquid. That’s all it is. So, see, nothing to be scared of.
Since gluten free flours don’t absorb liquids as well, the roux helps pre saturate some of that flour and helps it aid absorbing more liquid. This also helps make the texture soft and fluffy rather than, a common problem with gluten free breads, which can be dense and gummy. It also prevents having to add excess flour to make the dough shapeable and elastic. And the key for light, airy, gluten free yeast breads is adding the least amount of flour while you could still shape it.
The last thing I want to mention before walking through the recipe is the type of flour to use. I highly, highly, highly recommend using Cup4Cup for best results. However, if you read through the comments, you can see that others have had great success too with King Arthur measure for measure, which would be be a good substitute if you need a dairy free and gluten free roll recipe.
Some people have commented that their batter turned out thinner, but when I asked, they didn’t elaborate on what flour they use. I’m guessing that was the culprit because the different gluten free blends have different starches and then they absorb the liquids differently. So for the best success, I would stick with either Cup4Cup or King Arthur Measure-for-Measure.
Okay, moving on. Before you begin making the roux, first turn the oven to 200 degrees. So you’re going to start making the roux as the oven is heating up. Once it reaches that 200 degrees, then turn off the oven, you can leave the oven door closed, and the reason why I do this is because the warmer oven just serves as the extra warm place for the rolls to initially rise and gives them a great jump start on rising and they don’t have to sit out as long.
Grease an 8 by 8 inch baking pan and then set that aside. As the oven is preheating to that 200 degrees, that’s when you make the roux. In a small saucepan, you combine 2 tablespoons of gluten free flour with 3 tablespoons of water and 3 tablespoons of milk, or non dairy milk if you need a dairy free recipe.
Just whisk that constantly over medium heat until the mixture almost starts to separate and leave a trail in the pan. So it’ll get really thick, as you stir it, you’ll be able to see the pan underneath. And if you need a picture of that, you could refer to the recipe post and I show you what that looks like.
So remove that from the heat and then set aside. And then that’s your roux. You’re done with that.
In a large mixing bowl of a stand mixer with a paddle attachment, I find that’s the easiest way to make these rolls, combine one and a half cups of gluten free all purpose flour, three tablespoons of potato starch, three tablespoons of sugar, one tablespoon of the psyllium husk powder, one packet or two and a fourth teaspoons of instant rise yeast, one teaspoon of baking powder, and then a half a teaspoon of salt.
So just mix up the dry ingredients. And then you’re going to add three fourths cup of warm milk. So that should be around 110 degrees Fahrenheit, and I usually use my instant read thermometer to check that, but it should be a little bit, slightly hotter than room temperature. One room temperature egg, and then two tablespoons of melted butter, or you could use plant based butter.
So combine that on low speed until it’s blended, oh, I almost forgot. You want to add the roux to that mixture, too. So the milk, the egg, the melted butter, and the roux goes in with the dry ingredients. Mix it until it’s blended, and then once it’s mixed together, then increase the speed to high, and then beat it for 5 minutes. And the dough at this point will be stiff, but it’ll be still sticky.
Okay, so now it’s time to shape the rolls, and to do this, I put a silicone baking mat on my counter, or a piece of parchment paper, and then just spray that with cooking spray. Instead… of measuring out the dough to make sure each roll is the same size. What I do to make this go really quick is I just liberally grease a fourth cup measuring cup with cooking spray and then I grease my hands and then I scoop out that fourth cup measuring cup just to a level amount, which yields about a two ounce portion of dough.
If you want to be really technical about it, you could also use a food scale to measure it. the dough onto your greased hands, and then just roll it into a smooth ball.
Go ahead and transfer the ball over to your greased baking dish, and you will have three rows of three. Cover the baking dish with plastic wrap and then place it in the turned off oven for 10 minutes. Take the pan out of the oven and then preheat the oven to the baking temperature, which is 350. And while the oven is preheating, the rolls rise for about 20 minutes more.
Okay, here’s the other magic part of this recipe. For really great flavor, what I do is I melt two more tablespoons of butter, and I mix it with a fourth of a teaspoon of salt, and then brush that mixture over the top of the risen rolls.
So it almost has like this, like, Parker House rolls taste, and it has that really salty butter on top. Do that right before you’re going to put the rolls in the oven.
Bake them for 20 to 22 minutes or until the tops are lightly browned. But I’ll tell you what, the best way to tell when gluten free bread is is done, because it could be really deceiving. It could look done on top. It could look done on the bottom and then go to open it up and it could still be gummy inside, is I use my instant read thermometer and it should have a temperature of 195 to 200 degrees fahrenheit.
You’ll have some butter left over from when you brushed them before they baked. When they come out of the oven, immediately brush the tops with the remaining salted butter and then serve them warm. And they are absolutely heaven on earth.
You can make these ahead of time and then freeze them. Just make sure they have cooled completely, at least two hours before you wrap them up to freeze. And then when you’re ready to eat them, pull them out of the freezer and then just defrost at room temperature.
When you’re ready to serve them again, if they are chilled at all, they aren’t the best texture. So you want to make sure that you warm them slightly in the microwave, or you could wrap up the whole pan and cover it with foil and warm them slightly in the oven before serving them again.
If you’re hosting a gluten free Thanksgiving, or if you want to bring this to someone else’s house so you can have finally have some fucking rolls at Thanksgiving, then you can do that too.
Just you can make them whenever and then freeze them. You could wrap them up individually to pull out as needed or you could freeze the whole pan.
So remember you can find the full printable recipe on the show notes page and to get to it click on the link provided in whatever podcast app you’re listening on. Or you could go to my recipe website, which is mamagourmand.Com and click on the podcast tab. And there you’ll find the full printable recipe along with the recommended ingredients and equipment I’ve mentioned.
Sue says
I very much appreciated your soft gluten free rolls recipe and started to listen to the related podcast, but found your language so foul, I turned it off. You left such a bad impression on me that I am reluctant to ever tune in again or even check out more of your recipes.
Good character and honorable speech will go much farther in your desire to persuade the public to try your excellent recipes.
Melissa Erdelac says
Hi Sue,
I appreciate your feedback and I respect where you are coming from. It’s definitely not for everyone. If you will hear me out, I will let you know where I’m coming from. My recipe content on the blog, social media posts, and newsletters are more of the cut-and-dry, universal copy to appeal to all. I stick to the chemistry and scientific process of the recipes. However, I got into this business not only for my love of cooking, but because I’m a creative, expressive person. I find that the semantics of relaying my recipes have left little room to show my actual personality. The podcast was born because I wanted to explain the recipes in a way I would explain to friend, color commentary and all. Sounds like I may not be your cup of tea, but this is how I would speak to people I know well. I like to make people laugh, insert the unexpected, and hopefully find some common ground with what could be a very frustrating experience – baking gluten-free! Anyone familiar with GF baking isn’t unfamiliar with the frustrations and emotion that can come out of success and disappointments. My language personifies what I have felt and my hope is that others can relate. Obviously not everyone uses that language, but that’s a risk I have to take to be expressive.
Best,
Melissa
MaryEllen says
Hi Melissa,, Thank you for replying and for the fabulous soft rolls recipe. I’ll look for other bread recipes of yours to try.
We’ll agree to respect each other’s different styles of being and just rejoice in great GF bread. Take care and happy and healthy holidays to you and yours.
MaryEllen says
Melissa,
Your recipe looks like a good one and I agree with you that psyllium husk powder is the game changer for GF bread. I would like to suggest that for your podcast you think about cleaning up your choice of expletives and hopefully leave them out all together. I was kind of shocked and definitely disappointed that I couldn’t enjoy your GF teaching on the soft rolls podcast. It would have been awkward to say the least if I had had children listening with me as well. You’ll have a wider and happier audience if you go rated G. Your recipes look great and it would be a good thing to share them with all the people in the GF community.
Melissa Erdelac says
Hi Mary Ellen,
I appreciate you reaching out and I respect what you are saying. I’m not sure if I will change this or not, but I would like to explain my side. A lot of what I do for my business is very scientific and calculated from the recipe developing to how I publish them (in order for them to gain traction on google). Because of this, I feel like my voice and personality has to be put aside. I understand and accept that because when people come to my recipes, they are doing just that – looking for a specific recipe, and not wanting extra “fluff.” When I record my podcast it’s like I’m talking to a friend, explaining things in a fun and playful way to make the content more entertaining. Unfortunately, this is exactly how I talk (not in front of my kids, but how I talk to friends). If I use bad language in the episode, I label it explicit to give people a warning. I personally listen to podcasts on my headphones or when I’m driving by myself so I don’t worry if language might pop up. I know this isn’t the case for everyone. Anyway, I don’t want to lose any listeners, but it gives my audience to see the “real” me, which I guess can be endearing or off-putting.
Best,
Melissa