
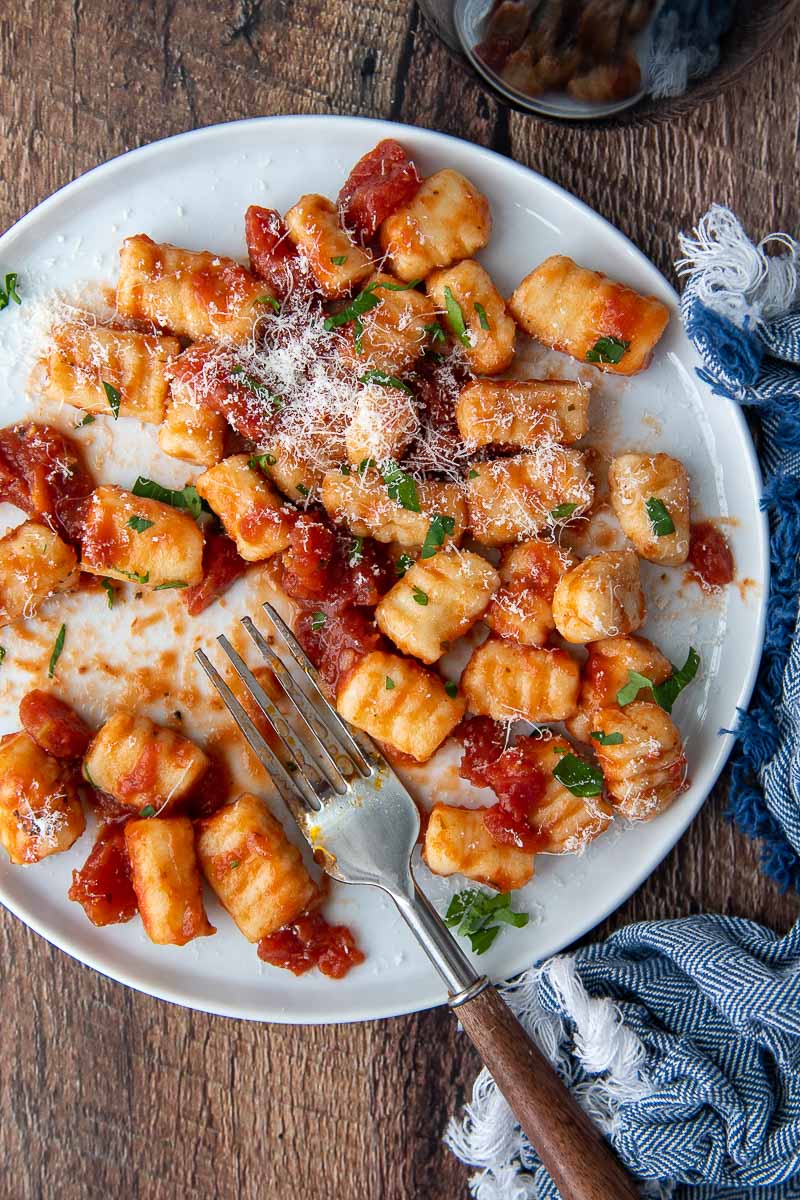
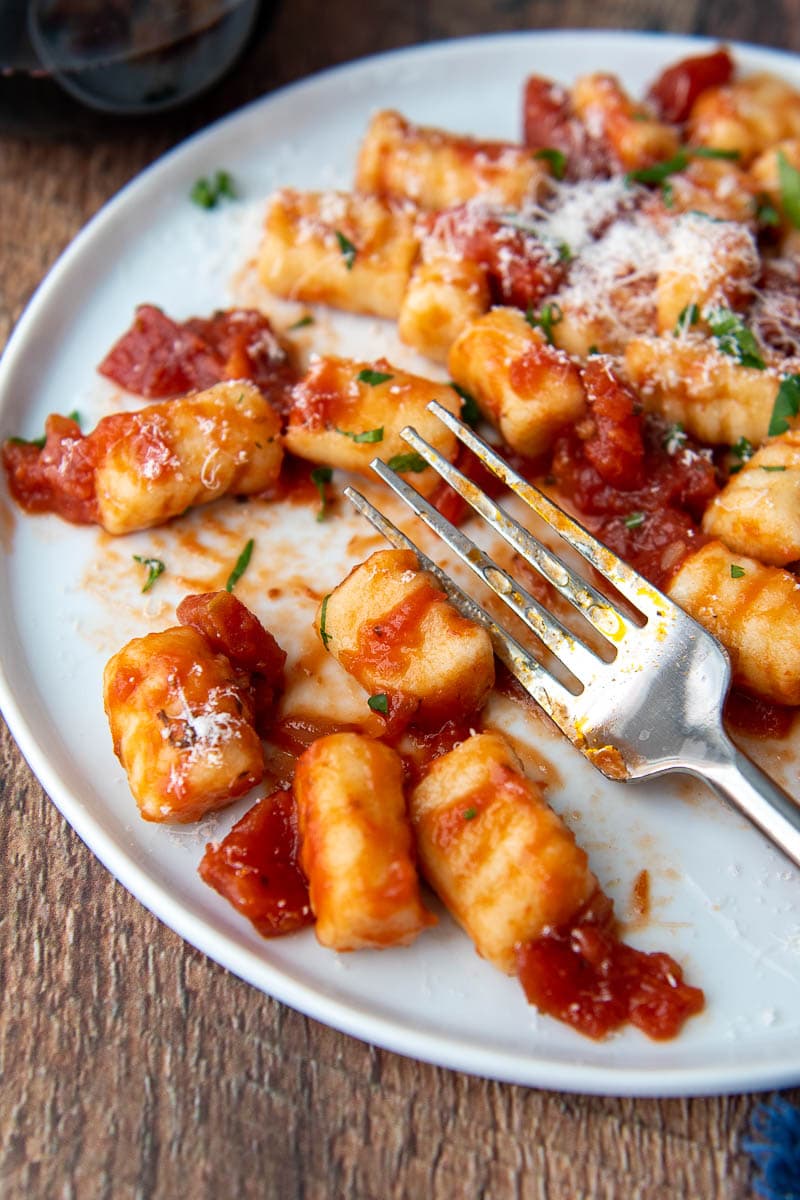
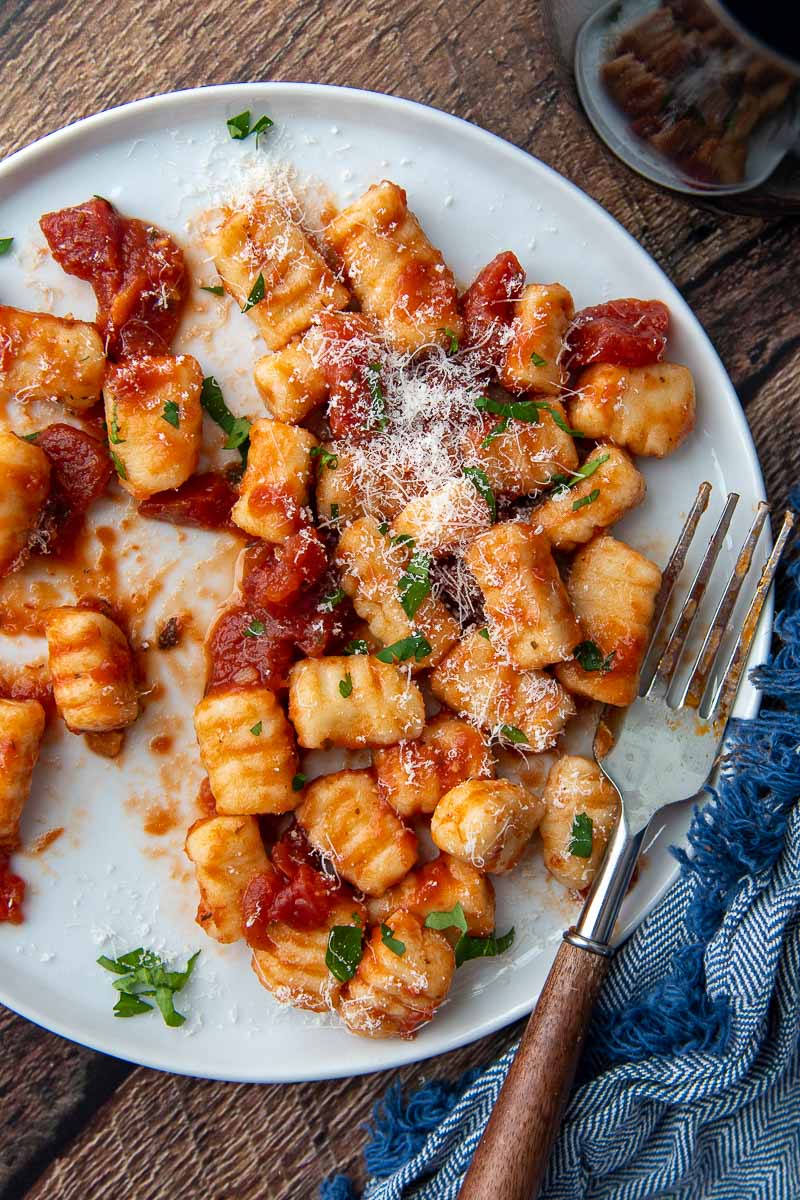
Dive into a plate of homemade gluten-free gnocchi in less than 30 minutes! Made with only a handful of ingredients —whole milk ricotta cheese, gluten-free flour, olive oil, egg, and a little parmesan cheese — I love the simplicity of ricotta gnocchi because it’s fast and easy to throw together for dinner. Toss with desired sauce, and enjoy!
Want to Save This Recipe?
Enter your email below & we'll send it straight to your inbox. Plus you’ll get affordable and easy gluten-free recipes delivered each week!
Well-Tested Gluten-Free Gnocchi Recipe
Being raised in a first-generation Italian household meant shunning store bought-pasta. My Italian Gramma and mom cut fresh pasta for everything from simple family dinners to celebratory holiday meals.
Many of these Italian recipes have been adapted our family’s own gluten-free versions just as good as I remember them, such as homemade gluten-free lasagna that is never mushy, baked ziti, and my gramma’s favorite focaccia made gluten-free.
While sadly Gramma was never able to give this authentic version of gnocchi made with gluten-free flour her stamp of approval, Mom and I give it an emphatic thumbs up and enjoy it with gusto! I particularly like it, because unlike Gramma’s gnocchi, there are no potatoes to peel, boil, or mash.
Instead of trying to replicate my family’s gnocchi recipe and swapping in GF flour (believe me, I tried!), I transitioned to a ricotta cheese gnocchi. Why?
Through recipe testing I found that GF gnocchi made with mashed potatoes tasted like, well, mashed potatoes. I believe this is due to the make up of GF flour blends, which rely heavily on rice flours. There wasn’t enough variance of the starches.
Using a base of gluten-free flour, mixed with ricotta, a little olive oil, egg, and parmesan decidedly improved both the taste and texture. Also, potato gnocchi adds a long extra step, plus the varying moisture content of potatoes doesn’t make for the best results.
As an added bonus, using ricotta in gnocchi also means the prep is fast and easy. All the ingredients are mixed together in one bowl, roll, and then cut. It’s now possible to enjoy a homemade gnocchi recipe in less than 30 minutes.
Made this tonight for my son with celiac. He loved it as did the rest of the family. Definitely a keeper. Thanks for a great recipe!
—Chris
Free Guide! Receive a Free Gluten Free Dinners Cookbook
TOP 5 Highest Rated Recipes!
Ingredient Notes
- Whole Milk Ricotta – I recommend whole milk ricotta, versus part skim, because the added fat makes the gnocchi more tender.
- Egg – Acts as a binding agent for the ingredients
- Olive Oil – Helps coat the GF starches to eliminate any gritty or graininess. You just need a touch.
- Parmesan Cheese – Also helps with binding and adds a nice salty flavor.
- Gluten-Free Flour – This gnocchi was tested with a variety of gluten-free flours with varying results. Therefore, I’ve included important recommendations and notes in the gluten-free flour section.
Watch This Recipe
Let’s Make This Together!
(Below shows step-by-step photos and modified instructions. For the complete recipe, along with ingredient amounts, scroll down to the recipe card.)
Quick and easy dough
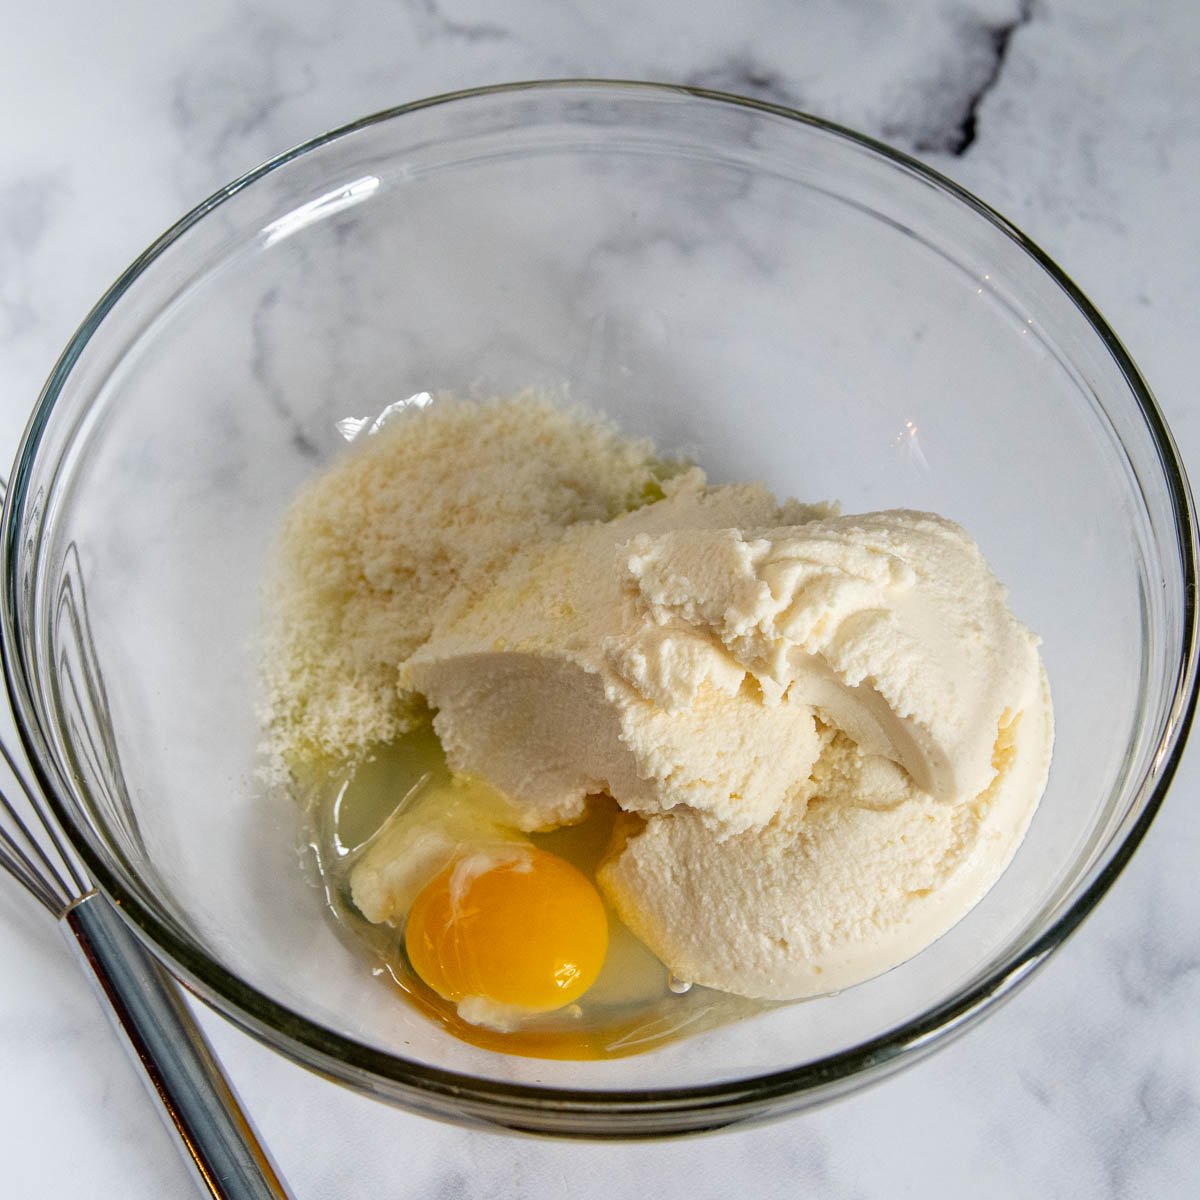
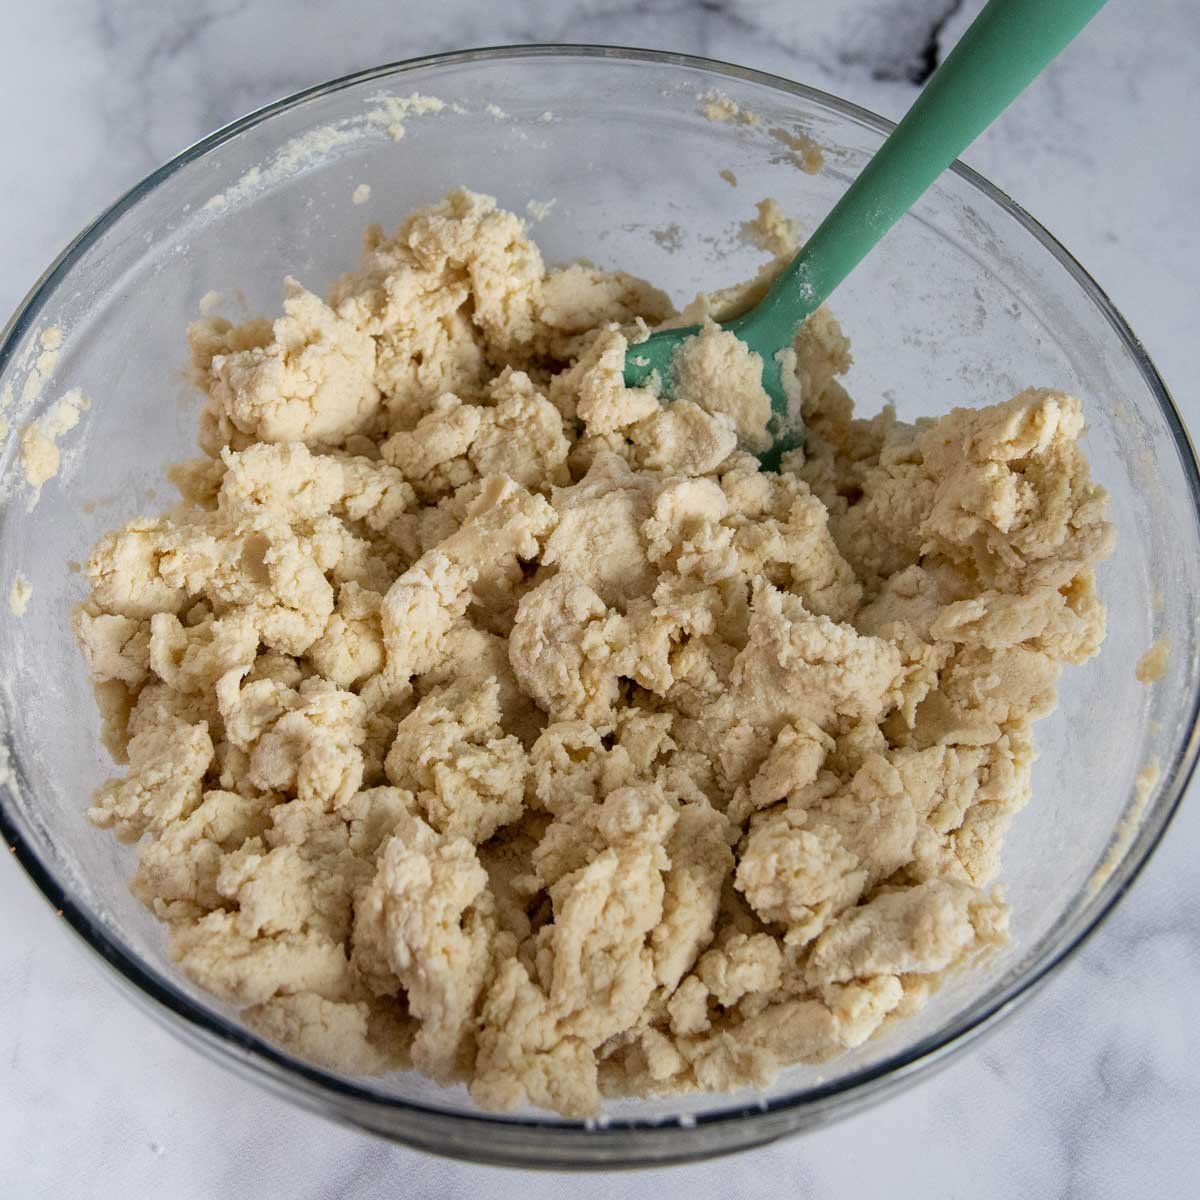
First whisk together the ricotta, egg, olive oil, and parmesan. Stir in the GF flour until it’s well mixed and the dough comes together. The dough should be soft and slightly sticky. If it’s too stiff add a dash of warm water. If it’s too loose add a tablespoon of flour at a time.
Start shaping
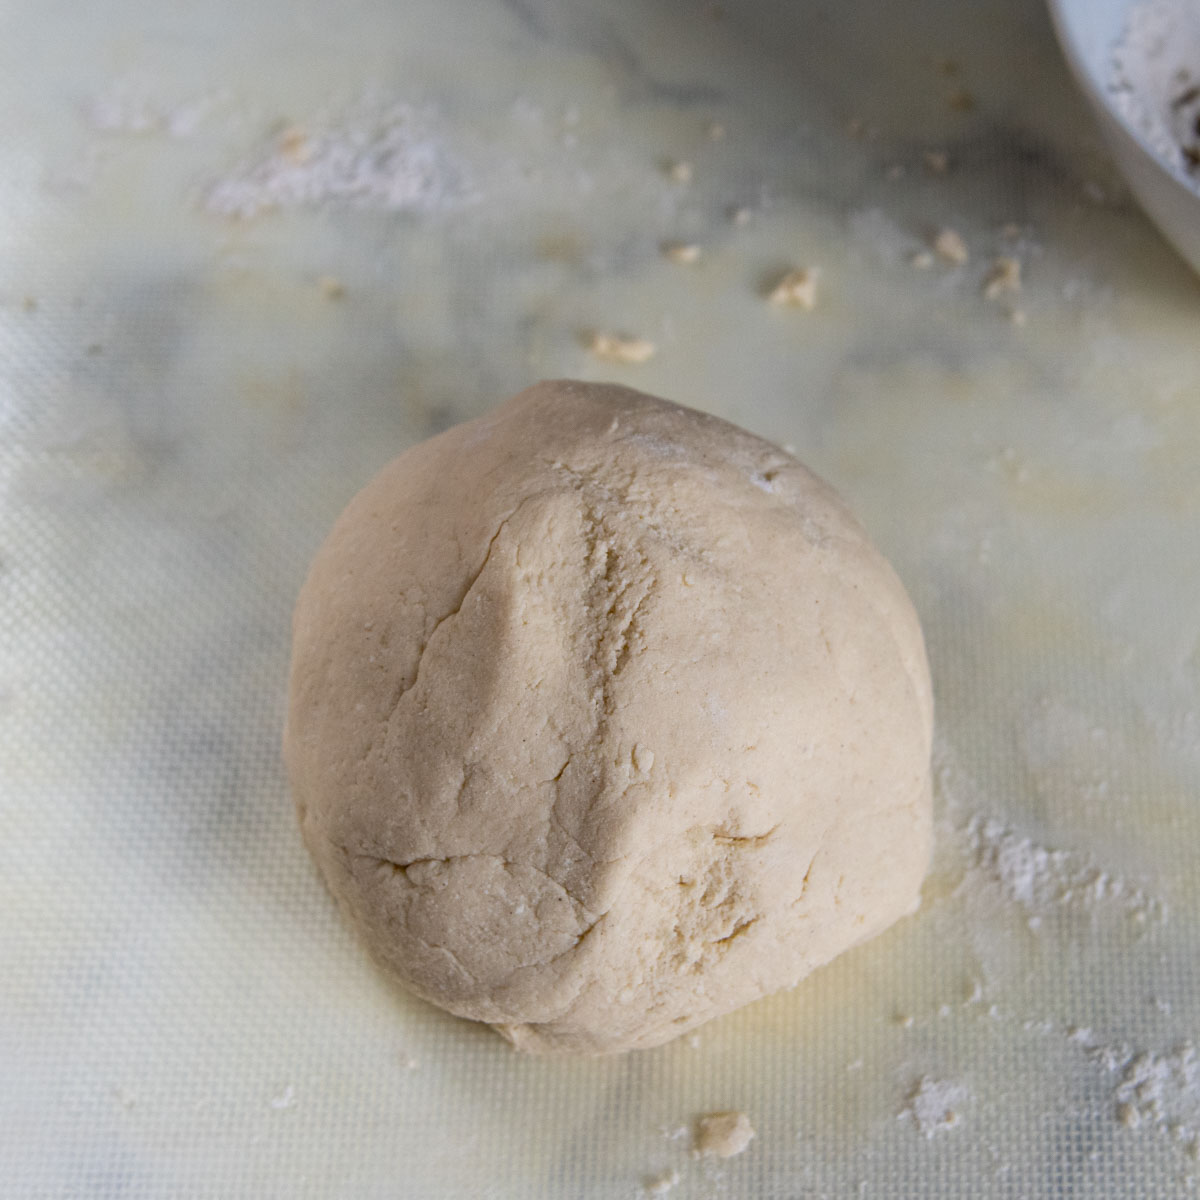
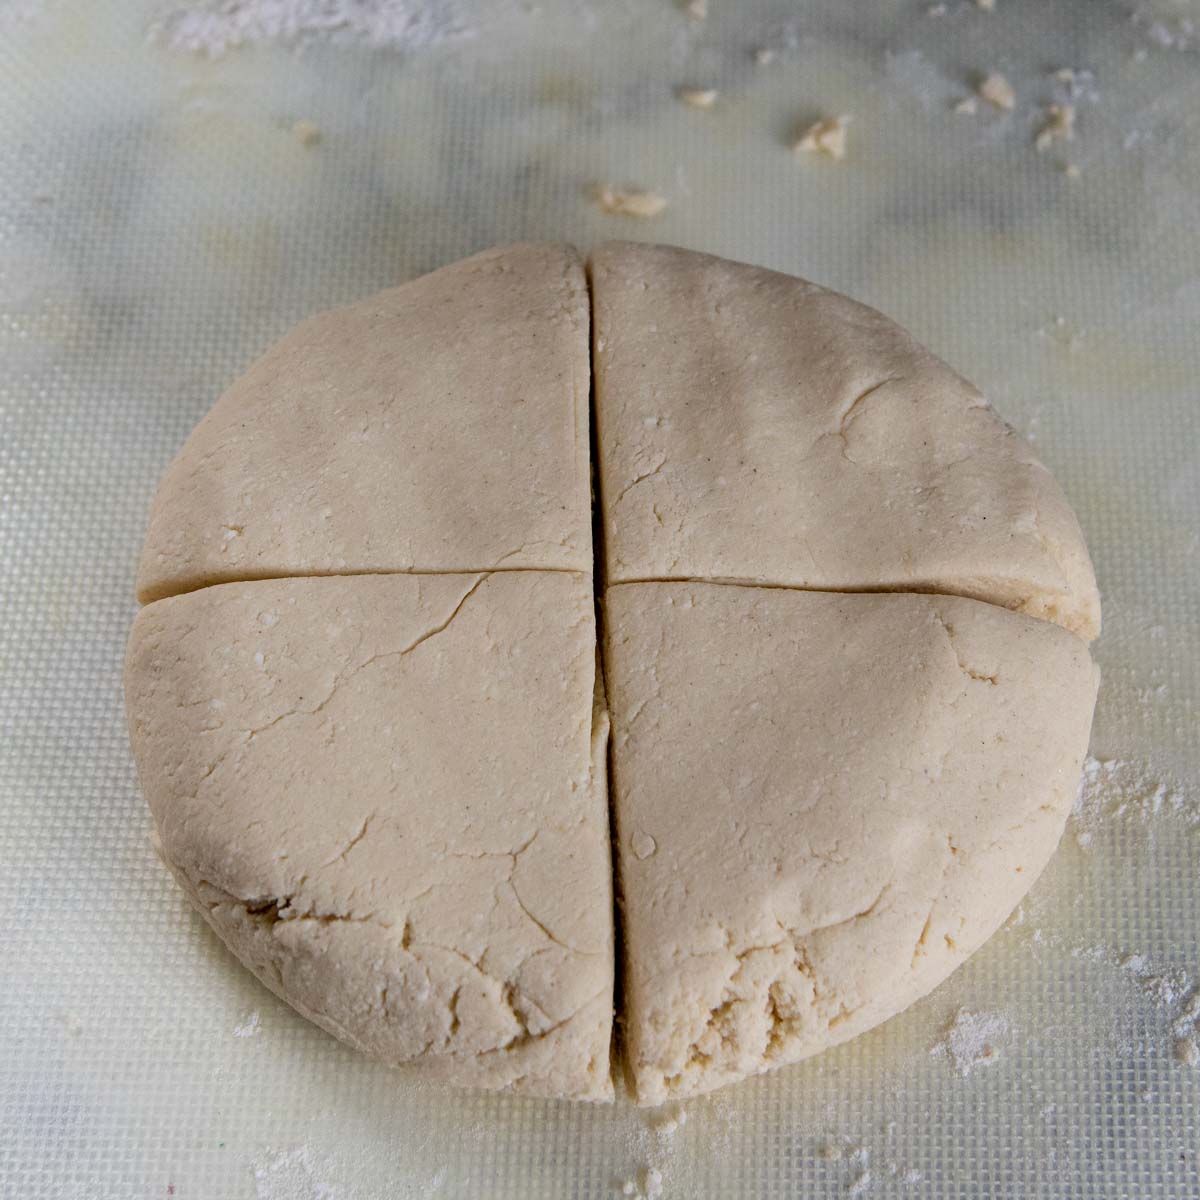
First turn the dough out onto a lightly floured surface and knead it until it becomes a smooth ball. I like to work the dough in four smaller sections, so flatten the ball into a thick disc and cut crosswise to get 4 pieces.
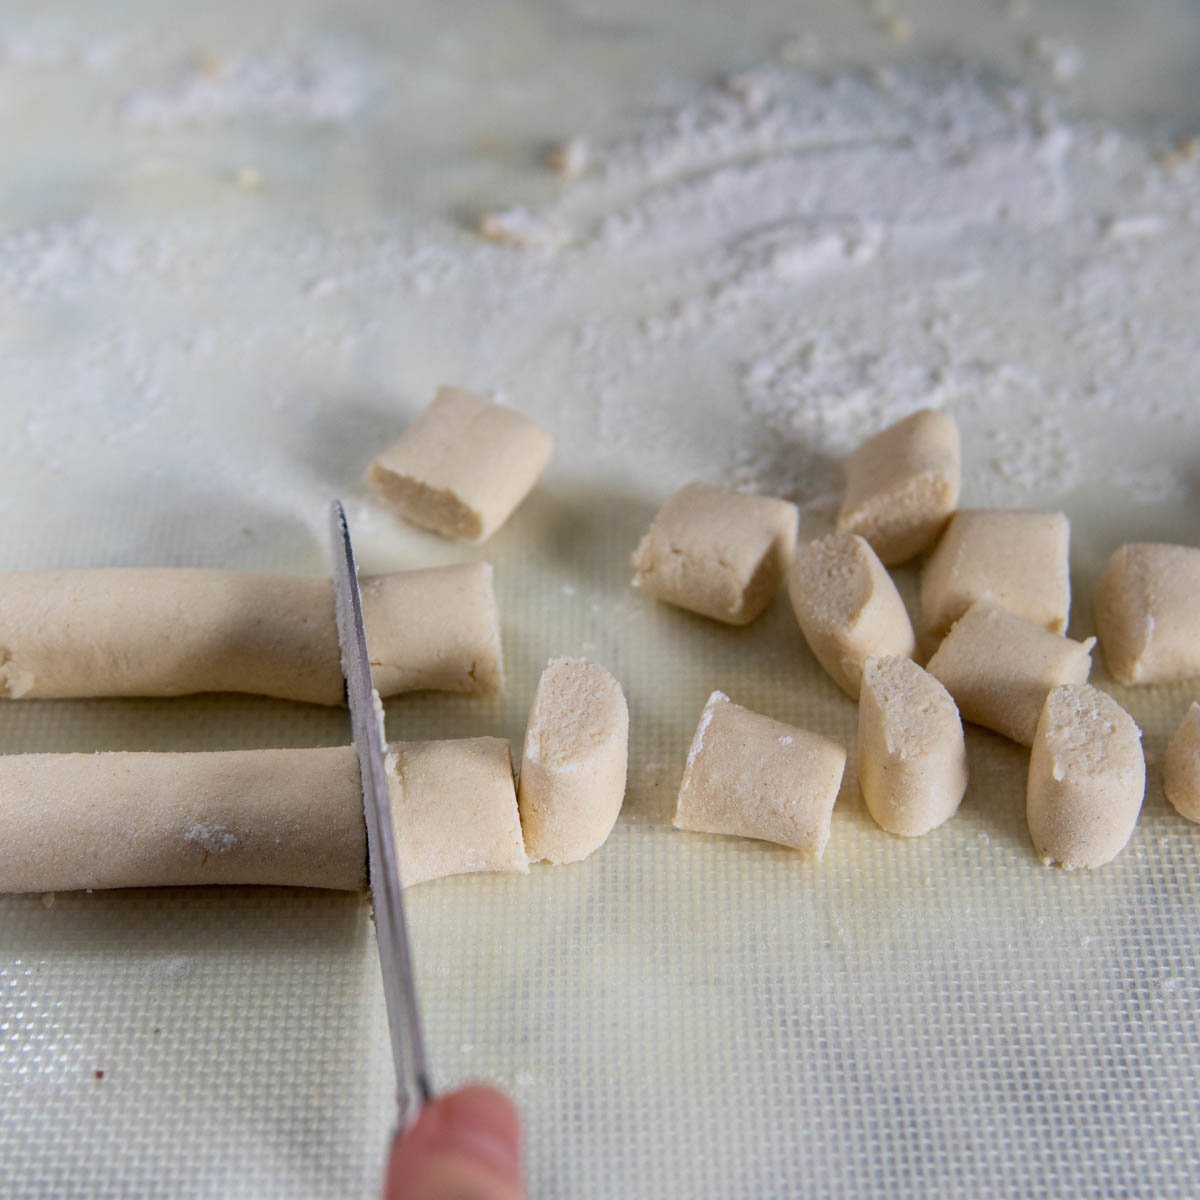
Roll and slice
So, a little tid bit about me – I’m the queen of efficiency. Why cut one rope at once when you can knock out two? Therefore, I roll two sections into long ropes and then cut them at the same time in ½” pieces.
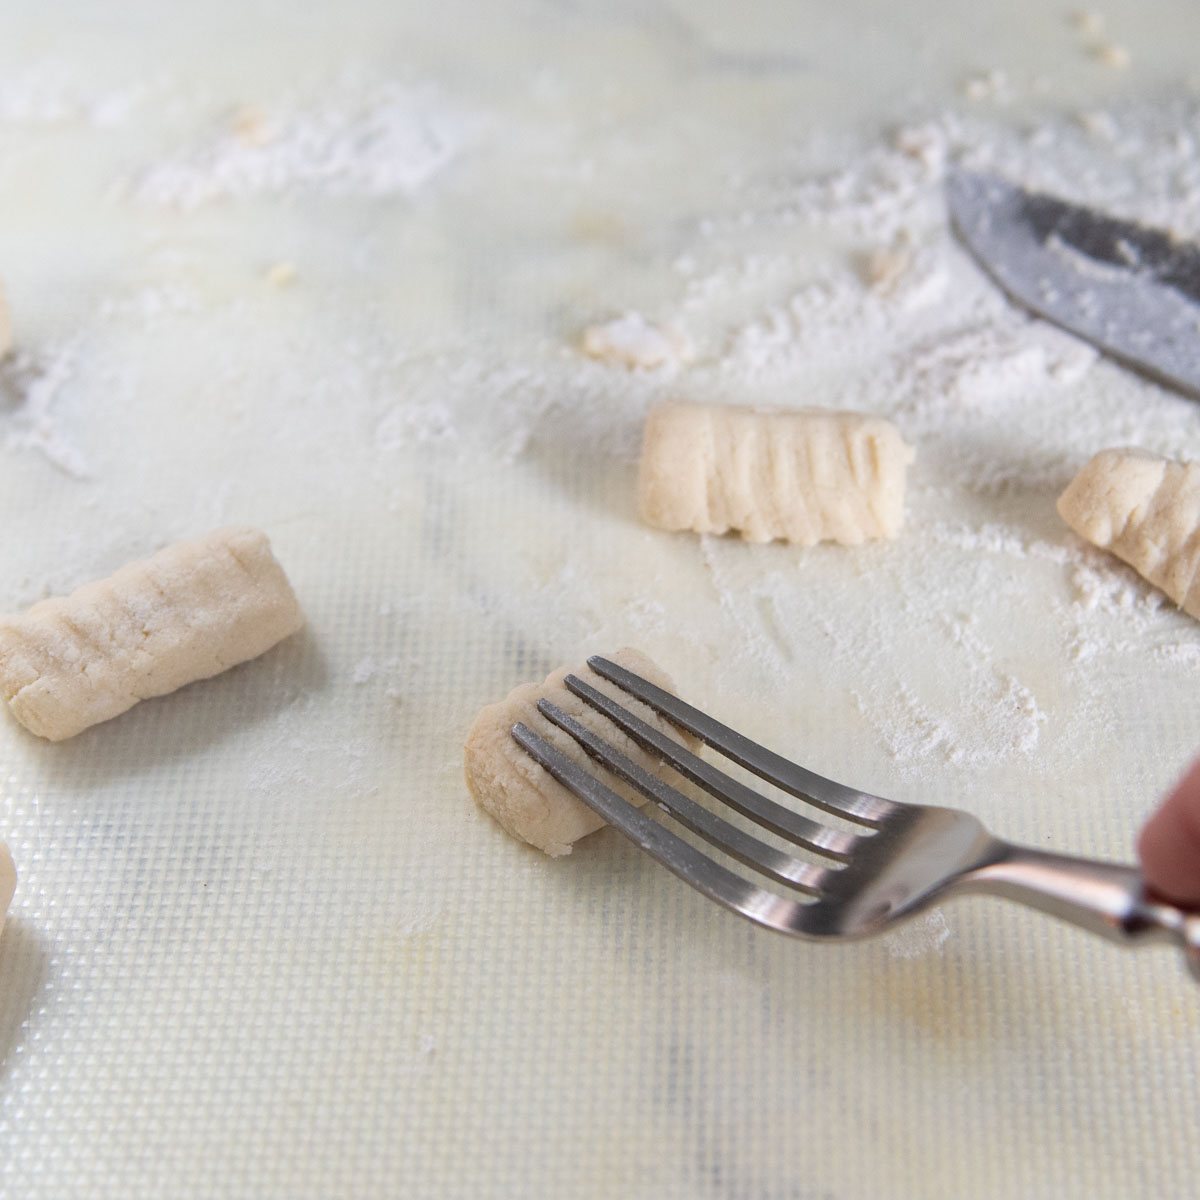
If you’re feeling fancy, you can also use the tines of a fork to make ridges. It doesn’t need the ridges pressed into them, but it is done so the sauce seeps into the groves.
My Gramma never did this, and I don’t either because it’s just an extra step and time. However, if you do want authentic-looking homemade gnocchi, use the tines of fork or a gnocchi board.
Everything You Need To Know About Cooking
I don’t recommend adding very much salt to the boiling water when cooking GF pasta. The salt absorbs in the starches too much, making an overly salty dish.
When cooking gnocchi, they are normally pulled from the boiling water as soon as they float to the top. However, with GF gnocchi it’s best to let them boil 30-45 seconds longer after floating to the top to ensure they’re fully cooked. Undercooked gnocchi will taste grainy and unpleasant.
After being cut, you also have the option of freezing them. Spread in a single layer on baking sheets to freeze, then transferred to a ziplock freezer bag once solid. When ready to cook, add less dumplings to the water than with freshly made gnocchi. Too much frozen pasta at once will reduce the water temp, so they will become mushy as they cook longer.
You may cook the dumplings in a sauce, rather than boiling water, but it works best if you used Cup4Cup gluten free flour . When I tried this with pasta made from other flours, it broke down and became mushy.
Recommended Gluten-Free Flour
Not all gluten-free flours are created equal and perform differently because of the varying starches they are made of. When testing this homemade gnocchi recipe, I wanted to make sure the results would be consistent depending on the flour. Unfortunately they were not.
THE RESULTS:
King Arthur Measure-for-Measure Gluten Free Flour – Came together and rolled nicely. However, it tasted doughy and grainy after boiling with an unpleasant taste. When I tried cooking it in a sauce, the gnocchi was mushy and did not hold shape.
Bob’s Red Mill 1-to-1 Gluten Free Flour – Similar results as King Arthur. The shape held together, but the ricey, grainy taste was very unpleasant.
Cup4Cup Gluten Free Flour (winner) – Came together and rolled nicely. The first time I added a little too much flour and the bite was a little gelatinous, even though the taste was good. The second time I only added about 1 tablespoon additional flour, just enough so the dough wasn’t sticky. The texture was much better and the taste had no hint of “gluten-free.” The gnocchi also performed well in boiling water or cooked in a sauce.
Cup4Cup gluten-free flour also works well for other GF Italian recipes. I use it to make gluten-free crespelle for manicotti and my homemade GF fresh pasta noodles.
Save this recipe to your pinterest board!
Let’s be friends on Pinterest! I’m always sharing great recipes!
Did you make this recipe? I love hearing from you! Leave a star rating and comment below the recipe card. It helps others when searching for recipes and I appreciate feedback from our community. You will always hear back from me! -Melissa
Soft, Tender Gluten-Free Gnocchi with Ricotta
Ingredients
- 15 ounce (g) whole milk ricotta
- 1 large egg
- 1 tablespoon olive oil
- ¼ cup (g) finely grated parmesan cheese
- 2 cups (308 g) all purpose gluten-free flour , (Cup4Cup highly recommended)
Instructions
- In a large mixing bowl whisk together ricotta, egg, olive oil, and parmesan cheese. Stir in 2 cups flour until well mixed and the dough comes together.15 ounce whole milk ricotta, 1 large egg, 1 tablespoon olive oil, ¼ cup finely grated parmesan cheese, 2 cups all purpose gluten-free flour
- Turn the dough out onto a lightly floured surface or silicone rolling mat. Knead the dough together until it becomes a smooth ball. If necessary, sprinkle a little more flour in (1-4 tablespoons) until the dough just no longer sticks to your hands.
- Flatten the ball into a thick disc and cut into 4 sections. Roll two sections into long ropes, about 1 inch thick.
- Carefully rub a little flour on a sharp knife blade and cut 2 ropes at one time in ½" pieces. If desired, use the tines of a fork to make indentations. Transfer the cut gnocchi to a baking sheet and repeat with the remaining 2 sections.
- If preparing straight away, transfer the baking sheets to the refrigerator while a large pot of water boils. Otherwise, transfer the baking sheets to the freezer to freeze until solid, then transfer to airtight ziplock bag.
- Boil the gnocchi in small batches, about 1/8 of the recipe at a time. Add the gnocchi to the boiling water, give a brief stir to prevent sticking, and then cook until they rise to the top. TIP: For gluten free gnocchi, it's best to leave them in about 30-45 seconds longer after rising to make sure they are cooked through.
- Use a slotted spoon or skimmer to lift the cooked gnocchi out into a large colander. Repeat with the remaining pasta. Immediately serve or toss with desired sauce.
Notes
How Much Does it Make?
Store bought gnocchi is often sold in one pound packages, which is what most recipes call for. This recipe makes 2 pounds, but you can always freeze half for later!Important tips:
- Cup4Cup Gluten Free Flour is highly recommend and yields the best taste and texture. However, the pasta will become a little gelatinous if too much flour is added, so add just enough so the dough losses it stickiness, about 1-2 tablespoons more.
- Freezing – After being cut, the gnocchi may be frozen on baking sheets and then transferred to a ziplock freezer bag once solid. Freeze up to 3 months. TO COOK: add less gnocchi to the water than with freshly made gnocchi. Too much frozen pasta at once will drastically reduce the water temperature, so they will become mushy as they cook longer.
- Can I cook fresh in a sauce? Yes, but this works out best if you used Cup4Cup gluten free flour to make your ricotta gnocchi. When I tried this with pasta made from other flours, it broke down and became mushy.
This post contains affiliate links. My opinions are always my own. If you purchase a product through an affiliate link, I make a small commission – at no cost to you. Read full disclosure policy here.


I have had celiac disease for almost 40 years. And, being of Italian descent me and my entire family were devastated with that diagnosis.
For years, I have been continuously looking for a gluten-free gnocchi recipe.
Your recipe is by far the best gnocchi recipe I have found and tried. Made four batches of your recipe for Easter Saturday dinner.
My family indulged and loved your recipe. The gnocchi were light and scrumptious. It wasn’t until the meal was almost done that I revealed it was a gluten-free recipe. They all felt your recipe was even better than the original gnocchi recipe handed down by our gramma.
Thank you so much. It was the best family time ever, and I was able to enjoy the gnocchi as well.
Yvonne (aka Nonna)
Oh Yvonne, you have no idea how much this means to me! Not that having to transition to a gluten-free diet isn’t devastating for everyone, but it’s an unfortunate extra knife twist when you are from an Italian family. I love that you withheld it was gluten-free until the end of the meal. That is something I would have totally have done. 🙂 Doesn’t it feel so good to eat dishes again that you loved?!
Best,
Melissa
Delicious! They turned out perfectly soft and light. I used Caputo GF flour (my go-to AP gf flour blend). I also mixed the dough by hand when I added the egg. I then refrigerated the dough before rolling out the ropes. The dough was easy to work with. The tip about giving these gnocchi 30+ seconds longer to boil after rising is most helpful! I then put them into a skillet already hot with a small amount of olive oil and sauted them briefly, then added sauce to the skillet and tossed them for a few seconds. I served these with beef braciole as a side dish and it was a wonderul Saturday evening dinner.
Thank you for giving us a GF pasta recipe that really works!
So glad you found the tips helpful, Patty! Thanks for taking the time to leave me this note. I appreciate it!
Best,
Melissa
Been making these for years. Caputo Fioreglut makes excellent gnocchi. Caputo also makes excellent pasta.
Thank you, Chloe. Yes, I agree. The Italians have figured out how to do gluten-free flour better. I love Rummo GF boxed pasta too!
Best,
Melissa
Does anyone know why my gnocchi turned out dense. I followed the recipe and used the cup 4 cup flour. Since my stand mixer was out, I whisked the eggs and cheese in there and then slowly added the flour. Did I over mix? It was a bit hard to roll into ropes but I did it. Was it too much flour? I love gnocchi, I’d like to try again.
Hi Jodi,
I wouldn’t use a stand mixer for this recipe anyway, so that wasn’t the issue. It does sound like too much flour was used. I would cut back by 1/2 cup next time and add a little in at a time if it is needed.
Best,
Melissa
Used 1 3/4 c GF KA flour. Pretty good.
Thanks for sharing! If you can have / get Cup4Cup gluten-free flour, I suggest trying it with that next time. You can ready my notes on the different flour brands in the post above the recipe.
Best,
Melissa
Have made these many times. They come out best when I’ve use Caputo Fioreglut. Acceptable with KA Measure for Measure. The Italian flour worked best.
Thank you so much, Chloe! I appreciate the time you took to let me know and it’s helpful for others! 🙂
Best,
Melissa
Hi Melissa,
Thank you for your quick response about draining the ricotta cheese.
Donna
Hi Melissa,
Just wondering do you drain your ricotta before mixing with the other ingredients? Other recipes for ricotta cheese gnocchi that I have seen usually say to drain the ricotta cheese for at least 30 minutes or longer, if needed. What are your thoughts? Thank you.
Hi Donna,
No, I’ve never drained the ricotta first, just added it in. Just be sure to use whole milk ricotta versus part skim.
Best,
Melissa
Made this tonight for my son with Celiac. He loved it as did the rest of the family. Definitely a keeper. Thanks for a great recipe!
Thank you Chris! This makes me so happy to hear. Thank you so much for taking the time to share!
Best,
Melissa
These are so good. I’m making them for an event so I did not cook them all. Just a few to taste test. I think I died and went to heaven! They are so good fresh. I froze the others and will do another taste test for dinner tomorrow night. I expect they will be just as good and then I make lots more for my event. Everyone will be so happy.
Thank you, Nancy! I wish you the best of your success with the event! Remember when you boil them from frozen to not put too many in the boiling water at one time. It will cool down the temp and they might become mushy. Let me know if you have any questions!
Best,
Melissa
We made these today and they were DELICIOUS!!! Half the recipe was enough for two for dinner; I was able to freeze the other half for another night!!Thank you for another gluten free recipe!
So happy to hear, Christina. Thanks for taking the time to share!
Best,
Melissa
I made this tonight and it was delicious! I boiled the gnocchi and then sauteed them in lemon garlic butter with shrimp. I used the Cup4Cup flour as suggested. Next time I will let the gnocchi boil for another 30 seconds or so; they were just a touch underdone. I’m at high altitude, so I’m not sure if that affected the cooking time. They tasted great in the end — butter always helps, right?
I’ve never made gnocchi before and it was easier than I expected — still a bit of a project, but doable. I’m bookmarking this recipe and can’t wait to check out your other ones!
Hi Elizabeth,
I’m so happy to hear! Yes, it’s not something you can do on busy weeknights, but I do think it’s a lot easier and less intimidating than it may seem. Thanks for taking the time to write.
Best,
Melissa