
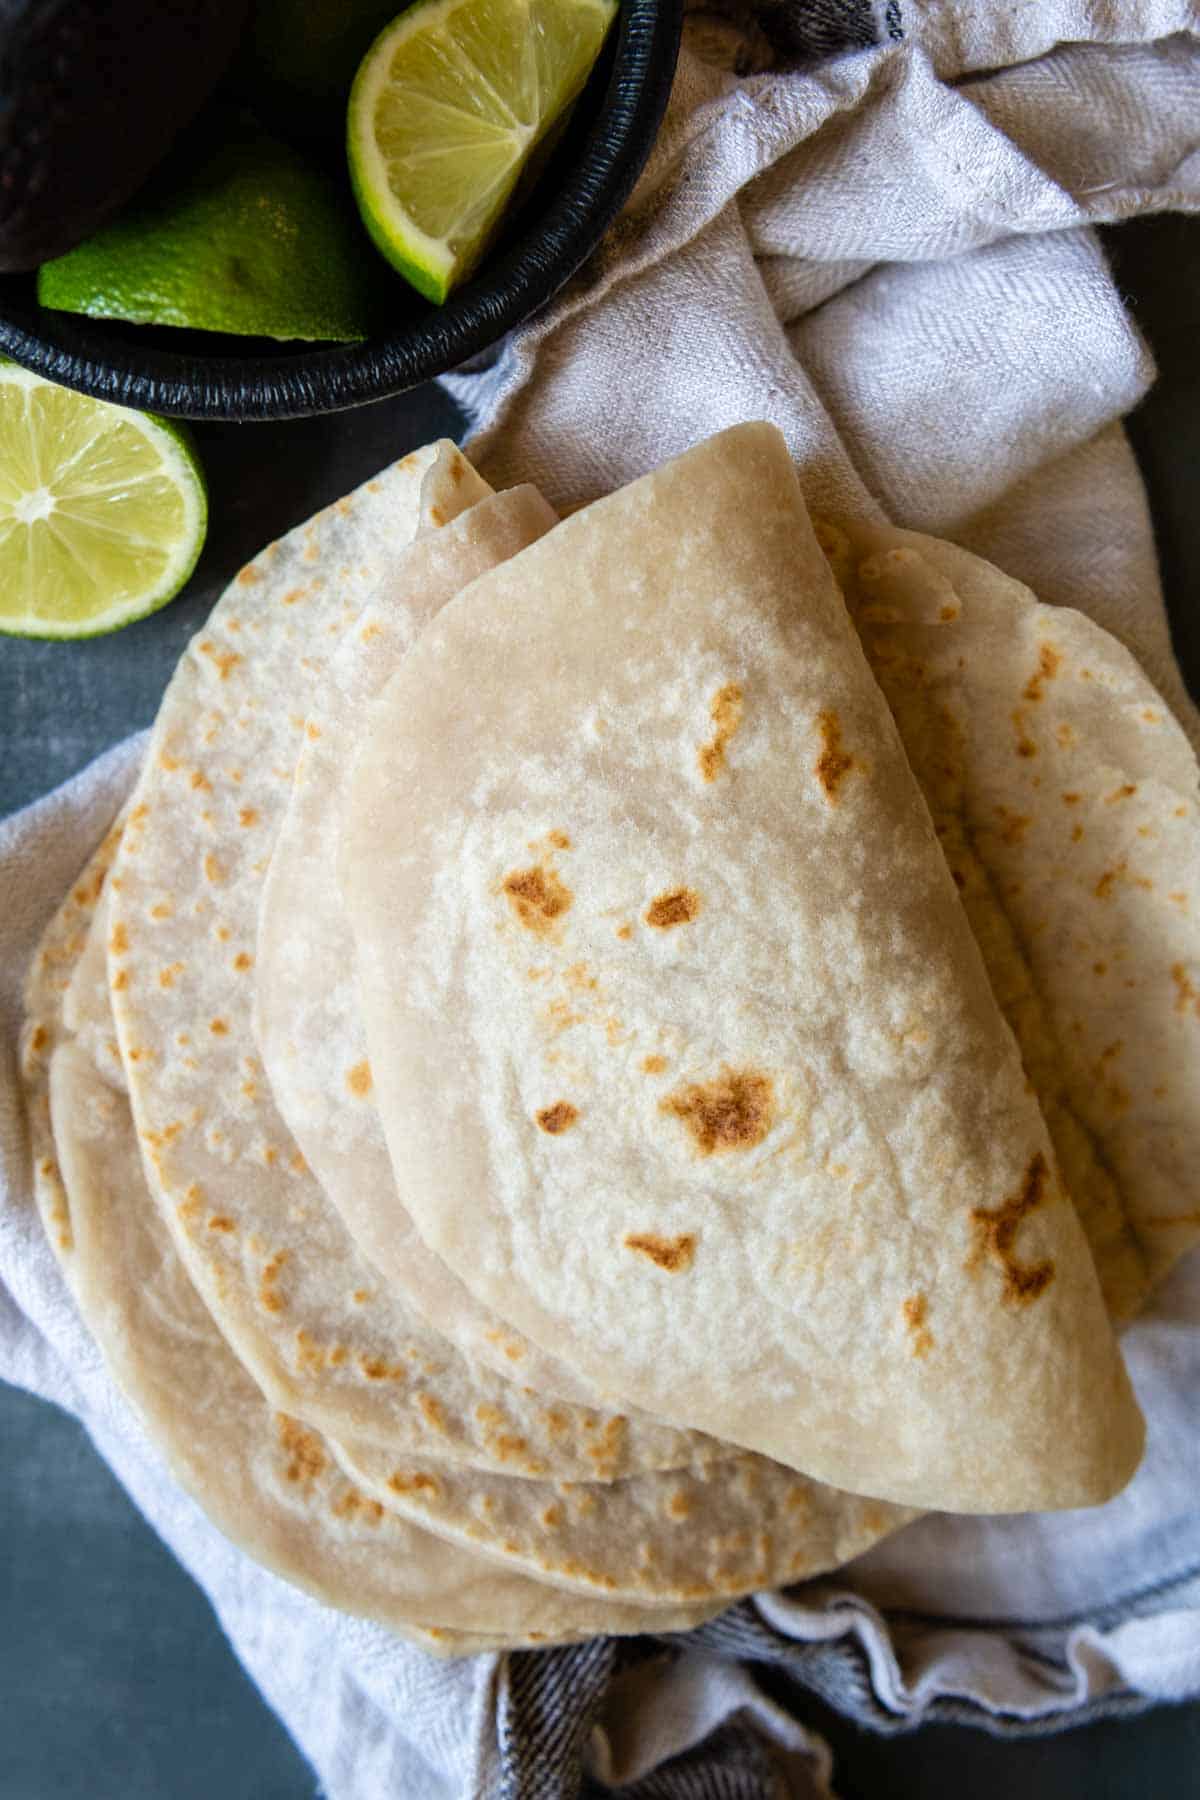
Finally you can enjoy soft, flexible gluten-free tortillas with a copycat authentic taste and texture to traditional homemade recipes! These easy flour tortillas use only 4 simple ingredients and take 30 minutes start to finish. Whether you are a kitchen novice or not, everyone can learn how to make this simple GF tortilla recipe. I’ll show you how!

Want to Save This Recipe?
Enter your email below & we'll send it straight to your inbox. Plus you’ll get affordable and easy gluten-free recipes delivered each week!
It’s Time To Enjoy Gluten-Free Tortillas Again!
Until I started testing this gluten-free flour tortilla recipe I had given up on ever enjoying them again. I had tried a couple store-bought brands, and if I wasn’t first deterred by the price, the taste and texture made me regret wasting the money.
I said goodbye to gluten-free wraps, quesadillas, burritos, flour shell tacos and more, deciding this was one more thing I was destined to live without (or use another corn tortilla). When I started to perfect more recipes that tasted identical to traditional versions (hello, soft gluten-free flatbread!), I determined all hope was not lost.
Just like a soft, squishy GF sandwich bread recipe, we deserve the same for tortillas. Am I right?! Now, every time I nosh of one of these beauties I’m mad I lived without them so long!
So what makes this recipe work? Why do these tortillas made with GF flour not only have an authentic taste, but such a soft and pliable texture?
While the method and ingredients are simple, it’s their combination that creates such exemplary results. Even if the recipe uses only 4 ingredients, the ingredient ratios’ yields an easy-to-handle dough, not saturated with GF flour, which causes dry and crumbly results.
This is achieved by my favorite, magic gluten-free ingredient, psyllium husk powder. Basically it helps absorb liquid and create elasticity, something GF flour has a hard time doing on its own.
Read on to discover just how easy these GF tortillas are to throw together, as well as many more expert tips to make this recipe a success the first time. It will be love at first bite, guaranteed!
Wow, all I can say is wow!! I have been struggling to find an easy gluten free flour tortilla recipe that is soft and flexible!! I have ended up with more hard hockey pucks than I care to count!! And then I happened upon Melissa’s phenomenal recipe!! I am seriously blown away!!
—Ronda
Free Guide! Receive a Free Gluten Free Dinners Cookbook
TOP 5 Highest Rated Recipes!
Ingredient Tid Bits
These homemade wraps have a simple list of ingredients, making them dairy-free and vegan as well (see note about GF flour). Below I share any important ingredient notes, as well as any workable substitutions.
- All-purpose gluten-free flour blend – The most important ingredient for taste and structure. I personally love and highly recommend Cup4Cup gluten-free flour because the cornstarch in the mixture gives a nice, flexible texture. Plus, the taste mimics wheat flour without grittiness. See the recommended GF flour section for dairy-free recipe notes and substitutions.
- Psyllium Husk Powder – If you are unfamiliar with this ingredient, don’t be deterred! It’s affordable and used for superior results in everything from flour tortillas to GF breads. It helps absorb moisture, making the dough pliable and easy to handle without relying on extra flour (which dries it out). It’s best to buy a blonde or light-colored brand because the darker colors will make the tortillas have a slight purple hue, but doesn’t affect the taste.
- Baking powder – Adding a touch of baking powder gives the tortillas a little lift, making them puff up and bubble similar to traditional ones. While other recipes add more baking powder, I found a smaller amount makes them thinner and more flexible.
Let’s Make This Together!
(Below shows step-by-step photos and modified instructions. For the complete recipe, along with ingredient amounts, scroll down to the recipe card.)
Whip up the easy dough.
Use a large bowl and wooden spoon or a stand mixer with a paddle attachment (preferred easy method). On low speed mix together the dry ingredients.
Continue to mix on low while the warm water and oil are added. Mix until well combined and the dough starts to form a ball. If you are not using a stand mixer, you may have to knead with your hands at this point so it’s well mixed.
Wrap up the dough in a piece of plastic wrap and let it rest for 10 minutes.

Time to roll.
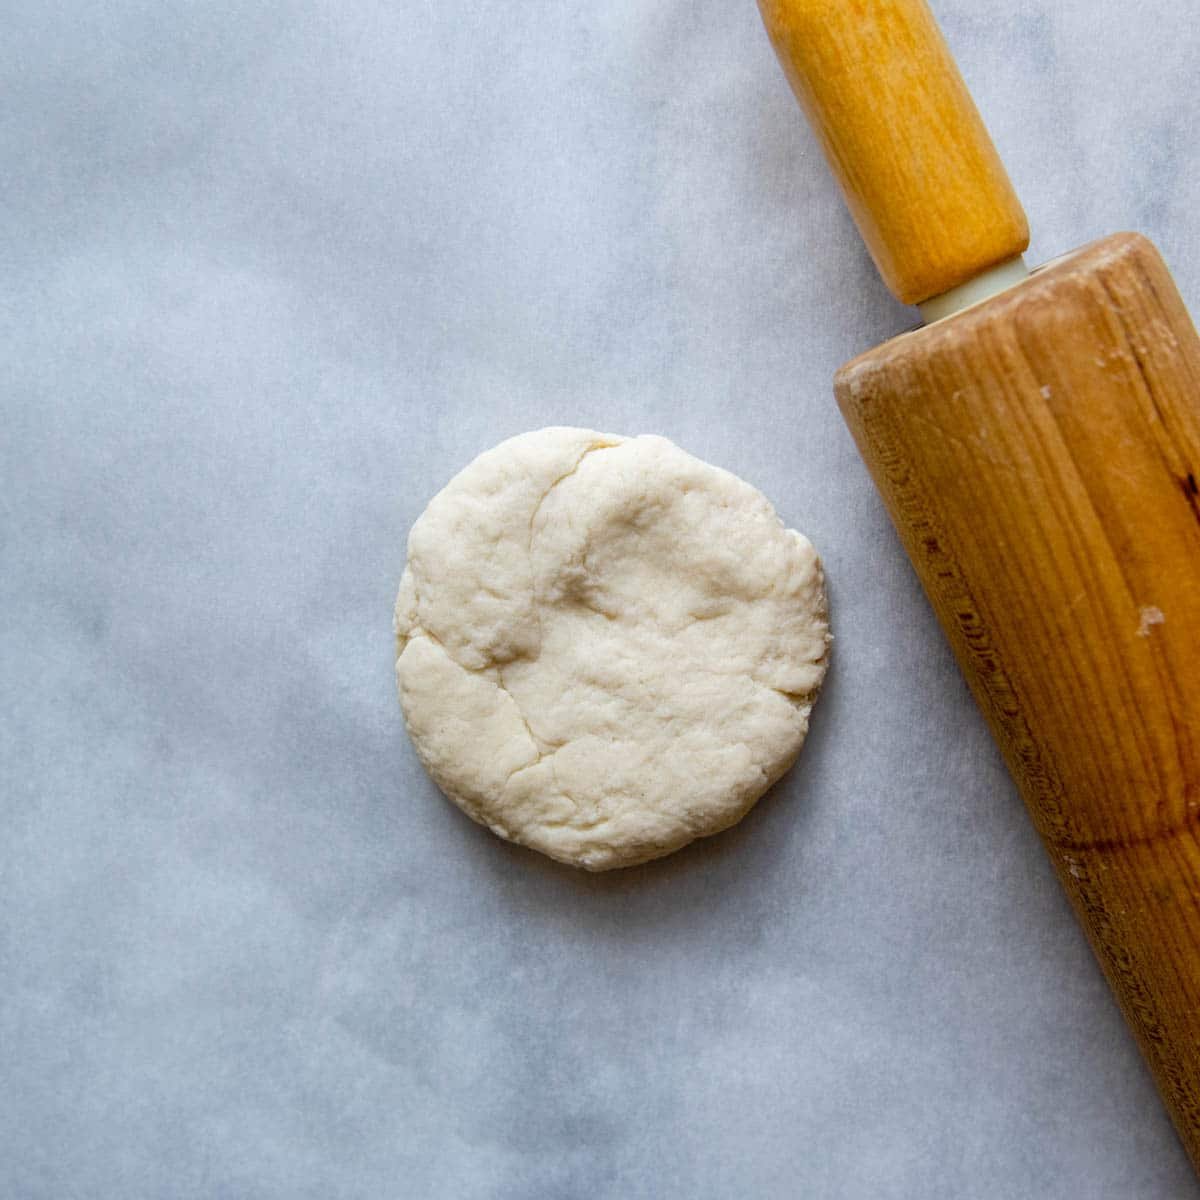
After the dough rests, divide it up into 6 equal sections. If you want to be really accurate about it, you can use a food scale with a piece of greased plastic wrap on top. Mine weighed 2.7 ounces each. Keep those 6 balls covered with plastic wrap while you roll.
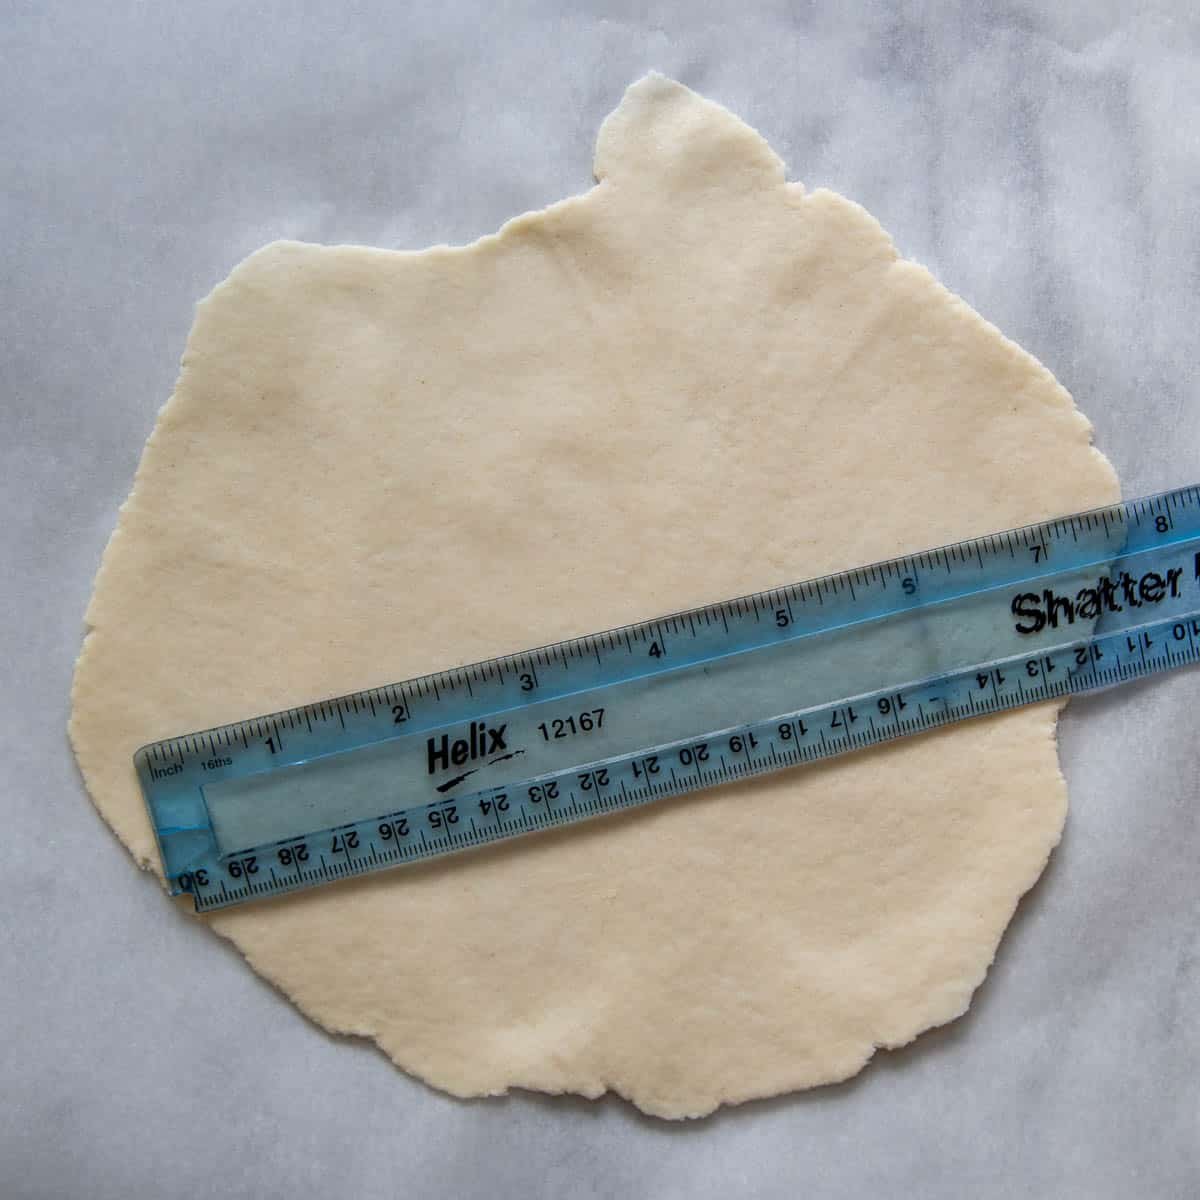
First flatten the ball into a thick disc. Use a rolling pin to flatten into a 6 1/2-inch diameter circle, rotating quarter turns as you roll. If the dough sticks to the rolling pin, rub a small amount of GF flour on the rolling pin (not the tortilla) and continue to roll.
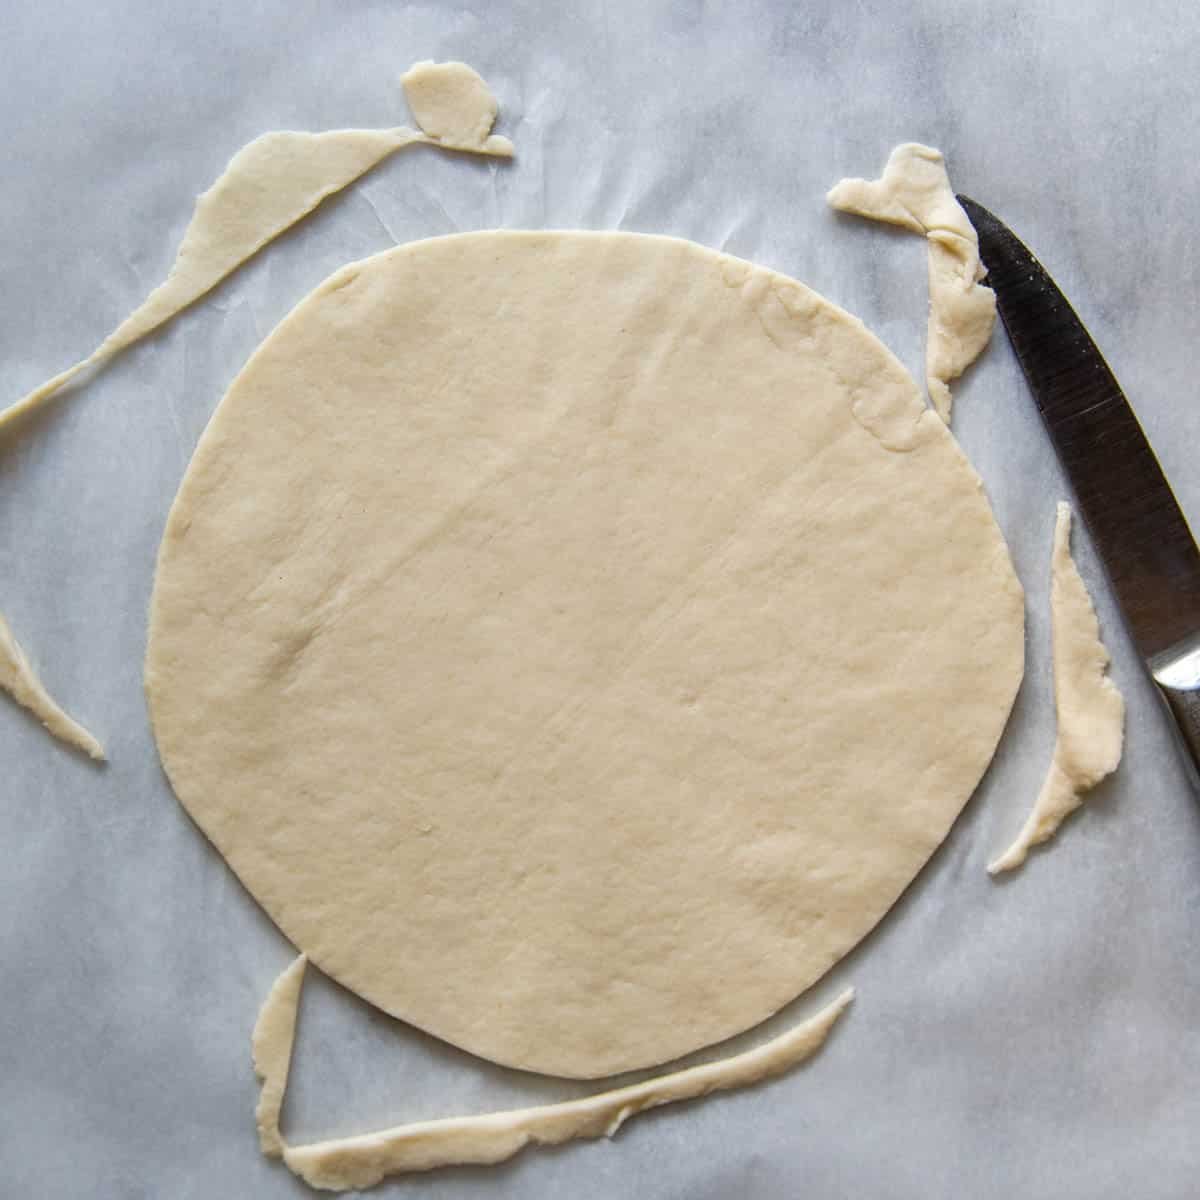
Use a knife to go around edges, shaping into a round circle. Save the scraps in a piece of plastic wrap because you can combine them to make an extra bonus tortilla at the end. Yaasss! Love bonus tortillas!
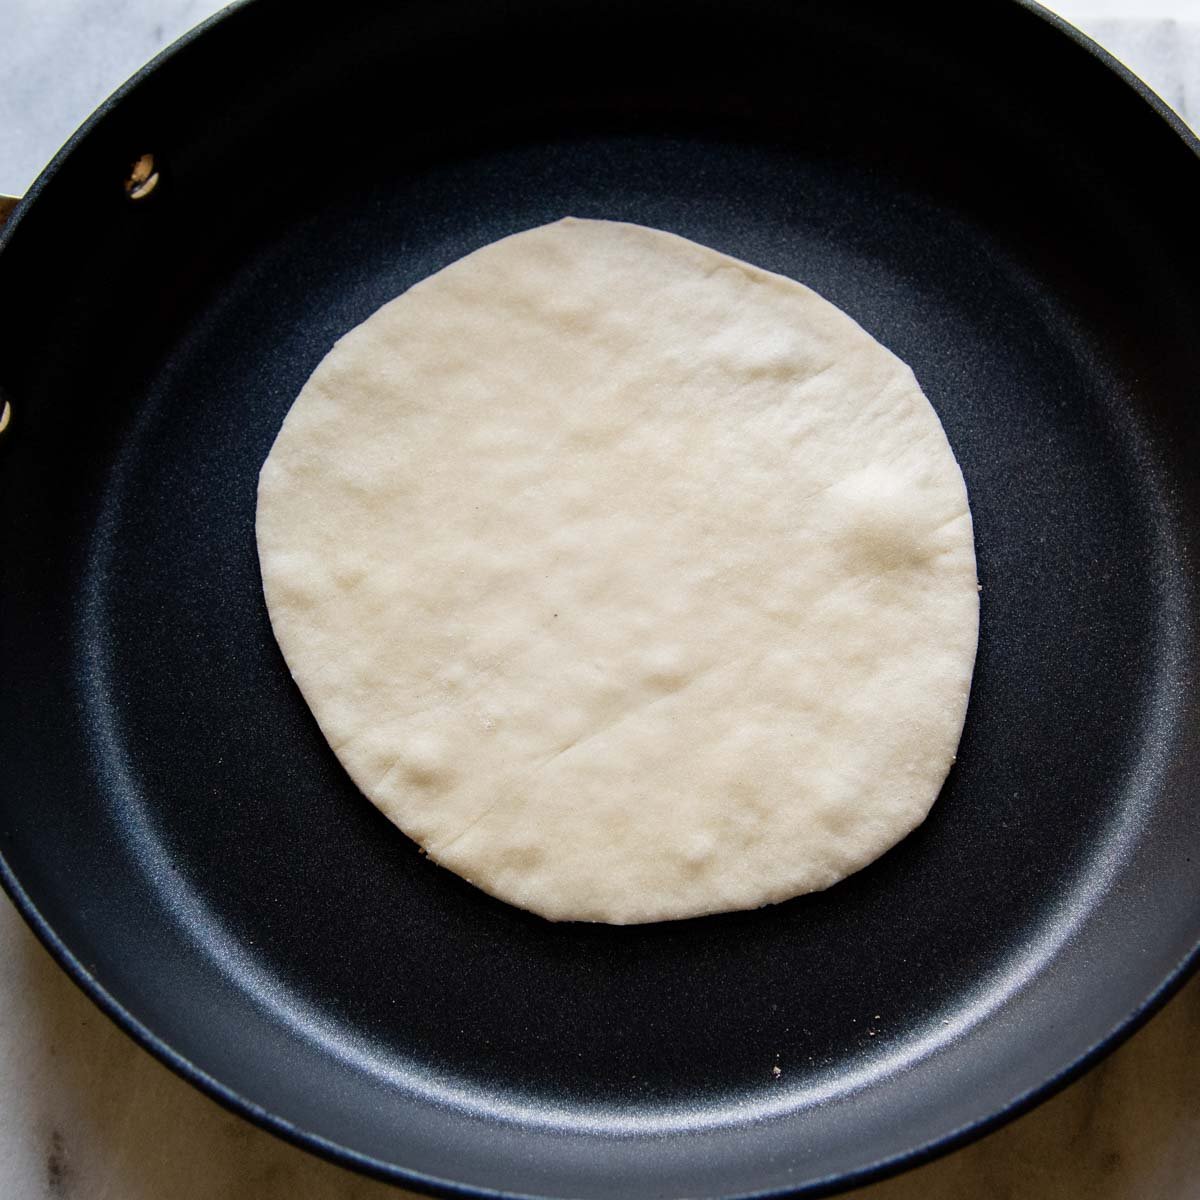
Let’s get cookin’ good lookin’.
Make sure your nonstick, ungreased pan is nice and hot before cooking. I let it heat up for about 5 minutes.
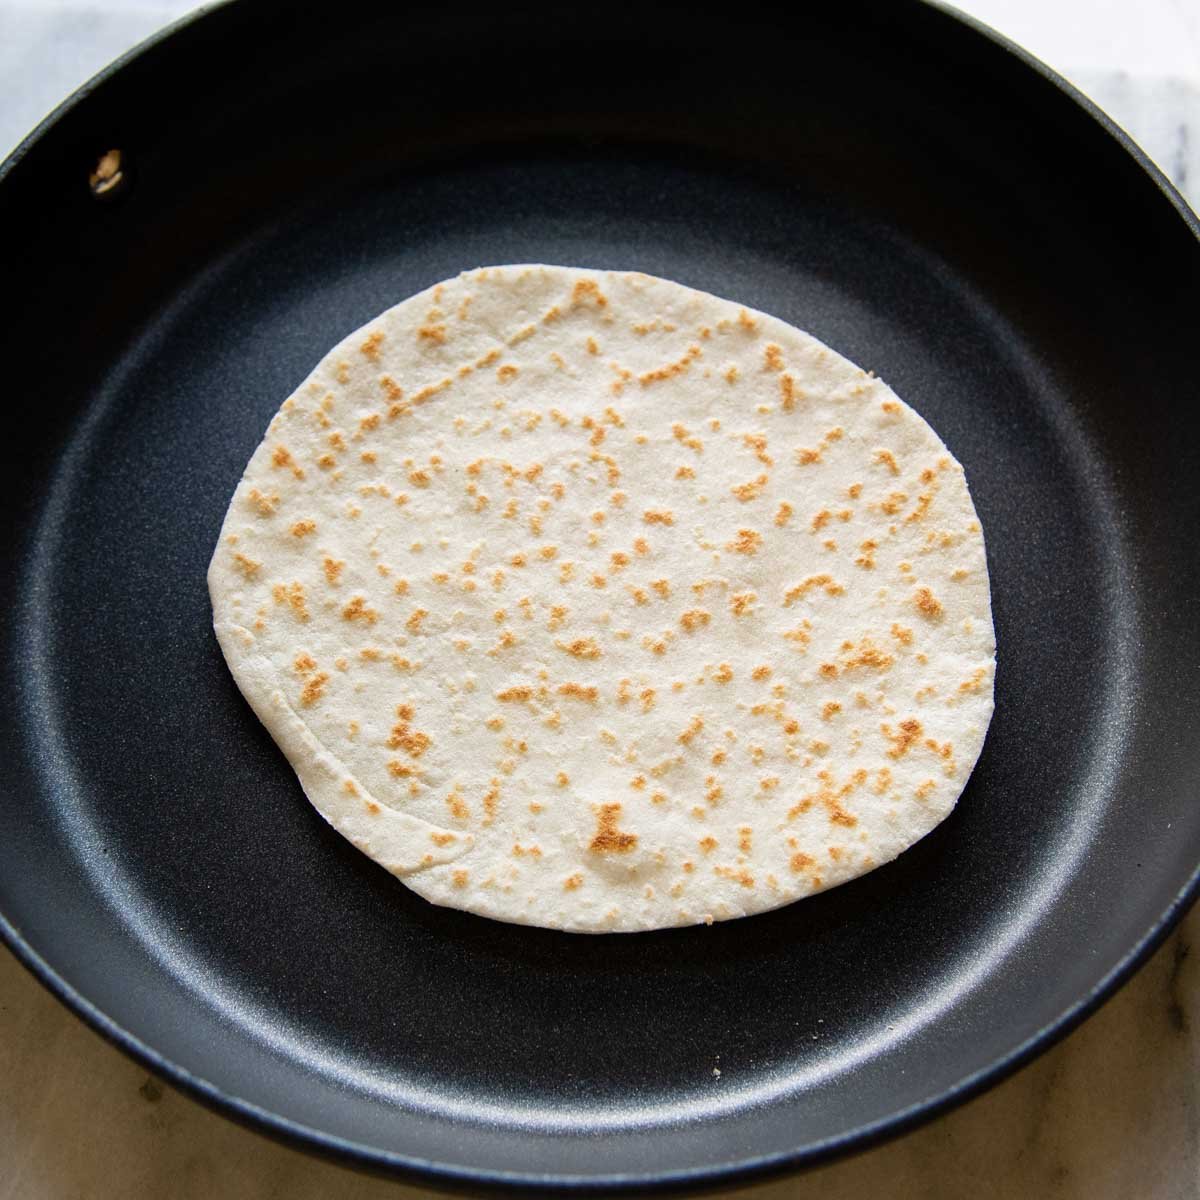
Add the tortilla to the pan and cook, undisturbed for 45 seconds, or until the underside has brown spots. Flip it over and cook for 15-20 seconds more. The cook time is key for making sure enough time has passed to cook off moisture and not overcook them, making them stiff.
That’s it! You have warm, authentic tortillas and you are back in business!
Recommended GF Flour
I use and recommend Cup4Cup gluten-free flour blend for the softest texture and best taste. If you use another brand you may want to replace a couple tablespoons of the flour with cornstarch to mimic Cup4Cup.
When making gluten-free recipes, the success primarily relies on the GF flour. Unfortunately, with so many differing varieties and availability it’s hard to test them all with the recipe. They all contain different ratios of starches, which can vary the outcome.
I have tested the most common brands with various recipes, which is why I stand behind Cup4Cup. If you use another GF flour that works well, be sure to leave a note in comments below!
Best Pan to Use
Use heavy nonstick pan, one that maintains and distributes heat well, or a cast iron skillet. If using a cast iron skillet, make sure it is well seasoned so the tortillas don’t stick. Either type of pan will be left ungreased.
Save this recipe to your pinterest board!
Let’s be friends on Pinterest! I’m always sharing great recipes!
Did you make this recipe? I love hearing from you! Leave a star rating and comment below the recipe card. It helps others when searching for recipes and I appreciate feedback from our community. You will always hear back from me! -Melissa

Soft, Authentic Gluten-Free Tortillas (30 Mins)
Ingredients
- 1 ½ cup (214 g) gluten free all purpose flour, Cup4Cup brand highly recommended
- 2 tablespoons (22 g) psyllium husk powder
- ½ teaspoon salt
- ¼ teaspoon baking powder
- ¾ cup (196 g) + 2 tablespoons very warm water
- 2 tablespoons (27 g) oil, canola, vegetable, or olive oil
Instructions
- Use a stand mixer with a paddle attachment (preferred method) or a large bowl and wooden spoon. On low speed mix together the gluten-free flour, psyllium husk, salt. and baking powder.1 ½ cup gluten free all purpose flour, 2 tablespoons psyllium husk powder, ½ teaspoon salt, ¼ teaspoon baking powder
- Continue to mix on low while the warm water and oil are added. Mix until well combined and the dough starts to form a ball, about 1 minute. If you are not using a stand mixer, you may have to knead with your hands at this point so it's well mixed.¾ cup + 2 tablespoons very warm water, 2 tablespoons oil
- Shape the dough into a large ball, cover with plastic wrap, and let rest for 10 minutes to hydrate the GF starches and give time for the water to absorb, making the dough easier to work with.
- Divide the dough into 6 equal sized balls. Keep covered in plastic wrap while the tortillas are being rolled one at a time.
- Flatten the ball into thick disc on a piece of parchment paper. Use a rolling pin to flatten into a 6 1/2-inch diameter circle, rotating quarter turns as you roll. If the dough sticks to the rolling pin, rub a small amount of GF flour on the rolling pin (not the tortilla) and continue to roll. (See recipe notes for more rolling tips.)
- Use a knife to go around edges, shaping into a round circle. Save the scraps in a piece of plastic wrap because you can combine them to make an extra tortilla at the end. Stack the rolled, uncooked tortillas between small sheets of wax or parchment paper, covered with plastic wrap, while you roll the rest out.
- Heat an ungreased nonstick skillet over medium-high heat for 5 minutes before cooking the tortillas.
- Add the tortilla to the hot pan and cook, undisturbed for 45 seconds, or until the underside has brown spots. Flip it over and cook for 15-20 seconds more. The cook time is key for making sure enough time has passed to cook off moisture and not overcook them, making them stiff.
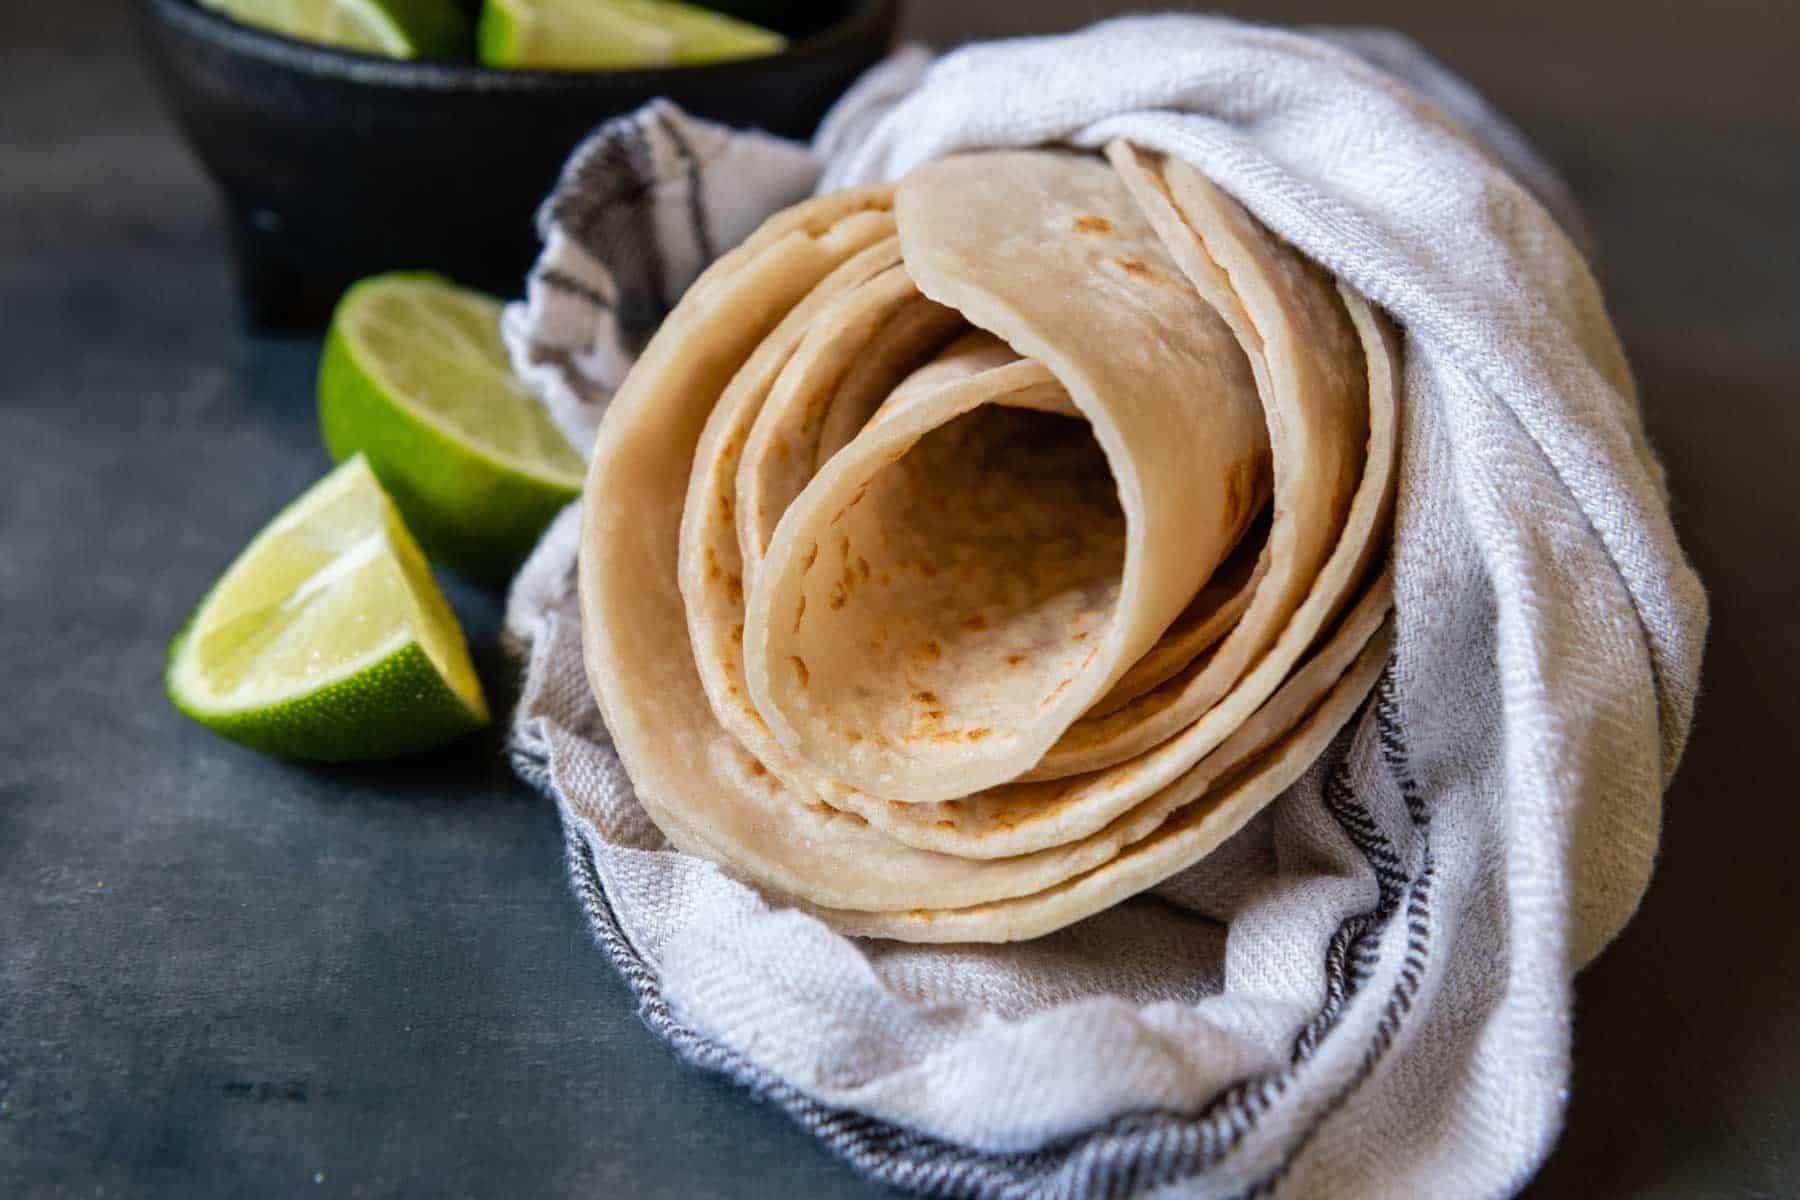
- If serving immediately, wrap in a lint-free towel or tortilla warmer to keep warm. Otherwise, transfer to a cooling rack. As one tortilla is cooking, begin rolling out the next tortilla to cook.
Notes
Tips for Handling, Rolling, and Shaping
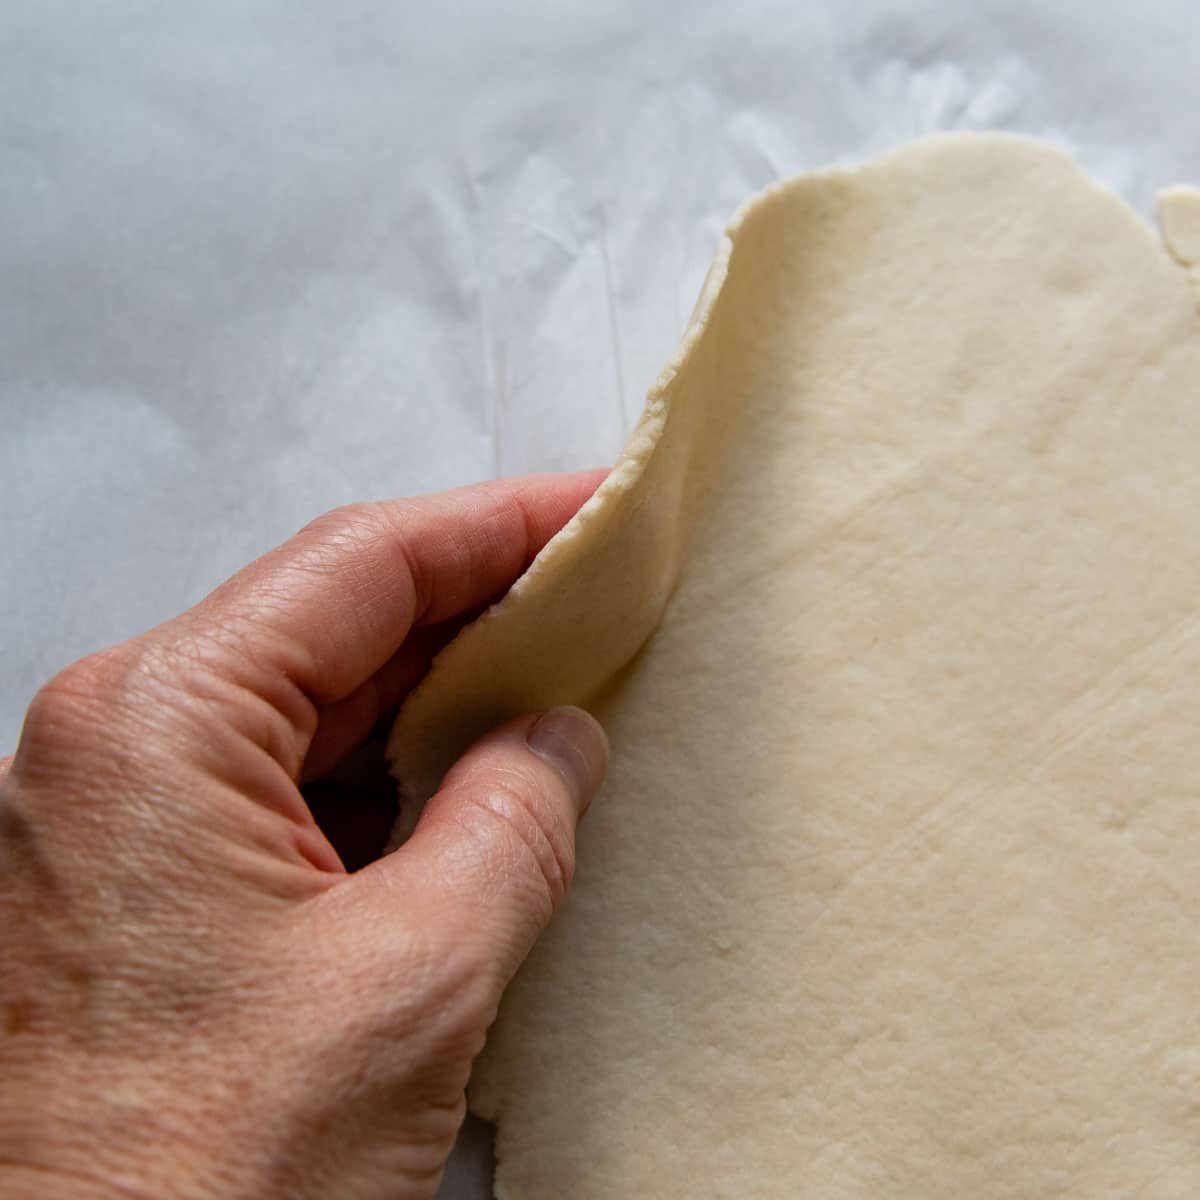
- As you roll, rotate quarter turns to make a round shape. If it begins to become lopsided, simply rip off the bigger side and press wherever dough is needed.
- When you begin to roll, the dough may stick to the rolling pin. Dust a small amount GF flour on the rolling pin, not the tortilla, and roll again
- If the parchment begins to crease, simply switch out the sheets every couple tortillas.
- You may cut around the edges to make round circles, or refer to this almond flour tortilla recipe to see how you can use a lid or dinner plate to make perfectly round circles.
Storing and Reheating
For storage, once they are done cooking and completely cooled, stack between pieces of parchment or paper towels. Transfer to an airtight container or ziplock freezer bag. Store at room temperature up to one day or in the refrigerator 3 days. They may also be frozen up to 3 months. Stack and wrap securely with plastic wrap before placing in a freezer bag. When ready to enjoy, briefly microwave for 10 seconds or rewarm in a dry, hot skillet. To make sure they are just as soft as the day you made them, wrap in damp paper towel before reheating or lightly spray the skillet with water before rewarming.This post contains affiliate links. My opinions are always my own. If you purchase a product through an affiliate link, I make a small commission – at no cost to you. Read full disclosure policy here.


Can I email you photos of my tortillas? I made them for the 1st time today and Im not sure what I did wrong
Of course! melissa@mamagourmand.com
These did not turn out well at all for me. They look nothing like the picture. They didn’t cook up like normal tortillas with the bubbles blowing up. They were purple. They looked really awful so went in the trash. I could never serve them to my family.
Hi Sherry,
The purple color didn’t have anything to do with the recipe, it’s from the psyllium brand you used. If you use a darker one it turns baked goods purple when it reacts with baking powder. I have a note about it in the recipe post and the psyllium I use is linked in the ingredients. Regardless, I’m sorry it was a waste of time and ingredients for you. That is always frustrating.
Best,
Melissa
This recipe is the best! Why have I been buying those crappy things that cost a fortune! My son requested quesadillas. I didn’t know where to start. I found your recipe and just happened to have the psyllium powder. It was a night where I was already exhausted, but these were so easy to make today that I’m making them again tomorrow! Thank you for sharing your recipe!!
Yay! Thanks so much for sharing this Melanie! I appreciate it.
Best,
Melissa
The first time I made these, I did not have psyllium husk, and the tortillas came out more white. The second time I made them, I had the psyllium husk and they turned out more purple. Is this normal? They tasted great, just looked different.
Hi Kim,
It wasn’t anything you did wrong, it was the brand of psyllium used. You have to use a very light colored psyllium for them to stay white. The one I use is linked in the ingredients. Glad the recipe worked out for you!
Best,
Melissa
Absolutely Delicious!!! Love making 1/2 recipe to go with chicken fajitas. They’re easy, delicious, flexible and 1/2 recipe makes three big tortillas:)
Thanks for sharing, Mimi! What a great idea.
Best,
Melissa
Thick, not flexible, would not recommend
Hello,
I’m sorry the recipe did not meet your expectations. I know it’s frustrating to spend time and ingredients on a recipe and not have it turn out. I’m not sure what happened in your case without any added context, but unfortunately with the wide range of GF flours, all comprised of different starches, that could have played a factor. That is why I recommend a certain flour in my recipes because it is what I have tested the recipes extensively with.
Best,
Melissa
It mentions c4c not being DF, but it IS DF now. In the dinner roll recipe, you state to replace 1 1/2 tbsp of flour with milk powder… Should I do that with this as well?
Hi Danielle,
Great question. It’s hard to get to all the posts and update. For something like this recipe I wouldn’t worry about the milk powder. I’m only switching to that suggestion for breads with yeast.
Best,
Melissa
Is the psyllium husk powder necessary because I can’t find it at my grocery store.
Hi Bee,
For unshaped GF breads you can generally leave it out, but for this that has to be rolled, I think it would be a very frustrating recipe without it. I buy mine off of amazon and use it for a lot of my recipes, but you may be able to substitute xanthan gum, which local grocery stores generally carry in the organic section. I would use 1 1/2 teaspoons in this recipe.
Best,
Melissa
I have made these several times now and they are the best tortilla ever! Great dough that cones together well and is easy to work with. The finished tortilla is flexible enough to use for wraps. I have used Cup4Cup and Better Batter, both with good success! Grateful 🙏
This makes me so happy to read and I appreciate you letting us know what you’ve used. Thanks for sharing, Anina!
Best,
Melissa
Haven’t made these yet but wondering if you could make pinwheels with these. I’d like to make a spinach and cheese roll up and cut into pinwheels. I’ve used the store bought ones and they’re mushy.
Hi Pamela,
I don’t think that would be a problem. I would just make sure they are nice an pliable first. If you aren’t wrapping them once they are freshly made, wrap the tortillas in a damp paper towel and microwave for a few seconds so they soften up again. Enjoy!
Best,
Melissa
Hi Melissa, could these be made in a tortilla press? Thanks!
Hi Jaime,
Yes! I haven’t personally done this, but readers have commented they’ve made these in a press. Wish I had one!
Best,
Melissa
Psyllium is a derivative of corn. Celiac s a lot of us can’t have corn of any kind.
Hi Terry,
I sorry to hear you can’t tolerate corn. That would be frustrating because a lot of gluten-free products do have corn in them. As if being gluten-free isn’t hard enough, right?!
Best,
Melissa
Psyllium husk is the outer husk of the Plantago ovata plant and is not a derivative of corn. That is not to say it doesn’t cause issues for people it often does.
Me and my mom tried to make these today using the cup4cup flour and the psyllium husk powder. They came out brown and cooked up looking purple??? The taste was awful. I would love to know what we might have done wrong. Any help is greatly appreciated.
Hi Michele,
Thanks so much for writing. I would be happy to help. The purple color is from the brand of psyllium used. Some are darker than others and those turn baked goods purple. Not sure why, but the psyllium I link to is light colored and won’t do that. However, it doesn’t affect the taste, just the color. I’m not sure why the taste was so bad, especially if you used C4C, which I use a lot for this recipe and find the taste very much like regular “wheat flour” tortillas. Hmm, no other adjustments were made?
Best,
Melissa
Thank you! I bought the cookbook bc all of your recipes have been life changing as a Celiac! From the bottom of my heart, thank you. I am getting tears in my eyes I am so happy with all the recipes. They have given me back good food!
Wow, Jenny, this means so much to me. I know exactly what you mean, though. It’s very emotional to finally be able to enjoy the foods you loved again. I hope to hear from you again!
Best,
Melissa
Great texture and flour! I just need to get the cooking temp/time down. Also need practice getting it into the frying pan. Using the stand mixer made it easier, faster and less mess and faster clean-up. Thanks!
Lovely to hear, Beverly! It feels great to enjoy flour tortillas again, doesn’t it?!
Best,
Melissa
How are you getting 7 entire servings with one cup of flour,
Hi Michelle,
Have you made it and did not get 7 servings or are you just curious? I was just wondering why you had rated the recipe so low? When I made these I get 7 tortillas since they are rolled thin. Let me know if you have any questions or need help with anything!
Best,
Melissa
They turned out fabulous. Will definitely be making them again!
Thank you, Martha! I appreciate this!
Best,
Melissa
Hi Melissa, thanks for responding! I am using the paddle blade and King Arthur’s Measure For Measure flour. After my first batch, for which I exactly followed the recipe, I also found King Arthur’s texture a bit rougher than expected. For my second batch I added two.more tablespoons of water, thinking that would help the ball formation, which it did and it also helped the texture as well but did not change the thickness at all. I am using a bamboo tortilla press, not a roller. I can exert quite a bit of pressure on it, but still no luck with significantly changing the thickness. I will try your idea of making more, smaller balls to see if that helps. Thanks very much for the suggestions!
Thanks for the feedback, Dennis. It’s very helpful. So as far as King Arthur, I typically test recipes with both Cup4Cup and King Arthur because a lot of readers can’t have dairy. Across the board, KA is always a little grittier tasting. If you have to use it, I would replace 3-4 tbsp KA flour with cornstarch. That will help with softness. You can judge from there about adding more water since it seemed to have helped you before. As far as the thickness, yes, I didn’t realize you were using a press. That would make them a little thicker. If the smaller size balls don’t help, you might have to hand roll them to get the desired thickness. 🙁 But try the smaller amount of dough first, because a press sounds a lot easier!
Best,
Melissa
Great suggestions, thanks very much Melissa. I’ll need to experiment a bit as we are trying to avoid corn. When I finalize thinner tortillas, I’ll let y’all know!
There’s taste great! I’m so happyi found your recipe! Just one thing, I followed the recipe to the letter. The dough in our mixer never quite forms a ball. it starts to bundle up on the mixer blade, but leaves a lot on the edges of the blade and sides of the bowl. I take the dough out, and form my own ball. I wrap it per the recipe then proceed. However I’ve made two batches and the tortillas have all come out at least twice as thick as I want. Any suggestions?
Hi Dennis,
I’d be happy to help. Are you using a paddle attachment in your mixer or whisk blades? If it’s whisk blades, that could be why it’s not forming a ball. As far as the thickness, it could be one of two things. What GF flour are you using? I notice some, like Bob’s Red Mill, has a thicker texture, where King Arthur is thinner (however, I find both this brands a little gritty to the taste). I use Cup4Cup, which contains more cornstarch. You can also try dividing the dough into 7 or 8 balls to begin with so the dough is stretched out thinner as it is rolled. Hope this helps!
Best,
Melissa
Hi Melissa,
Reporting back after a great success! I now have very thin tortillas thanks to your suggestions and some additional detective work on my part. I cut the recipe in half b/c we didn’t need that many tortillas.. I kept all of the ratios the same except I added 3 tablespoons of water to the halved recipe which resulted in a nice ball in my stand mixer! I added 5 minutes to the dough resting period for a total of 15 minutes. I then cut the dough into 8 parts, each of which made a nice, thin 6 inch tortilla using my bamboo press with four 90 degree rotations and re-pressing. PERFECTION! Thank you soooo much for the recipe and suggestions!
Yay! So happy to hear, Dennis. Thanks for taking the time to report back!
Best,
Melissa
I know you say a flour with corn starch gives it a better texture, but I can’t have corn. Can you recommend a substitute? Could I buy a gluten free flour and add potato starch to it instead of corn startch?
Hi Sheila,
I think that is a great suggestion. I would remove 2-3 tablespoons of the flour blend you are using and replace it with potato starch. Let me know how it turns out!
Best,
Melissa
great recipe, easy to roll. Made them bigger – about 8″ to use as a lunch wrap. Also added seasonings of garlic, onion, pepper and paprika and more salt. Came out great!
Love these ideas! Thanks for sharing!
Best,
Melissa
Wow, all I can say is wow!! I have been struggling to find an easy gluten free flour tortilla recipe that is soft and flexible!! I have ended up with more hard hockey pucks than I care to count!! And then I happened upon Melissa’s phenomenal recipe!! I am seriously blown away!! From the very first one, they came out wonderful!! I did not worry about making them perfectly round, as I didn’t expect them to turn out so well texture and flavor-wise, but next time, as I get more experience, I will strive to make them prettier!! I ended up using a silicone pastry mat, plopped the disc of dough in the center, and covered with a sheet of parchment paper, and rolled away. It worked out really well! The parchment would wrinkle, but I would just lift it up, and carried on, only using one sheet for a double batch of tortillas! They are a little purplish in color, but that does not bother me at all, and I am sure my grandson will think it is cool!! Thank you so VERY much for coming up with these recipes that take the terror out of trying to make gluten free items that taste and feel like the foods that kids and adults are used to!! I can’t wait to try a lot more of your recipes. Well done!! :o)
Yay, Ronda! So glad and thank you for adding your tips. The purplish color is from the brand of psyllium. If you purchase the brand linked in the recipe card it will not be purplish. There are so few brands that don’t change the color!
Best,
Melissa
Chewy and delicious. The texture is perfect for really being able to use these different ways and they won’t fall apart.
Thank you so much, Cynthia! I’m so happy you love the recipe as much as I do!
Best,
Melissa
Hello!! I have flax seeds that I can grind up. Can that be used in place of psyllium husk?
Hello,
I haven’t tried this. For breads I think it would work but for this recipe in particular I worry about the ground flax seeds creating enough elasticity. Have you tried it with other flatbreads or anything that needs to be rolled?
Best,
Melissa
I’ve never used that much psyllium powder in such a small recipe. Is it really that much?
Hi Shonda,
Just so I’m clear, are you asking if 2 TBSP is the correct amount? Yes, I agree it’s more than 1 1/2 cups of flour usually calls for, but tortillas are a different consistency and texture so you need that much to be able to shape, roll, and make them very pliable and flexible after they have cooked (without adding a lot more flour, which would have the opposite effect). Hope this helps!
Best,
Melissa
Hi.
Can I use regular whole wheat flour?
I’m not gluten intolerant.
Also, I don’t have phyllium husk. Can I use xanthum gum instead?
Thanks
Hi Will,
This recipe was created around GF flour. I would recommend an all-purpose flour recipe because I can’t say how it would turn out with the sub. The psyllium is to help bind the GF flour, which wouldn’t be a problem with traditional flour.
Best,
Melissa