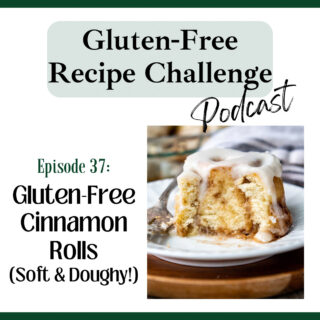
In episode 37 learn how to make the best gluten-free cinnamon rolls! If you want to enjoy a soft, tender cinnamon bun with gooey copycat Cinnabon filling, you’ve found the perfect match! This easy gluten-free recipe is ready with only one short rise and has dairy-free modifications included! Join Melissa, gluten-free cookbook author, as she shares many easy, pro tips to make this audio recipe for gluten-free cinnamon rolls.

Listen to this episode, along with the full audio library, on iTunes, Spotify, Stitcher, TuneIn, or your favorite podcast player.
Recipes and Resources Mentioned
Recommended Equipment
Recommended ingredients
Follow Along
Don’t forget to subscribe to our weekly newsletter! Besides receiving an immediate GLUTEN-FREE BAKING BONUS, this weekly newsletter gives you direct access to the newest recipes, helping you with menu planning and exclusive tips!
Transcript
Hey everyone, this is Melissa Erdelac, host of the Gluten Free Recipe Challenge podcast and creator behind the gluten free website MamaGourmand. Here we take beloved recipes you thought you never enjoy again and transform them into easy copycat versions just as good as the originals.
I have a question for you. What is the recipe that makes you silently, or maybe not so silently, seeth that you can’t eat anymore? I’m not talking the obvious, like bread, because, duh. But something you literally would never turn down, and now there are no good replacements for it.
Mine is cinnamon rolls. Not shitty cinnamon rolls like the ones with the crusty edges and no frosting. I would not waste the calories on those, even if I could. But I mean like those big, doughy, soft cinnamon rolls that have the warm icing seeping in the middle. The ones that I would eat until the point of feeling like I could vomit, but then you would be left with the best part, so you had to eat it anyway and just pay the consequences.
Guess who gets to eat the best cinnamon rolls to the point of vomiting again. This girl. And I really hope you can too. I took one for the team and I suffered through a lot of subpar versions because the thing about cinnamon rolls is there’s a lot of butter and sugar, which will make you overlook a lot of things we shouldn’t have to put up with, like ones that are dry and crumbly or a super overcomplicated recipe. I would not do that to you.
What turned out to be the magic ticket was I took a lot of the tricks that I use in my soft dinner rolls recipe. If those make people die from bread happiness, I figured why wouldn’t it work here? Plus, I tweaked the recipe to mimic the frosting and that gooeyness of Cinnabon rolls because those are the greatest food invention of all time.
So like a lot of bread recipes, the gluten free version is actually easier to make than the regular wheat flour version because you don’t have that double rising time. You don’t even have to roll out the dough.
You just pat it out. And once the rolls are assembled, it’s a really short rise time before they get baked in the oven. So even if you’ve never made cinnamon rolls before, I feel like you can handle this recipe and I’ll walk you through it.
A couple of things that I want to point out before we go through the recipe. I tested the recipe with cup for cup gluten free flour, and that was the clear winner, which I use all my bread recipes because the texture after baking is really soft and squishy and mimics the doughiness of wheat flour rolls.
If you can’t use cup for cup because of allergen reasons, my preferred runner up is King Arthur, measure for measure. But I do not recommend Bob’s Red Mill or Pillsbury gluten-free flour or actually namaste because it’ll take on more of those gluten free characteristics that are gritty and dry.
The other thing that I use for this recipe is a stand mixer with a paddle attachment. The dough is thicker when you mix it together, and it’s not going to work with a regular hand mixer, unfortunately.
Before you begin the recipe, turn your oven to 250, and then once your oven starts to preheat, then you could start making the first part of the recipe.
Once it reaches 250, turn it off. And the reason why I do this is because it has a shorter rise time. I like an extra warm environment to put the rolls in for a few minutes to start the rise, and then I take them out.
Okay, the dough starts with a roux, which if you listen to my gluten free dinner rolls recipe. I also use that technique in there. A roux is just a mixture of water, milk, and gluten free flour or wheat flour. And the reason why I do this for this recipe, because gluten free flours don’t absorb liquids as well. So the roux helps pre saturate some of the flour and it helps absorb more liquid. This is what makes the texture soft and fluffy rather than dense and gummy.
Since it’s helping absorb more liquid, you won’t have to add as much flour to make a workable dough and adding additional flour is what makes gluten free baked goods dry.
So to make the roux in a small saucepan combine 2 tablespoons of gluten free flour with 3 tablespoons of water and 3 tablespoons of milk and then just whisk that constantly over medium heat.
It’ll start to thicken and then eventually it’ll thicken so much that when you’re whisking it, you’ll be able to see the bottom of the pan. And I have a picture of that on the post, what that looks like. Once it gets to that stage, turn off your heat and just set it aside to cool while you start to make the rest of the dough.
To activate the yeast, you take three fourths cup of warm milk. And warm milk is about 110 degrees Fahrenheit. What I do is I heat it in my microwave for about 45 seconds, and then I use an instant read thermometer just to make sure it’s around that temperature. You could also heat the milk over the stove too.
To the warm milk, you add one teaspoon of sugar and then one package of dry yeast, which is two and a fourth teaspoons. Just mix that together and then let it sit for five minutes for the yeast to activate and it’ll start to get like foamy on top. That’s when you know it’s done.
Meanwhile, you can mix together your dry ingredients in your stand mixer. So combine 2 1/4 cups of gluten free flour, 1/3 cup of sugar, 1 1/2 teaspoons of psyllium husk powder, and I’ve talked about this in other recipes, the psyllium husk also helps absorb moisture so you don’t have to add as much liquid to the dough, which makes things gummy. One and a half teaspoons of baking powder. For gluten free baked goods, I don’t rely strictly on yeast because I don’t find it gives it enough lift, so I always use a combination of yeast and baking powder. And then a half a teaspoon of salt, and then just mix that on low speed.
Once that’s combined, you could add your warm milk, yeast mixture, along with four tablespoons of melted and cooled butter, one room temperature egg, and then your roux mixture that you made on the stove.
And that’s everything you need for your dough. Just combine it on low speed until it’s blended. And then you’re going to increase the speed to high and beat it for five minutes. After five minutes, the dough will be stiff, but it’ll still be sticky to the touch, and that’s fine. That’s exactly how you want it.
So now you can make the filling for the cinnamon rolls, and for that, in a small bowl, combine four tablespoons of slightly melted butter.
This is one of the things that I struggled with. I tried softened butter, I tried completely melted butter, and what happened was, It was either too runny, so when you would roll it, all the filling would fall out, or it was too thick, and it was hard to spread onto the dough.
So I settled on the in between. Melt the butter in the microwave, but not to the point that it is completely melted. Probably about like 50 percent melted. That’s the sweet spot. So four tablespoons of slightly melted butter, along with a half a cup of brown sugar, and then one teaspoon of cinnamon.
Now you’re ready to shape your cinnamon rolls. To do that, spray a silicone baking mat or a large piece of parchment paper with nonstick cooking spray. And you’re going to scrape the dough onto the greased surface. And then I also grease my hands with non stick cooking spray, or you could just use a little bit of oil too. And pat the dough into a 10 by 18 inch rectangle. Then use a silicone spatula and just spread the filling evenly across the dough.
And now it’s time to roll it. You want to start with the edge farthest from you and roll the log towards you. Keep rolling the dough until you have about a two inch unrolled strip closest to you.
Bring that strip up to the rolled portion and then just pinch the seams together and then smooth it out with your fingers. Then go ahead and turn the roll over so the seam is facing down towards the mat. Use a serrated sharp knife. You need a serrated knife for this. Before I start slicing it, I score it in nine two inch sections so I know where I’m going to cut.
And then when you cut it, you want to use a gentle sawing motion rather than just like pressing down with the knife. And this prevents the cinnamon rolls from being like squished and misshapen when you put them in the pan.
Once you have them all cut, then… Grease an 8×8 inch baking pan and transfer the rolls into the baking pan. Cover with a lint free dish towel or you could spray a large piece of plastic wrap with non stick cooking spray. And let that rise in your warmed but turned off oven for 10 minutes. Then take the rolls out of the oven. Set it at room temperature to let it rise for 20 minutes more, and while it’s doing that, then you could go ahead and preheat your oven to 350.
Okay, now you’re ready for your gooey cinnamon roll secret weapon. So, to make the filling really gooey inside, the trick is to pour some heavy cream over the rolls before you bake them. But you don’t want to put cold heavy cream on top. You want it to be room temperature because you don’t want to prohibit the rolls from rising more if it’s not room temperature, then you could warm it briefly in the microwave until it’s no longer cold, but it shouldn’t be hot either.
Pour a fourth of a cup of heavy cream over the top. And I will say, you could leave this part out, but I mean, why? You’ve gotten to this point. Just go for it.
Then bake the rolls for 30 to 35 minutes. And to prevent the tops from becoming too brown before the dough’s baked through, I loosely tent some foil over them for the last 10 to 15 minutes. The top should be golden brown and then the interior should not have wet dough. For best results, I always test my internal temperature of gluten free bread with an instant read thermometer, and it should read 190 degrees Fahrenheit inside when the rolls are baked through.
Take them out to cool, and at this point you could prepare the frosting. If you go to the recipe card, I have… Two frosting options. You could do a powdered sugar frosting with butter or you could do the cream cheese frosting. If you want the true Cinnabon experience, I would recommend the cream cheese frosting.
And that is just five ounces of softened cream cheese, beat together with three tablespoons of softened butter, one and a fourth cup of powdered sugar, one and a half teaspoons of vanilla extract. You want to spread the frosting on, not when they’re like, smoking hot, but they should be pretty warm.
So I would say let them cool for about 10 minutes and then spread the frosting on. And that’s it. . If you go to the recipe post, I also have instructions on how to make these ahead of time and freezing and the different frosting options.
Remember you can always find the full printable recipe on the show notes page and to get to it just click on the link provided in whatever podcast app you’re listening on or you could go to my recipe website which is mamagourmand.com and click on the podcast tab and there you’ll find the full recipe along with any recommended ingredients or equipment I’ve mentioned.
Leave a Reply