
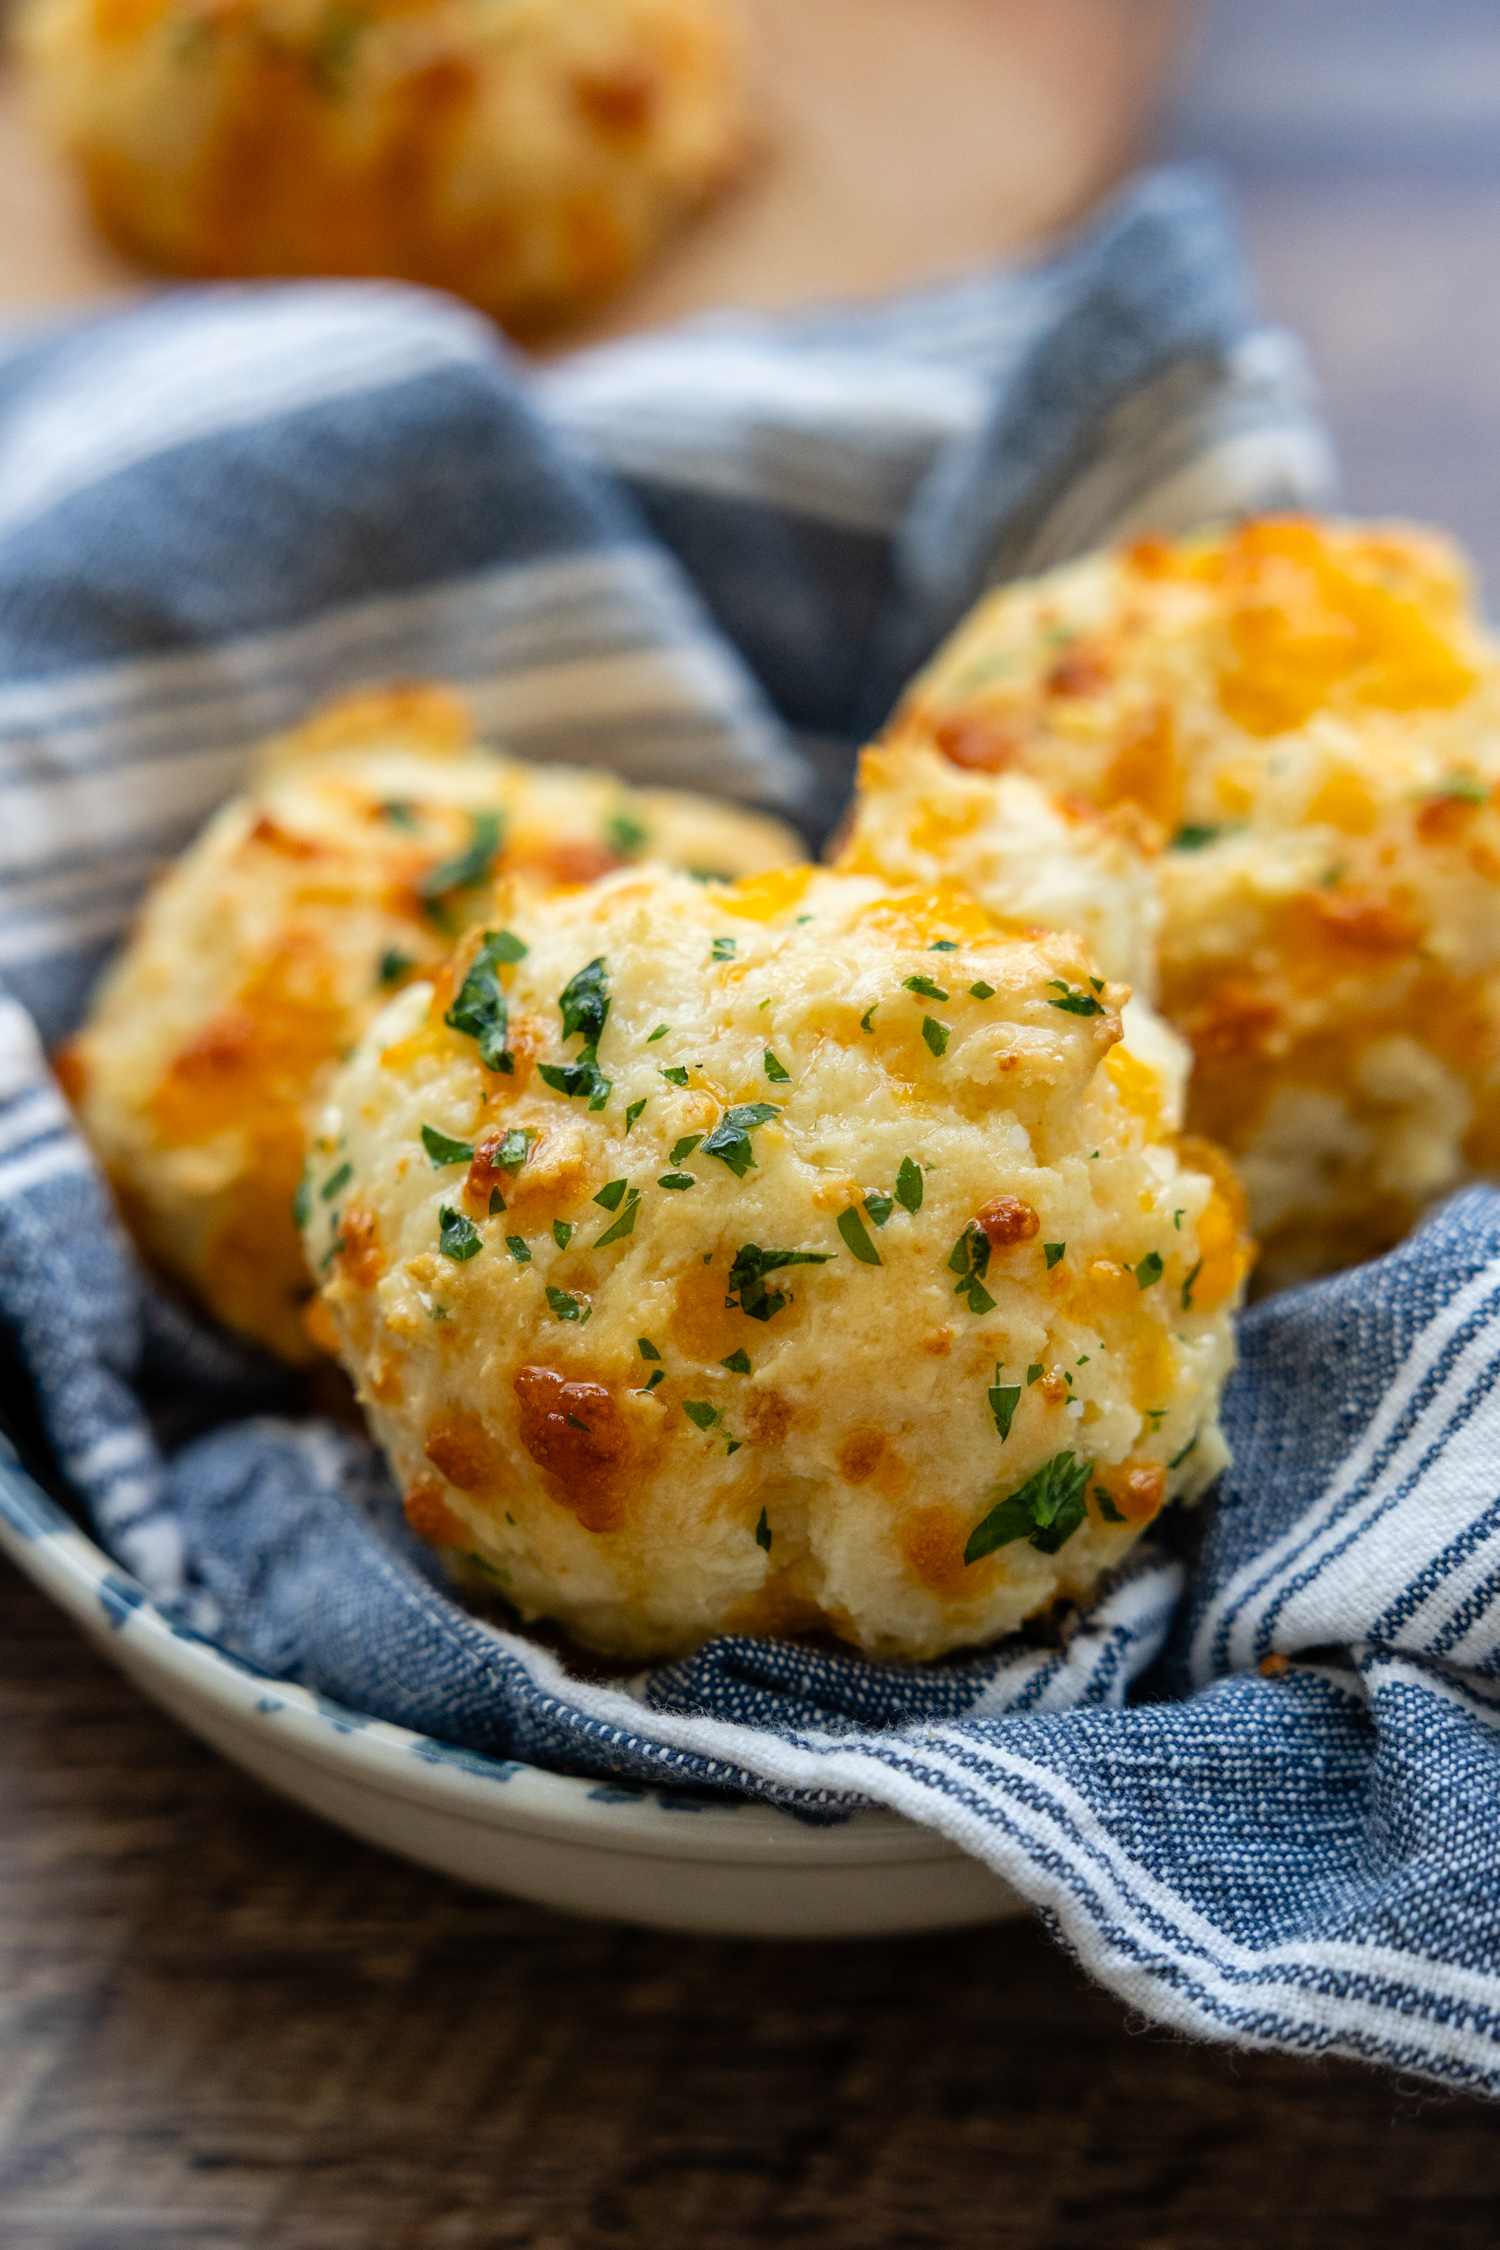
Move over Red Lobster! This copycat recipe for gluten-free cheddar biscuits have a spot-on, knockout taste and texture, complete with tender, cheesy, and buttery goodness and a hint of garlic. My easy tricks for a fool-proof success, like resting the dough and using a combination of yogurt and milk for a tender crumb, makes these savory treats soft, fluffy, and never dry!
Want to Save This Recipe?
Enter your email below & we'll send it straight to your inbox. Plus you’ll get affordable and easy gluten-free recipes delivered each week!
Gluten-Free Cheddar Cheese Biscuits (Red Lobster-Style)
If you are intimidated by making homemade biscuits, or new to gluten-free baking, this is probably the best place to start in my entire gluten-free bread recipe collection. But, don’t let the easy process deceive you. Making a gluten-free cheddar bay biscuit recipe is stone cold success in both taste and texture as well.
These cheesy drop biscuits skips time-consuming rolling or shaping. Just mix up the dough, scoop, drop, and bake. If you think making a copycat Red Lobster’s cheddar bay biscuits gluten-free means complicated ingredients, I would never do you like that.
I know there are store-bought mixes out there, but I also bet you have everything in your kitchen to make your own from-scratch, and substantially better, cheddar biscuits. Lucky for you, if you don’t, many of the ingredients have easy swaps. I go over those right below.
I like to build a little insurance into my recipes. I know the variety of gluten-free flour blends can lead to some inconsistent results. That is why I rely on some simple tricks to avoid a dry, crumbly texture. It’s not hard! I do this for everything from muffins, cookie dough, and these widely-shared savory gluten-free cheddar scones recipe.
After mixing the dry and liquid ingredients together, cover the bowl and chill for 30 minutes. This gives time to for the GF starches to hydrate, relax, and soften the texture. Different GF flours use different starch ratios, and some can be particularly gritty. I use and highly recommend Cup4Cup flour for the best texture, but if that is not available, resting the dough is an equal opportunity tweak to help all blends.
You may also notice this recipe does not use buttermilk. I prefer a mixture of yogurt and milk. Gluten-free flours do not absorb liquid as well, which is what causes that dense, gummy heaviness. Yogurt adds the moisture and tang of buttermilk, but bakes into a soft, tender crumb.
Free Guide! 5 easy tips for baking like a gluten-free pro!
Simple hacks for fail-proof gluten-free dishes every time!
Ingredient Swaps
- Yogurt – Whole, full-fat is preferred, but if I don’t have any on hand I’ve also swapped out an equal amount of sour cream with great results.
- Lemon juice – This is also gives the “buttermilk” taste. However, if you don’t have any, use an equal amount of vinegar.
- Cheddar cheese – For that best, pronounced cheesy taste use extra sharp cheddar and always freshly grated from the block! Of course, you can swap out other cheeses if you’re not looking for a Cheddar bay experience.
Watch This Recipe
Let’s Make This Together!
(Below shows step-by-step photos and modified instructions. For the complete recipe, along with ingredient amounts, scroll down to the recipe card.)
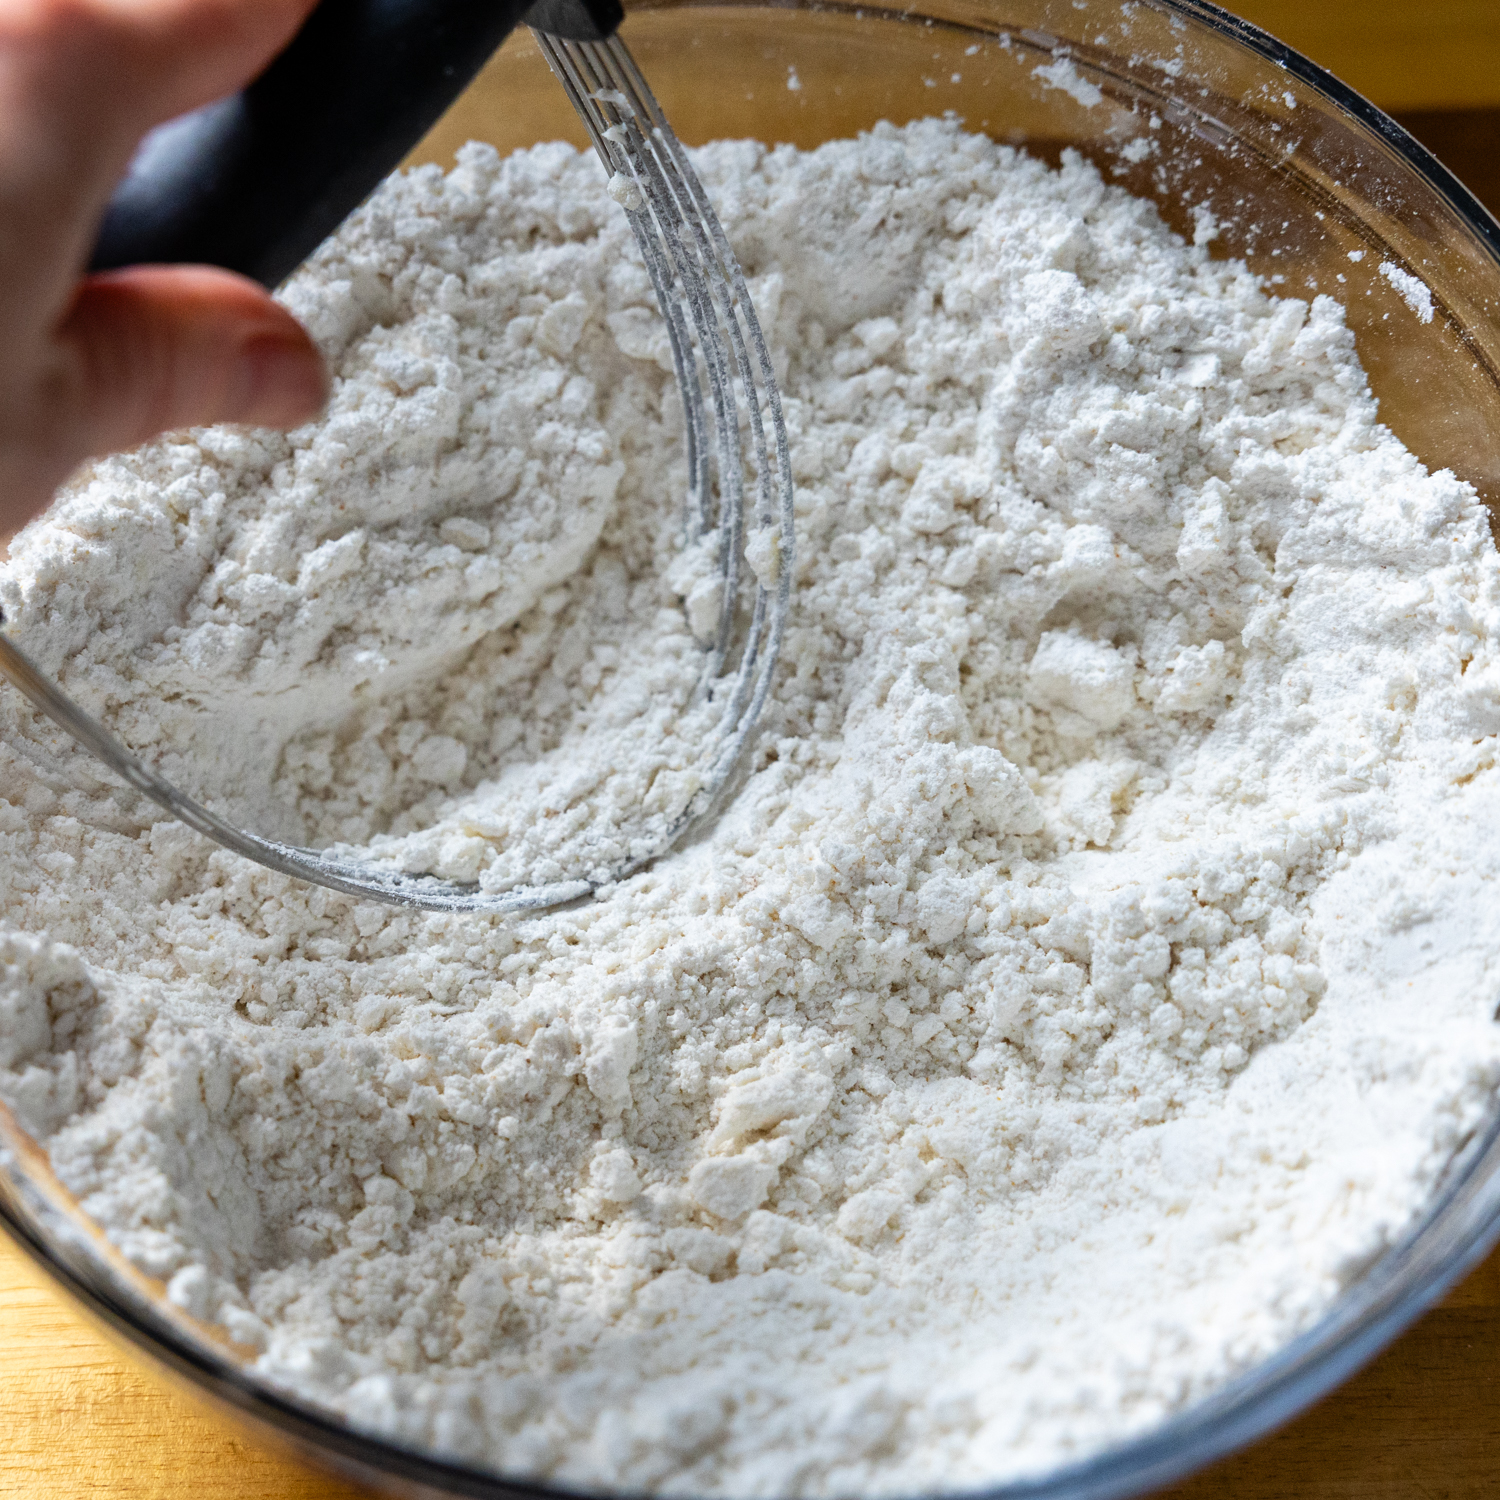
Cut the butter into dry ingredients
Whisk together all the dry ingredients. Work in the cold butter using a pastry blender, a fork, or even your fingers. You’ll want the butter to be mixed in enough so the mixture is sandy, without large clumps of butter.
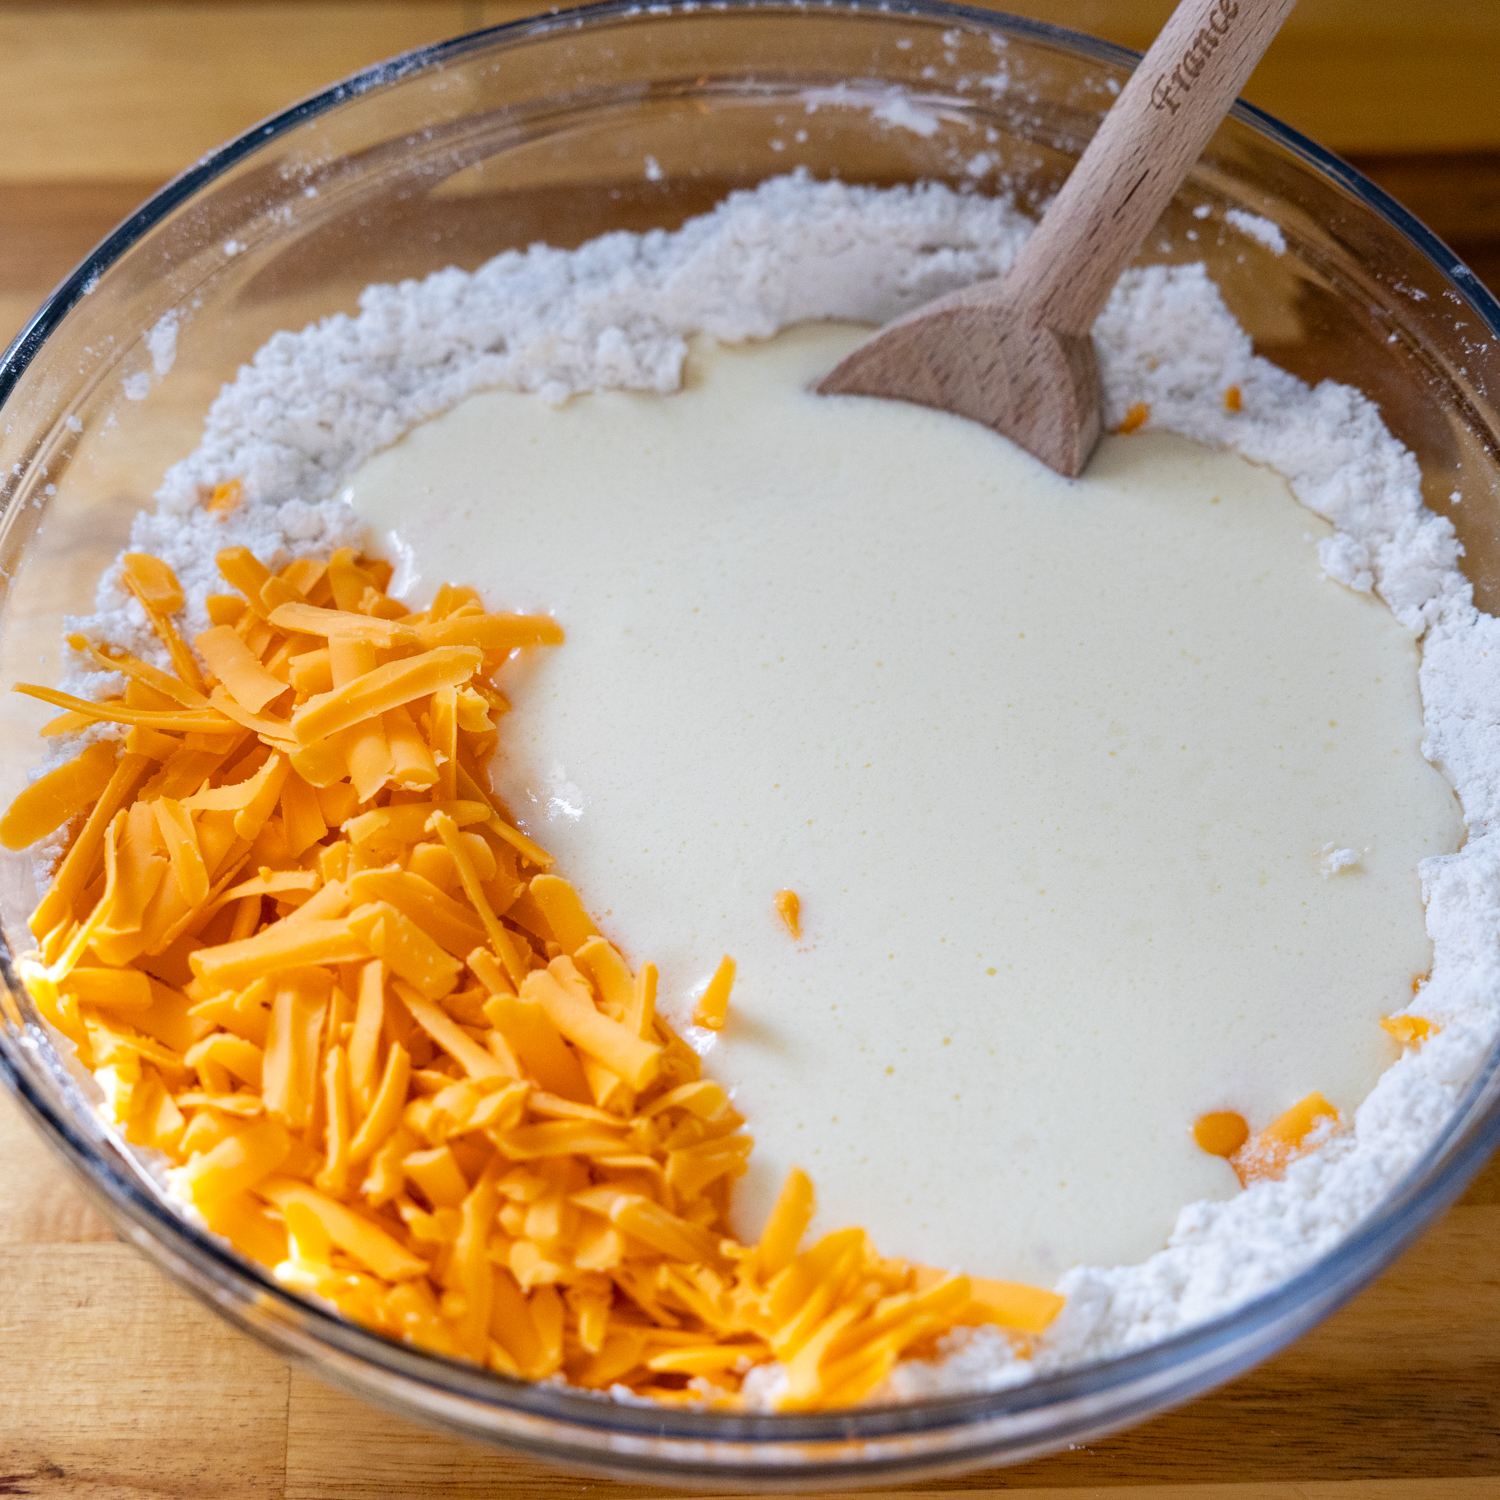
Add the liquid ingredients with lots of cheese. Then, rest is best.
In a separate small bowl whisk oil, milk, egg, yogurt, and lemon juice together. Pour those wet ingredients into flour mixture with the shredded cheese and stir to combine until a nice, soft dough forms.
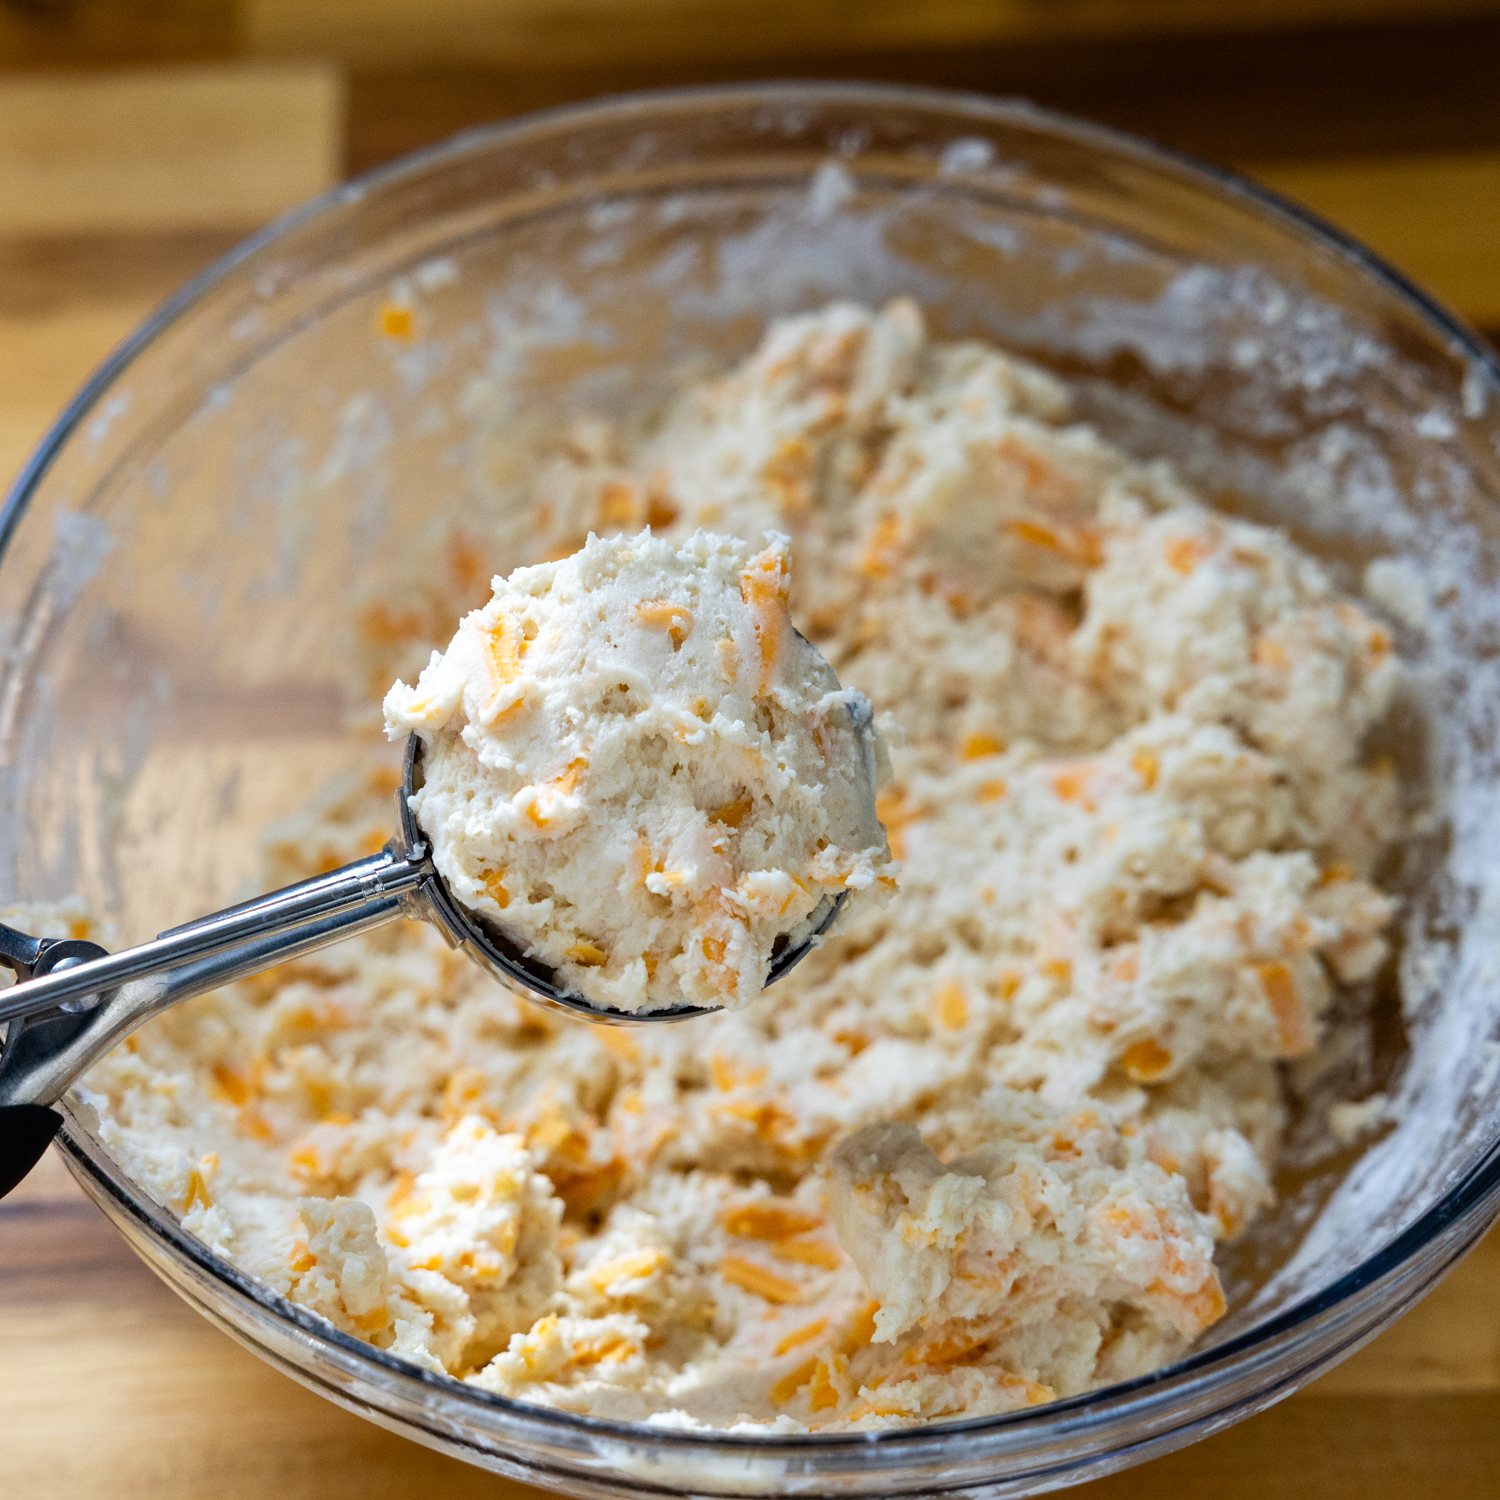
Now it’s time for the chilling. It’s only 30 minutes to let the flour soak up the moisture and fat, so they biscuits are soft and tender, instead of dry and gritty. This is when you can preheat your oven to 425℉.
Scoop and baking tips
Using a 4 tablespoon trigger scoop is the easiest way to drop the biscuits quickly and evenly. If you don’t have one on hand, grease a 1/4 cup measuring cup with nonstick cooking spray to drop the dough evenly.
You will get about 10-11 biscuits, dropped onto one baking sheet. Bake for about 16 minutes, rotating the pan halfway through.
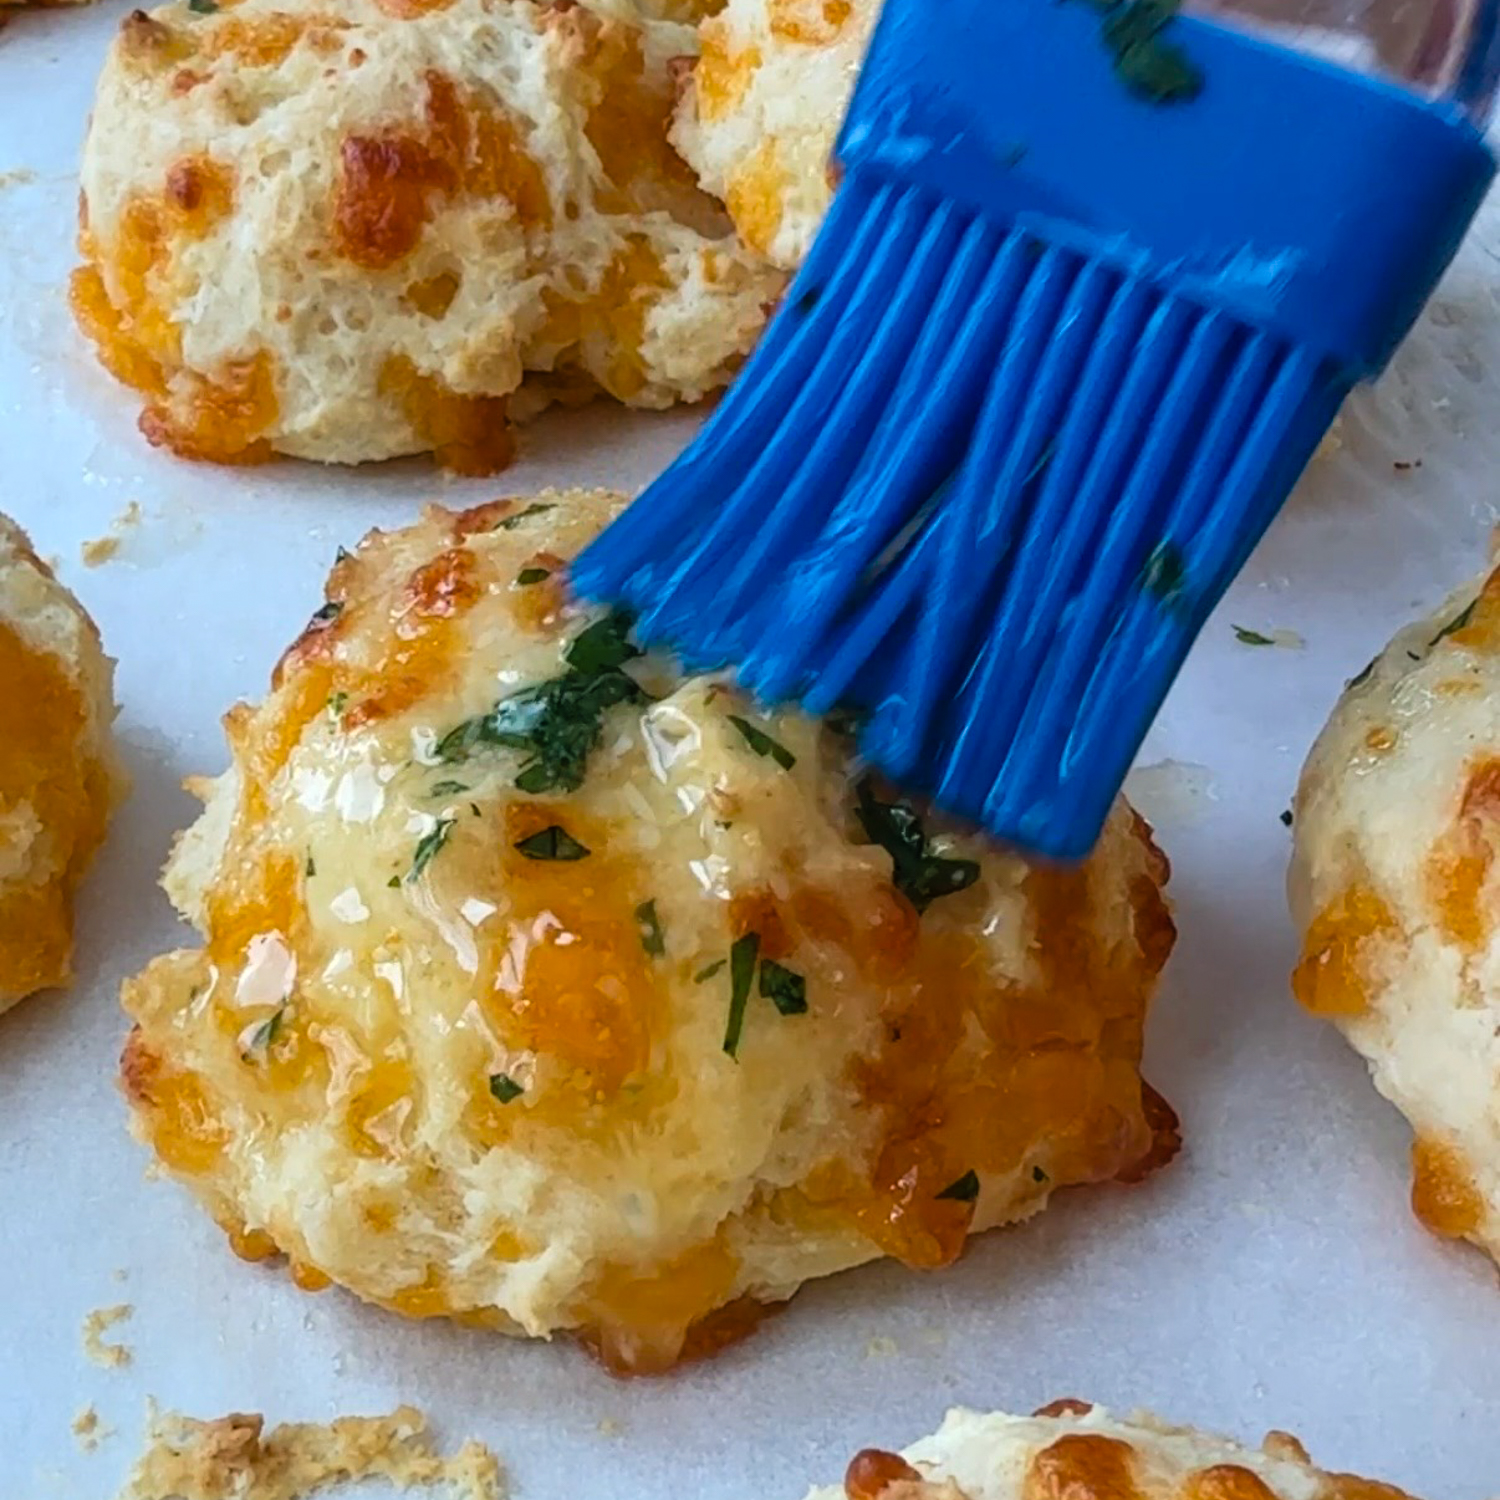
Brush on the butter (best part!)
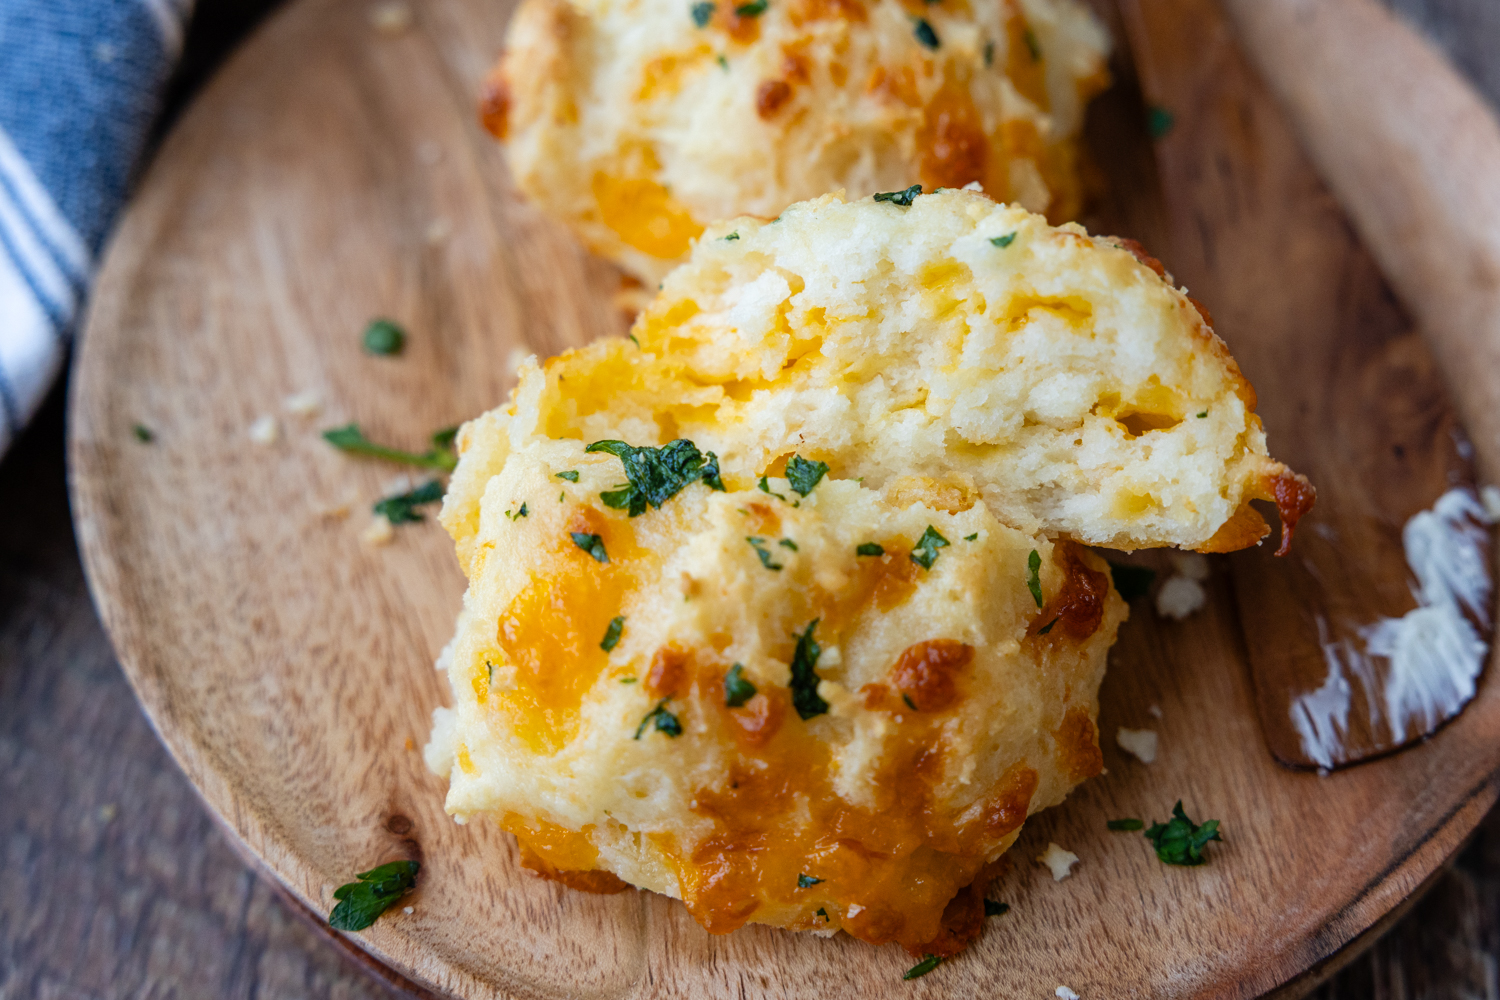
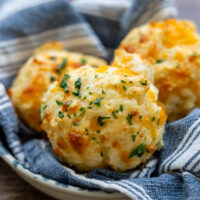
When you biscuits come out of the oven, melt together butter with a little salt, especially if you are using unsalted butter, and parsley. Dive into those warm, buttery, bites and rejoice in (a gluten-free) heaven on earth.
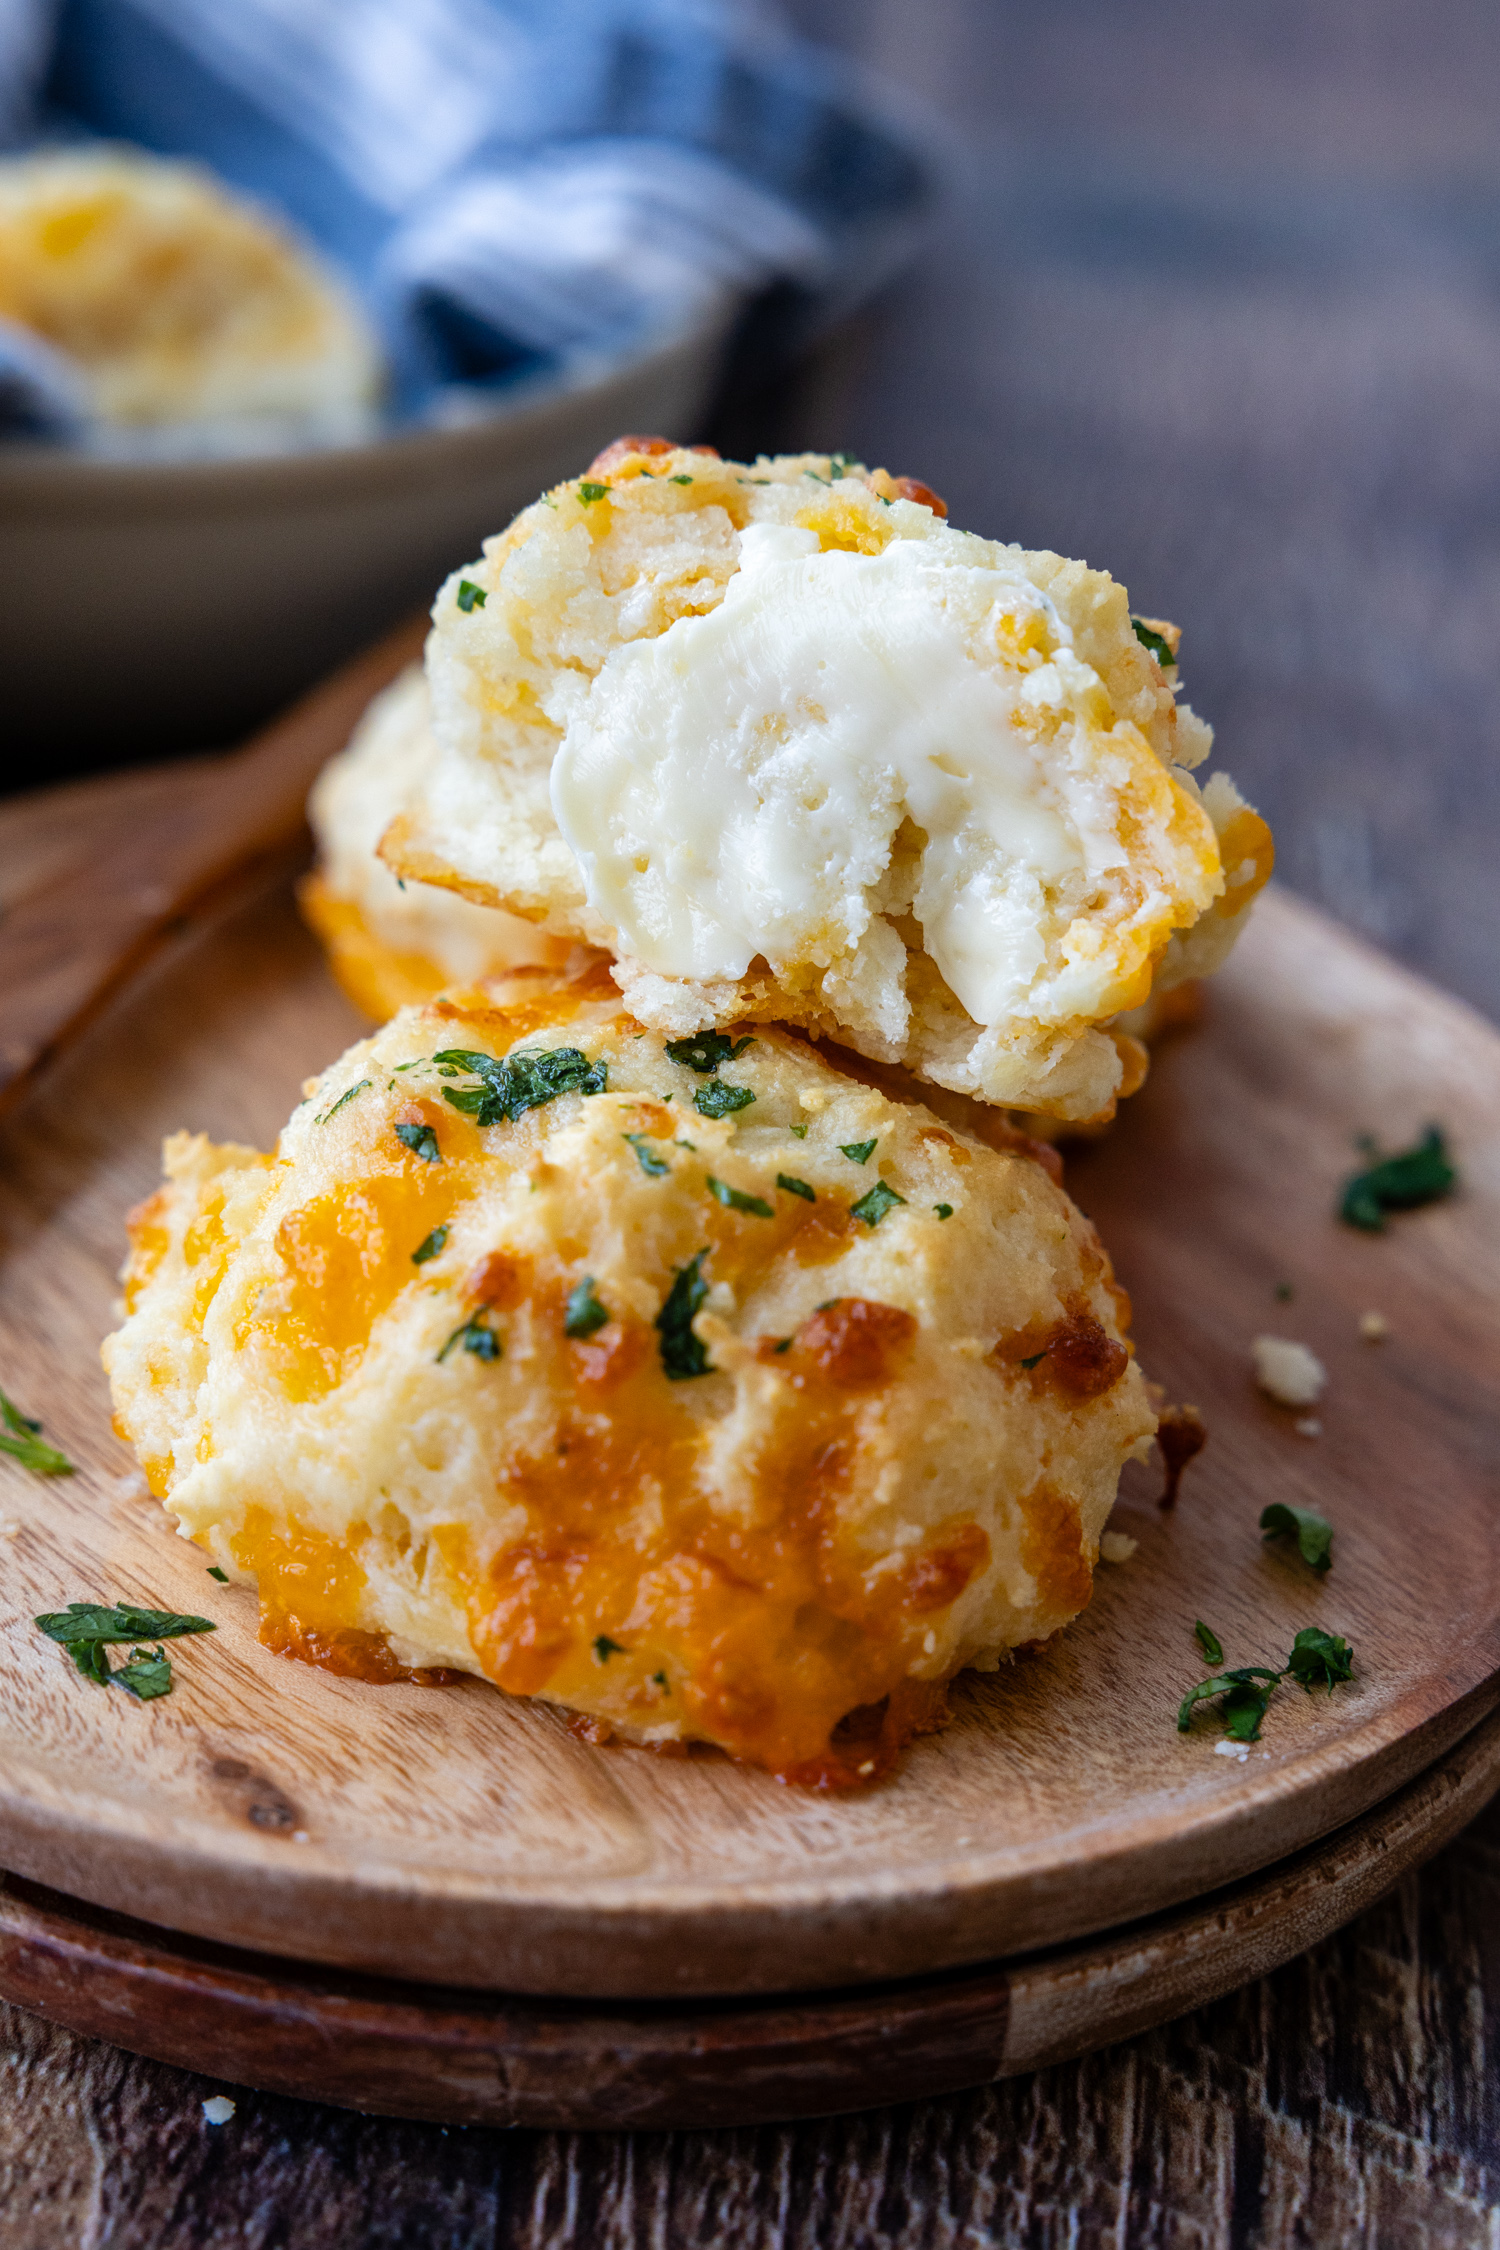
You know why everyone goes crazy over Red Lobster’s cheddar bay biscuits? Because they are served warm, soft, and buttery! These are best served the exact same way. If you need to make these ahead of time, save the butter brushing for right before serving. If frozen, thaw, reheat, brush, and serve!
My Favorite Biscuit Baking Method
Homemade biscuits bake at a high heat to create and trap steam quickly in a golden outer crust. Generally I like to stretch gluten-free breads and muffins baking times slightly, so there is enough time for adequate moisture to evaporate and avoid a dense, gummy crumb.
So, we need to balance those two things. I use a higher heat, 425℉, but don’t go as high as traditional biscuit recipes. To insure even baking with the high heat, I use a little trick picked up from America’s Test Kitchen. Stack two baking sheets inside of each other to insulate the bottom layer. This prevents the biscuit’s bottom from not becoming overly browned before it’s baked through.
Also, placing the biscuits closer together on the baking sheet helps create and trap steam. Since they are at a slightly lower oven, this gives a little steam boost.
Save this recipe to your pinterest board!
Let’s be friends on Pinterest! I’m always sharing great recipes!
Did you make this recipe? I love hearing from you! Leave a star rating and comment below the recipe card. It helps others when searching for recipes and I appreciate feedback from our community. You will always hear back from me! -Melissa
Buttery Gluten-Free Cheddar Bay Biscuits (Copycat)
Ingredients
- 2 cups (307 g) all-purpose gluten free flour blend, I recommend Cup4Cup gluten-free flour
- 4 teaspoons baking powder
- 1 teaspoon garlic powder
- 1 teaspoon sugar
- ½ teaspoon salt
- ¼ teaspoon baking soda
- 3 tablespoons (42 g) butter , chilled and cut into small pieces
- ¾ cup (200 g) plain whole-milk yogurt
- ½ cup (114 g) milk
- 1 large egg
- 2 tablespoons (27 g) oil
- 2 teaspoons lemon juice, I’ve substituted vinegar for this with good results
- 1½ cups (141 g) freshly grated Sharp cheddar cheese
For Topping
- 2 tablespoons melted butter
- 1 tablespoon fresh minced parsley , or 1/2 teaspoon dried parsley
- ⅛ teaspoon salt
Instructions
- Whisk flour, baking powder, garlic powder, sugar, salt, and baking soda in a large bowl. Add the butter to the mixture cut in with a pastry blender, fork, or fingers until small, pea-size pieces remain.2 cups all-purpose gluten free flour blend, 4 teaspoons baking powder, 1 teaspoon garlic powder, 1 teaspoon sugar, ½ teaspoon salt, ¼ teaspoon baking soda, 3 tablespoons butter
- In a separate bowl whisk together yogurt, milk, egg, oil, and lemon juice. Stir the yogurt mixture and cheddar into the flour mixture until no flour pockets remain. Cover bowl with plastic wrap and chill for 30 minutes to allow the starches to blend with the liquids and make the dough easier to shape. Preheat oven to 425ºF (230ºC)¾ cup plain whole-milk yogurt, ½ cup milk, 1 large egg, 2 tablespoons oil, 2 teaspoons lemon juice, 1½ cups freshly grated Sharp cheddar cheese
- Place one baking sheet inside a second so you have a double layer, and line the top baking sheet with parchment paper. Use a large trigger scoop (4 tbsp size) or grease a 1/4 cup measuring cup with nonstick cooking spray and scoop the batter into it. Drop on prepared baking sheet, spacing the scones only about 1 inch apart in the center of the sheet (this traps a little extra steam between the scones and makes them more tender).
- Bake until golden, about 15-17 minutes, watching carefully and rotating pan halfway through. When they come out of the oven stir the topping ingredients together and brush on. Serve warm.2 tablespoons melted butter, 1 tablespoon fresh minced parsley , ⅛ teaspoon salt
Notes
Storing and Freezing
These are best served warm and freshly baked. To make ahead of time, bake and cool, before brushing on the butter. Store in airtight container for 1-2 days. Rewarm and brush on butter before serving. For longer storage, wrap the cooled biscuits individually and freeze in an airtight container or ziplock freezer bag. Thaw, rewarm, and brush on butter before serving.This post contains affiliate links. My opinions are always my own. If you purchase a product through an affiliate link, I make a small commission – at no cost to you. Read full disclosure policy here.


I made these today and they turned out soooo good. Followed recipe exactly. You have the best GF recipes I’ve found anywhere. Thanks for sharing!
Ah thanks so much, Debra! I really appreciate you taking the time to share and I’m glad you’re enjoying my recipes.
Best,
Melissa
I made these with one package of Daiya Cheddar shreds. They came out great! So delicious. Very fluffy. Thanks for all your hard work developing this recipe.
It’s a pleasure, Jane! Thank you for the note letting me know they came out great. I appreciate it!
Best,
Melissa
Wow, these came out amazing! The only change I made is I used a minced clove of fresh garlic in place of the garlic powder. So soft and pillowy!
They really are! Thanks for the note, Laura!
Best,
Melissa
These are phenomenal. I’m making them for the 3rd time tonight some we first tried this recipe. It’s a hit every time!
Yay! I appreciate you commenting, Jen. Thank you!
Best,
Melissa