
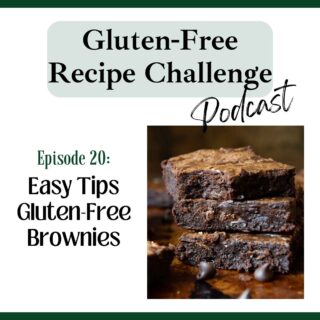
In episode 20 learn how to make fudgy from scratch gluten-free brownies with chewy outer edges, a thin crackly crust and gooey moist interior. Not only does this easy, one bowl recipe mix up in minutes, but she shares an easy tip to avoid common problems! Join Melissa, gluten-free cookbook author, as she shares many easy, pro tips to make this audio recipe for gluten-free brownies and you won’t have to miss out anymore!

Listen to this episode, along with the full audio library, on iTunes, Spotify, Stitcher, TuneIn, or your favorite podcast player.
Recipes and Resources Mentioned
Recommended Equipment
Follow Along
Don’t forget to subscribe to our weekly newsletter! Besides receiving an immediate GLUTEN-FREE BAKING BONUS, this weekly newsletter gives you direct access to the newest recipes, helping you with menu planning and exclusive tips!
Transcript
Hey everyone. I’m Melissa Erdelac, host of the Gluten-Free Recipe Challenge podcast and creator behind the gluten-free website, Mamagourmand. Here we take beloved recipes you thought you never enjoy again and transform them into easy copycat versions, just as good as the originals.
Today we’re gonna talk about everyone’s favorite dessert brownies, because who doesn’t love a brownie?
That’s right. No one. It’s not to love? Unless you’re one of those strange creatures who don’t like chocolate. I don’t know what sort of gene mutation must have happened to get saddled with that one, but luckily that’s a problem I don’t have.
Brownie recipes are usually pretty forgiving when you swap out a gluten-free all-purpose flour in traditional recipes. So why are we even talking about this in the first place?
Because I feel like if you combine a lot of sugar and butter and chocolate together, a lot of things can be overlooked. Like not having a crackly crust or a little extra greasiness or a thin flat structure. It’s also hard to complain when you’re stuffing your mouth with chocolate, at least for some of us.
So I’ll be honest with you, for many years I did just that, not stuff my face with chocolate, but just swap out the gluten-free flour for the wheat flour in traditional recipes.
I have this go-to brownie recipe and it seemed to work out pretty good when I swapped out the GF flour for it. Occasionally I would also make them with wheat flour. Say if I was like donating a dessert or something. And I realized they turned out, at least from the looks of it, a lot better with the wheat flour.
I wanted to do better for myself and for you. So I did.
First, I made them another time just swapping out the gluten-free flour, and really thought about what was wrong with them. I felt like they were a little flat, and although they still had that crackly crust, it seemed like they were slightly oversaturated with the butter fat.
I put my GF thinking cap on. And thought about how I could fix the recipe. The fudgy chocolate texture in this recipe in particular comes from using melted chocolate chips and not unsweetened cocoa powder. I didn’t wanna completely adjust this because then I’d be talking about reworking the entire recipe.
If I just went straight unsweetened cocoa, then I’d have to change the whole ratio of the flour and the butter. I also didn’t wanna just cut back on the butter or add more flour because then I would risk drying them out.
So what’s a girl to do? I’ll tell you what I did. I added a little unsweetened cocoa powder, and this fixed everything.
It bulked up the structure slightly so they were a little bit thicker and it helped absorb that butter fat. And that’s all it took. It felt like the brownie gods were smiling down on me that day.
The recipe is actually really easy and straightforward and literally anyone can make it.
But I will walk you through it because there are a couple more tips I wanted to share with you, like the best baking pan to use, uh, why I use the oven temperature I did, and how to really tell when your brownies are done. Especially if you’re one of those people that bakes the shit out of everything because you’re afraid you’re gonna die an agonizing raw egg death.
For brownies, the best type of pan to use is a metal baking pan, specifically an aluminum baking pan. And the lighter aluminum works better. I will say that this makes a 9 by 13 pan of brownies. And I tell you this because when I tell you the amounts of eggs and stuff, you’re gonna be like, that’s a lot of fucking eggs.
But you can also make it an eight by eight pan. I don’t know why you would want to, but that’s why this recipe is scaled to fit a 9 by 13 pan.
The reason we use metal pans when baking brownies is because metal conducts the heat a lot quicker than glass, so it allows that batter to rise quickly, which is essential because brownies don’t have leavening in it.
These have a little bit of baking soda , so it helps them rise and crisp up at a uniform pace. Whereas glass has a low thermal conductivity and is an insulator, so that means it takes longer to heat up. And it holds the heat longer than a metal pan. I find if you bake brownies in a glass pan, they need more time to bake, which means the edges can be really overcooked while the middle is not cooked. Also I find that the top isn’t as glossy as when you bake the brownies in a metal pan.
So preheat your oven to 325. This is also a little different. Typically brownie recipes bake at 350, and I do this because it extends the baking time, so it gives more time for the gluten-free starches to absorb all that moisture from the butter and the melted chocolate chips.
It eliminates any gritty or ricey texture. Also since metal conducts heat quicker, it gives a more gentle, longer baking time so it doesn’t overly dry out those edges and it gives time for the moisture to evaporate.
And this is also helpful if you are plagued with brownies that sink in the middle. This will allow everything to cook and rise at the same rate. So when you pull ’em outta the oven, you don’t have the edges that are done and then the middle that’s underdone and then sinks down.
The whole recipe comes together in a large sauce pan. Put in the two thirds cup of cube butter. I just kind of slice it in large tablespoons, one and a half cups sugar and one fourth cup of water. You turn that over medium heat and you just stir it until it comes to a boil. It’s not gonna be like a full rolling boil. It’s just the edges will start to bubble slightly.
Mixing the melted butter and sugar together, this is where the crackly crust comes from. It incorporates the ingredients, so it’s one solid mixture, but not as much as, say when you cream together softened butter with sugar. Therefore, they’re mixed, but not fully incorporated. And when they bake, the sugar partially separates and floats to the top, and this is what creates that shiny crackly crust.
Then remove it from the heat, and you’re going to add in two cups of semi-sweet chocolate chips, and you just stir that until it’s melted.
You want to set that aside to cool because the next thing you’re gonna add is the eggs. And you don’t want the eggs to cook when you add it in. Make sure you have room temperature eggs, and if you forget to set your eggs out, during this time, the 10 minutes, just put the eggs in a bowl of hot water and let it sit in the shell, of course. Then once you crack the eggs in, they should be room temperature.
Vigorously whisk four eggs in and two teaspoons of vanilla extract until that’s nice and combined and the batter will be a little bit thinner. Next you stir in the dry ingredients, so you stir in one in one half cups of gluten-free all-purpose flour, and you could use any preferred gluten-free flour in this recipe, it’s pretty forgiving. A fourth of a cup of unsweetened baking cocoa, and you could use natural unsweetened cocoa or Dutch processed a half a teaspoon of baking soda and a half a teaspoon of salt.
While some brownies don’t use baking soda in it. And you should never use baking powder in brownies, cuz that gives like a cakey texture. I like adding a little bit just because gluten-free baked goods need a little help with lifting. So adding a half a teaspoon of baking soda gives a little lift, and then it also kind of adds more chewiness to the edges, similar to a cookie.
Once that’s combined, stir in your remaining one cup of chocolate chips. And if you wanna add nuts at this point, you would do that. Make sure before you add the one cup chocolate chips at the end that the batter has cooled. Otherwise, when you add in the remaining chocolate , then they’re all just gonna melt into the batter.
Pour into your greased 9 by 13 metal baking pan, and you’re going to bake for 35 to 40 minutes, and you’ll know when they’re done because you insert a toothpick in the middle and it shouldn’t come out with liquid batter on it, but it shouldn’t come out completely clean either. There will be like a few moist crumbs on it.
Once it’s done baking, set it out and let it cool on a wire rack. And I know this is fucking hard, but don’t cut into them right away.
You have to allow time for the chocolate to cool and set up or otherwise when you cut the brownies, when they’re still really, really warm, they’re just kind of, kind of break apart. I mean, they’ll still be good, but you know, it’s not the prettiest thing.
And like I said, if for some insane reason you need a smaller pan of brownies, you can halve all the ingredients and bake this in it an eight by eight pan as well. Weirdly, the baking time doesn’t really change. It’s because the batter will be slightly thicker in an eight by eight pan. So it still needs about 35 to 40 minutes to bake.
If you wanna get like your fancy brownie on, you could also sprinkle the top with flaky sea salt before you bake, you can add chopped candy, which is gluten free, like chopped Snickers or Reese’s pieces or M and M’s. The other thing you could do is before they bake, you can dollop on either jam like raspberry jam, marshmallow fluff, or peanut butter. Dollop it all over and then you would gently swirl it with a knife before baking.
If you really wanna go all in, I use these brownies as a base for my Buckeye Turtle brownies, which are a layer of peanut butter and caramel pecan, and then a layer of chocolate over that.
Or I also have a cookie dough cream cheese brownie that I use these brownies as a base. And then I put cookie dough mixture on top and I’ll link to both of those recipes in the show notes as well.
When you’re storing brownies, after they have completely cooled, just wrap the pan with aluminum foil and let it sit at room temperature. You can store these up to a couple days. It has a little bit longer shelf life than other gluten-free baked goods just because there’s so much moisture in this recipe and a lot of sugar, which is a preservative.
You could find this full printable recipe on my show notes page. And to get to that, there’s a link in whatever podcast app you’re listening on, or you could go to my recipe website mamagourmand.com and click on the podcast tab. And the show notes will include the full recipe, along with any tips I’ve mentioned, recommended ingredients or the equipment like my favorite brownie baking pan.
Thanks for listening. And remember, if you have a gluten-free recipe idea, something that you would like me to transform into a great gluten-free version of, be sure to reach out to me. You could DM me on Instagram @mamagourmand, or you can email melissa@mamagourmand.com.
Leave a Reply