
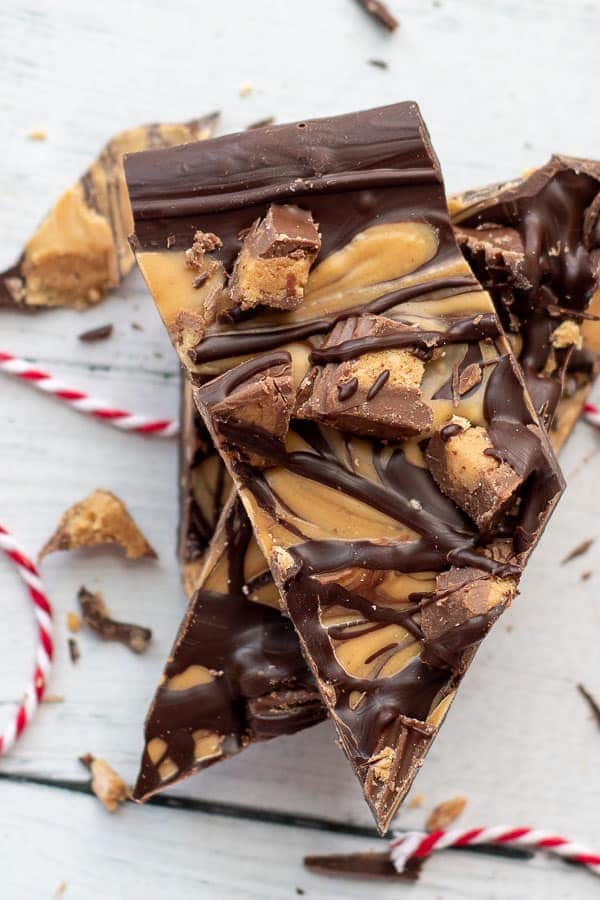
Whether you need an easy gluten-free Christmas treat or making chocolate candy for a quick homemade dessert, a bark recipe is the perfect option. This chocolate peanut gluten-free bark (also known as Tiger Butter), combines melted chocolate and peanut butter swirled together with chopped peanut butter cups perfectly set in a glossy, snap, and snack finish!
Want to Save This Recipe?
Enter your email below & we'll send it straight to your inbox. Plus you’ll get affordable and easy gluten-free recipes delivered each week!
Easy Peasy Chocolate Bark Made Gluten-Free!
Certain times of the year just scream for decadent chocolate candies. Valentine’s Day, Christmas, and Easter give us a solid excuse to make bark and candy recipes. This homemade gluten-free bark only uses three ingredients and takes minutes to make, so what are you waiting for?
If you love peanut butter (HUGE Reese’s fan here! 🙌), this family-favorite recipe cannot be missed! It’s right up there with fudgy chocolate flourless cookies and homemade, bakery-style gluten-free chocolate chip cookies, as recipe-musts on our gluten-free holiday list.
A GF almond bark is the ideal option to round out the list. Melted chocolate chips and peanut butter chips are swirled together with chopped GF Reese’s peanut butter cups scattered on top. If you are chocolate and peanut butter fanatic, you’ve come to the right place!
Then you should head over and check out these epic soft and chewy gluten-free peanut butter cookies or another old school classic no bake chocolate peanut butter bars…just sayin’ 😎.

What’s The Trick Chocolate Bark That Snaps?
Making chocolate bark gluten-free is as simple as making sure your ingredients are safe. The recommended brands are included in the recipe card.
Although candy bark technically only requires melting chocolate, you could run across some common problems, like unsightly white streaks (called “bloom”) and chocolate that doesn’t harden.
There’s an easy fix, though. Tempering chocolate means melting chocolate to a temperature that breaks down the crystals in the cocoa butter. Although it may sound intimidating, it can actually easily be done in your microwave. I’ll show you how!
Free Guide! 5 easy tips for baking like a gluten-free pro!
Simple hacks for fail-proof gluten-free dishes every time!
Let’s Make This Together!
(Below shows step-by-step photos and modified instructions. For the complete recipe, along with ingredient amounts, scroll down to the recipe card.)
Prep first for success
First line a baking pan with wax paper or parchment paper. Get your chopped peanut butter cups ready and chocolate measured. Now you’re ready to start melting!
Place two-thirds of the bag of chocolate in a microwave-safe bowl. Microwave until chips are completely melted. This will take about 2 minutes total, but watch carefully the last 45 seconds.
Add the remaining one-third of the bag of chocolate and stir to combine and melt. Continue to stir until all the chocolate is melted, smooth, and glossy. Let it sit a minute and stir again. It will eventually melt from the residual heat. This is the easy microwave tempering method.

Spread and drizzle
Spread the melted chocolate on prepped baking sheet, reserving a couple tablespoons in the bowl for the finishing touches.
In a separate bowl melt peanut butter chips, stirring until smooth. Drizzle peanut butter mixture on top of chocolate. Don’t worry, it will get better looking.

Finishing touches
Use a knife to swirl together chocolate and peanut butter. Isn’t that so pretty?! Scatter the chopped peanut butter cups on top.
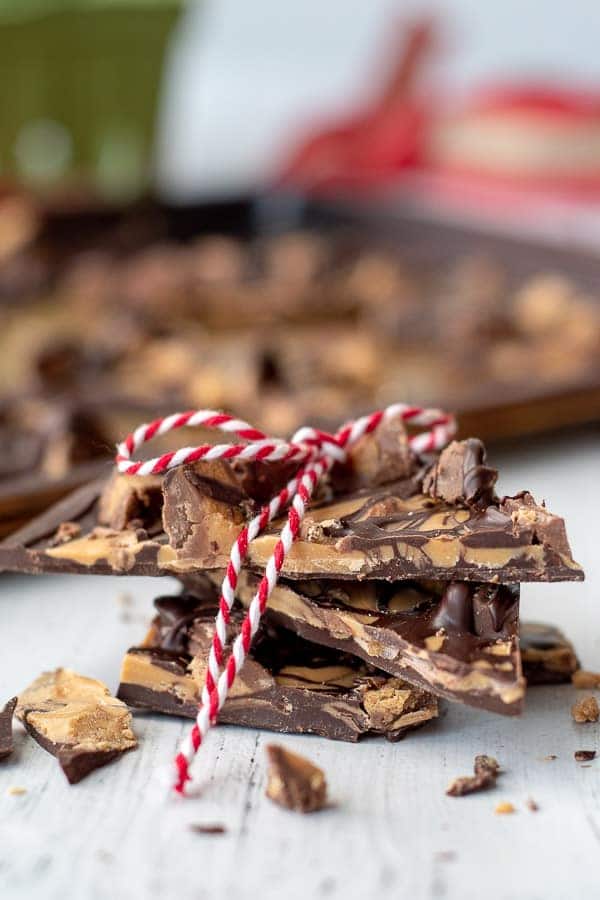
Now drizzle the remaining chocolate over top to hold the peanut butter cups in place. Allow time to set and harden, about 2 hours at room temp, then break into pieces.


Save this recipe to your pinterest board!
Let’s be friends on Pinterest! I’m always sharing great recipes!
Did you make this recipe? I love hearing from you! Leave a star rating and comment below the recipe card. It helps others when searching for recipes and I appreciate feedback from our community. You will always hear back from me! -Melissa
3-Ingredient Gluten-Free Bark (Chocolate Peanut Butter)
Ingredients
- 10-11 ounce (283.5 g) bag 60% cacao chocolate chips
- 1 cup (170 g) peanut butter baking chips, Reese's brand are gluten-free
- ¾ cup (12.75 g) chopped gluten-free peanut butter cups, Reese's brand are gluten-free
Instructions
- Take out two microwave safe bowls. In one, place two-thirds of the bag of chocolate. Set the remaining one-third of chocolate aside. In another bowl place peanut butter chips. Line a baking sheet with waxed paper and set aside.
- Microwave the two-thirds chocolate on high in 15-30 seconds intervals, stirring each time, until chips are completely melted. This will take about 2 minutes total, but watch carefully the last 45 seconds.
- Add the remaining one-third of chocolate and stir to combine and melt. Continue to stir until all the chocolate is melted, smooth, and glossy. Don’t be tempted to put it back in the microwave to finish melting added chips. Let it sit a minute and stir again. It will eventually melt from the residual heat. While the chocolate is finishing to melt, melt the peanut butter chips.
- Melt the peanut butter chips on high for 1-2 minutes total, stirring every 15-30 seconds, until peanut butter is smooth and melted.
- Pour melted chocolate on prepared baking sheet, reserving a couple tablespoons in bowl. Use an offset spatula to spread chocolate to about ¼-inch thick. Drizzle melted peanut butter on top and swirl together with a knife, first in horizontal lines then in vertical. Immediately sprinkle chopped peanut butter cups on top. Drizzle reserved chocolate over everything to hold peanut butter cups in place.
- Allow chocolate to set and harden on counter. Do not break into pieces until chocolate is completely set, about 2-3 hours.
Notes
How to Store
Once the chocolate is set completely and broke into pieces, store in an airtight container in a cool, dry place, ideally less than 70ºF. Properly tempered chocolate will keep for several weeks and doesn’t need to be refrigerated. If you have to store it in the refrigerator, make sure it’s in an airtight container to prevent moisture, smells, or condensation spoiling the chocolate.This post contains affiliate links. My opinions are always my own. If you purchase a product through an affiliate link, I make a small commission – at no cost to you. Read full disclosure policy here.


Melissa, Thank you for a beautiful recipe for such a worthy cause!
Your Mediavine swag is on the way and should be to you soon. It’s just a small token of our appreciation for your time and efforts to wipe out pediatric cancer.
— Susannah at Mediavine
Thank you Susannah! Can’t wait to check it out…Mediavine’s the best!