
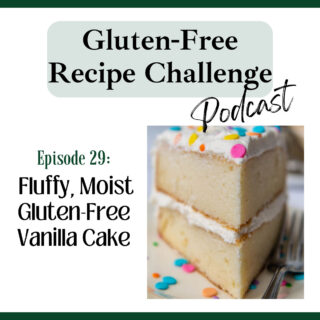
In episode 29 we explore why it’s so hard to achieve a fluffy, yet moist gluten-free white cake and how to easily fix that! If you have been on the search for a go-to, easy, homemade GF vanilla cake recipe, perfect birthdays and celebrations, look no longer! Join Melissa, gluten-free cookbook author, as she shares many easy, pro baking tips to make this audio recipe for gluten-free cake flawlessly.

Listen to this episode, along with the full audio library, on iTunes, Spotify, Stitcher, TuneIn, or your favorite podcast player.
Recipes and Resources Mentioned
Recommended Equipment
Recommended ingredients
Follow Along
Don’t forget to subscribe to our weekly newsletter! Besides receiving an immediate GLUTEN-FREE BAKING BONUS, this weekly newsletter gives you direct access to the newest recipes, helping you with menu planning and exclusive tips!
Transcript
Hey everyone, I’m Melissa Erdelac host of the Gluten Free Recipe Challenge podcast and creator behind the gluten free website MamaGourmand. Here we take beloved recipes you thought you never enjoy again and transform them into easy copycat versions just as good as the originals.
This week’s episode kicked my ass for such a long time. Vanilla cake. Why is it so damn hard to make a simple, white cake gluten free. The chocolate cake didn’t really didn’t give me any issues and you can find that recipe on my site and tips for it in episode 5. But vanilla cake? Sweet Mary Joseph. This thing stumped me.
The problem was that they were all either so damn dry and crumbly or on the opposite spectrum and they were super dense and gummy.
I couldn’t figure out why a vanilla cake recipe was so less forgiving than chocolate. And so for the longest time, I just suffered without it because it was better than the alternative.
Once I learned how liquids and fats can be basically little temperamental shits when it comes to combining with gluten free starches, I started to hone on the problem more.
Creaming softened butter wasn’t doing enough to meld with the gluten free flour so the cake was dry. Usually cakes start with a base of creamed butter and sugar. So what do most people do when something’s dry? They try to add more liquid to it. The problem is there’s also a very fine line of when gluten free flours can take the maximum amount of liquid, and then it stops absorbing, which is why the cakes then turn out gummy.
So what’s the fix? Melted butter. This way, the fat and the moisture coats the starches, and it leaves the cake moist instead of dry and crumbly. Also, instead of whole eggs, only the whites are used. So this gives the cake a nice white color, but it also keeps the crumb more light and fluffy.
The rest of the liquid is made up of whole milk, and just make sure that it’s room temperature along with the egg whites, because this helps them bind better together with the dry ingredients.
Okay, so let’s do this thing. First, you need to prep some of your ingredients.
You will need eight tablespoons of unsalted butter, and you want to melt that and cool it. Make sure it’s not warm or hot at all, because then when it hits the other liquids, it’ll resolidify.
You also need one cup of whole milk, and you want that to be at room temperature as well. So set it out for at least 30 to 60 minutes.
For best results, I recommend whole milk. You could also use dairy free milk. I would just use something with the most fat content possible. You could go as low as 2%, but I wouldn’t do anything lower than that.
You need five large egg whites, and these also have to be at room temperature, but what I recommend is separate them first when they’re cold, because eggs separate better when they’re cold, and then set the egg whites to come to room temperature.
You’re going to have five yolks, so you could either discard those, or, if you want, you can make a lemon curd for the filling, and I have a recipe for that I’ll link to.
Two teaspoons of vanilla extract. And you could just use regular vanilla extract here, but if you want a pure white cake, they do make clear vanilla extract, which is also good for pure white frostings, too.
The last thing I want to mention is the Gluten Free All Purpose Flour Blend. I use and recommend Cup4Cup for best results. It does have a little bit of milk powder in it. So the other option, if you are making a dairy free cake would be King Arthur measure for measure.
I do not recommend using Bob’s Red Mill. It has like this weird beany aftertaste and it absorbs liquids a lot more than other gluten free flour blends, which makes things a little drier.
Okay, so preheat your oven to 350. Spray two 9 inch cake pans with cooking spray, and then line the bottoms with parchment paper, and then spray the parchment as well.
The other option, you can make this in a 9×13 pan, or you can make cupcakes as well, and they have a little bit of different baking directions. So go to the recipe to see the different baking times.
Whisk together in a smallish bowl, your melted and cooled butter, 1 cup of milk, your 5 egg whites, and 2 teaspoons of vanilla.
Then in a large bowl, or ideally a stand mixer fitted with a paddle attachment, mix together 2 cups gluten free flour, 1 1/4 cup sugar, 1 tablespoon of baking powder, a half a teaspoon of baking soda, and a half a teaspoon of salt, and just mix that together on low speed until it’s combined.
Then you’re going to add all but about a half a cup of the liquid mixture to the dry ingredients.
Beat it slowly at first, just to combine everything, and then once everything’s combined and you don’t see flour anymore, then increase your speed to medium and beat it for two minutes until the batter will become a lot more pale and fluffy. Then pour in your remaining half cup of liquid and beat it for one minute longer.
So yes, that’s a lot of mixing which helps aerate the batter and then in turn will aerate the crumb and it really helps saturate the gluten free starches.
Divide the batter between your prepared cake pans and if you don’t like uneven cake layers what I do is I put my baking pan on a food scale. You zero it out and then pour the batter in. Then you put your second pan on. You don’t have to zero it out again because it should read zero. And then pour an equal amount of batter in that so you have the same weight of batter in each.
Spread it evenly and then bake it for 23 to 25 minutes and rotate it halfway through baking. The cake is done when the tops are a little bit golden and insert a toothpick in the middle and it should come out clean.
Allow the cake to cool in the pan for 10 minutes before you turn it onto a wire rack. Remove the parchment from the bottom and then cool it completely before frosting.
I have a really fluffy vanilla buttercream that’s good, a chocolate that I could also link to. But if you go to the recipe, there’s a lot more options for frostings and fillings linked there.
This cake, along with my chocolate cake recipe, makes up about 80 percent of the cakes I make. Because You can change up the flavor of it in so many different ways just by swapping out the fillings, the frosting, or adding flavors like zest or chocolate chips or coconut or anything like that.
So, what else do you need to know? Gluten free cakes do not stay fresh as long as regular cakes. They lose moisture a lot more quickly, and that’s just because the starches are barely hanging on to the moisture as it is. So therefore, if you don’t plan on serving the cake within a day, I would freeze it.
And you could do this by making the entire cake, putting the frosting on, and freezing the entire cake, or you can freeze the cake layers separately, thaw them, and then assemble them right before you’re going to serve it.
If you have a frosting that requires refrigeration, make sure you always serve gluten free cakes at room temperature.
The crumb really seizes up when it’s cold and you will not get the best texture. You want to serve it without a chill at all on it. And also buttercream’s a lot better tasting and texture when it’s at room temperature anyway.
It won’t kill you to eat a cake that’s been sitting out for four or five hours.
Believe me. You’ll live to tell the tale. There’s enough sugar in there that acts as a preservative.
So you can find this full printable recipe on the show notes page, and to get to it, click on the link provided in whatever podcast app you’re listening on right now. Or you could go to my recipe website, which is mamagourmand, and click on the podcast tab. And there you’ll find the full recipe those other frostings and fillings I mentioned, along with recommended ingredients or equipment.
Leave a Reply