
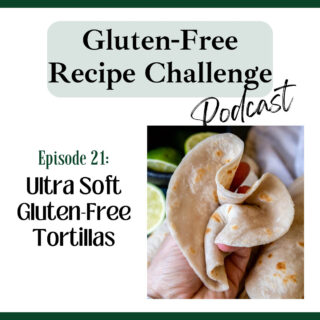
In episode 21 we learn how to make soft, gluten-free tortillas with this outrageously quick and easy recipe! Flour tortillas require only 4 simple ingredients and take 30 minutes start to finish. Whether you are a kitchen novice or not, everyone can learn how to make this recipe. Join Melissa, as she shares many easy, pro tips, plus the best ingredients and methods for success. This audio recipe for gluten-free flour tortillas will help you enjoy your favorite dishes again!

Listen to this episode, along with the full audio library, on iTunes, Spotify, Stitcher, TuneIn, or your favorite podcast player.
Recipes and Resources Mentioned
Recommended Equipment
Recommended ingredients
Follow Along
Don’t forget to subscribe to our weekly newsletter! Besides receiving an immediate GLUTEN-FREE BAKING BONUS, this weekly newsletter gives you direct access to the newest recipes, helping you with menu planning and exclusive tips!
Transcript
Hey everyone, I’m Melissa Erdelac, host of the Gluten Free Recipe Challenge podcast and creator behind the gluten free website Mamagourmand. Here we take beloved recipes you thought you’d never enjoy again and transform them into easy copycat versions just as good as the originals.
There are a lot of things that I’ve learned to live without, and I’m not even mad about it. For instance, when the complimentary bread basket comes before dinner, do we really need to be stuffing our faces with a bunch of carbs before we eat a large meal?
Probably not. So, I’m considering that one a win. Bunless burgers don’t make me angry, choosing salads over sandwiches at restaurants, or even having tacos on corn tortillas. They’re actually quite delicious when they’re properly warmed up. And the trick, by the way, is to heat a small skillet, spread on a real light sheen of oil, and lightly fry it on each side. It’s delish.
So, I wasn’t highly motivated to experiment with making homemade flour tortillas, even after I had tried a few store bought versions, which I think we could all agree. are god awful and shouldn’t even pass as food.
But, it seemed like a lot of you poor souls missed your soft, flexible, delicious flour tortillas, so I decided to give it a go. And now I know why you were asking. They’re fucking delicious. And, I must have suppressed every desire to enjoy them again.
And even better, they aren’t even a pain in the ass to make. So today, I’m admitting, it’s our God given right to enjoy flour tortillas again, and I will never live without them.
You actually only need four ingredients to make this and no special equipment. To shape the tortillas, you need a rolling pin and parchment paper, and then you cook them in a nonstick skillet.
First you need all purpose gluten free flour and this is the most important ingredient for the taste and structure, and I personally love and recommend Cup4Cup gluten free flour because the cornstarch in the mixture gives a nice flexible texture, and plus the taste mimics the wheat flour tortillas without any grittiness, but it does contain a little milk powder.
So if you can’t have dairy, then I recommend using King Arthur Measure-for-Measure. If you do use King Arthur, I would recommend removing about a tablespoon of the flour and replacing that with cornstarch, just so you still get that nice soft texture.
Next you’ll need psyllium husk powder. And if you’re unfamiliar with this ingredient, don’t be scared. It’s really affordable. It’s like, I don’t know, maybe 10-12 bucks on Amazon, and it’ll last you at least a year. I use it to help absorb moisture, which makes the dough really pliable and easy to handle, instead of just adding extra flour, which will dry it out. When you’re buying it, I’ll link to the one that I use because it’s best to buy a blonde or a light colored brand because the darker colors will make the tortillas have this slight purple hue or look like a, almost like a whole wheat tortilla. It doesn’t affect the taste, it just doesn’t look as you would expect it to.
A little baking powder is added to give the tortillas a lift and make them puff up and bubble similar to traditional ones. Some recipes add a lot more baking powder, but I found that adding a smaller amount makes them thinner and flexible when you’re using them.
Warm water, so I use warm water instead of just cold or room temperature water because it helps with the absorption of the flour and the psyllium, so the dough doesn’t have to rest as long before you roll it out.
And then next is oil. You could use any preferred oil, and this just adds softness and texture to the recipe. And it also helps coat the gluten free starches, which eliminates any grainy or dry texture. And last, just salt, a little bit of salt for taste.
This recipe makes seven tortillas. If you want a larger batch, I suggest making one recipe at a time instead of doubling the ingredients. Otherwise, the dough will sit too long as you’re rolling it out and they’ll be dry.
To make them, I use my stand mixer with a paddle attachment, which is the preferred easy method to do it, but you could also do it with a large bowl and a wooden spoon. On low speed, mix together the dry ingredients, which is one and a half cups of gluten free flour, two tablespoons of psyllium husk, a half a teaspoon of salt and a fourth a teaspoon of baking powder.
Just continue to mix that on low speed while you add in the warm water. You will need three fourths cup plus two tablespoons of warm water and two tablespoons of oil. Mix that until it’s well combined, and then the dough will start to form a ball in the bowl. And this will take about a minute.
If you’re not using a stand mixer, you may have to knead it with your hands at this point, so it’s really well mixed. Shape the dough into a large ball, and then cover it with plastic wrap and just let it rest for 10 minutes. And this helps hydrate the gluten free starches and it gives time for the water to absorb, which also makes the dough easier to work with.
After 10 minutes, you’re going to divide that big ball into 6 equal sized balls. If you want to be super accurate about it, you could use a food scale. I would just put a piece of plastic wrap on top with a little bit of nonstick cooking spray so the dough doesn’t stick.
Mine measured 2. 7 ounces each, but this is with Cup4Cup flour. So if you’re using a different flour, the measurements will be a little bit different. Honestly, you could just eyeball it and just do six equal size balls.
Then go ahead and heat a ungreased nonstick skillet over medium high heat. You want it to be nice and hot before you roll out the tortillas.
So let it heat for about five minutes. And while that’s heating, then you could begin to roll out your first tortilla. Take a piece of parchment paper and place it on your counter. Take one of the balls and flatten it into a thick disc. And then you’re going to use your rolling pin to flatten it into about a six and a half inch circle.
What I do is I roll it a couple times, rotate the tortilla about a quarter turn, roll it a couple times, rotate it just so it stays in somewhat an even circle. If you find your rolling pin is sticking at all to the dough, then take a little bit of gluten free flour and rub it on the rolling pin, not on the tortilla and continue to roll.
Your circle’s not going to look perfect at this point, and it could just stay that way, but what I do is I use a knife and I go around the edges to make an even circle and then I save those scraps in a piece of plastic wrap because all those scraps at the end, you could combine them and make an extra tortilla. So, bonus.
Once you have your first rolled tortilla, add it to the hot pan, cook it on one side, undisturbed, don’t touch it, for 45 seconds or until the bottom has lightly brown spots.
Then you flip it over and you cook it for 15 to 20 seconds more. That’s it. And I would be pretty precise about this because the cook time is key for making sure that enough time has passed to cook off the moisture, but not overcook them, which will make them stiff and not flexible.
Once that’s cooked, remove it to, you could either do a cooling rack if you’re going to make them and serve them later. If you’re going to enjoy them right away, then I recommend getting a lint free dish towel and wrapping them in that to keep them warm. Or I have this. It’s like one of my favorite kitchen things.
I have a tortilla warmer, which is like a little, um, it’s almost like a tortilla pillow. You put the tortillas inside, and then it keeps them warm, and I will link to that as well. My sister got it for me. It’s like, it was the best thing ever. I use them for everything. You could put pancakes in them, too, and warm them up in the microwave. It’s genius.
So, anyway, roll one tortilla, cook it, and then roll the next tortilla, cook it, roll the next tortilla, cook it, and continue doing that until they are all done. If you do want to roll all the tortillas before you cook them, then I would just stack them in between sheets of wax paper or parchment paper and just kind of cover it with plastic wrap so they don’t dry out, and you can do that as well.
To store these, once they’re done… cooking and completely cooled, I would stack them between pieces of parchment paper, or you could just do paper towels, and transfer them to an airtight container or a Ziploc freezer bag. You could store them at room temperature up to one day, or you could put them in the refrigerator for three days.
Just make sure they’re in a really airtight container. But mostly what I do is I freeze them. Make sure when you freeze them that you have that parchment paper or paper towel or wax paper in between, and then you could just grab what you need instead of having them all stick together in a stack.
When you’re ready to enjoy them again, I take one from the stack and you could briefly microwave it for 10 seconds. It might be a little bit longer if they’re frozen, or you could rewarm them in a dry hot skillet. Another thing is if you want to make sure that they’re just as soft as the day you made them, you can also wrap them in a damp paper towel before reheating, or you could lightly spray your skillet with a little bit of water before re warming, too.
So, how to use these things. I mean, the obvious, tacos. But, I’ve been making quesadillas like crazy. In fact, uh, when we go camping, that’s one of my favorite camper meals is quesadillas and I can’t remember the last time I had a quesadilla, and they were so damn delicious. I also use them for sandwich wraps, you could use them for enchiladas, for pinwheels, fajitas. I’ve made burritos with them and like fried them in a cast iron skillet. You could do chimichangas. And I tell you what, these have really opened my culinary world again. I had no idea the dark cloud I was living under, and I’m so glad they’re back in my life.
So remember, you could always find the full printable recipe for this on the show notes page and to get to it, click on the link provided in whatever podcast app you’re listening on, or you could go to my recipe website, which is mamagourmand.Com and click on the podcast tab. And then the show notes page shows the full recipe along with tips or recommend ingredients or equipment I’ve mentioned.
Sherri Harding says
This recipe is a lifesaver! Thank you so much for all of your hard work in bringing us these beautiful ideas! I made it and LOVE IT and now will always have the ingredients on hand IN BULK! Gluten Free Flexible Wraps Rock!!! BLESSINGS!!
Melissa Erdelac says
Oh my gosh, this makes me so happy! Thanks so much for taking the time to let me know!
Best,
Melissa