
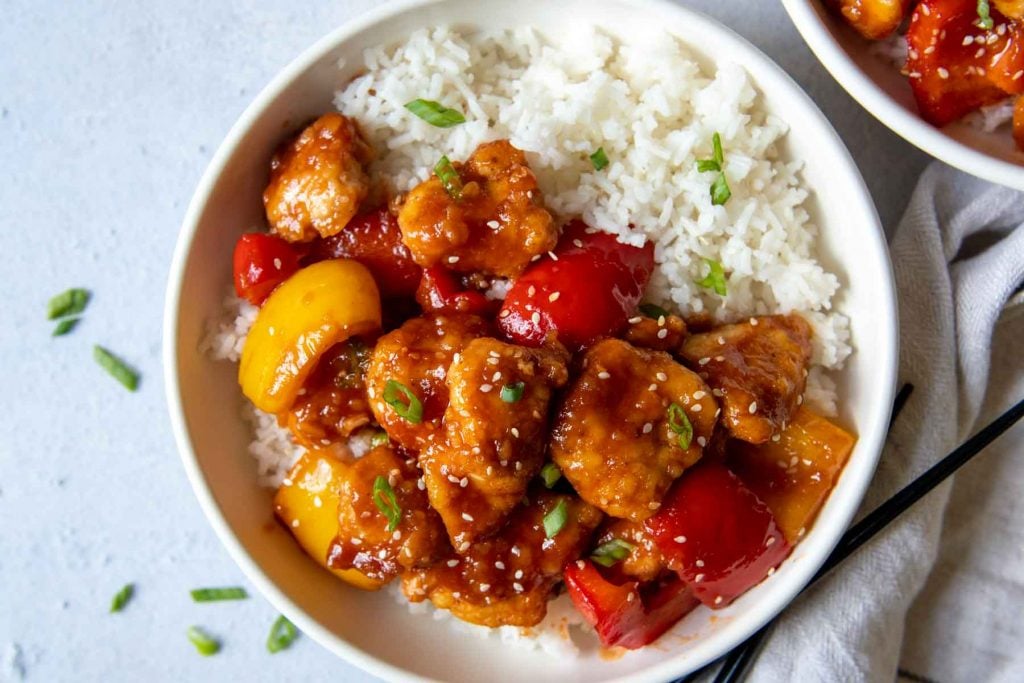
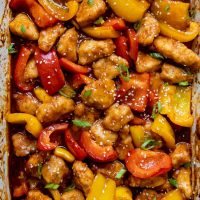
Enjoy your favorite Chinese take-out again with gluten-free sweet and sour chicken recipe! Make this easy dish at home with one pan, no frying, and a sticky, tangy gluten free sweet sour sauce coating golden, crispy chicken.
Want to Save This Recipe?
Enter your email below & we'll send it straight to your inbox. Plus you’ll get affordable and easy gluten-free recipes delivered each week!
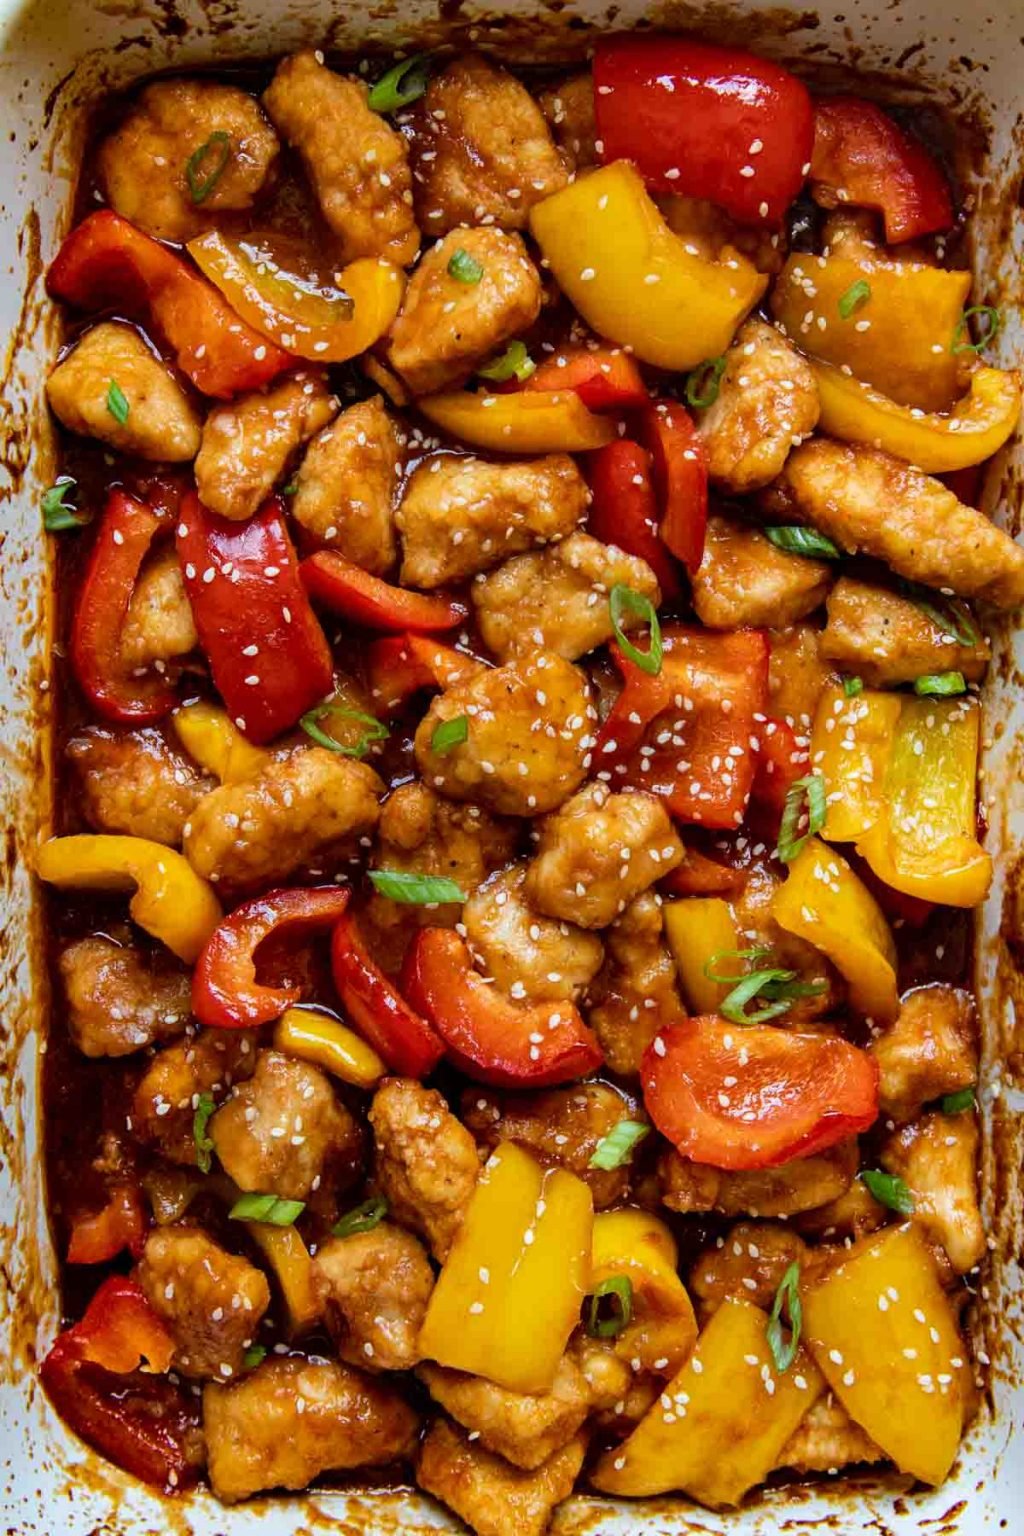
Baked Gluten-Free Sweet and Sour Chicken With No Frying!
The first hurdle for making a gluten free sweet and sour chicken recipe was easy. A lot of Chinese recipes use a mixture of egg, flour, and cornstarch for the batter. Omitting the flour, and instead dredging the chicken in 100% cornstarch made a naturally gluten-free and tasty breading.
Making the recipe effortless, while still maintaining a classic sweet and sour taste, was a little more complicated. Many baked sweet and sour chicken recipes still require frying to achieve a crispy coating and then finished in the oven.
I wanted a no fry, dump and bake recipe to lighten the work. So, instead, I utilized an oven-fry method, which also works for gluten-free orange chicken.
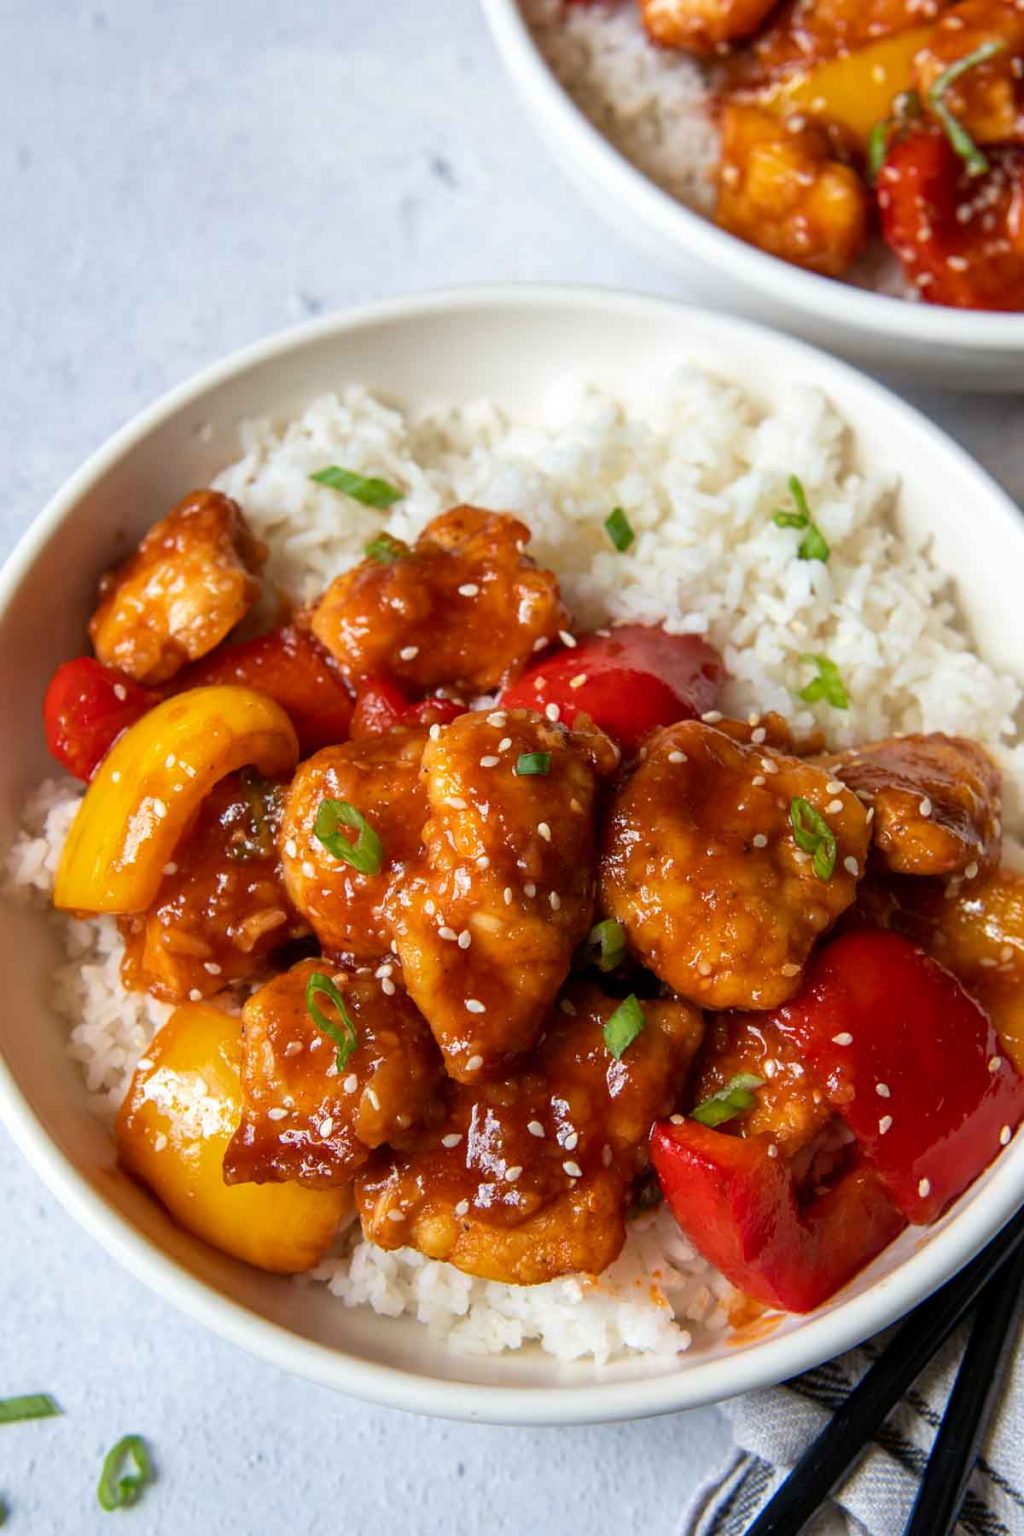
After coating the chicken, it is baked at a high heat for a brief time to set and crisp the breading. Then simply toss with the gluten free sweet and sour sauce and bake! While it’s crisping up in the oven is the ideal time to throw together our favorite side dish to serve with it, easy homemade gluten-free fried rice.
Free Guide! Receive a Free Gluten Free Dinners Cookbook
TOP 5 Highest Rated Recipes!
Gluten Free Sweet and Sour Sauce
You may be wondering if all sweet and sour sauces gluten free? Generally homemade sauces are thickened with cornstarch. However, soy sauce is also added for flavor, which isn’t always gluten free.
I use La Choy brand, which can be bought in most supermarkets, labeled GF, and deemed safe from celiac.com. Other gluten free options would be to substitute an equal amount of tamari or liquid aminos.
If purchasing a store-bought sauce, read the labels carefully because it may be thickened with wheat, contain ingredients derived from wheat, or use a non-GF soy sauce.
Gluten free soy sauce can also be enjoyed in gluten-free bulgogi or unstuffed egg rolls.
Let’s Make This Together!
(Note: This is a step-by-step tutorial with pictures. For more specific instructions, along with ingredient amounts, see the recipe card at the bottom of the post.)

- First toss the cut chicken breasts in the beaten egg.
- In a separate large bowl, combine the cornstarch, salt, and pepper. Use a fork to transfer the chicken pieces to the bowl and coat well with the dry ingredients.
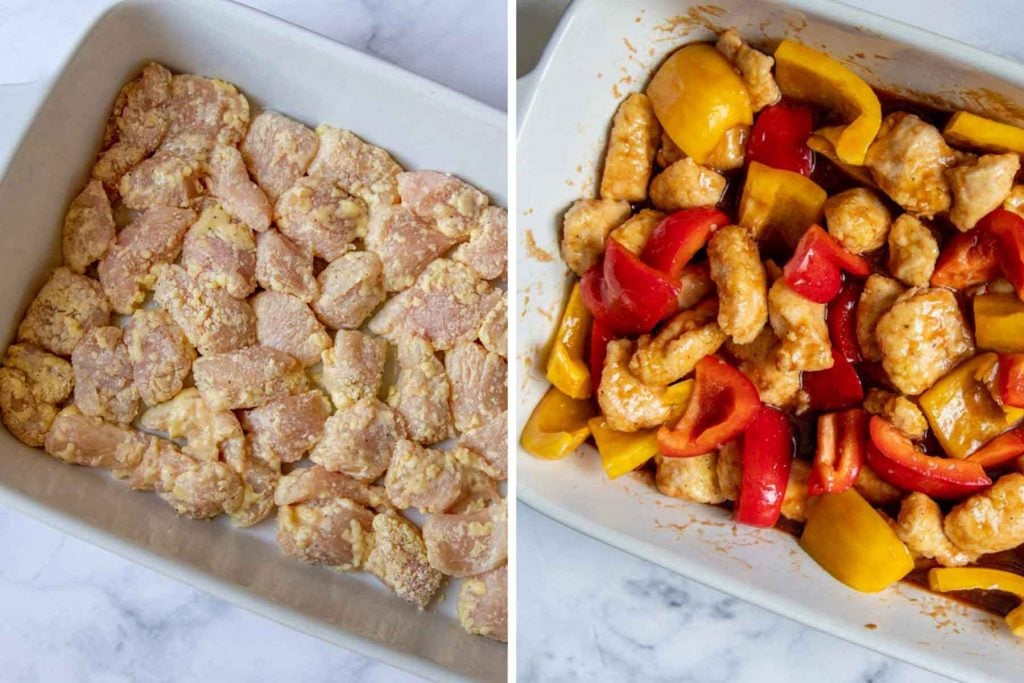
- Lay the chicken in a single layer in a oil-greased baking dish. Bake at 425ºF for 10 minutes to set the coating.
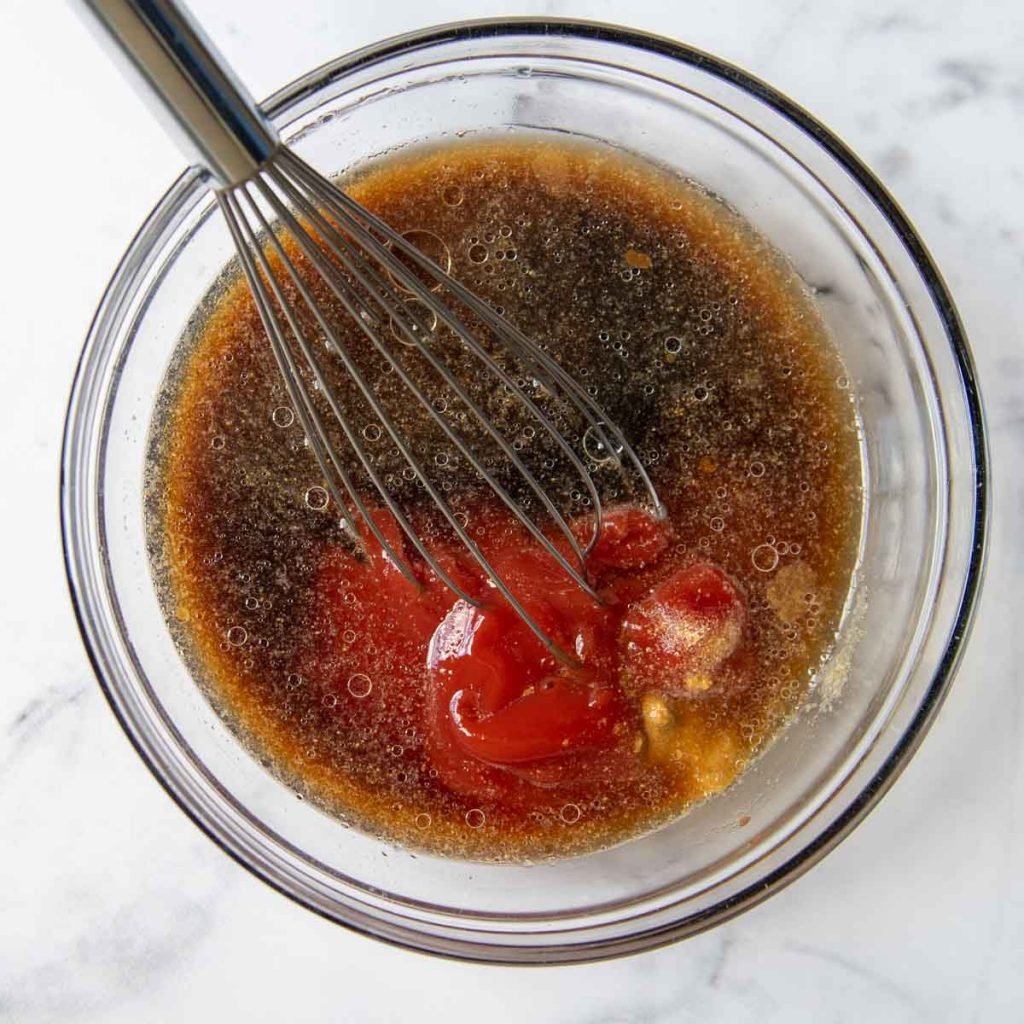
- Meanwhile whisk together the sweet and sour sauce. Toss the partially baked chicken with the sauce and peppers.
- Return to a 325ºF oven for 35 more minutes, stirring halfway through.
Using Chicken Thighs
If your prefer the taste of chicken thighs over breast meat, simply cut boneless, skinless thighs in bite-sized pieces to use.
Suggested Additions
Add a red and yellow pepper for color and a fresh, light flavor to balance the sauce. The peppers may be omitted or use green peppers instead. Although this recipe has no pineapple, it can be added in the last 20 minutes of baking.
Make-Ahead Tips
After the chicken has been tossed with the egg and dredged in cornstarch, lay it on an ungreased baking sheet, cover, and refrigerate up to several hours, until ready to bake.
Another option would be to do the initial baking at high heat, cool to room temperature, cover and refrigerate until ready to finish.
The sweet and sour sauce may be mixed, covered, and refrigerated up to two days ahead of time.
Save this recipe to your pinterest board!
Let’s be friends on Pinterest! I’m always sharing great recipes!
Did you make this recipe? I love hearing from you! Leave a star rating and comment below the recipe card. It helps others when searching for recipes and I appreciate feedback from our community. You will always hear back from me! -Melissa
Crispy Gluten-Free Sweet and Sour Chicken (Baked)
Ingredients
- 2 ½ tablespoons vegetable or canola oil
- 1 large egg
- 1 ½ pounds chicken breasts,, cut in 1" pieces
- ½ cup cornstarch
- ½ teaspoon salt
- ⅛ teaspoon pepper
- 1 red pepper, cut in 1" pieces
- 1 yellow pepper, cut in 1" pieces
Gluten Free Sweet and Sour Sauce
- ½ cup ketchup
- ⅓ cup light brown sugar
- ¼ cup apple cider vinegar
- ¼ cup water
- 2 tablespoons gluten free soy sauce, I use La Choy brand
- ½ teaspoon ground ginger
- ½ teaspoon garlic powder
- (optional) sesame seeds, for garnish
- (optional) cooked rice, for serving
Instructions
- Preheat the oven to 425ºF. Pour the oil in a 9X13 baking dish and place in the oven while it's preheating to get very hot.2 ½ tablespoons vegetable or canola oil
- Whisk the egg in a medium bowl. Add the chicken pieces and stir to coat well.1 large egg, 1 ½ pounds chicken breasts,
- In a large bowl, with enough room to move and coat chicken well, combine the cornstarch, salt, and pepper. Use a fork transfer the chicken pieces, letting the excess egg drip off, to the cornstarch mixture. Use a fork to coat the pieces all over with the cornstarch. TIP: At this point, I use my hands to separate the chicken and make sure they are coated.½ cup cornstarch, ½ teaspoon salt, ⅛ teaspoon pepper
- Carefully remove the hot dish and oil from the oven. Arrange the chicken pieces in a single layer. Bake for 5 minutes. Toss in oil, and then bake for 5 minutes more. Meanwhile, whisk together all the ingredients for the sweet and sour sauce in a small bowl.½ cup ketchup, ⅓ cup light brown sugar, ¼ cup apple cider vinegar, ¼ cup water, 2 tablespoons gluten free soy sauce, ½ teaspoon ground ginger, ½ teaspoon garlic powder
- Remove from the oven and REDUCE OVEN TEMPERATURE TO 325ºF.
- Add the peppers and sweet and sour sauce to the dish. Toss to combine. Bake for 30-35 minutes, stirring halfway through, or until sauce is bubbly, has thickened and chicken is cooked through. Serve immediately.1 red pepper, 1 yellow pepper
Notes
Adjusting Sauce Consistency
This post contains affiliate links. My opinions are always my own. If you purchase a product through an affiliate link, I make a small commission – at no cost to you. Read full disclosure policy here.


This dish was easy to make and tasted great. It will be a make again in our house.
So lovely to hear, Ben! This makes me so happy 🙂
Best,
Melissa
Delicious, easy dinner! I ended up mixing up more sauce half way through baking because I prefer a saucier chicken so the rice can soak it up. Will be making again!
Thanks Marlee! I appreciate you taking the time to let me know. Glad you enjoyed the recipe!
Best,
Melissa
Melissa Is there a way for me to bake at 350 F for this recipe? I have dry itchy facial skin and dermatologist on you tube recommend baking not above 360 F. It’s a complicated medical reason I can’t explain. It’s difficult living with this condition. Any help would be appreciated.
Hello,
You could bake it at 350 for about 20 minutes before adding the sauce to finish, but the chicken coating will not be crispy. For best taste and texture I would cook the chicken and sauce separately. Fry the chicken pieces as directed in this orange chicken recipe. Cook the sauce in a small sauce pan. Once it’s simmering, add 1 tablespoon cornstarch mixed with 2 tablespoons water to the sweet and sour sauce. Cook and stir until thickened. Hope this helps!
Best,
Melissa
Made this for dinner. Flavor was great, but it turned out very dry. Suggest more liquid. Also, it made only 3-4 servings, so double it, for sure. Otherwise very good.
Hi Connie,
Thanks for writing. If the chicken was dry, it might have overcooked a tad. You could also try boneless, skinless chicken thighs, which are a little juicier and don’t have a tendency to dry out.
Best,
Melissa
I only found this recipe last week and I’ve already made it twice!
Oh this makes me so happy, Hannah Mae! I’m so glad you are enjoying it and I really appreciate you taking the time to let me know!
Best,
Melissa