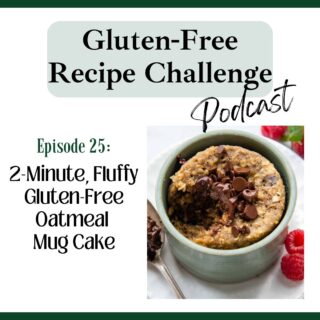
In episode 25 learn how to make the easiest emergency gluten-free dessert. Two-minute oatmeal mug cake requires no flour, only oats! Discover a simple hack for achieving light, fluffy, yet moist, texture every time. This recipe use simple ingredients, right in your kitchen, so you can enjoy this dessert (or breakfast) right now. Join Melissa, gluten-free cookbook, as she shares many easy, pro tips to make this audio recipe for gluten-free oatmeal mug cake in no time!

Listen to this episode, along with the full audio library, on iTunes, Spotify, Stitcher, TuneIn, or your favorite podcast player.
Recipes and Resources Mentioned
Recommended ingredients
Follow Along
Don’t forget to subscribe to our weekly newsletter! Besides receiving an immediate GLUTEN-FREE BAKING BONUS, this weekly newsletter gives you direct access to the newest recipes, helping you with menu planning and exclusive tips!
Transcript
Hey everyone, I’m Melissa Erdelac, host of the Gluten Free Recipe Challenge podcast and creator behind the gluten free website MamaGourmand. Here we take beloved recipes you thought you never enjoy again and transform them into easy copycat versions just as good as the originals.
We are going to check a lot of dessert boxes with this week’s episode.
Need a sweet, fast fix? Done. It’s ready in two minutes. Are your cupboards bare of ingredients? Check. Don’t feel like making something that will sit around all week and tempt you? I got you. Bummed again about not being able to enjoy the dessert that everyone else is having? Time to take matters into your own hands.
This oatmeal mug cake requires no flour, only oats, plus I use a simple hack to keep the texture really light and fluffy. And while you can enjoy this recipe for dessert… I would personally throw you no shade if you made it for breakfast as well. In fact, you’re my kind of people.
So what do you need for the recipe? You need one large egg, three tablespoons of milk, or you could use any dairy free alternative, two tablespoons of pure maple syrup, but you could also use brown sugar or honey or coconut sugar as well. One tablespoon of oil, and you can use any preferred oil. And if you don’t want to use oil, you can also replace it with peanut butter or any preferred nut butter. The cake still turns out delicious. It’s just a little bit more dense. It’s not quite as fluffy.
You need a half a teaspoon of vanilla extract. A half a cup of quick cooking oats and make sure they’re certified gluten free oats. And I say quick cooking oats instead of the old fashioned oats because it has such a short cooking time.
So you need to use those finer, smaller oats for the fluffiest results. Quick oats just absorb the liquids a little bit better in that short cooking time. Or you could substitute an equal amount of oat flour, which even makes the cake a little fluffier.
You also need a half a teaspoon of baking powder. A fourth of a teaspoon of ground cinnamon, and you could add any other seasonings here to you want. Like, a little bit of nutmeg or ground cloves or ground ginger would also taste good. An eighth of a teaspoon of salt.
And then to make it more dessert- y, I also stir in a half a tablespoon of miniature chocolate chips, but of course you could leave these out as well.
So to begin, you’re going to grease a 10 ounce microwave safe mug, or you could use a ramekin and just spray that with nonstick cooking spray. Place in the mug your egg, milk, maple syrup, oil, and vanilla extract, and then just whisk that together with a fork. Then using the fork, stir in the oats, the baking powder, cinnamon, and salt. If you’re using the chocolate chips, don’t stir those in yet.
Place the mug in the microwave. And here’s the trick. You’re going to cook it for half the time, so 45 seconds at full power. Then you remove it and you use the fork to stir the batter again until it’s uniformly mixed. It’ll be kind of like cooked on the top and liquidy on the bottom. And what this does is because when you cook mug cakes, the eggs settle to the bottom, so it makes this like gummy eggy layer at the bottom while the cake’s above it. So I found stirring it halfway through the egg, and it also avoids that like rubbery bottom.
If you’re adding chocolate chips, then this is the time you do that as well and then just stir it briefly to disperse them throughout the batter.
Put it back in the microwave, cook for another 45 to 60 seconds more. There will still be a little bit of moisture at top. And that is fine. It will absorb as it sits. So you remove it from the microwave at this point, and let it sit for one minute before serving. You want to avoid overcooking it because then it will also become a little bit rubbery.
To serve it, you could just eat it as is. You could eat it all in one full serving, or you can save half and after it’s cooled, wrap it securely with plastic wrap, and if you want to enjoy the second half later, I would just recommend rewarming it slightly before eating it.
You can put a little bit of peanut butter on it, slice bananas if you really want to go out, you could do ice cream, you could do fresh berries, nuts, whipped cream. You could even make like a quick glaze frosting, and to do that I would just mix together one tablespoon of powdered sugar, one teaspoon of milk, and a little dash of vanilla extract, and you could spread that on top.
Like I said earlier, you could also make this for breakfast. You could use it as is, just as the recipe is, or you can reduce the sugar a little bit if you want to start your day slightly healthier. And add things like peanut butter or berries or nuts to it to just give you a little bit more fuel for the day.
Remember, you could always find the full printable for this on the show notes page. To get to it, click on the link provided in whatever podcast app you’re listening on, or you could go to my recipe website, which is mamagourmand.com, and click on the podcast tab, and the show notes includes the full recipe along with any recommended ingredients or equipment.
Leave a Reply