
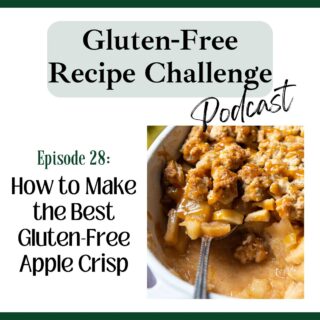
In episode 28 we go over how many gluten-free fruit crisps miss the mark and what makes this GF apple crisp recipe the absolute best! This easy gluten-free apple dessert is loaded with fresh apple cinnamon filling and the best, thick double topping, full of buttery oats and brown sugar! Join Melissa, gluten-free cookbook author, as she shares many easy, pro tips to make this audio recipe for gluten-free crisp, better than any you have tried before!

Listen to this episode, along with the full audio library, on iTunes, Spotify, Stitcher, TuneIn, or your favorite podcast player.
Recipes and Resources Mentioned
Recommended Equipment
Recommended ingredients
Follow Along
Don’t forget to subscribe to our weekly newsletter! Besides receiving an immediate GLUTEN-FREE BAKING BONUS, this weekly newsletter gives you direct access to the newest recipes, helping you with menu planning and exclusive tips!
Transcript
Hey everyone, I’m Melissa Erdelac, host of the Gluten Free Recipe Challenge podcast and creator behind the gluten free website MamaGourmand. Here we take beloved recipes you thought you’d never enjoy again and transform them into easy copycat versions just as good as the originals.
It’s fall, y’all. Or It is here in Indiana. When the kids were little, around this time, we’d always go apple picking. The weather was still nice, the honeycrisps would be ready, and also on the scale of perfectly pleasant to miserable, apple picking is the most enjoyable fruit picking, especially when kids are involved.
The problem was that it’s a little too enjoyable for them. Apples are really heavy, and then the poundage adds up quickly, and without fail, every single year, we leave a couple hundred dollars lighter. I know, it seems, completely absurd. I fell for it. every year.
So for this week’s episode, we are going to make apple crisp and crisps are generally pretty easy to make in a gluten free version because they don’t have a lot of flour.
Some recipes don’t have any at all, but just because they’re easy doesn’t necessarily mean that they are good. And here are some common problems that I find with crisps. Number one, the topping to fruit ratio is off. What’s the best part of a crisp? The damn topping. So, don’t skimp on it.
Number two, the crisp toppings without flour don’t clump together. I like when the crisps have bite size, like, oat chunks on them and not just an oat sprinkle on top. Number three, the fruit layer is either too soft and mushy, or it’s undercooked and not properly thickened.
And then lastly, a lot of crisps are overly sweet. Fruit is naturally sweet, but some recipes add too much sugar, making it a little syrupy. Then you add the topping with more sugar, you add ice cream, you add whipped cream, and it will push you into type 2 diabetes territory, and no one wants that.
Since I’m apparently hypercritical of crisp recipes, you can be assured that I will not steer you wrong here. So let’s get started.
First, the apples. This is crucial, the type of apple that you use. You need something good for baking. That means that they hold their shape, they don’t turn mushy when they’re baked. And my personal favorite are Golden Delicious because they have this perfectly balanced flavor. They’re not too sweet. They’re not too tart, and they hold their shape while they’re baking. If you don’t have Golden Delicious, or you want to use something else, other good baking options would be Honeycrisp. You could use Granny Smith apples, but these are tarter, so you might want to pair it with something else, like a combination of apples. Jonagolds work good, Braeburn and then Pink Ladies are also good for baking.
The next thing that you’ll need is old fashioned rolled oats. You want old fashioned rolled oats here, not quick oats. And just a word about oats and gluten free. So oats in their pure form are gluten free, but some people still react to it with Celiac. So you just have to, if you’re making this for someone else, I would just double check with them. And then you also need to use gluten free certified oats, and that means that they were not contaminated by being processed on shared equipment.
Next, the sugar. If you like to use even less sugar, go for it. It won’t affect anything. Everyone develops different tastes to sugar, so if you generally find desserts overly sweet, I would cut back just a tad.
I use gluten free flour in this recipe, and I just use it to, like I said, to clump the oats together so you have like bite sized chunks. For this recipe, you could use any preferred gluten free flour. I use Cup4Cup, but if you want to use whatever you have in your kitchen, that’s fine, too. And also instead of gluten free flour, you could use oat flour or coconut flour. It just might not clump up as well, but t hey could easily be swapped in.
You’ll need butter, but for a dairy free or vegan crisp, you could replace that butter with a plant based butter stick. And then, optionally, nuts. I use chopped pecans, but you could use walnuts or almonds.
So I’m going to describe how to make this recipe with a food processor, because that is what I primarily use. However, if you don’t have a food processor, you could also mix it up by hand. And I go over exactly how to do that in the linked recipe post. So just go to the show notes page and click on the recipe, and it’ll show you how to do the by hand method.
Preheat your oven to 400 degrees, and you need to grease a two quart baking dish. So that could be like an 8×8 baking pan, an 11×7 baking pan would work as well.
First you’re going to make the fruit filling. In a large bowl, whisk together a third of a cup of granulated sugar, two tablespoons of brown sugar, a tablespoon of water, a tablespoon of lemon juice, one and a half tablespoons of cornstarch, one teaspoon of vanilla extract, a half a teaspoon of cinnamon, and a half a teaspoon of nutmeg, and about an eighth of a teaspoon of salt.
So whisk that together, and then you’re going to add your apples. And this is where this recipe gets a little unconventional. Well, one of the places it gets unconventional. So what you do is you’re going to peel, core, and chop five apples, five large apples, which is about two and three fourths pound. Add that to the bowl, but then you’re also going to take an additional apple, peel and core it and you’re going to grate the apple.
The grated apple breaks down during baking to thicken the sauce while the chopped apples will hold their shape. So you have this perfect mixture of apple chunks with this grated apple that kind of just melds into the sauce, thickening the sauce as well. Transfer that to your baking dish. Pour two tablespoons of melted butter over the top of the apple filling. And I just find that adding a little fat to the apple filling makes a richer taste. You cover that with foil and bake it for 20 minutes. Now this is the other way that this recipe differs from other crisp recipes.
I like to partially bake the apples first because the apples need more time to bake then the topping. Then you’re going to add the topping and then finish bake it all together. So you have the perfect combination of tender apples on the bottom and then the perfectly cooked oat topping over it.
While the apples are baking, go ahead and make your topping. In the food processor, add three fourths cup of oats, a third of a cup of your gluten free flour, a third of a cup brown sugar, two teaspoons of vanilla, two teaspoons of water, and a fourth of a teaspoon of salt. And you’re just gonna pulse to combine that together.
Then add chopped cold butter. You need eight tablespoons of chopped cold butter and put in a third of a cup of your nuts if you’re using those. Process that until all the ingredients come together and it’ll form like a large crumbly ball.
Then to that add the remaining a third of a cup of nuts and a third of a cup of your old fashioned oats. Just pulse that two to three times to combine it with the butter mixture.
Pull your crisp out of the oven, take off the foil, and then break the clumps and scatter them over the partially baked apple filling. At this point, reduce your oven temperature to 350. You don’t have to wait for your oven to come to 350. Just… Lower the oven to 350. Put the apple crisp back in the oven, uncovered, and you’re going to bake it for 40 minutes or until the juices start bubbling and then the top is golden brown.
For best results, you want it to cool for a little bit before you dig in. As it cools, then that sauce thickens more. If you eat it right away, it’s going to be A, hot as shit, and B, the sauce is going to be a little bit runny.
Let it sit for 30 minutes to an hour for the filling to thicken, and then you can serve it slightly warm with ice cream or whipped cream.
To store the crisp, once it’s cooled completely, store it at room temperature and cover it with foil. Do not use plastic wrap because plastic wrap will trap in the moisture, and especially there’s a lot of moisture there from the apples, and it’ll make the topping soggy.
Just cover it securely with foil and it could sit on your counter for one to two days. If you want to keep it longer than that, you can store it in your refrigerator, just securely wrapped in foil up to a week.
And then when you reheat it, place individual servings on a plate and microwave it for about 30 seconds.
Or you could place the whole container in a 300 degree oven for about 20 minutes or until it’s heated through. And if you find the toppings getting a little overly brown while you’re reheating it, then you could loosely cover it with foil.
Remember, you can find this full printable recipe on the show notes page, and to get to it, click on the link provided in whatever podcast app you’re listening on. Or you could go to my recipe website, which is mamagourmand.com, and click on the podcast tab. And there you’ll find the full recipe along with any recommended ingredients or equipment.
Leave a Reply