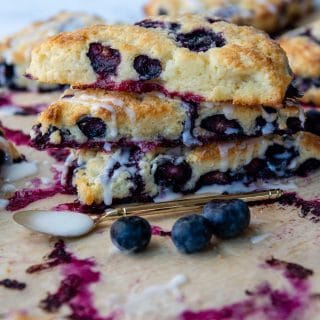
Tender, Fluffy Gluten-Free Berry Scones
Looking for the best gluten-free scones recipe? These easy berry scones are adaptable for a variety of flavors – blueberry, chocolate chip, apple cinnamon, or mixed berry. The creamy addition of sour cream makes them so tender and fluffy, no one will know they are actually gluten-free!
Servings 8
Calories 296kcal
Ingredients
Gluten Free Scones
- 1 ¾ cup (253 g) gluten-free all purpose flour (I use and recommend Cup4Cup brand)
- ⅓ cup (67 g) sugar
- 1 tablespoon (14 g) baking powder
- ¼ teaspoon salt
- 6 tablespoons (85 g) unsalted butter chopped into ½” pieces and chilled
- 1 ½ cups (222 g) blueberries or other chopped berries
- ⅔ cup (153 g) sour cream (may substitute yogurt)
- 1 egg yolk
- 1 teaspoon vanilla extract
Optional Topping
- 1 tablespoon milk or cream
- 1 tablespoon turbinado (coarse) sugar
Optional Glaze
- ½ cup (60 g) powdered sugar
- ½ - 1 tablespoon milk or cream
- ½ teaspoon vanilla extract
Instructions
- In a large bowl whisk together the gluten-free flour, sugar, baking powder, and salt. Use a pastry blender or fork to cut in chopped butter until the butter is uniformly mixed with the flour in very small, crumbly pieces.1 ¾ cup (253 g) gluten-free all purpose flour, ⅓ cup (67 g) sugar, 1 tablespoon (14 g) baking powder, ¼ teaspoon salt, 6 tablespoons (85 g) unsalted butter
- In a small bowl whisk together the sour cream, egg, and vanilla extract. First, gently stir in the berries into the flour mixture. Then, pour in sour cream mixture and gently combine until no flour pockets remain. The dough will be quite thick. Cover bowl with plastic wrap and refrigerate for 30 minutes while the oven preheats.1 ½ cups (222 g) blueberries or other chopped berries, ⅔ cup (153 g) sour cream, 1 egg yolk, 1 teaspoon vanilla extract
- Preheat the oven to 450°F (230°C). Line a baking sheet with parchment paper and spray with nonstick cooking spray.
- Place the dough in the center of the prepared baking sheet and shape it into a ball. Flatten the dough with your hands into a 7-inch (18 cm) disc, 1-inch (2.5-cm)–thick. If the dough is sticking, spray your fingers with cooking spray to shape. Cut the disc into 8 triangles, using a sharp knife. Use a small spatula to spread the cut scones around the baking sheet so they are about 2 inches (5-cm) apart.
- If topping with sugar, brush on milk or cream and sprinkle tops with sugar. Bake on the LOWER MIDDLE rack for 16-18 minutes, rotating halfway through, until the tops and bottoms start to turn golden brown. Cool on the baking sheet for 5 minutes, then transfer to a wire rack to cool.1 tablespoon milk or cream, 1 tablespoon turbinado (coarse) sugar
- For glaze, mix together ingredients. The glaze should be thin enough to drizzle on, but thick enough it stays on the scone. Place a piece of waxed paper under the cooling rack and then use a small spoon to drizzle glaze over the tops. Allow glaze to harden before stacking or storing.½ cup (60 g) powdered sugar, ½ - 1 tablespoon milk or cream, ½ teaspoon vanilla extract
- DID YOU MAKE THIS RECIPE?? DON'T FORGET TO LEAVE FEEDBACK AND RATE BELOW!
Notes
Storing, freezing, and make-ahead tips
Storing: They may be kept in an airtight container at room temperature up to 2 days, but will lose optimal taste and texture quickly. Refrigerating will dry out the scones, and is not recommended. Freezing: If not enjoying the same day, individually wrap the scones after they have completely cooled (at least 3 hours). Transfer to a ziplock freezer bag and freeze up to 3 months. Thaw on the counter for 1 hour or, for a grab-and-go breakfast, unwrap and defrost in the microwave. Make-Ahead: To bake the scones right before serving, shape the dough in triangles and place the baking tray in the freezer until they are solid. Wrap the unbaked scones in plastic wrap and transfer to a ziplock freezer bag. Freeze up to 3 months. To bake, place unwrapped, frozen scones on a parchment-lined baking sheet. Bake at 425ºF (220ºC), extending the baking time by a few minutes.Nutrition
Calories: 296kcal | Carbohydrates: 42g | Protein: 4g | Fat: 14g | Saturated Fat: 8g | Polyunsaturated Fat: 1g | Monounsaturated Fat: 4g | Trans Fat: 0.3g | Cholesterol: 59mg | Sodium: 242mg | Potassium: 57mg | Fiber: 3g | Sugar: 22g | Vitamin A: 435IU | Vitamin C: 3mg | Calcium: 138mg | Iron: 1mg