
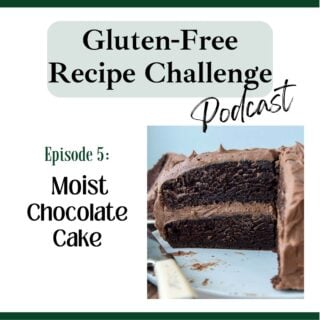
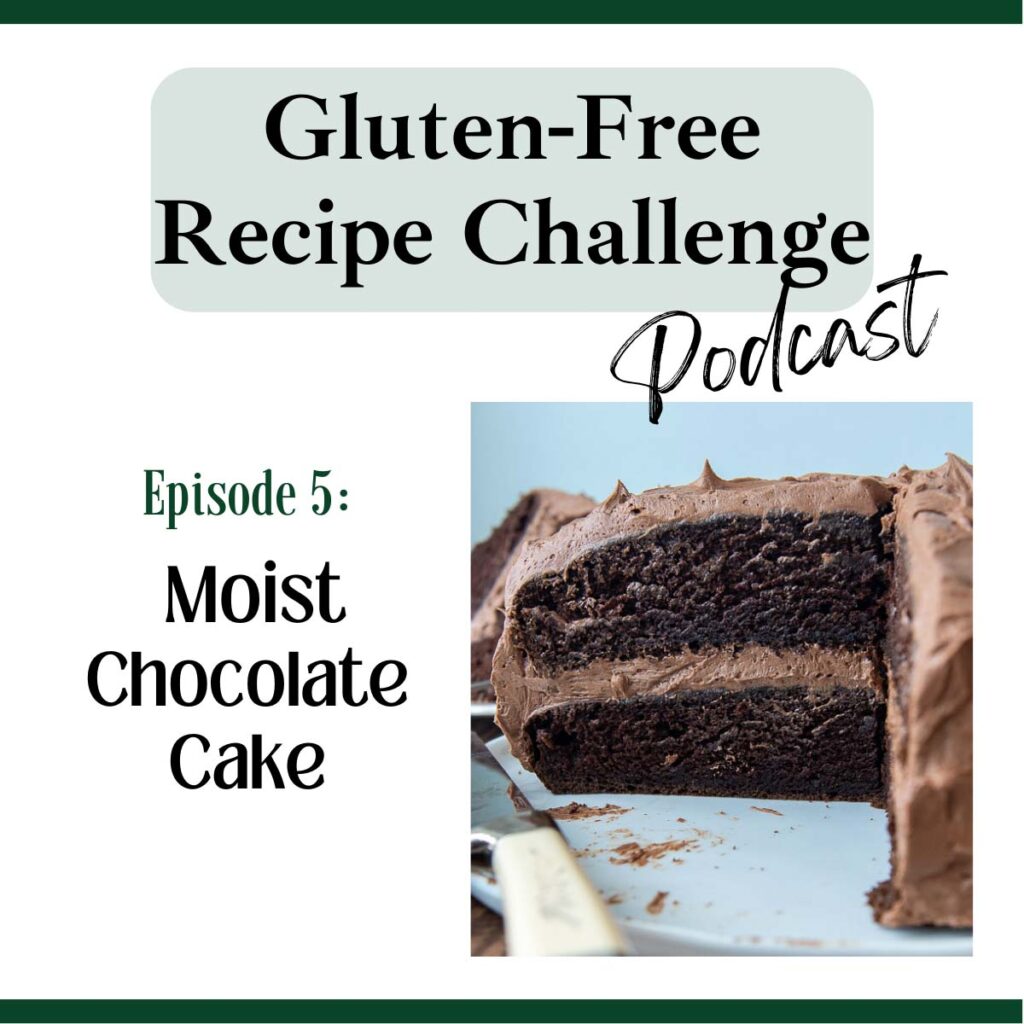
In episode 05 we learn how to make gluten-free chocolate cake so moist and fluffy, no one realizes it is gluten-free! This no-fail recipe comes together in 5 minutes and can be used with a variety of GF all-purpose flours for perfect results every time. Join Melissa as she shares many easy, pro tips for making the best GF cake with an airy, light, bakery-style crumb. This audio recipe for gluten-free chocolate cake will transform you into expert gluten-free baker.
Recipes and Resources Mentioned
- Gluten-Free Chocolate Cake
- Fluffy Buttercream Frosting
- Chocolate Buttercream
- Gluten-Free Chocolate Cupcakes
- Ding Dong Cake
- Gluten-Free Ice Cream Cake
- More gluten-free cake recipes
Recommended Equipment
Recommended ingredients
- Cup4Cup All Purpose Gluten-Free Flour
- Dutch-Processed Cocoa Powder
- Baker’s Imitation Vanilla Flavoring
Follow Along
Don’t forget to subscribe to our weekly newsletter! Besides receiving an immediate GLUTEN-FREE BAKING BONUS, this weekly newsletter gives you direct access to the newest recipes, helping you with menu planning and exclusive tips!
Transcript
Hey everyone. I’m Melissa Erdelac, host of the Gluten-Free Recipe Challenge podcast and creator behind the gluten-free website, Mamagourmand. Here we take beloved recipes you thought you’d never enjoy again and transform them into easy copycat versions, just as good as the originals.
So before we begin today, I gotta give a trigger warning. In today’s episode, I’m going to be using a very controversial word, a lot, M O I S T. If you’re one of those people, you may wanna skip this one or just read the transcript and save yourself some therapy.
Okay, so here we go. Today we’re gonna talk about a chocolate cake to end a ll your elusive chocolate cake recipe searching forever. So why is this recipe the best?
First of all, warning, it’s extremely moist. Seriously, without even having to add sour cream or yogurt or any other creamy dairy products. And hopefully you’re not traumatized by the word creamy either, it’s extremely moist. It’s not dense or heavy or gummy. The crumb is more just like a wheat flour cake like you would have at a bakery or those good old school box mixes.
If you put a slice of this cake next to a traditional one, no one would be able to tell which one is gluten free. Hand to God. Also, it does not use any specialty ingredients. You can use what you have right in your kitchen as long as you have a gluten-free flour mix. So it’s the perfect emergency dessert and it’s extremely affordable because you do not have to go out to the grocery store and buy anything. Plus, one bowl, you just dump in the ingredients, mix it together and bake.
So it’s super easy. It takes like four minutes to throw together. And if you are on a gluten-free, dairy-free diet, it can also easily be adapted to a dairy-free cake as well. The only dairy ingredient it has in it is milk, and that can be swapped out with any preferred dairy-free milk that you use, such as almond milk, soy milk, oat milk, whatever you want.
I’ve used this cake for everything from simple layer cakes, birthday cakes. I use it for a ding dong cake that I have the recipe and the site a link to, a gluten-free ice cream cake. I’ve used it for baked Alaska. I use this cake recipe for everything. It is my standard go-to cake.
What makes this cake so incredible? If the ingredients are so simple and it’s so easy to throw together, why is this cake the best? Well, it has a magic ingredient in it. Boiling water. That’s the magic.
When you add the boiling water, it helps saturate the starches, which we really need in gluten-free baking so they’re not gritty or ricey.
It also activates the baking powder in the cake, which helps produce a lot more carbon dioxide bubbles, making the cake really light and airy. Also boiling water, intensifies the chocolate flavor. It makes the chocolate bloom and intensify and adds extra moisture to the cake.
So typically gluten-free cakes have a tendency to be very dry, or they’re great for about a day, and then they get very dry and crumbly. The boiling water in this actually helps bring moisture and saturates the ingredients more than other cakes. So this is a cake that will stay good for three, four days.
Let’s go through the ingredients. First of all, you will need two cups of all-purpose, gluten-free flour. Typically for recipes, I really push Cup4Cup gluten-free flour and especially with, breads and things that are very reliant on the flour in the recipe.
But for this cake, you can use pretty much any gluten-free flour. I have tried it with every single gluten-free flour, and it always has great results. Bob’s Red Mill, King’s Arthur would be a dairy-free, gluten-free flour. You could use it with Namaste. Use it with any gluten-free flour, and it turns out great.
You’ll need granulated sugar, so just white sugar for this cake, unsweetened baking cocoa, and you could use natural baking cocoa, or I’ve used Dutch processed cocoa as well. You’ll need baking powder and baking soda. Salt. Milk. And for this, like I said earlier, you could use just whatever milk you have in your fridge.
I’ve used skim, I’ve used 2%. Or you could use any non-dairy milk. For the fat, you need oil, and you could use any preferred oil. I’ve used vegetable oil, canola oil. You can use coconut oil, whatever you’d like. Eggs. Vanilla extract.
If you listen to the gluten-free cookies episode, I talked about my crazy, inexpensive vanilla extract I use. The Baker’s imitation vanilla flavoring, and this is a recipe that would be perfect for it. Then at the end, you put in your one cup of boiling water.
Let’s make the cake. First, you are going to grease your cake pans. For this recipe you could use two nine inch cake pans. You can use a 9 by 13 inch cake pan, or it will make 24 cupcakes. Grease your cake pans, preheat your oven to 350, and then you’re ready to begin the cake.
In a large bowl of a stand mixer, or you could just use a mixing bowl with a hand mixer for this recipe, you pour in two cups of gluten-free flour, two cups of sugar, three fourth cup of unsweetened baking cocoa, two teaspoons of baking powder, one and a half teaspoon of baking soda, and one teaspoon of salt. Put all the dry ingredients in and then you mix it on low speed just to combine them.
After that, pour in your liquid ingredients, so you’ll pour in one cup of milk, a half a cup of oil, two eggs, and two teaspoons of vanilla extract.
Mix that all on medium speed until it’s just combined. So you just wanna make sure all the flour and the dry ingredients are combined with the wet ingredients.
And now it’s time for the magic to happen. This is when you pour in your boiling water. I put the mixer on low speed, and I gradually pour in the boiling water while it’s mixing. Once it’s all poured in, then you’ll want to increase the mixer to high speed and beat it for one minute. This just makes sure that everything’s aerated and it makes the cake nice and fluffy.
Once it’s been beaten for one minute, you pour in your cake pants and it’s time to bake. If you’re using nine inch layer cake pans, it’ll take about 30 to 35 minutes. And if you’re using a 9 by 13 pan, it’ll take about 45 to 50 minutes. Test the cake by putting in a toothpick in the middle and making sure that it has no liquid batter on it, and then it’s ready to be pulled out of the oven.
Let it cool in the pan for about five to 10 minutes, and then you could turn it onto a wire rack to cool completely before you frost it.
At this point, once the cake’s cooled, you can either frost it or you could wrap up the cake layers and freeze it. Say, if you’re not going to be having this cake for another week or so. If you do frost the cake immediately, I highly, highly, highly recommend you using the buttercream recipe that’s linked on the post, and I’ll link onto it on the show notes as well.
It is the fluffiest buttercream you’ll ever have. I have a white vanilla one, and then a chocolate one that uses a little bit of molasses in it to give it this like, kind of like caramelly undertone. I also have a chocolate whipped cream recipe that tastes great with this cake as well.
To store leftovers usually what I do is I press a piece of plastic wrap up to the cut sides of it, and I just let it sit on my counter. It’ll stay good up to three days. If you need to store it longer than that, what I do is I cut the cake in slices and I lay each slice on a piece of plastic wrap.
Wrap it up really well and stick it in the freezer. Once it’s frozen, I transfer those slices to a Ziploc freezer bag, and that way you could just pull out slices of cake whenever you need one.
Another option is you can bake the cake, frost it, and you could stick the whole thing in your freezer to freeze. Once it’s frozen solid, that’s when I pull it out and I wrap it really well with plastic wrap, and then I’ll g o over the plastic wrap with foil, so it’s a nice airtight seal on it. And you could freeze a cake like that up to three months.
So that’s about it. It’s a really short and simple episode because this is a really short and simple recipe.
If you’d like to check out more of my cake recipes, go to the website, Mamagourmand, and under desserts, there’s a whole cake index where I have bunt cakes, I have other layer cakes, I have baked Alaska, red velvet cake. Everything you can think of is there.
That’s all for this episode of the Gluten-Free Recipe Challenge. Remember, you could always find the full printable recipe on the show notes page. Click on the link that’s provided in whatever podcast app you’re listening on, or you could go to my recipe website, mamagourmand.com and click on the podcast tab.
The show notes page includes the full recipe, any tips I’ve mentioned, along with recommended ingredients or equipment. If you have a recipe idea or something you’d love to enjoy delicious version of, again, don’t be shy and reach out to me. DM me on Instagram. My handle is @mamagourmand or email melissa@mamagourmand.com.
Leave a Reply